12 | Page
INSTALLATION REQUIREMENTS
The inverter must be installed in an area that meets all of the following requirements:
1.
Dry - Do not place in an area where water can drip or splash on the inverter.
2. Cool - Ambient air temperature should be between 30°F and 105°F (0°C and 40°C).
The cooler the better.
3. Ventilate - Allow at least one inch (three cm) of clearance around the inverter for proper airflow.
Make sure that ventilation openings on the ends of the unit are not obstructed.
4. Safe - Do not install the inverter in the same compartment as a battery or in any compartment that
contains flammable liquids such as gasoline.
5. Close to Battery - Install unit as close to battery as possible (without being in the same
compartment) to minimize the length of cable required to connect the inverter to the battery. It is
better and cheaper to run longer AC wires than longer DC wires (cables).
CAUTION: To avoid fire, do not cover or obstruct ventilation openings. Do not install inverter in a zero-
clearance compartment. Overheating may result.
CAUTION: The inverter must only be connected to batteries with a nominal output voltage of 12 volts. It
will not work with a 6 volt battery, and will be damaged if it is connected to a 16 volt battery.
WARNING: This unit contains components which can produce arcs or sparks. To prevent fire or explosion,
do not install in compartments containing a battery or flammable materials, or in a location
which requires ignition protected equipment.
WARNING: This unit is suitable for installation in negative ground applications only. Do not attempt to
install to a positive ground application.
CONNECTING TO A VEHICLE BATTERY
Power wire and wiring are very important to the performance of the inverter. Because the inverter has a
low voltage, high current input, low resistance wiring is essential between the battery and inverter. This is
so it can deliver the maximum amount of energy to the load.
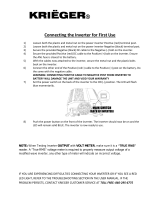
For safety reasons, it is recommended to install a properly rated ANL fuse (not included) on the red cable
as close to the positive (red) battery terminal as possible. If you have a dual cable installation, install a
properly rated ANL fuse on each red cable. Cut about 12 inches from ring terminal and install fuse. Use (1)
150 Amp ANL fuse or equivalent for the PRO 1500W, (2) 150 Amp ANL fuses or equivalent for the PRO
2500W, or (2) ANL 200 Amp ANL fuses or equivalent for the PRO 3000W power inverter.
Do not use aluminum wire. Aluminum has about one-third more resistance than copper wire of the same
size, plus it is difficult to make good, low-resistance connections to aluminum wire. Your PRO Power
Inverter comes with heavy duty copper cladded cable for connections between the battery and inverter.
Keep the cable length as short as possible. The recommendation is no more than six feet. This will keep
the voltage drop to a minimum.
If the cable has too much voltage drop, the inverter may shut down when drawing higher currents
because voltage at the inverter may drop below 10 volts. If you must use longer cables, make sure you
choose a thicker or heavier gauge cable appropriate for your installation requirements.


