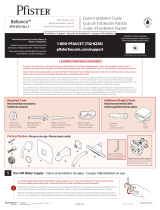
Pfister Marielle LG89-8MBK Specification and Owner Manual

Category
Sanitary ware
Type
Specification and Owner Manual

Pfister Marielle LG89-8MBK is a tub and shower trim kit designed for use with Pfister's 0X8 Series Pressure Balancing Valve. It features a sleek, modern design with a single-handle lever for easy control of water temperature and volume. Installation is simple, with no special tools required. The kit includes everything you need for installation, including a shower arm, flange, handle, and spout.

Pfister Marielle LG89-8MBK is a tub and shower trim kit designed for use with Pfister's 0X8 Series Pressure Balancing Valve. It features a sleek, modern design with a single-handle lever for easy control of water temperature and volume. Installation is simple, with no special tools required. The kit includes everything you need for installation, including a shower arm, flange, handle, and spout.

Required Tools
Herramientas necesarias
Outils nécessaires
Additional Helpful Tools
Otras herramientas útiles
Outils supplémentaires utiles
Telon Tape
Cinta de telón
Ruban en télon
Flashlight
Linterna
Lampe-torche
Cloth
Paño de limpieza
Chion
Parts in the Box • Piezas en la caja • Pieces dans la boîte
Turn O Water Supply Cierre el suministro de agua Couper l’alimentation en eau
1
Adjustable Wrench
Llave ajustable
Clé réglable
Phillips Screwdriver
Destornillador de estrella
Tournevis Phillips
509910200
September 20, 2019
Installation Support • Soporte de instalación • Support d’installation
Installation Videos Available
Videos de instalación a disposición
Vidéos d’installation disponibles
pisterfaucets.com/videos
Safety Goggles
Anteojos de seguridad
Lunettes de sûreté
LG89XMB, R891MB
Marielle
To reduce the risk of injury or property damage, read all instructions before installing product. Wear safety goggles. Product must be
installed in accordance with all state & local plumbing & building codes. Call a professional if you are uncertain about installing this product.
This product has been designed for use with the Pister™ 0X8 Series Pressure Balancing Valve. It will not work with any other product valve.
Please review the 0X8 valve installation instructions before installing this product.
Para disminuir el riesgo de lesiones o daños a la propiedad, lea todas las instrucciones antes de instalar el producto. Utilice gafas de seguridad.
El producto deberá instalarse de acuerdo con la normativa de plomería y construcción estatal y local. Llame a un profesional si no está seguro
sobre cómo instalar este producto. Este producto ha sido diseñado para usar con la válvula de equilibrio de presión de la Serie 0X8 de Pister™. No
funcionará con cualquier otra válvula. Revise las instrucciones de instalación de la válvula 0X8 antes de instalar este producto.
Pour réduire le risque de blessures ou de dommages, lire toutes les instructions avant d’installer l’appareil. Porter des lunettes de sécurité. Il faut
installer l’appareil en respectant tous les codes de construction et de plomberie locaux et d’État. Appelez un professionnel si vous nêtes pas certain
de la façon d’installer cet appareil. Cet appareil a été conçu pour être utilisé avec la valve déquilibrage de pression Pister™ OX8. Il ne fonctionnera
pas avec la valve d’un autre appareil. Veuillez lire les instructions d’installation de la valve OX8 avant d’installer ce produit.
WARNING / ADVERTENCIA / AVERTISSEMENT
Locate the water supply inlets & shut o the water supply valves. These are usually found near the water meter.
If you are replacing an existing unit, remove the old unit & clean mounting surface thoroughly.
Ubique las entradas del suministro de agua y cierre las válvulas de suministro. Estas se encuentran generalmente cerca
del medidor de agua. Si reemplaza una unidad existente, retírela y limpie completamente la supericie de montaje.
Repérez les entrées d’alimentation d’eau et fermez les robinets d’arrêt. Ils sont normalement trouvés près du compteur
d’eau. Si vous remplacez un appareil existant, enlevez le vieil appareil et nettoyez soigneusement la surface de montage.
Personal Assistance, Product Specs, &
“How-to” Questions:
Asistencia personal, especiicaciones del
producto y preguntas sobre “cómo hacerlo”:
Aide personnelle, sciications du produit
et questions « pratico-pratiques » :
1800PFAUCET (7328238)
pisterfaucets.com/support
1284015
Copyright © 2019, Pister Inc.
FD E
B
C
A
H
I J
G
Supplied Hex Wrench
Proveído Llave hexagonal
Fourni Clé hexagonale
Tub & Shower Trim
Borde para bañera y ducha
Garniture de baignoire et douche
Quick Installation Guide
Guía de Instalación Rápida
Guide dInstallation Rapide
SAMPLE COPY
2
2
No Parts Required for This Step
No se necesitan piezas para este paso
Aucune pce nécessaire pour cette étape
Phillips Screwdriver
Destornillador de estrella
Tournevis Phillips
Prepare for Installation
Preparación para la instalación
Préparez pour installer
Thin Wall Installation (1 38" Max)
Instalación en pared delgada (35 mm)
Installation avec mur mince (35 mm)
Reference  Referencia Référence
Thick Wall Installation (2 34" Max)
Instalación en pared gruesa (41 mm – 70 mm)
Installation avec mur épais (41 mm – 70 mm)
2A
2A
Bottom of Tub
Parte inferior de la Bañera
Fond de Baignoire
Bottom of Shower
Parte inferior de la Ducha
Fond de Douche
Bottom of Tub
Parte inferior de la Bañera
Fond de Baignoire
Bottom of Shower
Parte inferior de la Ducha
Fond de Douche
1 14" (32 mm) Dia.
4 34" (121 mm) Dia.
4" (102 mm) Dia.
for Thin Walls
para paredes delgadas
pour parois minces
4 34" (121 mm) Dia.
4" (102 mm) Dia.
for Thin Walls
para paredes delgadas
pour parois minces
48" (1219 mm)
30" (762mm)
Shower Only Dimensions
Dimensiones de la ducha solamente
Dimensions de la douche seulement
Tub and Shower Dimensions
Dimensiones de la bañera y la ducha
Dimensions baignoire et douche
1 14" (32 mm) Dia. 1 14" (32 mm) Dia.
48" (1219 mm)
min.
8" (203 mm)
min.
30" (762mm)
3
4A
Groove on bottom.
Estría en la base.
Rainure vers le bas.
E
D
D
E F
3Install Retainer and Stem - Instale el anillo de retención y el tallo - Installez retenue et la tige
4Install Flange and Handle - Instale la brida y el mango - Installez la bride et gérer
Phillips Screwdriver
Destornillador de estrella
Tournevis Phillips
No Tools Required for This Step
No se necesitan herramientas para este paso
Aucun outil n’est nécessaire pour cette étape
BC
A
F
Position handle as shown in vertical
o position.
Coloque en posición vertical en la
posición de apagado, como se muestra.
Placer en position d’arrêt vertical
comme illustré.
3A 3B
C
A
B
Extension Kit 970083 oers an
additional 7/8” if valves are roughed
in too deep.
Kit de Extensión de 970083 ofrece
un adicional de 7/8” si la válvula se
desbastada demasiado dentro al pared.
970083 kit d’extension fournit un
supplément de 7/8” si la vanne est
coupée trop loin dans le mur.
4
5A
5Connect Shower Arm & Spout
Conecte el brazo de la ducha y el surtidor
Branchez le bras de douche & le bec
HI
G
Telon Tape
Cinta de telón
Ruban en télon
Supplied Hex Wrench
Proveído Llave hexagonal
Fourni Clé hexagonale
5B 5B Option 2: Threaded Pipe
Opción 2: Tubo Roscado
Option 2: Tuyau Fileté
Option 1: Copper Pipe
Opción 1: Tubo de Cobre
Option 1: Tuyau de Cuivre
1 12" – 2 14"
(38 mm – 57 mm)
3/32 Hex Wrench
llave hexagonal de 3/32
clé hexagonale du 3/32
3 78" – 4"
(98 mm – 101 mm)
I
H
F
F
Chamfer and deburr
Chalán y desbarbar
Chanfrein et ébarber
Remove
Quita
Enlever
5
6
No Tools Required for This Step
No se necesitan herramientas para este paso
Aucun outil n’est nécessaire pour cette étape
Turn On Water & Flush
Active el suministro de agua y enjuague
Ouvrez l’eau et vidangez
6B 6C
6A
Turn on your water supply & check for any leaks.
Active el suministro de agua y revise si hay fugas.
Rétablissez lalimentation en eau et vériiez s’il y a des fuites.
Pull up to turn on shower.
Hale hacia arriba para activar
la ducha.
Tirez vers le haut pour mettre
la douche en marche.
Shower Functions • Funciones de la ducha • Fonctions de la douche
Hot
Caliente
Chaud
Open
Abierta
Ouverte
Cold
Fría
Froid
Allow full hot & full cold water to run for at
least 15 seconds each.
Deje correr el agua caliente y fría durante al menos
15 segundos cada una.
Permettez à l'eau chaude et l'eau froide de couler
au moins 15 secondes chacun.
15
sec
J
J
For Additional Installation Help:
Para la instalación adicionales de ayuda:
Pour aider à l’installation supplémentaires:
1800PFAUCET (7328238)
pisterfaucets.com
SAMPLE COPY
  • Page 1 1
  • Page 2 2
  • Page 3 3
  • Page 4 4
  • Page 5 5
  • Page 6 6

Pfister Marielle LG89-8MBK Specification and Owner Manual

Category
Sanitary ware
Type
Specification and Owner Manual

Pfister Marielle LG89-8MBK is a tub and shower trim kit designed for use with Pfister's 0X8 Series Pressure Balancing Valve. It features a sleek, modern design with a single-handle lever for easy control of water temperature and volume. Installation is simple, with no special tools required. The kit includes everything you need for installation, including a shower arm, flange, handle, and spout.

Ask a question and I''ll find the answer in the document

Finding information in a document is now easier with AI

in other languages