6
Installation Instructions
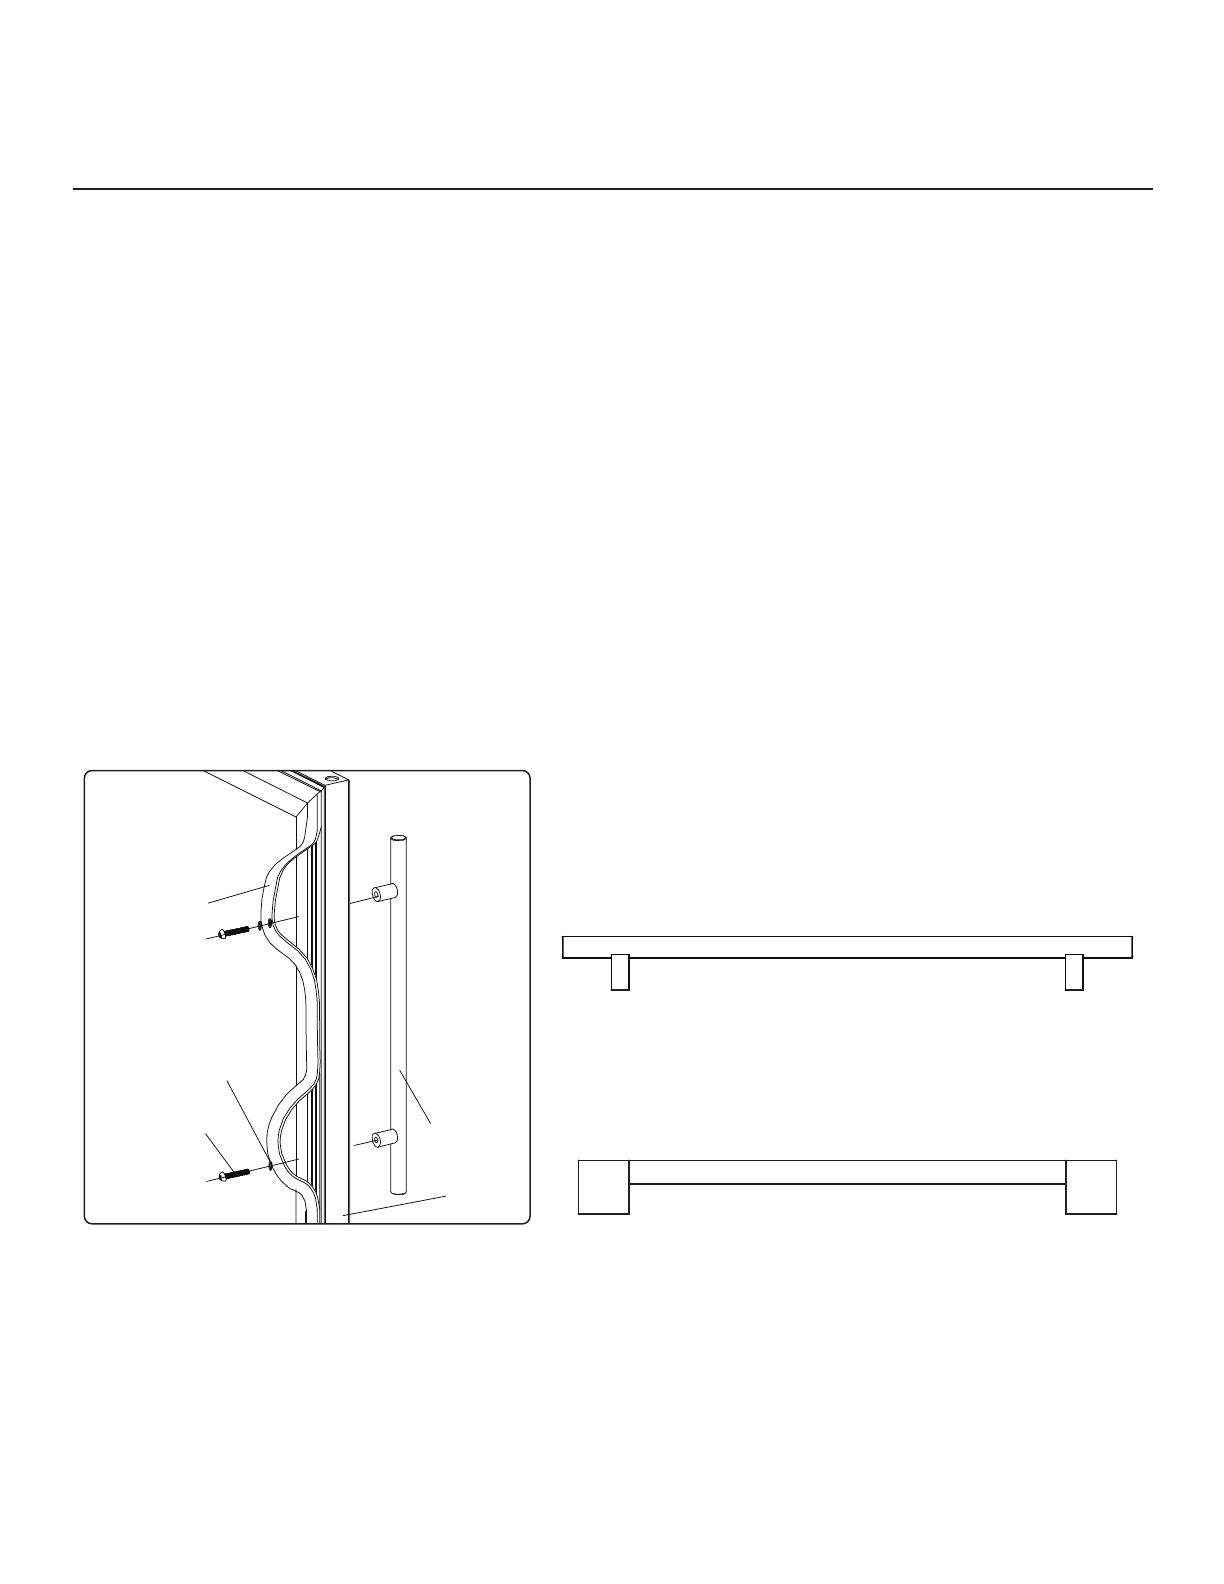
Handle
Door Frame
Gasket
Flat Washer
Screw
Zephyr Presrv Contemporary Handles
Zephyr Presrv Pro Handle
Part #: PRHAN-C101
Part #: PRHAN-C102
Part #: PRHAN-C104
Color: Stainless Steel
Color: Brushed Gold
Color: Matte Black
Part #: PRHAN-C001 Color: Stainless Steel
Installing the Optional Door Handles
If optional contemporary or pro handles are desired, refer below for the part numbers. You may install
your own door handle onto the wood overlay panel. Take care to measure and drill the handle screw
holes accurately and source the appropriate screws (not included) unless using Zephyr accessory
handles.
1. Confirm if the wood overlay panel has already been installed onto the unit. If not, refer to
installing the wooden overlay panel on page 5, to mount the overlay panel onto the unit.
2. Push aside the door gasket. Under the gasket you will see two designated holes for door handle
installation. Mark door handle hole locations on the wood overlay panel.
3. Remove wood overlay panel from door. Using 3/16” drill bit, create holes for handle screws.
4. Re-install wood overlay panel on the door.
5. Install the handle tightly as shown with (2) M4*40 screws and (2) M4 flat washers provided with
your existing panel ready cooler.
NOTE: If using a custom handle, install the handle in the position of your choosing with countersunk
screw holes prior to installing the wood overlay panel to the door.


