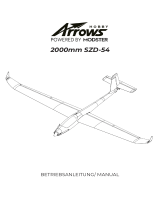
Arrows

Modster Arrows User manual

  • Hello! I am an AI chatbot trained to assist you with the Modster Arrows User manual. I’ve already reviewed the document and can help you find the information you need or explain it in simple terms. Just ask your questions, and providing more details will help me assist you more effectively!
  • What is the primary function of the Arrows Hobby Vector flight control system?
    How does the Vector flight control system benefit beginners?
    What advantages does the Vector system offer to intermediate and expert pilots?
    How many flight modes does the Vector flight control system operate in and how are they transitioned between?
    Explain the functionality of each flight mode.
    What is the significance of the rapid LED flashes during the initialization process?
    How can I verify a successful calibration process?
!"#!
Vector Flugsteuerungssystem Handbuch
Vector Flugsteuerungssystem Übersicht
1. Das Arrows Hobby Vector Flugsteuerungssystem ist ein digitaler Co-Pilot, der speziell für Ihr
Flugzeug programmiert wurde.
2. Für Anfänger bietet der Vector einen sicheren Flugbereich, um den Piloten beim Erlernen des
Fliegens zu unterstützen.
3. Für fortgeschrittene und bereits erfahrene Piloten kann der Vector die Auswirkungen von
Windbögen mildern, während er dem Piloten erlaubt, die vollständige Kontrolle zu behalten und
komplexe Manöver durchzuführen.
Das Vector Flugsteuerungssystem arbeitet in 3 Flugmodi - Stabilität, Dynamik und Direktflug; der Übergang zwischen den 3 Flugmodi erfolgt über
einen 3-Positionen-Schalter am Sender - die mittlere Position ist standardmäßig der Direktflugmodus.
Hinweis: Wenn nur ein Schalter mit 2 Positionen vorhanden ist, schaltet das Vector System nur zwischen den Flugmodi Stabilität und Dynamik um.
Stabilitäts Modus - Der Vector bringt das Flugzeug in den Horizontalflug zurück, wenn keine Steuereingaben erkannt werden. Perfekt für Piloten-
anfänger oder als sicherer Modus in Notsituationen.
Dynamischer Modus - In diesem Modus behält der Pilot die vollständige Kontrolle über das Fluggerät. Der Vector-Flugregler nimmt nur dann
Steuereingaben vor, wenn er eine Bewegung erkennt, die nicht vom Piloten initiiert wurde (Windböen, Seitenwind, usw...)
Direkt Modus - Für erfahrene Piloten, die ein reines Flugerlebnis ohne elektronische Eingriffe erleben wollen, werden zu keiner Zeit Eingaben vom
Flugregler gemacht. Es sei denn, er wird zurück in den Stabilitäts- oder Dynamik-Modus geschaltet.
1. Stellen Sie das Flugzeug auf eine ebene Fläche, schalten Sie den Sender und dann das Flugzeug ein.
2. Warten Sie, bis sich die Vector Flugsteuerung selbst kalibriert hat (Status-LED blinkt schnell).
3. Wenn der Kalibrierungs-Prozess abgeschlossen ist (nach ca. 3 Sekunden), schaltet das Flugzeug die Querruder- und Höhenruder-Servos
jeweils dreimal ein - dies zeigt einen erfolgreichen Kalibrierungs-Prozess an.
4. Flugmodus-Status-LED: Schnelles Blinken = Stabilisiert, kurzes Blinken= Direkt, Ein= Dynamisch.
Hinweis: Prüfen Sie vor dem Flug immer, ob die Steuerflächen in der richtigen Richtung reagieren. Umgekehrte Steuerflächenbewegungen können
dazu führen, dass das Flugzeug unkontrollierbar wird.
1. Sbus- und PPM: Schließen Sie das Sbus/PPM-Kabel direkt an den Sbus-Anschluss des Empfängers an. Achten Sie dabei genau auf die Polarität
des Kabels. Beachten Sie, dass die Kanalreihenfolge lautet: Querruder, Höhenruder, Gas und Seitenruder.
Verwenden Sie den Sender, um die Reihenfolge zu korrigieren, wenn die Standardeinstellungen nicht mit der Reihenfolge übereinstimmen.
Sbus / PPM /PWM EINGABE
1. PWM-Empfänger: Schließen Sie das Sbus/PPM-Kabel an einen freien Kanal an, der einem 2- oder 3-Stellungsschalter zugeordnet werden
kann. Schließen Sie an alle anderen Kanäle entsprechend der Beschriftung auf dem Servokabel an.
Funktionsweise
Initialisierung bei der Kalibrierung
Sbus- und PPM Empfänger
HÖHENRUDER KANAL
HÖHENRUDER KANAL
HÖHENRUDER KANAL
Vector flight control system manual
Vector flight control system overview
Functionality
Initialisation in calibration
Sbus and PPM receivers
1. Designed to be your loyal wingman, the Arrows Hobby Vector flight control
system is a digital co-pilot programmed specifically for your aircraft.
2. For beginners, Vector will provide a safe flight envelope to assist the pilot in
learning the ropes.
3. For intermediate & expert pilots, Vector can mitigate the effects of wind gusts
while allowing to maintain complete control & perform complex maneuvers.
The Vector flight control system operates in 3 flight modes - Stability, dynamic and direct; transition between the 3 flight
modes utilizing a 3- position switch on your transmitter- the middle position is the direct mode by default.
Note: If only a 2 position switch is available, the Vector system will only switch between Stability and Dynamic flight
modes.
Stability mode - Vector will return the aircraft to level flight whenever no control inputs are detected. Perfect for beginner
pilots or as a safe mode in emergency situations.
Dynamic mode - This mode allows pilots to retain complete control of the aircraft. The Vector flight controller only makes
control inputs when it detects movement not initiated by the pilot (wind gusts, cross wind etc).
Direct mode - For expert pilots who want to experience a pure flight experience with no electronic intervention, no input
is given at any time by the flight controller unless it is switched back to Stability or Dynamic modes.
1. Set the aircraft on a level surface, turn on the transmitter then power on the aircraft.
2. Wait for the Vector flight control to self calibrate (Status LED flashes rapidly).
3. When the calibration process is complete (after around 3 seconds), the aircraft or cycle its aileron and elevator servos
3 times each- indicating a successful calibration process.
4. Flight mode status LED: Rapid flashes= Stabilized, Short flashes= Direct, On= Dynamic.
Note: Prior to flight, always check that the control surfaces are responding in the correct direction. Reversed control
surface movement can cause the aircraft to be uncontrollable.
1. Sbus and PPM receivers: connect the Sbus/PPM cable directly to the Sbus port on the receiver, pay close attention to
the polarity of the cable. Noticed that the channel order is: ailerons, elevator, throttle and rudder. Use the transmitter to
correct the channel order if the default settings on the transmitter do not match this order.
2. PWM receivers: connect the Sbus/PPM cable to a spare channel that can be assigned to a 2 or 3 position switch.
Connect to all other channels according to the label on the servo lead.
RUDDER CHANNEL
THROTTLE CHANNEL
ELEVATOR CHANNEL
AILERON CHANNEL
Receiver SBUS \PPM PWM INPUT
RUDDER CHANNEL
THROTTLE CHANNEL
ELEVATOR CHANNEL
AILERON CHANNEL
SBUS \PPM PWM INPUT RUDDER CHANNEL
THROTTLE CHANNEL
ELEVATOR CHANNEL
AILERON CHANNEL
Receiver
SBUS
/