19
> Before start > Hookup >Setup >Playback >Part Names
En
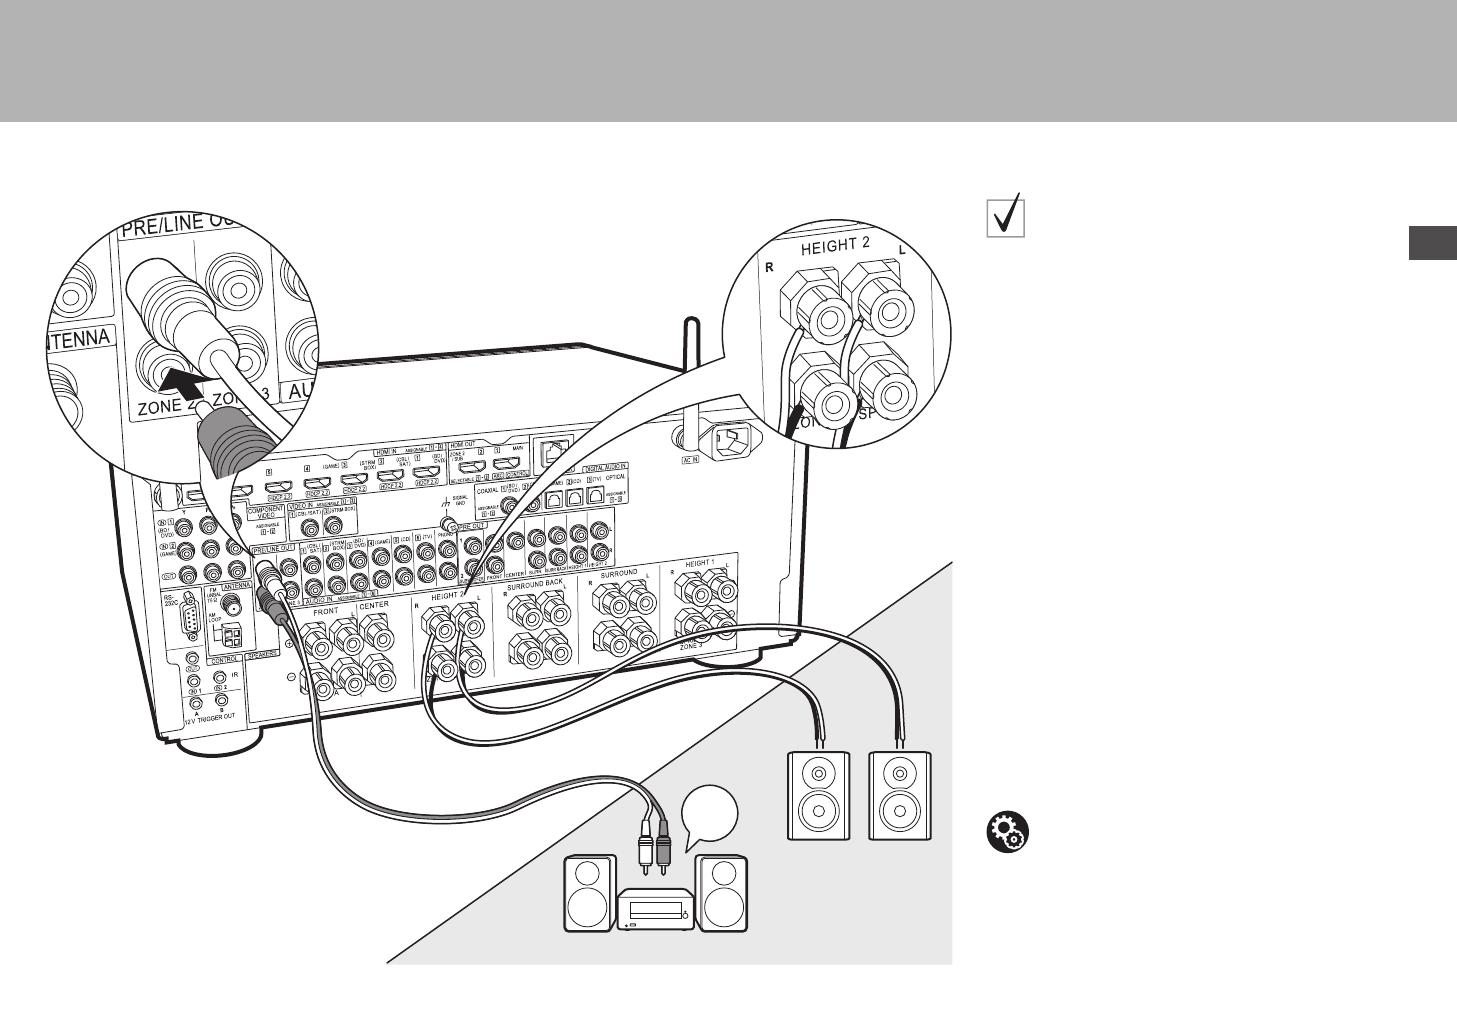
ZONE2
ZONE 2 SPEAKER
ZONE 2 PRE/LINE OUT
1
MAIN ROOM
LINE
IN
2
ᴧ
Depending on the combination of speakers, you
may need to connect to other jacks. See "Points to
note with speaker combinations" (P9) for details.
1 Analog audio cable, 2 Speaker cable
ZONE 2 PRE/LINE OUT /
ZONE 2 SPEAKER
You can enjoy audio in the separate room by, for example, playing a
Blu-ray Disc player in the main room (where this unit is located) and
listening to internet radio in the separate room (ZONE 2).
Connections with an AV component
Connect with HDMI IN 1 to 5 if you want to output an
external AV component to ZONE 2. If the AV component
doesn't have an HDMI jack, connect using a digital optical
cable, digital coaxial cable, or analog audio cable.
ZONE 2 PRE/LINE OUT
It is possible to play 2 ch sources in a separate room while
sources with a maximum of 11.1 ch are being played in the main
room. Connect the ZONE 2 PRE/LINE OUT jacks of the unit and
the LINE IN jacks of the pre-main amplifier or the power amplifier
in a separate room with an analog audio cable.
ZONE 2 SPEAKER
It is possible to connect speakers in a separate room and
play 2 ch sources.
0
You can play through a maximum of 7.1 channels in the main
room during ZONE 2 playback. With Bi-Amping connection or
while ZONE 3 speaker connection settings are enabled, no
sound is heard from the surround back speakers or height
speakers and a maximum of 5.1 channel playback is possible
in the main room. Listening modes such as Dolby Atmos
cannot be selected.
Setup
0 Settings are required in Initial Setup, "4. Multi
Zone Setup" (
P23) to enjoy this feature.
0
The audio from externally connected AV
components can only be played in ZONE 2 when the
audio is analog or 2ch PCM audio. If you have
connected to this unit with an HDMI cable or digital
optical/coaxial cable, may be necessary to convert
the audio output of the AV component to PCM output.
SN29402397_SC-LX801_701_BAS_En.book 19 ページ 2016年6月6日 月曜日 午後5時36分


