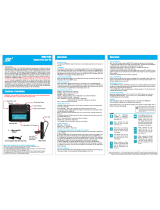
Cisco SPA525G - Small Business Pro IP Phone VoIP User manual

Category
IP phones
Type
User manual

This manual is also suitable for

Cisco Small Business
SPA525G and SPA525G2 SIP IP Phones
USER GUIDE
Cisco SPA525G and Cisco SPA525G2 SIP IP Phone User Guide 2
Contents
Chapter 1: Getting Started 8
Overview 8
Caring for Your Phone 10
Understanding Your Phone Lines and Buttons 10
Softkey Buttons 13
Using the Keypad and Buttons with Menus 16
Using Keypad Shortcuts 16
Using the Navigation Button 16
Entering Numbers and Text in Fields 16
Using Phone Hardware and Accessories 17
Using the Speakerphone 17
Using Wired and Wireless Headsets 17
Connecting the Headset 17
Connecting Bluetooth Headsets 18
Using a Headset with Your IP Phone 20
Switching Between the Handset/Headset/Speakerphone During a Call 20
Using the Cisco Attendant Console 21
Chapter 2: Installing Your Phone 22
Before You Begin 22
Connecting the Handset 23
(Optional) Attaching the Desk Stand 25
(Optional) Mounting the Phone to the Wall 25
Connecting the Power 26
Connecting Your Phone to the Network 26
Connecting Your Phone to the Wired Network 26
Connecting Your Phone to the Wireless Network 27
Determining Your Wireless Router Security Type 27
Setting the Phone Wireless Connection 29
Using Wi-Fi Protected Setup 30
Manually Adding a Wireless Profile 31
Uploading Security Certificates to the Phone 33
Cisco SPA525G and Cisco SPA525G2 SIP IP Phone User Guide 3
Contents
Verifying Phone Startup 34
Updating Your Phone Firmware 34
Chapter 3: Using Basic Phone Functions 35
Placing or Answering a Call 36
Using Dial Assistance 36
Adjusting Call Volume and Muting 37
Adjusting Call Volume 37
Using Mute 37
Putting a Call on Hold 37
Resuming a Call 37
Ending a Call 37
Transferring Calls 38
Performing an Attended Transfer 38
Performing an Unattended (Blind) Transfer 38
Redialing 39
Viewing and Returning Missed Calls 39
Returning a Missed Call 39
Viewing a List of Missed Calls 39
Turning the Missed Calls Shortcut On and Off 40
Forwarding Calls 41
Forwarding Calls to a Single Number 41
Forwarding Calls When Your Phone is Busy 42
Forwarding Calls When You Do Not Answer the Phone 42
Delaying Call Forwarding When there is no Answer the Phone 42
Setting Do Not Disturb 43
Configuring Call Waiting 44
Picking Up a Call 44
Parking a Call 45
Placing a Three-Way Conference Call 46
Cisco SPA525G and Cisco SPA525G2 SIP IP Phone User Guide 4
Contents
Using the Phone Directories 47
Using Your Personal Address Book 47
Adding a New Contact 48
Copying a Contact 49
Searching for a Contact 49
Deleting a Contact 49
Editing a Contact 49
Using the Corporate Directory 50
Using the Call History Lists 51
Viewing the Call History Lists 51
Deleting a Call History List 51
Calling from the Call History Lists 52
Deleting an Entry from the Call History Lists 52
Saving a Call History List Number to Your Directory 52
Setting or Changing a Phone Password 53
Logging In and Logging Out of Your Phone 53
Accessing Voicemail 54
Chapter 4: Using Advanced Phone Features 55
Configuring Privacy and Security Features 56
Blocking Caller ID 56
Blocking Anonymous Calls 56
Using Secure Call 57
Enabling Dial Assistance 57
Connecting to a Virtual Private Network (VPN) 58
Connecting to a VPN Manually 58
Viewing Your VPN Status 59
Creating and Using Speed Dials 59
Creating Speed Dials on Unused Line Buttons 59
Creating Numerical Speed Dials 60
Calling Speed Dials 60
Cisco SPA525G and Cisco SPA525G2 SIP IP Phone User Guide 5
Contents
Using the IP Phone With Your Bluetooth-Enabled Mobile Phone 61
Enabling Bluetooth 61
Pairing Your Cisco SPA525G2 with a Bluetooth-Enabled Mobile Phone 62
Initiating Pairing from the IP Phone 62
Initiating Pairing from Your Bluetooth-Enabled Mobile Phone 63
Verifying that the Cisco SPA525G2 is Paired 64
Importing Your Mobile Phone Address Book into the Cisco SPA525G2 64
Making a Mobile Phone Call by using Your Cisco SPA525G2 65
Receiving Mobile Phone Calls by using the Cisco SPA525G2 66
Switching Audio from Your Cisco SPA525G2 to Your Mobile Phone 66
Viewing Mobile Phone Battery and Signal Information on Your
Cisco SPA525G2 66
Charging Your Mobile Phone 67
Playing MP3 Files on Your Phone 67
Creating the Playlist 68
Playing Songs 68
Controlling the Audio 68
Using the Paging Feature 70
Paging Another Phone 70
Paging a Group of Phones 70
Configuring Auto Answer 70
Customizing Your IP Phone Screen 71
Changing the IP Phone Screen Contrast 71
Setting the Screen Backlight Timer 71
Configuring the Phone Screen Saver 72
Changing the Phone Wallpaper 73
Using Ring Tones 74
Accessing Weather and News on Your Phone 74
Accessing Weather Information 74
Accessing News 75
Configuring Date and Time Parameters on Your Phone 76
Using Star Codes 77
Cisco SPA525G and Cisco SPA525G2 SIP IP Phone User Guide 6
Contents
Restarting Your Phone 78
Viewing Phone, Network, and Call Information 79
Viewing Product Information 79
Viewing Network Information 79
Viewing Phone Line and Extension Information 80
Viewing Peripheral Status 80
Viewing the Wireless Connection Status 81
Advanced Menus for Technical Support Personnel 81
Chapter 5: Using the Web Configuration Utility 83
Logging in to the Phone Web User Interface 83
Making the Web Configuration Utility Viewable 85
Saving the Configuration Profile 85
Configuring Your Personal Address Book 85
Configuring Voice User Parameters 87
Configuring Call Forwarding 87
Configuring Supplementary Services 88
Call Waiting (CW Setting) 88
Block Caller ID (Block CID Setting) 88
Block Anonymous Calls (Block ANC Setting) 88
Do Not Disturb (DND Setting) 88
Display Text Messages on Receiving Phone (Display Text Message on Recv
Setting) 88
Text Messages From a Third Party (Text Message From 3rd Party) 89
Audio Volume 89
Screen 90
Viewing Call History Lists 90
Creating Speed Dials 91
Configuring Wi-Fi 92
Creating a Wi-Fi Profile 93
Configuring Bluetooth 93
Bluetooth Profiles 94
Cisco SPA525G and Cisco SPA525G2 SIP IP Phone User Guide 7
Contents
Upgrading Firmware 94
Appendix A: Where to Go From Here 96
Power Adapter Statement 98
FCC and IC Statement 98
Federal Communication Commission Interference Statement 98
IMPORTANT NOTE 99
Industry Canada Statement 99
1
Cisco SPA525G and Cisco SPA525G2 SIP IP Phone User Guide 8
Getting Started
This chapter provides an overview of your Cisco SPA525G and Cisco SPA525G2
IP phone. contains the following sections:
It contains the following sections:
Overview, page 8
Understanding Your Phone Lines and Buttons, page 10
Using the Keypad and Buttons with Menus, page 16
Entering Numbers and Text in Fields, page 16
Using Phone Hardware and Accessories, page 17
Using the Cisco Attendant Console, page 21
Overview
The Cisco SPA525G and Cisco SPA525G2 IP phone is a full-featured VoIP (Voice
over Internet Protocol) phone that provide voice communication over an IP
network. It provides traditional features, such as call forwarding, redialing, speed
dialing, transferring calls, conference calling, and accessing voice mail. Calls can
be made or received with a handset, headset or speaker.
The Cisco SPA525G and Cisco SPA525G2 features vary, depending on the type
of call control system that you are using and the limitations set by the phone
system administrator. This document describes using the Cisco SPA525G and
Cisco SPA525G2 with a Smart Phone Control Protocol (SPCP) phone system,
such as the Cisco Unified Communications 500 Series, with no limitations.
Getting Started
Overview
Cisco SPA525G and Cisco SPA525G2 SIP IP Phone User Guide 9
1
The phone can be powered by connecting your phone to an Ethernet switch that
provides Power over Ethernet (PoE) or you can use an optional Cisco PA100 power
adapter.
A phone is connected to the network through an Ethernet connection or the built-in
Wireless-G radio. If you are using the Wireless-G connection, a Cisco PA100
power adapter is required. The phone provides an additional Ethernet port that
allows a computer to be connected to the network through the phone. (We
recommend that if a PC is connected to the network through the phone, that the
phone be connected to the network only by using the wired Ethernet connection).
The Cisco SPA525G and Cisco SPA525G2 have 320 x 240 color, 3.2-inch LCD
screens and can manage up to five telephone extensions. They also provide
following hardware features:
Two 10/100 Mbps Ethernet ports
802.3af Power-over-Ethernet support
USB 2.0 port
AUX port (to attach a Cisco Attendant Console)
Bluetooth capability for headset support
Bluetooth capability for mobile phone pairing (Cisco SPA525G2 only)
2.5mm stereo earphone jack for a headset
Wireless-G client support
Kensington security slot support
Getting Started
Understanding Your Phone Lines and Buttons
Cisco SPA525G and Cisco SPA525G2 SIP IP Phone User Guide 10
1
The functionality of the phones can be modified by your phone system
administrator. Not all of the functional features described in this document are
available or they might function slightly differently on your phone. This document
describes the features as they function in factory default mode.
Caring for Your Phone
The Cisco Small Business IP phones are electronic devices that should not be
exposed to excessive heat, sun, cold, or water. To clean the equipment, use a
slightly moistened paper or cloth towel. Do not spray or pour cleaning solution
directly onto the hardware unit.
Understanding Your Phone Lines and Buttons
Use the following graphic and table to identify the parts of your phone.
Getting Started
Understanding Your Phone Lines and Buttons
Cisco SPA525G and Cisco SPA525G2 SIP IP Phone User Guide 11
1
Figure 1 Cisco SPA525G and Cisco SPA525G2 Phone Components
Table 1 IP Phone Components
# Phone Feature Description
1Handset
Pick up to answer or place calls.
2Speaker
Speaker for phone.
3 Message Waiting
Indicator
When lit:
RedYou have a new voice mail message.
Flashing RedYou have an incoming call.
4LCD Screen
Your phone may vary, but typically displays:
Date and time
Phone station name
Line extensions
Softkey options
Startup logo, screen saver, background
photo, and photo album
5 Line keys Indicates phone line status:
Green: Line is idle.
Red (steady): Line is active or in use.
Red (blinking): Line is on hold.
Orange: Line is unregistered (cannot be
used).
Flashing Orange: The phone is not
connected to the network.
These keys can also be programmed by your
system administrator to perform differently than
described here or to add functions such as
speed dial, call pickup, or monitor an extension.
6 Softkey buttons Press a softkey button to perform the action on
the label on the LCD screen above.
Getting Started
Understanding Your Phone Lines and Buttons
Cisco SPA525G and Cisco SPA525G2 SIP IP Phone User Guide 12
1
7 Navigation button Press in each direction to scroll through items on
the LCD screen.
8 Center Select button Press this button to select the option or menu that
is highlighted on the LCD screen.
9 Messages button Press to access voice mail (must be set up by
your phone administrator).
10 Hold button Press to place a call on hold.
11 Setup button
Press to access a menu to configure features and
preferences (such as your directory, status, and speed
dials), access your call history, set up functions (such
as call forwarding), and provide phone status
information.
12 Mute button
Press to mute or unmute the phone. When the
phone is muted, the button glows red. A flashing
red mute button indicates that the phone has no
network connectivity.
13 Volume button
Press + to increase the volume and press - to
lower the volume of the handset, headset,
speaker (when the handset is off hook), or ringer
(when the handset is on hook).
14 Headset button Press to turn the headset on or off. When the headset
is on, the button glows green.
15 Speaker button Press to turn the speaker on or off. When the speaker
is on, the button glows green.
16 Keypad Press keys to dial phone numbers, enter letters, and
choose menu items.
Table 1 IP Phone Components
# Phone Feature Description
Getting Started
Understanding Your Phone Lines and Buttons
Cisco SPA525G and Cisco SPA525G2 SIP IP Phone User Guide 13
1
Softkey Buttons
The phone displays four softkey buttons at a time on the LCD screen. Different
softkey buttons display depending on the phone screen or menu that is shown.
Press the Right Arrow or Left Arrow keys to see additional softkeys.
The following table shows some of the typical Cisco SPA525G and
Cisco SPA525G2 softkey buttons that are available (in alphabetical order). You
might not have all of these softkey buttons, and you might have additional buttons
that are not listed here. For example, your phone administrator can provide custom
softkey buttons on your phone, such as buttons that provide a speed dial to a
company number, or that access a specialized program that runs on your phone.
Contact your phone administrator for more information.
Table 2 Cisco SPA 525G/525G2 Softkey Buttons
Button Function
Add Adds a new item (for example, a new directory entry).
AddList Creates a list (for example, of MP3 files to play).
Alpha Press to enter alphabetic characters in a data entry field.
Answer Answers an incoming call.
Back Returns you to the previous screen.
Barge Press to interrupt a call on a shared extension.
BlindXfer Performs a blind call transfer. See “Performing an
Unattended (Blind) Transfer,” on page 38.
Call Rtn Returns the last missed call by dialing the number that called
you. See “Viewing and Returning Missed Calls,” on
page 39.
Clear Deletes an entire text or number field.
Clr DND Clears Do Not Disturb.
Clr Fwd Clears Call Forward All.
Conf Initiates a conference call. See “Placing a Three-Way
Conference Call,” on page 46.
ConfLx Conferences existing active calls on the phone together.
Connect Connects to the selected item (for example, to the wireless
network or Bluetooth device).
Getting Started
Understanding Your Phone Lines and Buttons
Cisco SPA525G and Cisco SPA525G2 SIP IP Phone User Guide 14
1
Copy Copies the selected item (for example, a contact in the
Address Book).
delChar Deletes the last number or letter.
Delete Deletes an entire item (for example, a number from the Call
History list).
Dial Dials the string of numbers that you have entered, or the
number that you have highlighted in a list such as Missed
Calls.
Directory Access your personal address book. See “Using Your
Personal Address Book,” on page 47.
DND Do Not Disturb prevents incoming calls from ringing your
phone. See “Setting Do Not Disturb,” on page 43.
Edit Opens an item so that you can edit numbers or letters, or
enable or disable a feature.
EditDial Edits a number before dialing.
End Call Disconnects a call.
Forward Forwards calls coming to your phone. See “Forwarding
Calls,” on page 41.
GrPickup Allows you to pick up (answer) a call at that is ringing at
another extension in your group. See “Picking Up a Call,” on
page 44.
Handset Switches audio from the Cisco SPA525G2 to your Bluetooth-
enabled mobile phone. See “Using the IP Phone With Your
Bluetooth-Enabled Mobile Phone” on page 61.
Handsfree Switches audio from your Bluetooth-enabled mobile phone
to the Cisco SPA525G2. See “Using the IP Phone With
Your Bluetooth-Enabled Mobile Phone” on page 61.
Hold Places a call on hold. See “Putting a Call on Hold,” on
page 37.
Ignore Ignores an incoming call.
Join Connects a conference call.
Table 2 Cisco SPA 525G/525G2 Softkey Buttons
Button Function
Getting Started
Understanding Your Phone Lines and Buttons
Cisco SPA525G and Cisco SPA525G2 SIP IP Phone User Guide 15
1
List In some menus, shows a list of configured items (for
example, a list of locations for weather or news).
Miss Displays the list of missed calls.
Next Moves to the next item in a list (for example, a song in the
MP3 Playlist).
Option Enters a sub-menu.
Park Parks a call at a designated park number. The call is active
until you unpark it, or the caller disconnects. See “Parking a
Call,” on page 45.
Paste Pastes the item you copied into a list or field.
PickUp Allows you to pick up (answer) a call that is ringing at another
extension. See “Picking Up a Call,” on page 44.
Play Plays a selected item such as a song or a ringtone.
Previous Moves to a previous item in a list (for example, a song in the
MP3 Playlist).
PrivHold Puts a call on hold on an active shared line.
Redial Brings up the list of recently dialed numbers. See
“Redialing,” on page 39.
Refresh Refreshes the screen. Useful after changing a configuration
or when you want to update information (such as weather).
Resume Resumes a call that is on hold.
Save Saves your changes.
Scan Scans for wireless networks or Bluetooth devices.
Select Selects the highlighted item on the LCD screen.
Transfer Performs a call transfer. See “Transferring Calls,” on
page 38.
Unpark Connects to a parked call. See “Parking a Call,” on
page 45.
View Displays more information about a selected item.
XferLX Transfers existing active calls on the phone.
Table 2 Cisco SPA 525G/525G2 Softkey Buttons
Button Function
Getting Started
Using the Keypad and Buttons with Menus
Cisco SPA525G and Cisco SPA525G2 SIP IP Phone User Guide 16
1
Using the Keypad and Buttons with Menus
You press a softkey button or other buttons to enter menus on the LCD screen.
Using Keypad Shortcuts
Use the keypad to enter the number of the menu or sub-menu item. For example, to
reach the Call History menu, press the Setup button and press 2.
Menus and options can change depending on the software release and what is
allowed by your phone system administrator.
Using the Navigation Button
Use the navigation button to scroll up or down through the menu items, and then
press the Select softkey button or the center Select button to choose the
highlighted item.
Entering Numbers and Text in Fields
Some fields on the IP phones require you to enter numbers and text by using the
keypad or softkey buttons. In general, the following guidelines apply:
Use the keypad to enter numbers and characters, pressing the key multiple
times to select the correct number or letter.
Press the number key multiple times to move to a different letter under that
number. (For example, to enter “Mary,” you would press 6 five times rapidly
and then pause (for M); press 2 and then pause (for a), press 7 three times
rapidly (for r), then press 9 three times rapidly (for y).
Available characters are shown in the following table:
Key Character Set
1 1 / : \ , ! ; $ ^ |
2abc2ABC
3def3DEF
Getting Started
Using Phone Hardware and Accessories
Cisco SPA525G and Cisco SPA525G2 SIP IP Phone User Guide 17
1
Use the delChar softkey button to backspace and delete the last character.
Use the Option > Clear softkey button to remove the entire entry.
Using Phone Hardware and Accessories
Using the Speakerphone
The IP phones provide a speakerphone. To use the speakerphone, press Speaker
(the handset can be either on or off hook).
Using Wired and Wireless Headsets
The SPA IP phones support headsets from different manufacturers. For the latest
supported models, contact your reseller. Additional information can be found at the
manufacturer websites.
Connecting the Headset
Each brand and type of headset may require different steps for connection.
Consult the documentation for your particular headset for more information:
Bluetooth headsets—See the “Connecting Bluetooth Headsets” section
on page 18.
4ghi4GHI
5jkl5JKL
6mno6MNO
7pqrs7PQRS
8tuv8TUV
9wxyz9WXYZ
0 Space 0 ~ ? > ‘ < “
* . @ * & % [ ] _
#/P # + - = ( ) { }
Key Character Set
Getting Started
Using Phone Hardware and Accessories
Cisco SPA525G and Cisco SPA525G2 SIP IP Phone User Guide 18
1
Wireless (non-Bluetooth) headsets (such as Plantronics or Jabra)—Follow
the instructions for your product to connect the phone to the wireless
headset base.
Wired headsets—Connect the 2.5mm connector from the headset into the
headset port on the right side of the IP phone.
Electronic Hookswitch (EHS)—Some headsets enable you to answer and
end phone calls by using controls located on the headset.
Connecting Bluetooth Headsets
Your phone is Bluetooth compatible and works with Bluetooth devices such as
headsets.
To configure the phone to work with your headset, first enable Bluetooth:
STEP 1 Press Setup.
STEP 2 Select User Preferences.
STEP 3 Select Bluetooth Configuration.
STEP 4 With Bluetooth selected, press the Right Arrow key to turn Bluetooth
On
.
Getting Started
Using Phone Hardware and Accessories
Cisco SPA525G and Cisco SPA525G2 SIP IP Phone User Guide 19
1
STEP 5 Press Set.
After enabling Bluetooth, create a profile for your headset:
STEP 1 Enable Bluetooth as described above.
STEP 2 Press Setup.
STEP 3 Scroll to User Preferences and press Select.
STEP 4 Scroll to Bluetooth Configuration and press Select.
STEP 5 Scroll to Bluetooth Mode and press the Right Arrow key to choose one of the
following:
PhoneYour IP phone pairs with a Bluetooth headset only. Choose this
option if you will not use the Cisco IP phone with a Bluetooth-enabled mobile
phone.
HandsfreeYour IP phone will operate as a handsfree device with a
Bluetooth-enabled mobile phone.
BothYour Cisco IP phone uses a Bluetooth headset or operates with a
Bluetooth-enabled mobile phone. Your IP phone will connect to only one
device at a time (either the Bluetooth headset or the Bluetooth-enabled
mobile phone. (See “Using the IP Phone With Your Bluetooth-Enabled
Mobile Phone” on page 61 for more information on using the
Cisco SPA525G2 with your mobile phone.)
If multiple Bluetooth devices are in range of the Cisco SPA 525G2, the order
of devices in the Bluetooth Configuration > Bluetooth Profiles list is used,
and the device with a higher priority is activated first.
STEP 6 Scroll to Bluetooth Profiles and press the Right Arrow key to enter the profile
screen.
STEP 7 Press Scan to scan for your headset. Depending on the network environment (for
example, the number of Bluetooth devices and noise level), your Bluetooth headset
might not appear on the found devices list. Ensure the headset is powered on and
has Bluetooth activated, and retry the scan.
STEP 8 In the list of found devices, select your headset and press Select to edit the profile.
STEP 9 Scroll to PIN and enter the PIN for your Bluetooth headset.
STEP 10 Scroll to Connect Automatically and press the Right Arrow key to turn to On.
Getting Started
Using Phone Hardware and Accessories
Cisco SPA525G and Cisco SPA525G2 SIP IP Phone User Guide 20
1
STEP 11 Press Connect. The profile screen displays and a check mark appears next to the
headset if the connection was successful.
Using a Headset with Your IP Phone
Steps to use your headset with the IP phone might vary. Consult the user
documentation for your headset for more information.
To use a wired headset, press Headset and dial the number to place a call,
or press the headset button to answer a ringing call.
To use a non-Bluetooth wireless headset (such as Jabra or Plantronics), lift
the receiver off hook before speaking or listening through the headset.
To use a Bluetooth headset, make sure your headset is powered on. Press
Headset on your phone (or, if supported, press Answer on your Bluetooth
headset twice) and dial the number to place a call. Press Answer on your
Bluetooth headset to answer a ringing call. See the user documentation for
your Bluetooth headset for more information.
Switching Between the Handset/Headset/Speakerphone
During a Call
Any of these audio devices can be used during a call. Only one device can be
used at a time. The handset can be on the hook when using the speaker or
headset function.
To switch from the handset to the speaker, press Speaker and place the handset
back on the hook.
To switch from the speakerphone to a headset, press Headset.
To switch from the speaker to the handset, pick up the handset.
To switch from the headset to the speakerphone, press Speaker.
  • Page 1 1
  • Page 2 2
  • Page 3 3
  • Page 4 4
  • Page 5 5
  • Page 6 6
  • Page 7 7
  • Page 8 8
  • Page 9 9
  • Page 10 10
  • Page 11 11
  • Page 12 12
  • Page 13 13
  • Page 14 14
  • Page 15 15
  • Page 16 16
  • Page 17 17
  • Page 18 18
  • Page 19 19
  • Page 20 20
  • Page 21 21
  • Page 22 22
  • Page 23 23
  • Page 24 24
  • Page 25 25
  • Page 26 26
  • Page 27 27
  • Page 28 28
  • Page 29 29
  • Page 30 30
  • Page 31 31
  • Page 32 32
  • Page 33 33
  • Page 34 34
  • Page 35 35
  • Page 36 36
  • Page 37 37
  • Page 38 38
  • Page 39 39
  • Page 40 40
  • Page 41 41
  • Page 42 42
  • Page 43 43
  • Page 44 44
  • Page 45 45
  • Page 46 46
  • Page 47 47
  • Page 48 48
  • Page 49 49
  • Page 50 50
  • Page 51 51
  • Page 52 52
  • Page 53 53
  • Page 54 54
  • Page 55 55
  • Page 56 56
  • Page 57 57
  • Page 58 58
  • Page 59 59
  • Page 60 60
  • Page 61 61
  • Page 62 62
  • Page 63 63
  • Page 64 64
  • Page 65 65
  • Page 66 66
  • Page 67 67
  • Page 68 68
  • Page 69 69
  • Page 70 70
  • Page 71 71
  • Page 72 72
  • Page 73 73
  • Page 74 74
  • Page 75 75
  • Page 76 76
  • Page 77 77
  • Page 78 78
  • Page 79 79
  • Page 80 80
  • Page 81 81
  • Page 82 82
  • Page 83 83
  • Page 84 84
  • Page 85 85
  • Page 86 86
  • Page 87 87
  • Page 88 88
  • Page 89 89
  • Page 90 90
  • Page 91 91
  • Page 92 92
  • Page 93 93
  • Page 94 94
  • Page 95 95
  • Page 96 96
  • Page 97 97
  • Page 98 98
  • Page 99 99

Cisco SPA525G - Small Business Pro IP Phone VoIP User manual

Category
IP phones
Type
User manual
This manual is also suitable for

Ask a question and I''ll find the answer in the document

Finding information in a document is now easier with AI