Page is loading ...

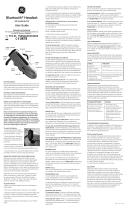
User Guide
650E
Stylish Bluetooth
®
Headset with Multipoint Technology

WELCOME
Thank you for purchasing a Plantronics headset.
Let us provide you with the best possible service and technical support. After
reviewing this user guide, if you need additional assistance or have any product
questions, please contact:
• Plantronics Technical Assistance Center at 866-363-BLUE (2583)
• www.plantronics.com/support
Please refer to the separate Safety Instructions booklet for important product
safety information prior to installation or use of product.
REGISTER YOUR PRODUCT ONLINE
Visit www.plantronics.com/productregistration to register your product online
so we can provide you with the best possible service and technical support.
TABLE OF CONTENTS
Package Contents & Features 3
Charging 4
Pairing 5
Powering 7
Adjusting Fit 8
Using Your Headset 9
Multipoint 11
Indicator Lights 12
Optional Accessories 12
Troubleshooting 13
Product Specifications 13
Technical Assistance 14
Warranty 14
Regulatory Notices 15

3
3
PACKAGE CONTENTS & FEATURES
PLANTRONICS DISCOVERY
TM
650E
AC charger
PLANTRONICS DISCOVERY 650E
ACCESSORIES
Indicator light
Call control button (on/off)
Volume/mute button
Microphone
Soft gel ear tips
Ear loop
AAA
battery
small
medium
large
Headset
charging
pocket
AAA
battery
charger

4
CHARGING
PLANTRONICS DISCOvERY 650E
Before using, you must first charge your headset.
1 hour = minimum charge 3 hours = full charge
A
B
DISCONNECTING COMPONENTS
To separate components, grasp both the battery charger and the charging pocket
with the shirt clip facing you. Bend the components back and they will snap apart.
NOTE Do not twist the components apart.
CAUTION
Only replace with a non-rechargeable AAA battery.
Option A: Using the included AC charger
The indicator light glows red continuously while
charging and turns off when fully charged.
1. Plug the AC charger into the base of the charging
pocket and connect it to your power source.
2. Insert the headset into the charging pocket.
Option B: Using a AAA battery
One AAA battery recharges the headset to full
capacity.
1. Twist the bottom of the AAA battery charger
counterclockwise and release the battery holder.
2. Insert the battery into the AAA battery holder.
3. Slide the battery holder back into the battery
charger and turn clockwise.
4. Snap battery charger onto charging pocket.
Ensure that the indentation on the battery
charger connector aligns with the shirt clip on
the charging pocket.
5. Insert the headset into the charging pocket.

5
PAIRING
Step One:
Prepare Phone—
Turn on Bluetooth
For most phones, go
to Settings/Tools menu
and select Bluetooth or
Connectivity and select
“On.” (Or see the user
guide for your phone.)
SETTINGS
SETTINGS
Time and Date
Phone Settings
Bluetooth
Sound Settings
Network Services
Security
Reset Settings
BLUE TOOTH
Discover/
Search
BLUE TOOTH
6XXPlantronics
Headset Passkey
PASSKEY
0000
This headset now comes with QuickPair
TM
technology so pairing with your Bluetooth
phone is even easier. Follow the instructions below to pair your phone with your
headset for the first time.
Step Two:
Prepare Headset—
Pairing Mode
Begin with headset turned
off. Turn headset on (hold
call control button for at
least four seconds) and it
will automatically go into
pairing mode, flashing red
and blue.
Step Three:
Pairing—
Add Headset to Phone
For most phones, go to
Settings/Tools > Bluetooth >
Search or Add a Device, then
Select “6XXPlantronics.”
For passkey enter 0000.
Headset will flash blue
when paired successfully.
It is now powered on and
ready to use.
NOTE: Normally you only need to pair the headset and handset once. If the headset
has been previously paired with another device, follow pairing instructions on the
next page.
QUICKPAIR FEATURE INSTRUCTIONS

6
PAIRING
If headset has been previously paired with another device, please follow these
instructions for pairing a second time. Be sure the headset is fully charged. For
set up and pairing instructions with other Bluetooth devices, please consult your
Bluetooth device user guide or visit www.plantronics.com/easytopair–an online,
interactive pairing guide for phones and headsets.
Begin with headset turned off.
1. Press and hold down the call
control button for 10 seconds until
the headset status indicator begins
to flash red then blue.
The headset is now in pairing
mode for the next 120 seconds.
2. While the headset is flashing,
use the phone menu to search
for Bluetooth devices and select
“6XXPlantronics.”
3. When prompted for a passkey,
enter 0000. Headset will flash
blue when paired successfully.
1.
2.
3.
When purchased the headset will have the online and standby indicator lights enabled.
To disable these indicators, press the volume up button while turning the headset
ON. To re-enable both indicator lights, turn the headset off; then press the volume up
button again while turning the headset ON.
NOTE: This process only disables online and standby indicator lights when headset is
connected to mobile phone. All other indicator lights, such as low battery, will continue
to function.
TO DISABLE ONLINE AND STANDBY
INDICATOR LIGhTS

7
POWERING
CHARGE LEVEL INDICATION
When the headset is turned on, the
indicator light will briefly show the
headset charge level.
1. Turn on the headset by pressing
and holding the call control button
until the indicator light glows blue.
If you are wearing the headset,
you will hear a beep when the
power turns on. The indicator light
will flash blue every 5 seconds
when the power is on.
2. Turn off the headset by pressing the
call control button for 6-8 seconds
until the indicator light glows red
or until you hear the beep. The
indicator light remains unlit when
the power is off.
3 red flashes = greater than 2/3 battery charge
2 red flashes = 1/3 to 2/3 battery charge
1 red flash = less than 1/3 battery charge

8
R
L
Right ear
Left ear
NN
ADJUSTING FIT
The Plantronics Discovery 650E
headset comes with three soft gel ear
tips and an optional ear loop.
1. The medium-sized ear tip is pre-
installed and aligned for wearing
on the right ear (R).
2. For left ear wearing, twist the ear
tip counterclockwise.
3. Place the headset into your ear and
check to see that it fits comfortably.
If the headset is either too tight
or too loose, remove the medium-
sized ear tip from the headset by
turning the ear tip to the centre
or neutral position.
4.
3.
1.
2.
The ear loop may be attached to the
headset to improve stability.
1. Remove the ear tip from the
headset by turning the ear tip to
the center or neutral position and
pulling the ear tip away from the
headset.
2. Attach the ear loop between the ear
tip and the headset.
3. Replace the ear tip.
USING ThE OPTIONAL EAR LOOP
4. In the neutral position, the ear tip
can easily be removed by pulling
the ear tip directly away from the
headset.
Next, select the ear tip size that
fits most comfortably in your ear.
Hold the ear tip with the elongated
edge pointing down toward the
neutral position and then push
the ear tip onto the headset.
NOTE Choose an ear tip that is large
enough such that it will not enter the
ear canal. Do not insert the ear tip
into the ear canal as it may become
lodged in the ear canal. The ear tip
should rest against the entrance to
the ear canal.

9
USING YOUR HEADSET
ANSWERING/
ENDING/MAKING
CALLS
To answer or end a call, briefly press
the call control button.
To make a call, enter number on
your phone, press send, and the call
is automatically transferred to the
headset; no need to press the call
control button.
NOTE When answering a call, wait
until you hear a ring from the headset
itself (not the ring from your phone),
before pressing the call control button.
AUTO ANSWER
Removing the headset from the
pocket will automatically answer
the call. Returning the headset to the
charging pocket will end the call.
ADJUSTING
vOLUME
To increase listening volume, press
the upper end (+) of the volume/mute
button. To decrease listening volume,
press the lower end (-).
WARNING: Do not use headphones/
headsets at high volumes for an
extended period of time. Doing so can
cause hearing loss. Always listen at
moderate levels. See www.plantronics.
com for more information on headsets
and hearing.
MUTE A CALL
To turn the mute on while on a call,
press both sides of the volume/mute
button simultaneously until you hear
a beep.
To turn the mute off, press both
buttons again.

10
USING YOUR HEADSET
ADDITIONAL FEATURES
Redialing last number
To activate last number redial, double
press the call control button. You will
hear a high tone after each press.
Using voice dialing
With the headset on, press and hold
the call control button for 2 seconds
to activate voice dialing.
NOTE To use voice activated dialing,
the voice dialing feature must
be enabled on your phone. See
your Bluetooth phone manual for
instructions.
Rejecting a call
When receiving an incoming call,
press and hold the call control button
for 2 seconds to reject the call.
MOvING OUT OF RANGE
As the headset moves more than 33 feet (10 meters) away from the Bluetooth device
or encounters interference:
• Audio quality will degrade
• A beep will be heard in the headset when the connection drops between headset
and Bluetooth device
• When out of range, only the power off function will operate
If any of the above occur, move closer to your Bluetooth device to improve the
connection between the two devices.
Switching a call from phone to
headset
To switch an active call from your
phone to your headset, press the call
control button for 3 seconds.
Switching a call from headset to phone
To switch an active call from your
headset to your phone, press and hold
the call control button until you hear
a tone.

11
MULTIPOINT
USING MULTIPOINT (MORE THAN ONE
BLUETOOTH DEVICE)
Plantronics Discovery 650 supports
multipoint technology, which permits
simultaneous connections with two
different Bluetooth audio devices.
TO PAIR ANOTHER BLUETOOTH DEVICE
Repeat the previous pairing steps with
the new device.
INITIATE A CALL The headset will
assume you wish to initiate a call
on the device recently used.
To use the second device initiate the call
using the controls on the second device.
The second device forms the link with
the headset.
ANSWER A CALL An incoming call
on either device will ring through the
headset. In most cases, the ring tone
from the device will transfer through
to the headset, allowing the user to
determine which device is ringing.
In some cases, however, the headset
applies a ring tone to the incoming call.
In either case, the user will be able
to determine which device is ringing
through the distinct ring tone.
To answer the call, press the call
control button.
TO ANSWER A CALL ON ONE DEVICE
WHILE TALKING ON THE OTHER
There is no function for placing one
call on hold while answering another.
Therefore, to answer the second call,
the first call must be terminated.
Terminate the first call by pressing
the call control button once.
Wait for the beep and then answer
the second call by pressing the call
control button again. If you choose
not to answer the second call, and
you have voice mail on the second
device, the call will go to voice mail.

12
OPTIONAL ACCESSORIES
73646-01
Vehicle power adapter
69519-05
USB headset charger
73647-01
Soft gel ear tips
and ear loop
73651-01
Mini USB charger
73650-01
4-pack charge adapter kit
FOR USE WITH
MOTOROLA
FOR USE
WITH NOKIA
FOR USE
WITH PALM
FOR USE WITH
SONY ERICSSON
73649-01
AAA battery charger
To order, please contact your Plantronics supplier or go to www.plantronics.com.
AvAILABLE FOR PURChASE
INDICATOR LIGHTS
Headset Status Headset Indicator Light
Powering on Blue light appears and flashes every
6 seconds.
Power on Blue light flashes every 5 seconds.
Powering off Red light appears and goes off.
Power off —
Charging battery Red light glows continuously.
Battery fully charged Red light goes off.
Low battery Red light flashes.
Pairing mode Red then blue light flashes for 120 seconds.
Missed call Purple light flashes every 5 seconds.
Press any button to cancel.
Ringing Purple light flashes rapidly.
Headset in pocket Headset vibrates to indicate incoming call.
Online indicator (OLI) Blue light flashes every 10 seconds.

13
TROUBLESHOOTING
Headset was not in pairing mode when mobile
phone menu selections were made. See page 5 and
6 “Pairing”.
Incorrect menu selections were made on your mobile
phone. See page 5 and 6 “Pairing”.
Your phone did not locate the headset.
Repeat the pairing process on page 5 and 6.
Incorrect menu selections were made on your mobile
phone. Repeat the pairing process on page 5 and 6.
Mute is turned on. Press both sides of the volume/
mute button simultaneously.
The headset is not turned on. Press the call control
button for approximately 10 seconds until you hear
a beep or see the indicator light glow blue to turn
headset on.
Your headset is out of range. Move the headset
closer to the phone or Bluetooth device.
Your headset battery is drained. Charge your battery
using the AC charger or AAA battery. See page 4
“Charging”.
The listening volume is too low. Press the volume/
mute button to increase the sound heard in the
headset.
My headset does not work
with my phone.
I did not enter my
passkey.
Callers cannot hear me.
I cannot hear caller/
dialing tone.
PROBLEM SOLUTION
Talk time* Up to 5 hours
Standby time* Approximately 70 hours /Up to 170 Hours with AAA Charger
Charge time 3 hours
Range Bluetooth standard 33 feet (10 meters)
Power requirements 5V DC – 180 mA
Battery type Lithium Ion
Version Bluetooth 1.2
Supports Bluetooth Hands-Free and Headset Profiles.
*Performance may vary by device.
PRODUCT SPECIFICATIONS

14
TECHNICAL ASSISTANCE
WARRANTY
Visit our Web site at www.plantronics.com/support for technical support including
frequently asked questions, compatibility and accessibility information. The
Plantronics Technical Assistance Center (TAC) is also ready to assist you on
866-363-BLUE (2583).
LIMITED WARRANTY
• This warranty covers defects in materials and workmanship of products
manufactured, sold or certified by Plantronics which were purchased and used
in the United States.
• The warranty lasts for one year from the date of purchase of the products.
• This warranty extends to you only if you are the end user with the original
purchase receipt.
• We will at our option, repair or replace the products that do not conform to
the warranty. We may use functionally equivalent reconditioned/refurbished/
remanufactured/pre-owned or new products or parts.
• To obtain service in the U.S., contact Plantronics at (866) 363-BLUE (2583).
• THIS IS PLANTRONICS’ COMPLETE WARRANTY FOR THE PRODUCTS.
• This warranty gives you specific legal rights, and you may also have other rights
that vary from state to state. Please contact your dealer or our service center
for the full details of our limited warranty, including items not covered by this
limited warranty.

15
REGULATORY NOTICES
EXPOSURE TO RF RADIATION
The internal wireless radio operates within the guidelines found in radio frequency
safety standards and recommendations, which reflect the consensus of the
scientific community. Independent studies have shown that the internal wireless
radio is safe for use by consumers. Visit www.plantronics.com for more information.
NOTE: Modifications not expressly approved by Plantronics, Inc. could void the user's
authority to operate the equipment.
FCC REQUIREMENTS PART 15
This device complies with Part 15 of the FCC Rules. Operation is subject to the
following two conditions:
1. This device may not cause harmful interference, and
2. This device must accept any interference received, including interference that
may cause undesired operation.
This equipment has been tested and found to comply with the limits for a Class
B digital device, pursuant to Part 15 of the FCC Rules. These limits are designed
to provide reasonable protection against harmful interference in a residential
installation. This equipment generates, uses and can radiate radio frequency
energy and, if not installed and used in accordance with the instructions, may cause
harmful interference to radio communications.
However, there is no guarantee that interference will not occur in a particular
installation. If this equipment does cause harmful interference to radio or television
reception which can be determined by turning the radio or television off and on, the
user is encouraged to try to correct interference by one or more of the following
measures:
1. Reorient or relocate the receiving antenna.
2. Increase the separation between the equipment and receiver.
3. Connect the equipment into an outlet on another circuit.
4. Consult the dealer or an experienced radio/TV technician for help.
EXPOSURE TO RADIO FREQUENCY
RADIATION
This device and its antenna must not be co-located or operated in conjunction with
any other antenna or transmitter. To comply with FCC RF exposure requirements,
only use supplied antenna. Any unauthorised modification to the antenna or device
could void the user’s authority to operate this device.

16
© 2006 Plantronics, Inc. All rights reserved. Plantronics, the logo design, Plantronics
Discovery, QuickPair, and Sound Innovation are trademarks or registered trademarks of
Plantronics, Inc. The Bluetooth
®
word mark and logos are owned by the Bluetooth SIG, Inc.
and any use of such marks by Plantronics, Inc. is under license. All other trademarks are the
property of their respective owners.
Patents U.S. 5,210,791
Patents Pending.
72448-08 (12-06)
Plantronics Inc
345 Encinal Street
Santa Cruz, CA 95060 USA
Tel: (800) 544-4660
www.plantronics.com

17
Guía del usuario
650E
Auricular Bluetooth
®
–con tecnologia multipunto

18
BIENvENIDO
Gracias por comprar un auricular Plantronics.
Permítanos proporcionarle el mejor servicio y asistencia técnica posibles. Después
de leer este manual, si necesita ayuda adicional o tiene cualquier pregunta acerca
del producto, póngase en contacto con:
• Centro de asistencia técnica de Plantronics, llamando al 866-363-BLUE (2583)
• www.plantronics.com/support
Antes de empezar, lea el folleto de información sobre seguridad que se
proporciona con el producto.
REGISTRE SU PRODUCTO POR
INTERNET
Visite www.plantronics.com/productregistration y registre su producto por Internet
para que podamos proporcionarle el mejor servicio y asistencia técnica posibles.
CONTENIDO
Contenido del paquete y funciones 19
Carga 20
Emparejamiento 21
Encendido 23
Ajuste 24
Uso del auricular 25
Multipunto 27
Luces indicadoras 28
Accesorios optativos 28
Solución de problemas 29
Especificaciones del producto 29
Asistencia técnica 30
Garantía 30
Avisos sobre normativa 31
18

19
19
CONTENIDO DEL PAQUETE Y
FUNCIONES
DISCOVERY
TM
650E DE PLANTRONICS
Cargador de CA
ACCESORIOS DEL PLANTRONICS
DISCOVERY 650E
Luz indicadora
Botón de control de llamada
(encendido/apagado)
Botón de volumen/silencio
Micrófono
Auriculares de gel suaves
Gancho de sujeción
Batería
AAA
pequeños
medianos
grandes
Paquete de
carga de
auriculares
Cargador
de baterías
AAA

20
CARGA
DISCOvERY 650E DE PLANTRONICS
Antes de utilizar el auricular, es necesario cargarlo.
1 hora = carga mínima; 3 horas = carga completa
A
B
DESCONEXIÓN DE LOS COMPONENTES
TPara separar los componentes, sujete tanto el cargador de baterías como el
estuche de carga con el clip dirigido hacia usted. Doble los componentes hacia
atrás para separarlos.
NOTA no gire los componentes para separarlos.
PRECAUCIÓN
Use siempre baterías AAA no recargables de repuesto.
Opción A: con el cargador de CA incluido
La luz indicadora roja brilla continuamente durante la
carga y se apaga al terminar la carga.
1. Conecte el cargador de CA a la base del estuche
de carga y a la fuente de alimentación.
2. Coloque el auricular en el estuche de carga.
Opción B: con una batería AAA
Una batería AAA sirve para recargar el auricular a su
capacidad completa.
1. Gire la parte inferior del cargador de baterías AAA
hacia la izquierda y libere el soporte de la batería.
2. Inserte la batería en el soporte para baterías AAA.
3. Vuelva a colocar el soporte en el cargador de
baterías y gírelo hacia la derecha.
4. Encaje el cargador de baterías en el estuche
cargador. Asegúrese de alinear la muesca del
conector del cargador de baterías con la pinza del
estuche de carga.
5. Coloque el auricular en el estuche de carga.
/