Page is loading ...

BSERIES
BioMass B250
OPERATION AND
MAINTENANCE
MANUAL
By SteelTech Inc.
Version 1
UL 2523-2009
CAN/CSA B366.1-2011
BSERIES

2 Heatmaster
SS
B Series Furnace Operating Manual

BSERIES
3
CONTENTS
WARRANTY AND SAFETY
Warranty Registration & Delivery Form . . . . . . . . . . . . . . . Front Insert
Warranty Details ...........................................4
Water Treatment And Testing ................................5
Safety Precautions..........................................6
FURNACE INSTALLATION GUIDE
Specications..............................................7
Location ..................................................7
Clearances To Combustibles.................................7
Furnace Foundation ........................................8
Trench ....................................................9
Indoor Installation ..........................................9
Wiring And Hydronic Lines .................................11
WIRING DIAGRAM
Wiring Diagram ...........................................14
Field Wiring Diagram ......................................17
FUEL
Wood Chips ..............................................18
Coal .....................................................16
Wood Pellets .............................................16
CONTROLS AND SAFETY DEVICES .....................17-21
HOW THE B-SERIES BIOMASS FURNACE WORKS . ..........22
OPERATING THE FURNACE
Filling The Furnace With Water .............................23
Firing The Furnace ........................................23
Furnace Components...................................25-26
CARE AND MAINTENANCE ...............................27
TROUBLESHOOTING
Troubleshooting Poor Combustion
And Low Heat Output .....................................28
Electrical Troubleshooting .................................31
RETAIN THIS MANUAL FOR
FUTURE REFERENCE
DO NOT THROW AWAY
CANADA
SteelTech Inc.
Box 158
Winkler MB. R6W 4A5
Canada
Ph. (204) 325-9792
Fax (204) 325-9803
USA
SteelTech Inc.
Box 373
Walhalla ND. 58282
Ph. (877) 325-9792
Fax (204) 325-325-9803
www.heatmasterss.com

4 Heatmaster
SS
B Series Furnace Operating Manual
LIMITED WARRANTY
SteelTech Inc. warrants to the original owner of the
Biomass furnace that it is free from defects in workmanship
and material, which could cause a leak or malfunction of
the rebox or water jacket, and against corrosion (if the
instructions in the owners manual for water treatment
and maintenance are followed) for the life of the furnace
towards the purchase of a new HeatMaster
SS
furnace, in
the following pro-rated schedule.
Warranty schedule
Coverage in the initial 5 years is 100%
Year 6 - 7 is 50%
Year 8 - 9 is 40%
Year 10 - 15 is 30%
Year 16 to life is 10%
In addition, all steel and drive components including
housing, legs, Augers, Burners, etc. have a pro-rated
warranty for a period of 10 years with coverage reducing
by 10% per year. Any parts not manufactured by SteelTech
Inc. that are used on the furnace – such as thermostats,
limit switches, pumps, heat exchangers, burners, augers,
and motors – carry their own manufacturer’s warranty.
SteelTech Inc. will not be liable for the cost of shipping,
replacement or repair of these parts.
If warranty requires removal or replacement of the furnace
or a part on the furnace, Steel-Tech Inc. is not responsible
for the cost of plumbing, replacement of antifreeze or
water treatment, shipping cost or any other cost other than
the replacement component or furnace.
SteelTech Inc. always has the right to decide if a part
or furnace will be repaired or replaced and will not be
liable for any cost not authorized by a SteelTech Inc.
representative.
SteelTech Inc. does not warranty any damage caused
by negligence and deterioration due to lack of proper
ongoing maintenance, physical damage caused by abuse
or freeze up power surges or unauthorized work, or
modications to the furnace.
SteelTech Inc. is not liable for any damage or cost which
may occur from or during the operation of the furnace
or damage incurred due to any heating system failure.
The purchaser assumes all responsibility for the care,
maintenance and safe operation of the furnace including
adding of approved furnace treatment or water. SteelTech
Inc does not warrant door gaskets, exterior paint or nish.
To qualify for warranty all instructions must be followed in
operator’s manual, water must be tested and maintained
at a minimum of once per year, and warranty registration
must be on le at SteelTech Inc. within 30 days of purchase
along with a copy of the original invoice. No warranty can
be approved unless the warranty registration and water
test verications are on le at the SteelTech Inc. ofce.
The warranty can be violated by operating the furnace in a
manner inconsistent with the owner’s manual.
SteelTech Inc. reserves the right to change conditions of
warranty at any time.

BSERIES
5
WATER TREATMENT AND TESTING
Water Treatment Policy
To qualify for warranty, water must be tested at a minimum
of once per year and water treatment added when
necessary.
To take a water sample:
Locate your water sample bottle, mailing carton and
mailing label provided to you by your dealer.
Open the furnace drain located in the side pump
cabinet of the furnace for 10-15 seconds or until the
water runs clear. CAUTION: Water is hot! Use extreme
care when pouring into a bucket, and let cool before
collecting a sample.
Fill one of the test bottles at least 1/2 to 2/3 full.
Fill out the mailing label provided with the test bottle
completely, including your email address, the model
number and the serial number of your furnace. Make
sure to note if the furnace water contains any antifreeze
or additional chemicals.
Attach top part of the label to sample bottle and
bottom part to the outside of mailing tube. Place bottle
in the tube.
Mail to our testing lab. Results can take up to 4 weeks
to receive and up to 8 weeks if no email address is on
hand at HeatMaster
SS
.
You will receive a water test report outlining what must
be done (if anything). If any action is necessary, take
another sample and mail it to our test lab again to verify
the recommended changes have been made.
Add the water treatment through the ll pipe located at
the top of the furnace when initially lling the furnace with
water or after testing, if needed. Ensure that all drains are
closed. It is recommended that water treatment is added
at a 1:200 ratio when initially ring the furnace and 1:300
after that. Additional treatment may have to be added
for water with more severe properties or for systems with
more chemically demanding requirements.
Recommended operating levels are as
follows:
Conductivity: 100 - 4000 ppm
pH: 8.5 – 10. 5
Nitrates: no less than 730 ppm
Test Parameters and What They Mean
Conductivity
Conductivity is a measurement of minerals in your furnace
water. While it is common to have minerals in water, in
excess minerals can cause many problems in hydronic
systems including scaling and corrosion.
pH
pH is a measurement of alkalinity (hard or soft water). For
outdoor furnace water and the water treatment used in
outdoor furnaces, it is better to have your water a little
harder than softer (recommended pH range is 8.5-10) as
the active ingredients in the water treatment neutralize
harder water easier than softer water.
Nitrates
Nitrates tested for are a measurement of how much
water treatment is in the water. Nitrates measured are
active units of water treatment available to neutralize
harmful elements in your furnace water. Nitrates also act
to neutralize harmful bacteria that may build-up in the
furnace water over time.
Glycol
Inhibited glycol provides anti-corrosion elements and
freeze protection for outdoor furnaces and is compatible
with Outdoor furnace Water Treatment. Because outdoor
furnaces are open to the atmosphere systems and will
have fresh water added occasionally, oxygen is always
entering the system and will break down the glycol over
time to create glycolic acid which will harm your furnace
system. When this happens you will be required to drain
and ush your furnace system.
It is always suggested to use 100% virgin glycol instead
of recycled glycol as it will break down much sooner and
create glycolic acid.

6 Heatmaster
SS
B Series Furnace Operating Manual
SAFETY PRECAUTIONS
Read and understand all precautions before operating
the furnace.
This furnace needs a periodic inspection for proper
operation. It is against federal regulations to operate
this furnace in a manner inconsistent with operating
instructions in this manual.
Save these instructions. Retain this manual as long as
you own your furnace. Carefully read and follow these
directions.
DANGER
Do not start the re with or burn garbage, gasoline,
naphtha, engine oil or other inappropriate materials.
Only competent persons with a sound understanding
of this heating method that are qualied and trained
should operate this furnace. Improper ring could result
in personal injury and/or damage to the unit and void
warranty.
ATTENTION
USE APPROVED FUELS ONLY!
The person(s) operating this furnace must comply
with all applicable local and state laws or other
requirements.
The person(s) operating this furnace is responsible to
run it in such a way so that it does not cause a public or
private nuisance. Consult with local authorities prior to
installation to adhere to local laws and ordinances.
DO NOT OVER FIRE THIS HEATER. Attempts to
achieve heat output rates that exceed the heater
design specications can result in permanent damage
to the heater.
WARNING
All installations and operations of your furnace must
follow state, provincial, and local laws pertaining to
operations, wiring, plumbing and building codes.
All models operate at atmospheric pressure. DO NOT
obstruct, block or plug the overow vent tube in any
way, which is located on top of the furnace.
When installing the furnace, the chimney should
never be connected to a chimney ue serving another
appliance.
DO NOT operate furnace in event of power failure.
Use caution when opening rebox and ash cleaning
doors.
DO NOT use chemicals or uids to start the re.
Risk of Fire:
DO NOT operate with fuel loading or ash removal
doors open.
DO NOT store fuel or other combustible material within
marked installation clearances.
Inspect and clean ues and chimney regularly.
This appliance should not be installed in a location
where a corrosive atmosphere, ammable gas or
vapour, combustible dust or combustible bers may
be present. If ammables are present in the building,
ensure ducts, vents and doorways between the rooms
are sealed so as to not allow vapours or bers to travel
to the appliance.
CAUTION
DO NOT start or operate furnace without checking the
heating uid. The furnace must be lled.
Check for buried cables and utility lines before digging
the trench to your furnace.
For safety and proper temperature control keep all
doors closed during operation.
Hot Surfaces: Keep children away. Do not touch during
operation.
ATTENTION: DO NOT CONNECT THIS UNIT TO A
CHIMNEY FLUE SERVING ANOTHER APPLIANCE.

BSERIES
7
FURNACE INSTALLATION GUIDE
Installation should be performed by a qualied installer and must comply with all requirements of the agency having
jurisdiction.
B250
Max BTU Output 250,000 BTU/hr
Furnace Size (W x H x L) 61 x 84 x 112
Furnace Weigh 3,000 lbs
Firebox Dimensions (W x H x L) 14.5 x 29 x 24
Chimney Size 6”
Water Capacity 140 gallons
Inlet / Outlet 1 pair of 1”, 1 pair of 1 1/2”
Power requirements 125/250V, 1Phase, 60Hz, 19 AMPS
LOCATION
The location of the furnace will affect the heat lost to the
surrounding area. Although the unit is well insulated, a
furnace installed indoors will lose less heat than in an
outdoor location.
Ensure the minimum clearances to combustibles are
maintained.
Store the furnace fuel in a clean, dry location.
Do not place or store furnace fuel within the installation
clearances or within the space required for servicing
the unit.
Indoor installations will require adequate fresh air
supply into the room housing the furnace. If other fans
are drawing air from the same space ensure there is
sufcient supply air to prevent a negative pressure.
Contact all governing authorities in your area prior to
installation.
When choosing the location for your furnace; you
should consider prevailing wind direction, as well as
distance from buildings and fuel storage.
Give consideration for any effect on your neighbors.
CLEARANCES TO COMBUSTIBLES
Whether installing your furnace inside a building or
outside, the following clearances to combustibles must
always be followed. Damage and personal injury may
result.
DO NOT STORE COMBUSTIBLE FUELS IN THE SAME
SPACE AS THE FURNACE IF INSTALLED INDOORS.
Minimum Clearance to Combustibles
Furnace Roof to Ceiling (Indoor
Installations)
24”
Side Walls & Rear 6”
Front (Loading door) 24”
Service Clearances
Front (Firebox Door) 48”
Sides 48”
Roof 48”
Ash Auger (from the motor end) 30”

8 Heatmaster
SS
B Series Furnace Operating Manual
FURNACE FOUNDATION
Footprint dimensions and load specications are shown
in the illustration at the bottom.
Consult with local professionals to ensure the
foundation design is adequate to support the given
loads with your soil conditions.
Extending the concrete to include the service areas
around the furnace is recommended.
A cement pad of 4-6” in thickness should be used.
The furnace should never be installed on a combustible
oor.
Never allow combustible material to accumulate on the
furnace foundation.
A non combustible material such as cement or steel
should be used under the boiler and at least 16 inches
(400 mm) in front and 8 inches (200 mm) on either side
of the fuel-loading and ash removal doors.
Bottom View
Top View

BSERIES
9
TRENCH
SteelTech Inc recommends the trench to be 24” to 36”
deep and wide enough to install your water lines. If
possible, have a gradual slope in your trench to allow
drainage away from your lines and out of the trench
bottom.
Some insulated underground pipes have room for
electrical wire in it. If it does not, place the electrical supply
in the bottom of the trench and cover with 6 inches of dirt
before installing the heating lines.
NOTE: We recommend a deeper burial when installing
piping below an area with regular vehicle trafc. This will
help to reduce the compression force on the lines.
INDOOR INSTALLATION
IMPORTANT: A re may be caused by the following:
Improper installation. To reduce the risk of re, follow all
local codes and these installation instructions carefully.
Storing ammables in the same room as the furnace or
fuel.
Improper ash handling.
This appliance should not be installed in a location
where a corrosive atmosphere, ammable gas or
vapour, combustible dust or combustible bers may
be present. If ammables are present in the building,
ensure ducts, vents and doorways between the rooms
are sealed so as to not allow vapours or bers to travel
to the appliance.
ATTENTION: When installing the furnace in a building,
always make sure that smoke and CO detectors are
properly installed in the same area as the furnace.
Outside combustion air requirements will apply. Refer
to the “Combustion Air Requirements” section in this
manual.
Outside combustion air may be necessary if:
The solid-fuel red appliance does not draw steadily,
smell, experiences smoke roll-out, burns poorly, or
back-drafts whether or not there is combustion present
Any of the above symptoms are alleviated by opening a
window slightly on a calm day.
The building is equipped with a well-sealed vapor
barrier and tight-tting windows and/or has any
powered devices that exhaust house air.
There is excessive condensation on windows in the
winter.
A ventilation system is installed in the house.
Chimney
Note: Incorrect chimney installation will void the warranty.
The chimney on your B Series outdoor furnace is a
stainless steel double wall insulated chimney. When
installing the furnace, the chimney should never be
connected to a chimney ue serving another appliance.
Make sure chimney, ue pipe and draft inducer fan stay
clean and in good condition at all times.
The top of the chimney must extend at least 3 feet above
the highest point where it exits the roof and be at least 2
feet taller than any point of the roof within 10 feet. For a
new chimney, use an insulated stainless steel system that
conforms to type HT (High Temperature) requirements of
UL 103 and ULC-S629 and complies with the requirements
of Chapter 11 of NFPA 211, Standard for Chimneys,
Fireplaces, Vents and Solid Fuel Burning Appliances in the
USA or CSA B365 Installation Code for Solid Fuel Burning
Appliances and Equipment in Canada.

10 Heatmaster
SS
B Series Furnace Operating Manual
This is a forced air furnace but it is important that the
chimney has a good draft to further eliminate any smoke
issues.
Note: Using a smaller chimney may cause smoke issues
and using larger chimney may negatively affect furnace
performance.
ATTENTION: Cleaning of the heat exchanger, ue pipe,
chimney and draft inducer is especially important at the
end of the heating season to minimize corrosion during
the summer months caused by accumulated ash.
Chimney Installation
ATTENTION: Before installing, check with local building
codes for information regarding chimney height and
distances to adjacent buildings, etc. You may need
to obtain a building permit for the installation of this
appliance or the chimney.
Make sure to follow these simple rules to ensure proper
performance and safety.
We recommend that chimney installed on our products
be installed by professionals who are certied in the
USA by NFI (National Fireplace Institute) or in Canada
by WETT (Wood Energy Technology Transfer).
Draft problems may occur because of incorrect
chimney installation.
The chimney must be connected using a minimum
double wall stainless steel chimney and connector.
Use only components intended for the brand and
model of chimney you are using. Never substitute
parts from other chimney brands or fabricate your own
components.
To be safe and effective, the chimney must be
installed exactly in accordance with the manufacturer’s
instructions.
Use a direct exit whenever possible. A vertical exit with
no elbows is always the safest and most trouble-free
installation.
Maximum chimney installation height is 15 ft.
If installation requires a taller chimney height, contact
the manufacturer.
Maximum horizontal installation from the furnace to the
exhaust exit is 3 ft.
Maximum 8 ft. run from elbow to elbow but keep as
short as possible.
Never use an elbow with a greater than 30 degree
bend. 45 degree elbows and tees cannot be used.
Elbows should never be installed in oor joists or roof
and attic entries.
Shields should be used whenever going through oors,
attics, and roofs to keep the wood and insulation from
getting too hot and possibly catching re.
Make sure to follow local building codes.
Roof Penetrations and Clearances
The basic rule is this: the top of the chimney must clear
the roof penetration point (the upper edge) by at least 3
feet and must clear anything within a 10 foot radius by at
least 2 feet. This includes the peak of the house, parapet,
dormer, chimney, or spire. See diagram below.
If the chimney terminates beyond 10 feet from the ridge of
the roof it must clear the upper penetration of the roof by
3 feet. Notice that the ue still terminates 2 feet above the
roof at the 10 foot perimeter:
ATTENTION: Do not connect this unit to a chimney ue
serving another appliance
10 ft. (3 m)
or less
2 ft. (0.6 m)
minimum
Ridge
Chimney
3 ft. (0.9 m)
minimum
More than
10 ft. (3 m)
Height above
any roof surface
with 10 ft. (3 m)
horizontally
10 ft. (3 m)
2 ft. (0.6 m)
minimum
Ridge
Chimney
3 ft. (0.9 m)
minimum

BSERIES
11
WIRING AND HYDRONIC LINES
All wiring must conform to local codes.
Use an electrical wire rated and approved for
underground installations. This wiring can be placed
in the same trench below the water lines. A qualied
technician must perform the electrical portion of the
installation.
Underground Hydronic Lines
Hydronic lines (hot water heating lines) whenever buried
or encased in cement should not be spliced. Take the
necessary steps to ensure they stay dry. This ensures that
minimal heat loss occurs. Supply and return lines should
always be sized according to the ow rates required by
the building heat load.
A minimum of R8 insulation value is recommended. Using
pre-insulated piping with a waterproof jacket is strongly
encouraged. Any insulated piping must be encased in a
waterproof jacket to prevent damage to the insulation and
saturation from ground water.
Hint: Mark your feed and return lines prior to covering
and allow enough pipe above ground at both ends for a
relaxed connection.
Furnace Connection
Connections to the furnace are clearly marked.
Return (from the building) are the top ports.
Supply (to the building) are the bottom ports.
The installation of isolation valves at both ends of the
pump is recommended as well as a valve at the return
line. This will allow you to shut off water supply if repairs
or additional heating components are added to the
system.
Your main power is connected to the junction box on
the side of the control panel and should be connected
by a qualied technician.
Building Connections
A hole large enough to accommodate the water lines and
proper insulation through the wall is important. Be sure to
properly seal this penetration from both sides of the wall
to avoid damage from water and condensation.
System Flow Rates
Your B250 Biomass furnace is factory equipped with a
circulating pump to maintain proper ow through the
furnace at all times. This pump is factory wired. Never
operate circulating pumps when the furnace is low on
water. This pump is not designed to provide any ow
to the supply/return piping to the buildings. Circulating
pump(s) need to be properly sized and installed on the
outlets provided in the pump cabinet on the furnace.
The size of the pump(s) will depend on the heat load
requirements and the pressure drop through the system
piping and components. These selections should be
made by a hydronic professional.
Interior Connections
You may require either a water-to-water (tube and shell
or plate) or a water-to-air exchanger (rad) to transfer heat
energy from the hot water your furnace has produced.
Your plumber or dealer can design and install a system to
best t your needs. The following are examples of basic
interior connections. Your dealer carries the necessary
parts for installation.
It is important to note that when installing a piping system
in your building that you should avoid installation methods
that cause too great a restriction in the piping system.
Examples of this are reducing pipe size, an excessive
amount of joints and elbows, etc.
Combustion Air
Furnaces, exhaust fans, and other appliances all draw air
from the room in which they are located. Your Biomass
furnace adds to that draw, making it important to ensure
there is an adequate source of fresh air to offset these
demands. If this is not provided a negative pressure
may be created in the room and starve combustion in
the furnace. The room housing the B250 must have an
opening to the outside providing a minimum of 250
square inches of net free air into the room.
IMPORTANT: The furnace room must never be in a
negative pressure condition. Negative pressure could
result in smoke in the room.

12 Heatmaster
SS
B Series Furnace Operating Manual
Whenever possible we recommend installing the pumps
supplying the buildings in the cabinet on the Biomass
furnace. This will aid in priming the pumps and minimize
the potential for cavitation. Strategically placed air
bleeders in the system can simplify air removal on initial
startup. This can also allow a point for feeding water
into the system for the initial ll and topping up when
necessary. Air locks restrict system ow which leads to
poor performance of any type of heat exchanger.
DISCLAIMER: The following information in the interior connections
are examples and suggestions only. Your Biomass heating system
should always be designed and installed by a hydronic heating
professional.
Water-To-Water Heat Exchangers For Pressurized
Furnace Systems
A water-to-water heat exchanger may be used to maintain
pressure in an existing boiler system. The water-to-water
exchanger is installed in-line on the return side of the
existing pressurized boiler system. This allows the non-
pressurized outdoor boiler to heat the pressurized
indoor boiler.
The pressurized boiler system can be used as a backup heat
source in case of emergency or need for additional heat.
When connecting the Boiler to an existing pressurized
boiler system:
The heat exchanger must not be installed so that it
interferes with normal heat delivery of the existing
boiler system.
The heat exchanger must be installed without affecting
the operation of the electrical and mechanical safety
controls of the original boiler.
The heat exchanger must provide for a changeover
from one fuel to the other without requiring manual
adjustment of any controls or components other than
the thermostats.
The heat exchanger must have provisions for
preventing, or adequate water capacity within the
boiler to prevent damage from loss of circulation due to
electrical power failure.
The heat exchanger must be installed without changing
the function of the controls or rewiring of the original
boiler. A wiring interconnection is permitted. The
electrical system of both boilers shall be powered from
a single branch circuit without exception.
Furnace Safety
Operate the boiler periodically to ensure that it will
operate satisfactory when needed.
Do not relocate or bypass any of the safety controls in
the original boiler installation.
The operation of the boiler must be veried for
acceptable operation before and after installation of the
add-on appliance by a gas tter who is recognized by
the regulatory authority.
Do not connect to any chimney or vent serving a gas
appliance.
Installation should comply with requirements of CAN/
CSA-B365, and changes to the installation should comply
with CSA B139 (for oil-red boilers), C22.1 (for electric
boilers), or CAN/CSA B149.2 (for gas-red boilers).
Example of overhead heater hookup through boiler
Domestic Hot Water
Flat plate heat exchangers can be used very effectively to
pre-heat domestic water. This heat exchanger is typically
installed in the cold water line feeding the conventional
water heater. The water heater settings remain unchanged.
Depending on the furnace operating temperatures,
an anti-scald valve may need to be installed after the
water heater. In situations with very hard water, you may
nd a tube & shell style heat exchanger to have lower
maintenance requirements than a at plate style.

BSERIES
13
Forced Air Furnace (Water-To-Air Exchanger)
The water-to-air heat exchanger is typically mounted in
the supply air plenum directly off the forced air furnace
cabinet. The entire airow should be routed through the
heat exchanger and it should be mounted below the A/C
coil if possible. The heat exchanger should be sized to t
existing ductwork and exceed the heat loss requirements
of the building. An over-sized heat exchanger can result in
very short on cycles providing uneven heat.
If undersized, it will not produce the necessary BTU’s to
maintain the building temperature in the coldest weather.
Although not ideal, the heat exchanger can also be placed
in the cold/return air portion of the ductwork. Some
furnaces may have issues with hot return air exceeding the
maximum design temperatures of the furnace. This should
be investigated prior to installation.
It is important that the warm-air supply-duct system is
constructed of metal in accordance with NFPA 90B- 1993,
2-1.1. If the outlet-air temperature of a central furnace
exceeds 250° F (121° C) when it is tested in accordance
with the requirements for Simultaneous Firing in 56.4.1
and 56.4.2 of the standard. It is also important that the
plenum’s installed to the furnaces be constructed of metal
in accordance with NFPA 90B- 1993, 2-1.3.
Example of hookup for a forced air furnace and hot water.

14 Heatmaster
SS
B Series Furnace Operating Manual
Pressure
Switch
Cold Start
Button
X
L1
L2
DI1
24V
U WV
Siemens V20
6SL3210-5BB13-5UV1
DIC0 V
X
X
Walker Motor
90V DC
-+
L1
N
L+ M I1 I2 I3 I4 I5 I6
Q8
24V DC Inputs
Outputs
I7 I8L+ M I1 I2 I3 I4 I5 I6
Q1 Q2
Q3
Q4
24V DC Inputs
Outputs
6ED1052-1MD08-0BA0
I7 I8
POE
LAN
Wifi
Antenna
POE
L1
13
T1
14
T2
T3
L3L2
A1
A2
-
+
Igniter
240V
L1
L2
Damper
Solenoid
120V
L2
L1
X
X
X
X
T2
22
T3
14
L2
L3 A1
A2
-
+
21
T1
L1 13
L2
L1
Agitator
Motor
240V
L1
L2
Igniter Air
Pump
L N
L3L1 L2
Air Lock/Fuel
Feed Motor
208-240V 3 Ph
X
L1 N
+
- -
DC Power
Supply
X
X
Wifi
Antenna
Water
Temperature
Sensor
Type “T”
+ -
Receptacle
Ground Bus Bar
Neutral Bus Bar
Terminal
Strip
Negative
Bus Bar
Positive
Bus Bar
High Limit Contactor
3TG1010-0BB4
Heatmaster SS
B250-2019 Electrical Schematic
Revision 4-V1.5
Pump Cabinet
Receptacle
Max 5 Amp Load
X
X
Emergency
Stop
Button
High Limit
Switch
Fuel Auger/Air Lock 10 Amp
Draft Fan 2 Amp
Ash Auger 2 Amp
Igniter 5 Amp
Air/Solenoid/Walker 15 Amp
Recirc/Pump Plugs 15 Amp
Controls 2 Amp
Agitator 5 Amp
L1 L2
N
Main Power
Connection
125/250V
1 Ph 60 hz
19 Amps
30 Amp
Max Breaker
X
X
X
Main Disconnect
Switch
10 11 126 7
L1
13
T1
14
T2
T3
L3L2
A1
A2
-
+
Agitator Contactor
3TG1010-0BB4
L1
13
T1
14
T2
T3
L3L2
A1
A2
-
+
Igniter Contactor
3TG1010-0BB4
X
X
L1
13
T1
14
T2
T3
L3L2
A1
A2
-
+
Draft Fan Contactor
3TG1010-0BB4
Flue Cleaner Relay
3TG1010-0BB4
X
Flue Cleaner 5 Amp
Flue
Cleaner
240V
L1
L2
4 53
Ash Auger
120V
L1
N
6ED1055-1NB10-0BA2
8
L1
N
Draft
Fan
120V
L1 N
A+ A-
Baldor Motor
Speed Control
Walker Motor
9
Alarm
Light
24V DC
Q7Q6Q5
Q4Q3
Q2
Q1
E-Net
500 ohm resistors
Low Water
Switch
+ -
Firebox
Temperature
Sensor
Type “K”
NOC
1 2
Field Wired
Alarm Contact
This circuit is closed in
normal operation and
opens in the event of an
alarm or power failure.
Max 5 amp resistive
Max 3 amp inductive
13
Re-Circ
Pump
120V
L1
N

BSERIES
15
FUEL
This heater is designed to burn coal, wood pellets
and natural wood chips only. Using high quality
fuel is essential for optimal operation
WOOD CHIPS
Choosing a high quality wood chip from a quality
supplier will give you higher efciencies, less ash and less
maintenance.
A lower quality wood chip will include with it unwanted
debris such as gravel, nails, etc and higher amounts of
bark which will result in lower efciencies and higher
amounts of ash and maintenance.
Wood chips should be sized to 1” or smaller. Chips larger
than 1” may jam the feed auger and/or air lock.
Higher efciencies and lower emissions generally result
when burning wood fuel with less than 25% moisture
content. Burning wood chips with a moisture content over
25% will cause the unit to fail and are not approved.
Storing Wood Chips
Store chips on a at surface such as a cement oor to
avoid picking up unwanted debris that may cause an issue
in the appliance operation.
Protecting the fuel from rain and direct contact with the
ground will prevent the fuel quality from deteriorating
over time. Store your wood chips under an open-ended
shelter to avoid rain and snow build-up on the pile.
Keeping 3 sides open will allow the sun and wind to
season the wood. Storing wood chips in a woodshed or
under a tarp in the summer will hinder airow and allow
moisture to wick up from the ground into the fuel.
KEEP ALL FUELS IN A DRY AIR-AIDED STORAGE
WARNING: Risk of re:
Do not operate with rebox or ash removal doors open.
Do not store fuel or other combustible material within
marked installation clearances.
Inspect and clean ues and chimney regularly.
Remove ashes regularly.
Do not use chemicals or uids to start the re.
CAUTION: Hot Surfaces: Keep children away. Do not
touch during operation.
DO NOT BURN:
Garbage
Lawn clippings or yard waste
Materials containing rubber, including tires
Materials containing plastic
Waste petroleum products, paints or paint
thinners, or asphalt products
Materials containing asbestos
Construction or demolition debris
Railroad ties or pressure-treated wood
Manure or animal remains
Saltwater driftwood or other previously salt water
saturated materials
Unseasoned wood
Paper products, cardboard, plywood, or
particleboard
The prohibition against burning these materials
does not prohibit the use of re starters made
from paper, cardboard, sawdust, wax and similar
substances for the purpose of starting a re in an
affected wood heater.
Burning these materials may result in the release
of toxic fumes or render the heater ineffective and
cause smoke.

16 Heatmaster
SS
B Series Furnace Operating Manual
BURNING COAL
Both bituminous and anthracite coal can be burned in this
appliance. However, the characteristics of coal can vary
signicantly depending on the type, location and quality
of coal and thus, will burn differently with varied BTU’s,
ash content, clinkers, etc. Settings will need to be adjusted
to account for the different characteristics. This appliance
is designed to burn 1 1/4” and down stoker coal. If other
sizes are used, adjustment to the feed and burn settings
need to be made to prevent over feeding, jamming and
ensure a proper burn.
Anthracite Coal burns hot and clean but will not re-light
very easily once it goes out. It is best to run for long burn
times using large differentials or by heating a storage tank.
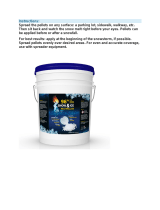
WOOD PELLETS
Wood pellet fuel belongs to the category of biomass fuels.
It is produced automatically by compressing wet sawdust
and green wood chips and forming them into pellets.
When compared to other fuels, wood pellets are easier
to move, burn, need less storage space, produce less ash
and deliver more energy content by weight (almost 7,750
Btu per pound). Traditionally wood pellets are classied
according to the amount of the ash produced. There are
three grades in this classication;
Premium (ash content of wood pellets less than one
percent)
Standard (ash content between one and two percent)
Industrial (ash content three percent or more)
WARNING: Be careful to choose a high quality wood
pellet for best results. Lower quality wood pellets will
contain more debris such as glue, cardboard, bark and
other biomass materials that may burn less efciently and
cause more creosote, ash and maintenance
Look for the following when choosing a high quality pellet:
High Heat Output/BTU Rating
Low Moisture Content
Low Ash Content
No additives or bark

CONTROLS
Review the furnace controls, components,
and safety devices prior to start up.
CONTROLS AND SAFETY DEVICES
Furnace Control Your HeatMaster
SS
B Series furnace uses
a factory-programmed control to maintain the set water
temperature. The control is located to the left of the
rebox door and offers several user programming options
to accommodate a wide variety of installation variables.
Cold Start Mode
If the unit has been started in a low water temperature
situation and the water is still below normal operating
temperature.
Alarm
If there is an Alarm condition (see the Alarm screen
descriptions).
Water Temperature
This displays the current temperature of the water in the
furnace. In normal operation, this should be within +/-5 F.
of the set temperature range.
Software Version
This is displayed for several seconds once the control is
turned on.
WATER TEMPERATURE SCREEN
Water Temperature Set-point
The temperature the furnace should shut down. The
differential is the number of degrees in Fahrenheit the
furnace should cool from set-point before the furnace
should start up.
Low Temperature Shut Down
The temperature at which the furnace should shut down to
preserve heat in the event of a loss of operation.
USING YOUR CONTROL
Screen/Keypad
The LOGO control is equipped with a display which
communicates the furnace status as well as any alarms. The
keypad allows the user to navigate through the various screens
and make adjustments to the settings.
When the unit is powered on the Model/Software version screen
will be displayed temporarily
BSERIES
17
Screen/Keypad

18 Heatmaster
SS
B Series Furnace Operating Manual
Dashboard – Heating Cycle
This screen is the default in normal operation. This will display the
current Water Temperature, Burner Status (Heating or Off), and
Firebox Temperature
Output Status 1
Displays the current status of the unit’s components.
Output Status 2 – Displays the current status of the unit’s
components.
CHANGING CONTROL SETTINGS
To change a setting press the UP/DOWN arrows to navigate to a
SETTINGS screen. To enter the Adjust Mode, press and hold the
ESC key until a black box appears around a parameter on the
screen.
Use the UP/DOWN arrow keys to move the black box to the
parameter you desire to change.
Press the OK key to open the parameter for editing.
Use the LEFT/RIGHT keys to navigate to the character you wish to
change.
Use the UP/DOWN keys to change the character. Be careful not
to change the +/- character at the left side of the value as this will
cause operational issues.
Press the OK key to save your changes.
Press the ESC key to exit the Adjust Mode.
Use the UP/Down keys to navigate to the desired screen.
Repeatedly pressing the UP key will bring you to the current
dashboard screen.

BSERIES
19
Set Water Temperature
In this screen the user may view and adjust the Water
Temperature Setpoint and the Differential. When the water
temperature reaches the Set Temperature the unit will turn
OFF. When the unit cools to the Set Temperature minus the
Differential the unit will start up.
Set Low Temperature Shut Down
In this screen the user may view and adjust the Low Temperature
Shut Down. If the water temperature cools to this point the unit
will turn off and display a Low Temperature Alarm. The Cold Start
Button will need to be pressed to resume operation.
Ignition Settings
Here the user may view and adjust the Ignition Settings. The
ignition sequence operates as follows:
When the unit starts a heating cycle it needs to determine if
the igniter is necessary to light the fresh fuel.
If the rebox temperature is warmer than the Bypass set
point the unit will begin the heating cycle without running the
igniter.
The Bypass set point must be set high enough to ensure the
fresh fuel will ignite when it drops to the grate.
If the rebox temperature is cooler than the Bypass set point
the unit will run the ignition sequence. The igniter will start
and the unit will deliver fuel to the grate for Feed Pulse length
of time.
Once the Feed Pulse time has expired the Fan On Delay time
will begin. This allows enough time for the igniter to establish
a small re before the draft fan turns on.
Once the Fan On Delay time has expired the draft fan will
turn on for the length of the Fan Pulse time. If during this time
the rebox temperature reaches the Ignition Off setpoint the
unit will resume feeding fuel and shut down the igniter. If the
rebox does not reach the Ignition Off setpoint during the Fan
Pulse the unit will repeat the ignition cycle to bring in another
fuel Feed Pulse and allow time for ignition. This cycle will
repeat until the rebox reaches the Ignition Off setpoint when
it will turn off the igniter, turn on the draft fan, and resume
feeding fuel.
Flue Cleaner Settings
The user can view and adjust the ue cleaner run time. The unit
will accumulate burn time unit it reaches the Off For set time in
minutes. It will then turn the ue cleaner On For the set time in
minutes:seconds.
Ash Auger Timer Settings
The user can view and adjust the ash auger run time. The unit
will accumulate burn time unit it reaches the Off For set time in
minutes. It will then turn the ash auger On For the set time in
minutes:seconds.
Idle Timer
An optional timer that will cycle burner after being in an off cycle
for a set amount of time. To enable this feature turn the Timer
Status to ON. Set the OFF For time in hours:minutes and the On
For time in minutes:seconds. This allows the re to be kept alight
between heating cycles. Generally, this feature is not used with
an automatic ignition system.

20 Heatmaster
SS
B Series Furnace Operating Manual
Delay Settings
Walker On – This delay the start up of the walking grate at the
start of a heating cycle. This allows time for the re to become
established before moving the fuel along the grate.
Burner Off – This will allow the draft fan to continue to run at the
end of a heating cycle after the fuel feed has been shut down.
This can be set longer to burn off the fuel remaining on the
grate or shorter to leave some fuel on the grate at the end of the
heating cycle.
CONTROL ALARMS
Alarm – Blower Fault
The draft fan operation is conrmed by a pressure switch. The
control has turned on the draft fan but the pressure switch
was not activated. Check the draft fan for blockage. If it is clear
press the Cold Start button to clear the fault. If the fan runs but
continues to fault check the pressure switch. The tubing may be
blocked or the switch may need adjustment.
Alarm – Emergency Stop
The Emergency Stop button on the furnace has been pressed.
Once it is safe to do so, rotate the Emergency Stop button to
allow it to pop up and the fault will reset.
Alarm – High Temperature Limit
The High Limit switch on the unit has been activated. This
indicates a high water temperature situation has occurred. The
switch will automatically reset at approximately 150 F.
Alarm – Low Temperature
The water temperature in the unit has gone below the Low
Temperature Shut-Down setpoint. Press the Cold Start button
to resume operation. The unit will remain in Cold Start Mode
until the water temperature has reached the Water Temperature
setpoint minus the differential.
Alarm – Low Water Level
The water level sensor has detected a low water situation. Check
for leaks and repair if necessary. Add uid until the alarm clears.
Once the unit is back up to operating temperature top off the
uid so the oat indicator shows full.
/