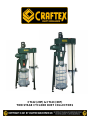
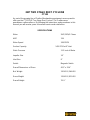
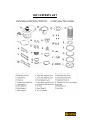
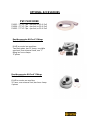
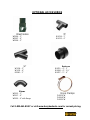
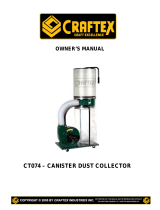
Craftex CT122 is a powerful and versatile dust collector, perfect for a variety of woodworking applications. With a 2HP motor and a suction capacity of 1450 CFM, it can handle even the most demanding tasks. The two-stage design ensures that even the finest dust particles are captured, making it an ideal choice for workshops where air quality is a concern. The CT122 also features a large 30-gallon drum capacity, so you can collect large amounts of dust without having to empty it frequently.
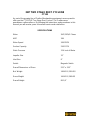
Craftex CT122 is a powerful and versatile dust collector, perfect for a variety of woodworking applications. With a 2HP motor and a suction capacity of 1450 CFM, it can handle even the most demanding tasks. The two-stage design ensures that even the finest dust particles are captured, making it an ideal choice for workshops where air quality is a concern. The CT122 also features a large 30-gallon drum capacity, so you can collect large amounts of dust without having to empty it frequently.


-
 1
1
-
 2
2
-
 3
3
-
 4
4
-
 5
5
-
 6
6
-
 7
7
-
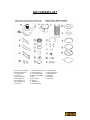 8
8
-
 9
9
-
 10
10
-
 11
11
-
 12
12
-
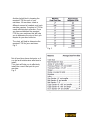 13
13
-
 14
14
-
 15
15
-
 16
16
-
 17
17
-
 18
18
-
 19
19


Craftex CT122 is a powerful and versatile dust collector, perfect for a variety of woodworking applications. With a 2HP motor and a suction capacity of 1450 CFM, it can handle even the most demanding tasks. The two-stage design ensures that even the finest dust particles are captured, making it an ideal choice for workshops where air quality is a concern. The CT122 also features a large 30-gallon drum capacity, so you can collect large amounts of dust without having to empty it frequently.
Ask a question and I''ll find the answer in the document
Finding information in a document is now easier with AI
Related papers


Other documents
-
Craftex CX Series CX413 Owner's manual
-
-
-
-
-
-
-
-
General International 10-005 M1 Owner's manual
-