Page is loading ...

Components
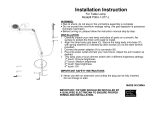
Important Safety Precautions
INSTRUCTIONS PERTAINING TO A RISK OF FIRE OR INJURY TO PERSONS
IMPORTANT SAFETY INSTRUCTIONS
WARNING – To reduce the risk of FIRE OR INJURY TO PERSONS:
Turn off/unplug before servicing fixtures. Contact only switch/plug when
turning on.
Keep lamp away from materials that may burn.
Do not operate the luminaire fitting with a missing or damaged cover.
Stair Riser Light
100W Transformer
16/2 AWG Wire
5” Post Cap Light RadianceRail
5-1/2” Post Cap Light AZEK Railing
4 x 4 Post Cap Light
RadianceRail Express Lighted Island Cap
Accent Light
In addition to a basic tool set, you will need the following
for installation of the components.
Drill Bits:
3/8”
7/64”
1/4”
3/16”
2.5mm
Allen Wrench
Spade Bits:
5/8”
3/4”
1”
Tools Required
Lighting Layout Overview
Cable Guide
& Screw
(12/bag)
In-Deck Light
Under-Rail Light
Dimmer
Manufactured for use with:
LIGHTING
Visit www.timbertech.com/installation to view TimberTech installation videos, and
www.azek.com/installation to view AZEK installation videos
SAVE THESE INSTRUCTIONS
Fixture Wattage
Lighted Island Cap 2W
Post Cap Light 4W
Accent
Under Rail
Stair Riser
In-Deck
2W
2W
2W
1W
Post Cap Light
Transformer
Wire routed
between post
and post cover
Wire Junction
Outdoor GFCI Outlet
Stair Riser Light
Wire routed
inside top
rail assembly
Wire cannot be
routed inside top
rail of stairs
Wire routed
under deck
Non-Looped
Circuit
Non-Looped
Circuit
Accent Light
Accent Light
Under-Rail Light
Under-Rail Light
Under-Rail Light
Under-Rail Light
In-Deck Light
In-Deck Light
In-Deck Light
16/2 AWG Wire
The AZEK and TimberTech system is designed for use with AZEK Railing and TimberTech Railing products.
Below is a sample lighting layout showing xture placement and wiring routes. When laying out the wiring for your deck, keep the following in mind:
t#VJMEJOHDPEFTWBSZCZMPDBMFQMFBTFDPOTVMUBMMBQQMJDBCMFDPEFT
before beginning project.
t.PEJåDBUJPOTNVTUCFNBEFUPSBJMJOHDPNQPOFOUTEVSJOHBTTFNCMZUP
accommodate wiring and xtures. Do not begin deck construction until
you have read the lighting instructions.
t5IJTVOJUTTFDPOEBSZXJSJOHTIBMMCFQSPUFDUFECZSPVUJOHJODMPTF
proximity to the luminary or tting, or next to a building structure
such as a house or deck. The wiring shall not be buried except for a
maximum 6 inches (15.2cm) in order to connect to the main
secondary wire.
t"NBYJNVNPG8DBOCFBQQMJFEUPBTJOHMFDJSDVJUBOEOPNPSFUIBO
90W should be applied to the transformer. Please refer to the chart below to
determine the wattage of each xture.
t5IF"8(TFDPOEBSZTVQQMZXJSFDBOCFburied to a maximum of 6” for
routing under deck or other obstacles. The luminary (unit secondary)
wires cannot be buried underground.
t-VNJOBSJFTTIBMMOPUCFJOTUBMMFEXJUIJOGFFUNPGQPPMTQBPS
fountain.
t5SJNQPTUDPWFSTUPDPSSFDUMFOHUITFF1PTUBOE3BJM1SFQQBHF
Installing In-Deck Light
1
2
3
4
5
Locate and mark the centerline of the deck plank where the in-deck light will be mounted.
On the desired point of the center line, use a 1” spade bit to create a through hole (be sure not to drill into the substructure.)
Guide the light’s wire into the through hole.
Push the lighting fixture into the through hole until the flange touches the deck surface.
The wire connections can then be made under the deck’s surface.
In-deck light should be installed in a low foot-traffic area.
In-deck light can only be used when there is room under the deck to access the wires to make all of the connections
Installing Stair Riser Light
Installing Under-Rail Light
1
2
3
4
5
6
Locate and mark vertical and horizontal centerlines for Stair Riser Light location. Level the back plate and secure using #6 x 1” wood screws.
Use the back plate as a template to locate the center of the 1“ hole for the wire.
Cut a 1” diameter hole at the center point, at a slight downward angle, using a 1” spade bit.
Trim excess wire length and make wire connection to main circuit wire using wire nuts provided.
Align the light with the 1” hole and assure alignment between the Stair Riser light and the back plate.
Secure housing to back plate using the set screw with a 2.5mm Allen wrench.
1
2
3
4
Choose the location for the Under-Rail Light so it is centered in the balusters.
Drill a 3/8” hole to feed the wire through the RadianceRail Support Rail.
Feed the wire and mount the light to the recessed RadianceRail Support Rail making sure the light is tilted in (light comes with
a 15˚ tilt which is usually facing the deck). Use the center alignment beam for a guide for the 2 screws. Use 8-3/4“ screw size.
Trim excess wire length and make wire connection to main circuit wire using nuts provided.
Stair Riser Light
Housing
Stair Riser Light
Cover
Stair
Riser
#6 x 1”
Wood
Screw
Set
1” Hole at a slight
downward angle
Screw
Installing Post Mounted Accent Light
1
2
3
4
5
6
7
8
9
Post Skirt
Accent Light wire channel must be routed during the installation of the Post Sleeve. The Post Sleeve and the wood post must be prepared in advance to accommodate
installation of the Accent Light. (No post preparation is necessary for the 5” and 5 ½” Post Sleeves.)
If using the 4” Post Sleeve, prepare the wood post by routing a 1/4” wide by 1/4“ deep wire channel up the center of
the post on the face where the Accent Light will be mounted. For main cable, slightly bevel the corner of the 4x4 post.
If a Post Skirt is used, install it over the wood post before installing the Post Sleeve. You will not be able to install Post Skirt after Post Sleeve and Accent
Light are in place.
Remove Accent Light Cover from Accent Light Back Plate by loosening Set Screw located at bottom of Accent Light Cover.
Prepare the Post Sleeve in the following manner:
t$VUUIF1PTU4MFFWFUPUIFEFTJSFEMFOHUI
t%FUFSNJOFUIFIFJHIUUIF"DDFOU-JHIUXJMMCFNPVOUFE
t.BSLUIFMPDBUJPOPGUIFXJSFIPMFBOEUIFNPVOUJOHTDSFXIPMes using the template provided on the
instructions that come with the product.
t%SJMMBwIPMFGPSUIFXJSFBOEESJMMUXPwIPMFTGPSUIFNPVOUJOHTDSFXT
Route the Accent Light wire through the Back Plate then through the wire hole in the Post Sleeve then invert the Post Sleeve and allow the wire to extend out the top end
of the Post Sleeve.
Hold the Accent Light Back Plate loosely in position and slide UIF1PTU4MFFWFPWFSUIFXPPEQPTUBOEJOUPUIF1PTU4LJSU.BL e sure the wire is in the routed wire channel.
"UUBDIUIF"DDFOU-JHIU#BDL1MBUFUPUIFQPTUVTJOHUXPY/4” screws provided.
Re-install Accent Light Cover and secure with Set Screw with Allen Wrench.
Trim excess wire and make wiring connections. (See Connections section of manual).
Routed Channel for
Accent Light Wire
Beveled Corner
GPS.BJO$BCMF
Accent Light
Back Plate
Yw
Screws
Accent Light
Cover
Set
Screw
09.04.2014

Transformer Settings
Power is supplied to the lighting fixtures via 16/2AWG wires connected to the provided
transformer. One side of the 16/2AWG wire is connected to the Common terminal (C),
the other side is connected to an Output terminal. One side of the 16/2AWG wire
contains raised ridges to allow for easy identification (see Wire Connections section).
The maximum recommended load for the transformer is 90 watts.
Transformer Connections
Consult the instructions provided with the transformer for
additional information.
Outside
GFCI Circuit
On
Turns unit on
100 Watt Transformer
Off
Turns unit off
Auto
Photocell Control “Auto” – Lights come
on at dusk and go off at dawn
4H
6H
8H
Stays on 4 hours after dusk
Stays on 6 hours after dusk
Stays on 8 hours after dusk
Dimmer Instructions
PDF !"# "pdfFactory Pro" $#%&'( www.fineprint.cn
Female
Male
Male
Dimmer
Line Length 10’
Stripped
Antenna
Female
Power from
Transformer
Install the Dimmer next to the LED Transformer. Use the provided 10” wire and
water-tight connector to connect the Dimmer to the LED Transformer. Next, use the
provided 10’ wire and water-tight connector to connect the Dimmer to main run of wire.
To use the Dimmer, turn the LED Transformer to a setting that turns the lighting
on when desired. To dim the lights, press the button on the remote or on the dimmer until
the desired brightness is achieved.
Recommended load for the dimmer is between 20-90 watts.
Wiring Instructions
Connections between the main 16/2AWG cable and the lighting fixtures are made using the space between the post and the Post Cap Light
as a junction box.
When routing the main wire around the deck, leave a loop of extra wire at the top of each post to allow for splicing connections.
Use silicone filled wire nuts with corrosion protection and intended for outdoor use to make all connections. They shall be copper, copper alloy,
or the equivalent.
When making splices, do not pre-twist wires. Pre-twisting wires can lead to a poor seal inside the wire nut causing corrosion and/or voltage drop.
Wire Connections
Wire Nut Instructions
IMPORTANT: Turn off power before installing or removing connector. Product to be used in accordance with local and national codes.
1. Strip wires 5/8”
2. Align frayed strands of conductors.
3. Do not pre-twist. Place stripped wires together with ends even, but lead smaller stranded wires slightly ahead of larger solid or stranded wire.
4. Twist connector onto wires pushing firmly until hand-tight. DO NOT over torque.
5. Wipe excess sealant in and around conductors. DO NOT REUSE.
Use the following guidelines for correct usage of wire nuts.
3
Post & Rail Preparation
Trim 4x4 wood posts 2 ½” shorter than the nished Post Sleeve length.
Trim Post Sleeves to length: 39-40” for a lit post, 2 ½” longer for unlit post.
For best results, use a miter saw with a fine toothed blade to make Post Sleeve cuts.
Check cuts for square.
Feed main 16/2AWG cable between post and Post Sleeve. (See Wire Connections section
for more info.)
Post & Post Sleeves
4 x 4: RadianceRail Express
Trim 4x4 wood posts 2 ½” shorter than the nished post sleeve length.
In order to provide clearance for wiring between the post and Post Cover you must create a
wire channel.
If you plan to install a post mounted Accent Light, you must rout a slot down the post to the
desired fixture position. (See Accent Light instructions.)
Trim Post Covers to length: 37-5/8” for a lit post, 39” for an unlit post.
For best results, use a miter saw with a fine toothed blade to make Post Cover cuts. Check
cuts for square.
Feed main 16/2AWG cable up or down post using prepared feature. (See Wire Connections
section for more information)
Post & Post Sleeves
Install Support Rails and Balusters as normal, DO NOT install Top Rail yet.
Drill a 5/8” hole through the Post Sleeve on centerline,
directly above rail Mounting Blocks.
After running all wiring, secure four Cable Guides to
Support Rail using #8 x ¾” screws. Use the Cable
Guides to pre-drill holes thru the Support Rail with a
7/64” bit.
Attach Top Rails before installation of Post Cap Lights. Use the holes that were pre-drilled
through the Cable Guides to attach the Top Rail. FAILURE TO USE THESE HOLES MAY RESULT
IN WIRE DAMAGE.
Make a notch on the centerline of the Top Rail by boring
a ¾” hole centered ½" back from the end of the rail,
then cut it out to form an open slot.
Railing
Chamfer the corner
of the post
Rout a ¼” by ¼”
slot down the post
Run wires up
corner voids
created by
Post Cover Ribs.
OR
(The following instructions are for a rail height of 36”)
(The following instructions are for a rail height of 36”)
1
2
3
1
2
3
4
5
1
2
3
4
5
SCREW
HOLE
DRILL
THRU
3/16”
Cable Guide Placement
NOTE: Do not rout a wire
channel where a rail is to
be mounted.
x
5” Post Cap Light RadianceRail
5-1/2” Post Cap Light AZEK Railing
Lighted Island Cap
Installing Post Cap Light
6
Post Lamps must be installed after the rail assembly has been completed.
Lighted Island Cap Installation
Post Cap
Post Lamp Cover
Post Lamp
Bottom Housing
Post Lamp Lens
Post Cover
Before installing, refer to Post & Rail Preparation section.
1
2
3
4
5
6
7a
7b
8
Install the Lens onto the Post Sleeve as shown.
Remove the Post Lamp Cover from the Post Lamp Bottom Housing.
Trim excess wire length and make wiring connections to 16/2AWG main cable and
other 18/2AWG luminary wires. Check to confirm polarity of main cable connections.
Coil the connected wires inside the Post Sleeve and insert the Post Lamp Bottom Housing into the
Lens. Check to make sure no wires are exposed or pinched between Lens and Bottom Housing.
Install the mounting screws and washers assembled as shown. Watch as screws are
installed to ensure that wires are clear of screw tip prior to driving them into the wood
post. Tighten only until the silicone washer begins to compress. Over-tightening could
break the Bottom Housing causing permanent damage.
Reinstall Post Lamp Cover and screws.
For 5” & 5-1/2”: (Includes Gasket) Rotate Gasket for desired fit of Post Cap.
For 4x4 (Includes Gasket): Set gasket centered on post Lamp Cover.
Install Post Cap onto Post Lamp Cover.
Silicone
Washer
Metal
Washer
Base
Mounting
Screw
5x5
4x4
UP
Lens Orientation
7a
Gasket
Post Cap
Post Lamp Cover
Post Lamp
Bottom Housing
Post Lamp Lens
Post Cover
5x5
4x4
UP
Lens Orientation
Gasket
7b
The Lighted Island Cap is
preassembled. Installation
simply requires the wires to be
properly connected and the unit
placed onto the post.
/