Page is loading ...

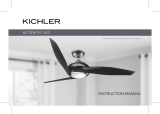
24" POLA WALL FAN
INSTRUCTION MANUAL
Product images may vary slightly from actual product

KICHLER.COM
2

24" POLA WALL FAN |
3
TABLE OF CONTENTS
SAFETY RULES..................................................................4
TOOLS AND MATERIALS REQUIRED..................................5
PACKAGE CONTENTS........................................................5
MOUNTING BASE ON A WOOD FRAMED WALL................6
MOUNTING PIPE AND BASE ASSEMBLY..........................6
WALL MOUNT BRACKET / MOTOR ASSEMBLY...............7
MOTOR / REAR GRILLE AND BLADE ASSEMBLY...............7
FRONT GRILLE ASSEMBLY...............................................7
OPERATING INSTRUCTIONS............................................8
MAINTENANCE..............................................................8

| KICHLER.COM
4
SAFETY RULES
CAUTION: Read and follow all instructions before operating fan.
Do not use if any part is damaged or missing.
WARNING: To reduce the risk of fire or electrical shock, DO NOT use this fan with any solid state speed control device. This appliance
has a 3-prong grounded plug that must be inserted into a matching outlet. To reduce the risk of electrical shock, this grounding plug
must not be cut o the plug. Where a two-prong wall outlet is encountered, it must be replaced: contact a qualified electrician. DO NOT
attempt to defeat this safety feature. Use your fan only with adequate wiring that is up to code. Connect to properly grounded outlets
only.
NOTE: Installation of this equipment should be performed by a qualified person. We do not warrant any damage or injuries as a result of
improper installation.
This fan is suitable for wet location. The fan has Ground-Fault Circuit-Interrupters (GFCI) plug for protection against electrical shock ,
please press the TEST button (then RESET button) every month to assure proper operation.
RULES FOR SAFE OPERATION:
• Always unplug before cleaning.
• Always unplug unit when not in use.
• Do not place foreign objects through guard into the blade.
• Do not operate without fan guards properly locked.
• Do not use this fan with an extension cord.
• Do not place fan or any parts near an open flame, cooking or other heating appliance.
• Do not operate this unit with a damaged cord or plug, especially when this unit has been malfunctioning, dropped or damaged.

24" POLA WALL FAN |
5
TOOLS REQUIRED PACKAGE CONTENTS
• Motor Assembly
• Front/Rear Grille and Blade
• Wall Mounting Pipe and Base
• Owner’s Manual and Hardware Package
• Philips screw driver
• Blade screw driver
• 11mm wrench
• Step ladder
• Wire cutters
Unpack your fan and check the contents. You should have the
following items:

| KICHLER.COM
6
Mounting Base on a Wood Framed Wall
1. Locate a wall stud secure and solid enough to hold the
weight of the base assembly. Carefully locate and mark
the center of the wall stud. If you do not have a solid
structural framing member at that location then you must
provide an adequate alternative for mounting the fan.
2. Place mounting bracket (4) against the wall centered with
the centerline of the wall stud and 4 holes.
3. Drill 4 holes on the wall and secure bracket to wall using 3
lag screws (2) and spring washer (3) provided.
If mounting on a concrete wall, be sure to locate a structurally
solid and secure location to hold the weight of the fan
assembly and use suitable concrete anchors (not provided) to
mount the base to the wall.
Mounting Pipe and Base Assembly
1. Put one end of the pipe (7) into the slot of the base.
2. Carefully insert the position knob (6) and tighten it to hold
the pipe.
ASSEMBLY

24" POLA WALL FAN |
7
Wall Mount Bracket / Motor Assembly
1. Remove the 2 bolts (11), washers (10) and nuts (12) from
the wall mount / pipe (7).
2. Align the holes on the pipe with the holes in the motor
flange on the motor assembly.
3. Insert the bolts (11) and replace the washers and nuts
removed in step 1.
4. Adjust the tilt to the desired positionand tighten the pivot
knob (8) to set the angle.
5. Tighten the position bolt and nut.
CAUTION: Be sure to secure the knob.
Motor / Rear Grille and Blade Assembly
1. Remove the 4 nuts, spring washers and flat washers
(15,16,17) from the bolts around the motor shaft.
2. Carefully slide the rear grille (14) over the bolts.
3. Secure with the flat washers, spring washers, and nuts
removed in Step 1.
4. Carefully slide the blade assembly (18) over the shaft and
align the inner hex head driver (20) provided with the slot
on the shaft of the motor.
5. Tighten the blade assembly (18) with the screws using a
philips-head screwdriver (not provided).
CAUTION: Do not alter the angle of the blades.
Front Grille Assembly
1. Hang the front grille (19) on top rib of rear grille (14) by
utilizing the hook.
2. Put the decorative ring (17) into the front grille (19), then
insert the bolts (22) and tighten the nut (20) to following
interface.
3. Snap the front grille into the rear grille to secure.
4. Cover with decorative screw cover (21).
Install the mounting bracket decorative cover (1) to the
mounting bracket last.

| KICHLER.COM
8
OPERATING INSTRUCTIONS
1. Change the setting on the speed control to the desired
operating speed. The pull chain controls the fan speed as
follows:
• 1 pull - Low
• 2 pulls - Medium
• 3 pulls - High
• 4 pulls - O
2. To change the tilting angle of the fan head, loosen the tilt
adjustment knob on the fan head joint, tilt the fan head to
the desired angle and tighten the pivot knob.
3. To make the fan oscillate, pull up on the oscillating knob
located on the bottom of the motor housing. To stop the
fan from oscillating, push down on the oscillating knob.
CLEANING
WARNING: Unplug from electrical supply source before
cleaning. After servicing, any safety device (including grills
and blades) must be reinstalled or remounted as previously
installed. Use soft damp cloth then wipe with dry cloth.
Do not use harmful cleaners.
Do not bend the blades.
If you should have any operation questions, contact us toll free
at 1-866-558-5706.

24" POLA WALL FAN |
9
www.kichler.com
KICHLER
®
LIGHTING
7711 EAST PLEASANT VALLEY ROAD P.O. BOX 318010
CLEVELAND, OHIO 44131-8010
CUSTOMER SERVICE 866.558.5706
8:30 AM TO 5:00 PM EST, MONDAY - FRIDAY

VENTILADOR DE PARED POLA, 71.1 CM
MANUAL DE INSTRUCCIONES
Las imágenes del producto pueden diferir ligeramente del producto original

KICHLER.COM
2

VENTILADOR DE PARED POLA, 71.1 CM |
3
TABLA DE CONTENIDO
NORMAS DE SEGURIDAD...............................................................4
HERRAMIENTAS Y MATERIALES NECESARIOS..............................5
CONTENIDO DEL PAQUETE.............................................................5
MONTAJE DE BASE EN PARED CON MARCO DE MADERA.........6
MONTAJE DE TUBO Y ENSAMBLAJE DE BASE.........................6
SOPORTE DE MONTAJE EN PARED/ENSAMBLAJE DEL MOTOR
...7
ENSAMBLAJE DE MOTOR/REJILLA TRASERA Y ASPA..................7
ENSAMBLAJE DE LA REJILLA FRONTAL......................................7
INSTRUCCIONES DE USO...............................................................8
MANTENIMIENTO........................................................................8

| KICHLER.COM
4
NORMAS DE SEGURIDAD
PRECAUCIÓN: Lee y sigue todas las instrucciones antes de poner en funcionamiento el ventilador.
No uses el ventilador si alguna de las piezas está dañada o en falta.
ADVERTENCIA: Para reducir el riesgo de incendio o descarga eléctrica, NO utilices este ventilador con ningún dispositivo de estado
sólido para control de velocidad . Este electrodoméstico tiene un enchufe de 3 clavijas con conexión a tierra, que tiene que insertarse en
un tomacorriente adecuado. Para reducir el riesgo de descargas eléctricas no se cortará la clavija del enchufe que conecta a tierra.
Si se encuentra un tomacorriente de pared con dos clavijas, tiene que ser reemplazado: contacta a un electricista calificado. NO intentes
violar este sistema de seguridad. Utiliza el ventilador sólo con cableado adecuado que cumpla con las regulaciones. Conéctalo sólo a
tomacorrientes bien conectados a tierra.
NOTA: La instalación de este equipo debe realizarse por una persona calificada. No están cubiertos por la garantía los daños o lesiones
resultantes de instalación incorrecta.
Este ventilador es apto para lugares húmedos. Este ventilador posee un enchufe GFCI (Interruptor de Circuito por Falla de Conexión a
Tierra) como protección contra descargas eléctricas. Oprime el botón TEST (PRUEBA) [y después el botón RESET] (REINICIAR) todos
los meses para verificar si el dispositivo funciona correctamente.
NORMAS PARA FUNCIONAMIENTO SEGURO:
• Desenchúfalo siempre antes de limpiarlo.
• Desconecta el ventilador siempre que no esté en uso.
• No introduzcas objetos extraños en las aspas a través del protector.
• No pongas el ventilador en funcionamiento si su protector no está debidamente asegurado.
• No uses este ventilador con una extensión eléctrica.
• No coloques el ventilador ni ninguna de sus piezas cerca del fuego o de otros electrodomésticos para cocción o calefacción.
• No utilices el ventilador con un cable o enchufe dañado, especialmente si ha estado fallando, se ha caído o sufrido daños.

VENTILADOR DE PARED POLA, 71.1 CM |
5
HERRAMIENTAS NECESARIAS CONTENIDO DEL PAQUETE
• Ensamblaje del motor
• Rejilla frontal/trasera y aspa
• Base y tubo de montaje en la pared
• Manual del usuario y paquete de herrajes
• Destornillador Phillips
• Destornillador para aspas
• Llave de 11 mm
• Escalera de tijera
• Cortacables
Desempaca tu ventilador y revisa el contenido. Debes tener los
siguientes artículos:

| KICHLER.COM
6
Montaje de base en pared con marco de madera
1. Localiza una viga de pared suficientemente segura y
sólida para sostener el peso del ensamblaje de la base.
Ubica y marca con cuidado el centro de la viga de pared.
Si no hay un elemento de enmarcado estructural sólido en
el lugar, tienes que buscar una alternativa adecuada para
instalar el ventilador.
2. Coloca el soporte de montaje (4) contra la pared, centrado
con la línea central de la viga de pared y 4 orificios.
3. Taladra 4 orificios en la pared y asegura el soporte a la
pared con 3 tornillos tirafondos (2) y arandelas de resorte (3)
incluidos.
Si se monta en una pared de concreto, cerciórate de localizar un
lugar seguro y estructuralmente sólido para sostener el peso
del ensamblaje del ventilador y usa anclajes adecuados para
concreto (no incluidos) al efecto de instalar la base en la pared.
Montaje de tubo y ensamblaje de base
1. Coloca un extremo del tubo (7) dentro de la ranura
de la base.
2. Inserta con cuidado la perilla de ajuste (6) y apriétala
para sostener el tubo.
ENSAMBLAJE

VENTILADOR DE PARED POLA, 71.1 CM |
7
Soporte de montaje en pared / Ensamblaje del motor
1. Quita los 2 pernos (11), arandelas (10) y tuercas (12) del
montaje de pared / tubo (7).
2. Alinea los orificios del tubo con aquellos en la brida del
motor sobre su ensamblaje.
3. Inserta los pernos (11) y vuelve a colocar las arandelas y
tuercas retiradas en el paso 1.
4. Ajusta la inclinación a la posición deseada y aprieta la
perilla de pivote (8) para fijar el ángulo.
5. Aprieta el perno y la tuerca de ajuste.
PRECAUCIÓN: Asegúrate de ajustar la perilla.
Ensamblaje de motor / rejilla trasera y aspa
1. Retira las 4 tuercas, arandelas de resorte y arandelas planas
(15, 16, 17) de los pernos alrededor del eje del motor.
2. Desliza con cuidado la rejilla trasera (14) sobre los pernos.
3. Asegura con las arandelas planas, las arandelas de resorte
y las tuercas retiradas en el Paso 1.
4. Desliza con cuidado el ensamblaje del aspa (18) sobre el eje
y
alinea el conductor de cabeza hexagonal interior (20) - incluido -
con la ranura en el eje del motor.
5. Aprieta el ensamblaje del aspa (18) con los tornillos usando un
destornillador de cabeza Phillips (no incluido).
PRECAUCIÓN: No modifiques el ángulo de las aspas.
Ensamblaje de rejilla frontal
1. Cuelga la rejilla frontal (19) en la varilla superior de la rejilla
trasera (14) utilizando el gancho.
2. Coloca el aro decorativo (17) dentro de la rejilla frontal (19)
e inserta enseguida los pernos (22); aprieta la tuerca (22)
en la interconexión siguiente.
3. Inserta a presión la rejilla frontal en la rejilla trasera para
asegurarla.
4. Cubre con la cubierta decorativa para tornillos (21).
Por último, instala en el soporte de montaje su cubierta
decorativa (1).

| KICHLER.COM
8
INSTRUCCIONES DE USO
1. Cambia la configuración del control de velocidad a la
velocidad de funcionamiento que desees. El interruptor
de cadena controla las velocidades del ventilador de la
siguiente manera:
• Hala 1 vez - Baja
• Hala 2 veces - Media
• Hala 3 veces - Alta
• Hala 4 veces - Apagado
2. Para cambiar el ángulo de inclinación de la cabeza del
ventilador, afloja la perilla de ajuste de inclinación en la
unión de la cabeza, inclínala hasta el ángulo deseado y
ajusta la perilla de pivote.
3. Para que el ventilador oscile, hala hacia arriba la perilla de
oscilación ubicada en la parte inferior de la carcasa del
motor. Para que el ventilador deje de oscilar, empuja hacia
abajo la perilla de oscilación.
LIMPIEZA
ADVERTENCIA: Antes de limpiarlo desenchúfalo de la fuente
de suministro eléctrico. Luego del mantenimiento, todos
los dispositivos de seguridad (incluyendo las rejillas y aspas)
tienen que reinstalarse tal y como estaban antes.
Usa un paño suave húmedo y pasa enseguida uno seco.
No uses limpiadores que puedan causar daños.
No dobles las aspas.
Si tienes alguna pregunta sobre el funcionamiento, llámanos
gratis al 1-866-558-5706.

VENTILADOR DE PARED POLA, 71.1 CM |
9
www.kichler.com
ILUMINACIÓN KICHLER
®
7711 EAST PLEASANT VALLEY ROAD P.O. BOX 318010
CLEVELAND, OHIO 44131-8010
SERVICIO AL CLIENTE: 866.558.5706
DE LUNES A VIERNES, DE 8:30 AM A 5:00 PM (ESTE)
/