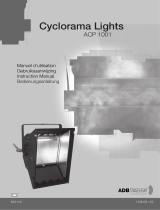
ADB SH 20 User manual

Type
User manual
TV Spotlights
Page 6
Advice before Use
Read carefully these instructions.
As soon as the equipment is delivered, open packings and
inspect the equipment carefully.
If you notice any damage, contact immediately the transport
company and register your complaint in due form with
mention of the defects.
Be sure that this equipment left our factory in perfect
condition.
Check if the received equipment is consistent with the
delivery notice and if this delivery notice is consistent with
your order.
If it is not, contact immediately your supplier.
General Remarks
This luminaire is a lighting equipment designed for professional
use only in theatres and indoor television or film studios.
Designed and built in accordance with EN 60950 safety
regulations, it must imperatively be connected to earth by
means of its earth wire. It also complies with the CEI safety
regulations (598-1/598-2-17 publications).
To prevent any electrical shock, there is no need to open this
equipment when functioning.
Nevertheless:
Any part or lenses have to be replaced if they are visibly
damaged and their efficiency might be reduced, for example
in case of deep cracks or scratches.
Lamp must be changed if damaged or distorted by heat.
If internal access is needed for control, service or repair purposes,
always refer to qualified personnel.
In all events, always unplug the power supply cable before
opening.
LETHAL VOLTAGE PRESENT INSIDE
It is the user's responsibility to use the luminaire for its intended
purpose and to check the equipment that might be connected
to it.
The luminaire can under no circumstances be modified.
ADB will not assume any responsibility in case of damage
resulting from modications made to the luminaire.
This luminaire is a piece of professional equipment designed for
easy and simple use. Nevertheless, always refer to qualified
personnel for any installation or repair work.
Important Remarks:
Power supply cables and other connections are essential for
your equipment and contribute greatly to a safe and trouble free
operation.
Always hold the plug when disconnecting a cable, never pull
the cable.
Never use cables or connectors in bad condition, check
them before installation and periodically thereafter.
Never tie power supply and data cables together.
Fitting the Lamp
ALWAYS disconnect the supply cable from the mains.
Set the switch into the "OFF" position.
Open the front door by pulling on the lever of the door catch
(see Fig. 1).
Place the lamp into the socket.
The type G38 socket is equipped with a lever permitting the
contact jaws to be separated in order to facilitate this operation.
Please refer to the index plate to establish the type of lamp to
be used. Please consult the manufacturer's instructions supplied
with the lamp so as to use the lamp in the proper manner.
The lamp MUST be replaced if it has been damaged or
deformed by heat.
Electrical Connection
Your spotlight has been designed to operate at a maximum
voltage of 220-240V. It must be connected to the mains using
a 3-core cable, the cross-section of which is suitable for the
power of the lamp, in accordance with the local regulations. We
recommend a cross-section of 2.5 mm
2
for 1 kW and 2 kW
spotlights and a cross-section of 4 mm
2
for 5 kW spotlights. The
insulation of the cable must withstand the maximum temperature
when operating under load, as stated on the index plate.
Refer to the attached figure 3. Unscrew the 4 screws from the
terminal box in order to gain access to the terminals. Insert the
cable into the cable clamp; connect the green/yellow conductor
to the earth terminal; connect the other two conductors to the
terminals. Immobilize the cable by tightening the screws of the
cable clamp; and screw on the cover of the terminal box.
Page 7
TV Spotlights
Assembly
Your spotlight can be suspended from a bar by means of a DIN/
BBC spigot in accordance with the DIN standard 15560-101
(an accessory for the manually controlled model). This spigot
socket provided for the sections HB and HS of DIN 15560-102.
It may also be mounted on a tripod (manual model). These
accessories are available as an option .
You should avoid placing the spotlight close to inflammable
materials; the minimum distance is shown on the index plate.
Do not exceed the maximum angles of inclination stated on the
index plate. ALWAYS use the safety cable by passing it into the
safety ring or into the suspension yoke.
Assembly of the accessories
Consult the list of accessories.
The front door comprises two slides to receice the various
accessories; the first one (exterior) is provided for the 4-leaf
barndoor which is supplied with the spotlight; the second one
(interior) is provided for the colour filter frame or the diffusing
scrims. These various accessories are fixed to the spotlight by
two lateral channels and a channel inthe base of the door. A
retaining catch, situated on the upper part of the door, prevents
the accessories from accidentally falling during the manoeuvering
of the spotlight (see page 10).
Remark:
The weight of the accessories shall not be more than 25% of the
weight of the luminaire.
4-leaf barndoor
The 4-leaf barndoor, which is supplied with the spotlight, is
made up of four blades and of a metal ring.
In order to fit this, release the retaining catch by pulling it laterally
and pivoting it through 180°.
Insert the 4-leaf barndoor into its slide; check that it is properly
engaged into the three channels. Lock the retaining catch
again. The frictional force of each blade may be adjusted at each
end of the blade.
Metal or cardboard filter frame
Cut out the colour filter and place it in the filter frame. Release
the retaining catch and insert the filter frame into the interior
slide; check that it is properly engaged into the three channels.
Lock the retaining catch again.
Metallic diffusing scrims
ADB supplies two types of metal diffusing scrims : the square
scrim and the orientable half-moon scrim; each type is available
with attenuation of 25% or 50%. These accessories permit the
luminous intensity of the spotlight to be attenuated without
altering the colour temperature of the lamp.
Release the retaining catch and insert the scrim into the interior
slide; check that it is properly engaged into the 3 channels. Lock
the retaining catch again.
The "half-moon" diffusing scrim may then be oriented in such a
manner as to obtain the desired light effect.
Outrig filter frame.
This filter frame is used especially on the 2 kW and 5 kW
spotlights in order to increase the service life of the colour filters.
Please consult the fitting instructions supplied with the outrig
filter frame.
Adjustments
Adjustment of the focussing
The focussing is adjusted either by hand or using a pole, by
turning the yellow colour head, which is situated on the side of
the spotlight. Turn the head in a clockwise direction to disperse
the light beam. Turn in an anticlockwise direction to concentrate
the light beam.
Adjustment of the friction of the optical carriage
The frictional force of the optical carriage on its two translation
shafts may be adjusted in accordance with the wishes of the
operator.
Disconnect the equipment from the mains; open the front door
and place the optical carriage as close as possible to the lens
by means of the focussing head.
The adjusting screw is situated on the left hand side of the
optical carriage. Adjust the frictional force by means of a
screwdriver; when the desired adjustment has been obtained,
retighten the lock-nut.
Pan (horizontal) positioning
For the "manual" type of spotlight, the azimuth positioning is
simply carried out manually. For the "pole operated" type of
spotlight, the positioning is carried out by turning the blue colour
head, which is situated on the side of the spotlight. Turn the
head in the desired direction of rotation of the spotlight.
Tilt (vertical) positioning
For the "manual" type of spotlight, the elevation positioning is
simply carried out by hand, by releasing the clamping lever
situated on the side of the spotlight (see Fig. 1). When the
desired inclination has been obtained, retighten the locking
lever.
For the "pole operated" type of spotlight, the positioning is
carried out by turning the white colour head, which is situated
on the side of the spotlight. Turn the head in a clockwise
direction to incline the spotlight downwards. Turn the white
head in an anticlockwise direction to raise the spotlight again.
Do not exceed the maximum angles of inclination given on the
index plate.
Maintenance
Cleaning and replacing the mirror
We recommend that the mirror should be cleaned each time
you replace the lamp. Disconnect the spotlight. Allow the
spotlight to cool. Open the front door of the spotlight. Bring the
optical carriage as close as possible to the lens. Carefully
remove the lamp. Clean the mirror using a clean, non-fluffy cloth
impregnated with alcohol.
Cleaning and replacing the lens
It is essential to clean the lens regulary, in order to maintain the
optimum output from your equipment. Disconnect the spotlight.
Open the front door of the spotlight. Allow the spotlight to cool.
Raise the three tabs for fixing the lens and turn them through
90°. Remove the lens; clean both sides of the lens using a clean,
non-fluffy cloth impregnated with alcohol, replace the lens and
refix it by means of the fixing tabs. Close the front door again.
TV Spotlights
Page 10
Le projecteur en votre possession est conforme, sur le plan de la
sécurité, aux normes de la CEI, publications 598-1 et 598-2-17.
1 Lyre de suspension
2 Anneau de sécurité
3 Manette de blocage
4 Cloche de positionnement en site
5 Cloche de positionnement en azimut
6 Poignée de manipulation
7 Cloche de focalisation
8 Loquet de retenue des accessoires
9 Porte frontale
10 Glissière pour accessoires.
11 Verrouillage de la porte
12 Boîte de raccordement
De schijnwerper die in uw bezit is, komt overeen wat de
veiligheid betreft, met de CEI-normen, publicaties 598-1 en
598-2-17.
1 Ophangbeugel
2 Veiligheidsring
3 Blokkeerhendel
4 Positioneringsklok helling
5 Positioneringsklok richting
6 Bedieningshandvat
7 Focusseerklok
8 Houderklem van de toebehoren
9 Voordeur
10 Glijgoten voor toebehoren
11 Deurvergrendeling
12 Aansluitingsdoosje
The spotlight in your possession meets the IEC standards,
publications 598-1 and 598-2-17, as regards safety.
1 Suspension yoke
2 Safety ring
3 Locking lever
4 Elevation positioning head
5 Azimuth positioning head
6 Manoeuvering handle
7 Focusing head
8 Accessory retaining catch
9 Front door
10 Slide for accessories
11 Lock for the door
12 Connecting terminal box
Der Scheinwerfer, der sich in Ihrem Besitz befindet, entspricht
im Bereich der Sicherheit den Vorschriften der CEI,
Veröffentlichungen 598-1 und 598-2-17.
1 Aufhängebügel
2 Sicherheitsring
3 Sperrhebel
4 Glocke zur senkrechten Verstellung
5 Glocke zur waagerechten Verstellung
6 Handgriff
7 Glocke zur Fokussierung
8 Halteriegel für die Zubehörteile
9 Vorderes Tor
10 Gleitvorrchtung für Zurberhörteile
11 Torverriegelung
12 Klemmkasten
Page 11
TV Spotlights
La plaque signalétique, placée latéralement sur l'appareil,
reprend les informations suivantes :
1 type du projecteur
2 angles de champ en degrés
3 symbole conforme aux prescriptions de la commission
internationale de l’éclairage CIE indiquantant le type du
projecteur
4 numéro de code
5 numéro de série
6 tension nominale d’alimentation en V
7 puissance maximale de la lampe en W
8 températureambiante maximale (en °C) admissible pour un
fonctionnement normal
9 poids du projecteur sans lampe et sans accessoires, en kg
10 symbole indicant la distance minimale (en m) entre matières
inflammables et toute surface externe du projecteur (pour
prévenir l’inflammation des matières inflammables à partir
de 80°C)
11 type de socquet pour la lampe à utiliser
12 courant maximal admissible en A
13 indice de protection contre la pénétration des poussières et
de l’humidité selon le code IP (International Protection)
14 température maximale de la surface externe du projecteur
en fonctionnement de régime
15 inclinaison maximum autorisée du projecteur
16 température maximale (en °C) à laquelle sera soumis
l’isolement des câbles d’alimentation
17 indication du haut du luminaire
18 marque d’origine
De identificatieplaat die zich aan de zijkant van de schijnwerper
bevindt, vermeldt de volgende gegevens :
1 type van de schijnwerper
2 openingshoek
3 symbool overeenkomstig de voorschriften van de IEC dat
het gebruikte lenstype symboliseert
4 codenummer
5 serienummer
6 nominale voedingsspanning in V
7 maximumvermogen van de lamp in W
8 maximum toegelaten omgevingstemperatuur in °C om een
normale werking van de schijnwerper te verzekeren
9 gewicht in kilogram van de schijnwerper zonder lamp en
zonder accessoires
10 minimumafstand tot ontvlambare stoffen in meter t.o.v.
gelijk welk extern oppervlak van de schijnwerper (om het
ontvlammen van brandbare stoffen te voorkomen 80 °C)
11 type van de gebruikte lamphouder
12 maximum toegelaten stroom in A
13 beschermingsindex IP in verband met de weerstand van de
schijnwerper tegen stof en vochtigheid
14 maximale temperatuur in °C van de behuizing bij normale
werking
15 maximaal toegelaten inclinatie in graden t.o.v. de 0° stand
16 maximale temperatuur in C waaraan de isolatie van de
voedingskabel mag onderworper worden
17 aanduiding van de bovenkant van de schijnwerper
18 merknaam
The indentification plate located on one side of the luminaire
contains the following information :
1 luminaire type designation
2 field angles in degrees
3 symbol indicating type of luminaire in accordance with CIE
regulations
4 code number
5 serial number
6 rated power supply voltage in V
7 maximum wattage (in W) of the lamp
8 maximum permissible ambient temperature (in °C) for normal
operation
9 weight without lamp and accessories (in kg)
10 symbol indicating minimum distance (in m) between
inflammable matters and any external part of the luminaire
to prevent ignition of inflammable matters from 80°C up
11 lampholder type
12 maximum permissible current in A
13 resistance luminaire IP (International Protection) protection
index defining to dust and humidity
14 maximum temperature (in °C) of the luminaire housing
during normal operation
15 maximum tilt of luminaire allowed 0° position
16 maximum temperature (in °C) to which the supply cable will
be submitted
17 indication of the luminaire's top side
18 brand name
Das Typenschild, das auf der Seite des Scheinwerfers
angebracht ist, enthält folgende Informationen:
1 Typenbezeichnung Scheinwerfers
2 Öffnungswinkel in Grad
3 Symbol zur Kennzeichnung des Scheinwerfertyps in
Übereinstimmung mit den Bestimmungen der CIE
4 Code des Modells
5 Seriennummer
6 Betriebsspannung (V)
7 Höchste zulässige Leistung der Lampe (W)
8 Maximale zulässige Umgebungstemperatur in °C für den
normalen Betrieb
9 Gewicht ohne Lampe und Zubehör
10 Symbol zur Kennzeichnung des minimalen Abstandes
zwischen entflammbaren Gegenständen und jeder der
Außenflächen des Gerätes in Metern (um das Entflammen
brennbarer Gegenstände bei > 80° C zu vermeiden)
11 Typ des Sockels der Lampe
12 Höchster zulässiger Strom in A
13 IP Schutzgrad (International Protection), der sich auf die
Widerstandsfähigkeit des Scheinwerfers gegen Staub und
Feuchtigkeit bezieht.
14 Höchste Temperatur des Gehäuses des Scheinwerfers bei
normalem Betrieb
15 Höchste mögliche Schwenkung des Scheinwerfers in Bezug
zum 0° Winkel
16 Höchste Temperatur in °C, der die Anschlußleitung
ausgesetzt wird
17 Informationen über die Orientierung des Scheinwerfers
(Oben/Unten)
18 Markenname
TV Spotlights
Page 12
Accessoires
Porte-filtres carton (4 x)
Porte-filtre métallique
Atténuateur 25 %
Atténuateur 50 %
Pivot DIN télévision
Crochet avec douille DIN
Crochet pour tube Ø 35 à Ø 50 mm
Câble de sécurité
Câble de raccordement 3 x 2,5 mm
2
+ fiche
Câble de raccordement 3 x 4 mm
2
+ fiche
1 kW Studio 2 kW Studio 5 kW Studio
2 kW Compact 5 kW Compact
2 x 1,25 kW 2 x 2,5 kW
PFC/275 - -
PFM/275 PFM/340 -
AM25/275 AM25/340 AM25/400
AM50/275 AM50/340 AM50/400
PIVOT DIN PIVOT DIN PIVOT DIN
A8 A8 A8
A25 A25 A25
A30 A30 A30
CAS 120/N CAS 120/N CAS 120/N
RAC/2,5/2M RAC/2,5/2M -
- RAC/4/2M RAC/4/2M
Toebehoren
Kartonnen filterhouder (4x)
Metalen filterhouder
Metalen verzwakker 25 %
Metalen verzwakker 50 %
DIN-adapter
Ophanghaak met DIN-dop
Ophanghaak voor buis Ø 35 tot Ø 50 mm
Veiligheidskabel
Verlengingskabel 3 x 2,5 mm
2
+ stekker
Verlengingskabel 3 x 4 mm
2
+ stekker
1 kW Studio 2 kW Studio 5 kW Studio
2 kW Compact 5 kW Compact
2 x 1,25 kW 2 x 2,5 kW
PFC/275 - -
PFM/275 PFM/340 -
AM25/275 AM25/340 AM25/400
AM50/275 AM50/340 AM50/400
PIVOT DIN PIVOT DIN PIVOT DIN
A8 A8 A8
A25 A25 A25
A30 A30 A30
CAS 120/N CAS 120/N CAS 120/N
RAC/2,5/2M RAC/2,5/2M -
- RAC/4/2M RAC/4/2M
Accessories
Cardboard filter frame (4x)
Metallic filter frame
25 % diffusing scrim
50 % diffusing scrim
DIN spigot
Hook clamp with DIN spigot socket
Hook clamp for tube Ø 35 to Ø 50 mm
Safety cable
Connecting cable 3 x 2.5 mm
2
with plug
Connecting cable 3 x 4 mm
2
with plug
1 kW Studio 2 kW Studio 5 kW Studio
2 kW Compact 5 kW Compact
2 x 1,25 kW 2 x 2,5 kW
PFC/275 - -
PFM/275 PFM/340 -
AM25/275 AM25/340 AM25/400
AM50/275 AM50/340 AM50/400
PIVOT DIN PIVOT DIN PIVOT DIN
A8 A8 A8
A25 A25 A25
A30 A30 A30
CAS 120/N CAS 120/N CAS 120/N
RAC/2,5/2M RAC/2,5/2M -
- RAC/4/2M RAC/4/2M
Zubehörteile
Kartonfilterrahmen (4x)
Metallfilterrahmen
Weichzeichner 25 %
Weichzeichner 50 %
DIN - Zapfen
Aufhâgehaken mit DIN Hülse
Aufhâgehaken für Ø 35 bis Ø 50 mm Rohr
Sicherheitsseil
Anschlusskabel 3 x 2,5 mm
2
mit Stecker
Anschlusskabel 3 x 4 mm
2
mit Stecker
1 kW Studio 2 kW Studio 5 kW Studio
2 kW Compact 5 kW Compact
2 x 1,25 kW 2 x 2,5 kW
PFC/275 - -
PFM/275 PFM/340 -
AM25/275 AM25/340 AM25/400
AM50/275 AM50/340 AM50/400
PIVOT DIN PIVOT DIN PIVOT DIN
A8 A8 A8
A25 A25 A25
A30 A30 A30
CAS 120/N CAS 120/N CAS 120/N
RAC/2,5/2M RAC/2,5/2M -
- RAC/4/2M RAC/4/2M
TV Spotlights
Page 14
Dimensions A B C D E F G Net Packing (mm) Gross Lamp HCL
(mm) Weight (kg) Weight (kg) (mm)
SH 10 315 485 300 445 575 385 425 8,1 380 x 580 x 510 10,1 GX9,5 55
SHF 10 G22 63,5
SP 10 315 485 300 445 575 385 425 10,1 380 x 580 x 510 12,3 GX9,5 55
SPF 10 G22 63,5
SH 20 375 635 425 600 730 420 540 12,4 510 x 650 x 560 16 GY16 70
SHF 20 G38 127
SP 20 375 635 425 600 730 420 540 14,4 510 x 650 x 560 18,3 GY16 70
SPF 20 G38 127
SH 50 395 665 445 600 730 470 670 15,1 540 x 660 x 570 17 GY38 127
SP 50 17,8 19,7
CH20 315 485 300 445 575 385 425 8,1 380 x 580 x 510 10,1 GY16 70
CP20 10,1 12,3
CH50 375 635 425 600 730 420 540 12,4 510 x 650 x 560 16 GY38 127
CP50 14,4 18,3
SH12 375 635 425 600 730 420 540 12,4 510 x 650 x 560 16 GX38q 143
SP12 14,4 18,3
SH25 395 665 445 600 730 470 670 15,1 540 x 660 x 570 18 GX38q 143
SP25 18,1 20,6
Optical & Electro-mechanical Data
Page 15
TV Spotlights
Light level for other throw distances
spot focus : divide 200,000 by the square of the distance
flood focus : divide 17,300 by the square of the distance
Beam diameter for other throw distances
spot focus : mutiply the distance by 0.114
flood focus : multiply the distance by 0.98
Typical values, measured without wire mesh guard, 220 V
Throw distance (m) 2.5 5 7.5 10 12.5 15
SH10/SP10 Spot focus Beam Field Beam diameter (m) 0.28 0.57 0.85 1.14 1.40 1.70
7.5° 15° Light level (lux) 32 000 8 000 3 560 2 000 1 280 890
Flood focus Beam Field Beam diameter (m) 2.4 4.9 7.3 9.8 12 14.6
56° 69° Light level (lux) 2 770 692 308 173 111 77
SH20/SP20 Spot focus Beam Field Beam diameter (m) 0.28 0.57 0.85 1.14 1.40 1.70
7.5° 15° Light level (lux) 32 000 8 000 3 560 2 000 1 280 890
Flood focus Beam Field Beam diameter (m) 2.4 4.9 7.3 9.8 12 14.6
56° 69° Light level (lux) 2 770 692 308 173 111 77
SH50/SP50 Spot focus Beam Field Beam diameter (m) 0.28 0.57 0.85 1.14 1.40 1.70
7.5° 15° Light level (lux) 32 000 8 000 3 560 2 000 1 280 890
Flood focus Beam Field Beam diameter (m) 2.4 4.9 7.3 9.8 12 14.6
56° 69° Light level (lux) 2 770 692 308 173 111 77
CH20/CP20 Spot focus Beam Field Beam diameter (m) 0.28 0.57 0.85 1.14 1.40 1.70
7.5° 15° Light level (lux) 32 000 8 000 3 560 2 000 1 280 890
Flood focus Beam Field Beam diameter (m) 2.4 4.9 7.3 9.8 12 14.6
56° 69° Light level (lux) 2 770 692 308 173 111 77
CH50/CP50 Spot focus Beam Field Beam diameter (m) 0.28 0.57 0.85 1.14 1.40 1.70
7.5° 15° Light level (lux) 32 000 8 000 3 560 2 000 1 280 890
Flood focus Beam Field Beam diameter (m) 2.4 4.9 7.3 9.8 12 14.6
56° 69° Light level (lux) 2 770 692 308 173 111 77
SH12/SP12 Spot focus Beam Field Beam diameter (m) 0.28 0.57 0.85 1.14 1.40 1.70
7.5° 15° Light level (lux) 32 000 8 000 3 560 2 000 1 280 890
Flood focus Beam Field Beam diameter (m) 2.4 4.9 7.3 9.8 12 14.6
56° 69° Light level (lux) 2 770 692 308 173 111 77
SH25/SP25 Spot focus Beam Field Beam diameter (m) 0.28 0.57 0.85 1.14 1.40 1.70
7.5° 15° Light level (lux) 32 000 8 000 3 560 2 000 1 280 890
Flood focus Beam Field Beam diameter (m) 2.4 4.9 7.3 9.8 12 14.6
56° 69° Light level (lux) 2 770 692 308 173 111 77
Fresnel Spotlights
Photometric Data
TV Spotlights
Page 16
ADB - Your Partner for Light
Belgium N.V. ADB-TTV Technologies S.A.
(Group Headquarters) Leuvensesteenweg 585, B-1930 Zaventem
Tel : 32.2.709.32.11, Fax : 32.2.709.32.80, E-Mail : [email protected]
Deutschland ADB GmbH Boschstrasse 3, D-61239 Ober-Mörlen
Tel : 49.6002.93.933.0, Fax : 49.6002.93.933.33, E-Mail : [email protected]
France ADB S.A.S. Sales Office: 168/170, boulevard Camélinat F-92240 Malakoff
Tel : 33.1.41.17.48.50, Fax : 33.1.42.53.54.76, E-Mail : [email protected]
Factory & Group Logistics Centre: Zone industrielle Rouvroy F-02100 Saint-Quentin
Tel : 33.3.23.06.35.70, Fax : 33.3.23.67.66.56, E-Mail : [email protected]
M-4010-4L-08j
Subject to modifications
www.adblighting.com
  • Page 1 1
  • Page 2 2
  • Page 3 3
  • Page 4 4
  • Page 5 5
  • Page 6 6
  • Page 7 7
  • Page 8 8
  • Page 9 9
  • Page 10 10
  • Page 11 11
  • Page 12 12
  • Page 13 13
  • Page 14 14
  • Page 15 15
  • Page 16 16

ADB SH 20 User manual

Type
User manual

Ask a question and I''ll find the answer in the document

Finding information in a document is now easier with AI

in other languages