Page is loading ...

REQUIRES 2 PEOPLE
FOR EASE OF ASSEMBLY
REQUIERT 2 PERSONNES
POUR FACILITER
L'ASSEMBLAGE
USER ASSEMBLY GUIDE
GUIDE D’ASSEMBLAGE
GREYSON / HUNTINGTON / LANSING
ENTRYWAY BENCH & MIRROR
BANC D’ENTRÉE ET MIROIR
ITEM /NUMBER NUMÉRO D’ARTICLE
3AXCGREBEN
Like us on
& share your pictures and
comments to be eligible
for exclusive promotions.
Suivez-nous sur
partagez vos photos et vos
commentaires afin d’être admissibles
à des promotions exclusives.
1/10
TM
TM
TM

Allen Key
ClefAllen
2 SETS
2 ENSEMBLES
HARDWARE / QUINCAILLERIE
REQUIRES 2 PEOPLE FOR EASE OF ASSEMBLY
REQUIERT 2 PERSONNES POUR FACILITER L'ASSEMBLAGE
Seat
Siège
ONE PAIR
UNE PAIRE
1 PIECE
1 PIÈCE
2/10
A
1 2 3
B
Sides
Côtés
Allen Key Bolts
BoulonsAllen
M6 x 30 mm
9 PIECES
9 PIÈCES
9 10 11
C D
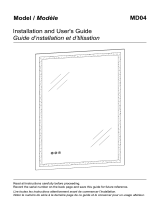
Mirror
Miroir
8 x 30 mm
6SPIECE
6 PIÈCES
1 PIECE
1PIÈCE
1 PIECE
1PIÈCE
INFOGRAPHIC LEGEND / :LÉGENDE GRAPHIQUE
In relative spatial arrangement to the assembled unit / Disposition par rapport à l'assemblage
INNER
Panel: Inner side Back
OUTER
F
B
GREYSON / HUNTINGTON / LANSING
ENTRYWAY BENCH & MIRROR
BANC D’ENTRÉE ET MIROIR
Panneau : côté intérieur
Panel: Outer side
Front
Top
Panneau: côté externe
Bottom
T
Arrière Avant Supérieur Inférieur
Wood dowel
Goujon en bois
Backrest
Support Arrière
E
Wall mount bar
Barre de montage mural
1 PIECE
1PIÈCE
M6 x 80 mm
1 PIECE
1 PIÈCE
5 6 7
2SPIECE
2 PIÈCES
Bracket
Support
Wood bolt caps
Capuchon en bois
2 PCS
2 PIÈCES
4SPIECE
4 PIÈCES
M4 x 50mm
Phillips Screw
Vis cruciforme
Allen Key Bolts
BoulonsAllen
Cross nuts
Écrou croix
1 PIECE
1 PIÈCE
M5 x 60mm
Phillips Screw
Vis cruciforme
4
8
Wall anchor
Ancrages muraux
4SPIECE
4 PIÈCES
6SPIECE
6 PIÈCES
M4 x 15mm
Phillips screw round head
Vis cruciforme à tête ronde
Hooks
Crochets
3SPIECE
3 PIÈCES
12
4SPIECE
4 PIÈCES
M4 x 25mm
Phillips Screw
Vis cruciforme

3/10
ASSEMBLY INSTRUCTIONS / INSTRUCTIONS D’ASSEMBLAGE
NOTICE / AVIS
Please use a screwdriver for the screws. The screwdriver is not included in the pack.
SVP utilisez un tournevis pour les vis. Le tournevis n’est pas fourni avec le produit.
Please use a screwdriver for the screws. The screwdriver is not included in the pack.
SVP utilisez un tournevis pour les vis. Le tournevis n’est pas fourni avec le produit.
STEP 1
EÙTAPE 1
1. Using 2 Phillips Screw 5 attach Brecket 6 to Seat B .
2. Use Phillip screwdriver to snugly tighten screws .
1. Utiliser des 2 Vis cruciforme 5 pour attacher le Support 6 dans les Sieøge B .
2. Utiliser un tournervis aø teâte eùtoileùe pour visser les vis deùlicatement.
B
5
6
5
6
GREYSON / HUNTINGTON / LANSING
ENTRYWAY BENCH & MIRROR
BANC D’ENTRÉE ET MIROIR

4/10
B
ASSEMBLY INSTRUCTIONS / INSTRUCTIONS D’ASSEMBLAGE
NOTICE / AVIS
Please use a screwdriver for the screws. The screwdriver is not included in the pack.
SVP utilisez un tournevis pour les vis. Le tournevis n’est pas fourni avec le produit.
Please use a screwdriver for the screws. The screwdriver is not included in the pack.
SVP utilisez un tournevis pour les vis. Le tournevis n’est pas fourni avec le produit.
STEP 2
EÙTAPE 2
1. Insert 2 Dowels 4 into of each Sides A .
2. Align pre-drilled holes on Seat B with Dowels 4 in Sides A .
3. Using 6 Allen Key Bolts 1 attach Seat B to Side A .
4. Use Allen Key 3 to tighten screws. Do not over-tighten.
1. Inseùrer 2 goujons 4 dans les coins supeùrieurs de chaque Coâteùs A .
2. Aligner les trous preùperceùs infeùrieur au Sieøge B avec des goujons 4 dans les Coâteùs A .
3. Utiliser des 6 Boulons allen 1 pour attacher le Sieøge B dans les Coâteùs A .
4. Utiliser la Clef Allen 3 pour visser les vis . Ne pas trop serrer.
B
A
A
1
3
4
1
1
4
4
4
1
GREYSON / HUNTINGTON / LANSING
ENTRYWAY BENCH & MIRROR
BANC D’ENTRÉE ET MIROIR

5/10
ASSEMBLY INSTRUCTIONS / INSTRUCTIONS D’ASSEMBLAGE
NOTICE / AVIS
Please use a screwdriver for the screws. The screwdriver is not included in the pack.
SVP utilisez un tournevis pour les vis. Le tournevis n’est pas fourni avec le produit.
Please use a screwdriver for the screws. The screwdriver is not included in the pack.
SVP utilisez un tournevis pour les vis. Le tournevis n’est pas fourni avec le produit.
STEP 3
EÙTAPE 3
1. Insert 2 Dowels 4 into Backrest C .
2. Align pre-drilled holes on Seat B with Dowels 4 in C .
3. Using 3 Allen Key Bolts 1 attach Seat B and C .
4. Use Allen Key 3 to tighten screws. Do not over-tighten.
1. Inseùrer 2 goujons 4 dans les coins supeùrieurs de Support Arrieøre C .
2. Aligner les trous preùperceùs infeùrieur au Sieøge B avec des goujons 4 dans les C .
3. Utiliser des 3 Boulons allen 1 pour attacher le Sieøge B et C .
4. Utiliser la Clef Allen 3 pour visser les vis . Ne pas trop serrer.
Backrest
Backrest
Support Arrieøre
Support Arrieøre
B
C
3
1
4
4
1
GREYSON / HUNTINGTON / LANSING
ENTRYWAY BENCH & MIRROR
BANC D’ENTRÉE ET MIROIR

6/10
B
ASSEMBLY INSTRUCTIONS / INSTRUCTIONS D’ASSEMBLAGE
NOTICE / AVIS
Please use a screwdriver for the screws. The screwdriver is not included in the pack.
SVP utilisez un tournevis pour les vis. Le tournevis n’est pas fourni avec le produit.
Please use a screwdriver for the screws. The screwdriver is not included in the pack.
SVP utilisez un tournevis pour les vis. Le tournevis n’est pas fourni avec le produit.
A
A
5
6
B
C
2
5
3
2
2
STEP 4
EÙTAPE 4
1. Using 2 Phillips Screw 5 attach Bracket 6 to Side A .
2. Use Phillip screwdriver to snugly tighten screws .
3. Attach Backrest C to back of Side A using Allen key bolts 2 into pre-drilled holes on Side A .
4. Insert Cross nuts 2 into pre-drilled holes in Backrest C .
5. Use Allen Key 3 to tighten Bolts .
1. Utiliser des 2 Vis cruciforme 5 pour attacher le Support 6 dans les Coâteùs A .
2. Utiliser un tournervis aø teâte eùtoileùe pour visser les vis deùlicatement.
3. Fixer Support arrieøre C au dos de Coâteùs A au moyen Boulons allen 2 dan les trous preùperceùs do Coâteùs A
4. Inseùrer EÙcrou croix 2 dans les trous preùperceùs du Support arrieøre C .
5. Utiliser une Clef allen 3 pour serrer les boulons.
GREYSON / HUNTINGTON / LANSING
ENTRYWAY BENCH & MIRROR
BANC D’ENTRÉE ET MIROIR

7/10
B
ASSEMBLY INSTRUCTIONS / INSTRUCTIONS D’ASSEMBLAGE
NOTICE / AVIS
Please use a screwdriver for the screws. The screwdriver is not included in the pack.
SVP utilisez un tournevis pour les vis. Le tournevis n’est pas fourni avec le produit.
Please use a screwdriver for the screws. The screwdriver is not included in the pack.
SVP utilisez un tournevis pour les vis. Le tournevis n’est pas fourni avec le produit.
STEP 6
EÙTAPE 6
1. Attach Hooks 12 to Mirror D , using Phillips Screw round head 11 into guide holes on Mirror D
1. Fixer les Crochets 12 aux Miroir D au moyen de grandes Vis cruciforme aø teâte rond 11 dans les
trous de D .Miroir
D
12
11
7
7
STEP 5
EÙTAPE 5
1. Insert 2 wood bolt caps 7 into exposed bolt holes on side of bench.
1. Inseùrer les 2 capuchons en bois 7 sur les vis apparentes de coâteùs du banc .
GREYSON / HUNTINGTON / LANSING
ENTRYWAY BENCH & MIRROR
BANC D’ENTRÉE ET MIROIR

9/10
ASSEMBLY INSTRUCTIONS / INSTRUCTIONS D’ASSEMBLAGE
NOTICE / AVIS
Please use a screwdriver for the screws. The screwdriver is not included in the pack.
SVP utilisez un tournevis pour les vis. Le tournevis n’est pas fourni avec le produit.
Please use a screwdriver for the screws. The screwdriver is not included in the pack.
SVP utilisez un tournevis pour les vis. Le tournevis n’est pas fourni avec le produit.
STEP 8 - Attach Wall Mount Bar to Wall
1. Screw 1 Phillip Screw 9 through the tall side of the Wall Mount Bar E at
2. Screw 4 Phillip Screws 8 through the tall side of the Wall Mount Bar E at
positions (a),(b),(d),(e) where wall anchors 10 were placed.
3. Tighten all screws. Do not over tighten.
positions (c).
ÉTAPE 8 - FIXER LA BARRE DE MONTAGE MURAL AU MUR
1. Vissez une vis à tête cruciforme 9 dans la grande partie de la barre de montage mural E à la
position (c).
2. Vissez 4 vis à tête cruciforme 8 dans la grande partie de la barre de montage mural E aux
positions (a), (b), (d), (e) là où les ancrages muraux 10 ont été placés.
3. Serrez toutes les vis. Ne pas trop serrer.
9
8
8
9
GREYSON / HUNTINGTON / LANSING
ENTRYWAY BENCH & MIRROR
BANC D’ENTRÉE ET MIROIR

10/10
ASSEMBLY INSTRUCTIONS / INSTRUCTIONS D’ASSEMBLAGE
NOTICE / AVIS
Please use a screwdriver for the screws. The screwdriver is not included in the pack.
SVP utilisez un tournevis pour les vis. Le tournevis n’est pas fourni avec le produit.
Please use a screwdriver for the screws. The screwdriver is not included in the pack.
SVP utilisez un tournevis pour les vis. Le tournevis n’est pas fourni avec le produit.
STEP 9 - Mounting Wall Shelf to Wall
1. Align the top of the Wall Mount Bar E with the bottom of the angled bracket on the back
of the Mirror D .
2. Gently slide the down on to the Wall Mount Bar E .Mirror D
ÉTAPE 9 - MONTAGE DE LA TABLETTE AU MUR
1. Alignez le dessus de la barre de montage mural E avec la partie inférieur du support à angle
au dos du miroir D .
2. Faites glisser délicatement le miroir D vers le bas, sur la barre de montage mural E .
GREYSON / HUNTINGTON / LANSING
ENTRYWAY BENCH & MIRROR
BANC D’ENTRÉE ET MIROIR
/