Electrolux ESL67070R User manual
- Category
- Dishwashers
- Type
- User manual
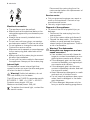
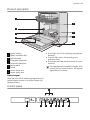
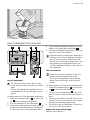
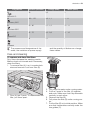
Electrolux ESL67070R is a dishwasher designed to make dishwashing effortless and efficient. It features a water softener with electronic adjustment levels, ensuring optimal cleaning results even in hard water areas. The rinse aid dispenser can be activated or deactivated, and the multi-tab function allows for the use of combined detergent tablets. The LED display provides clear information about the selected washing program, remaining time, and any malfunctions. The dishwasher also includes a red optical signal that projects onto the floor to indicate program status.
Electrolux ESL67070R is a dishwasher designed to make dishwashing effortless and efficient. It features a water softener with electronic adjustment levels, ensuring optimal cleaning results even in hard water areas. The rinse aid dispenser can be activated or deactivated, and the multi-tab function allows for the use of combined detergent tablets. The LED display provides clear information about the selected washing program, remaining time, and any malfunctions. The dishwasher also includes a red optical signal that projects onto the floor to indicate program status.


-
 1
1
-
 2
2
-
 3
3
-
 4
4
-
 5
5
-
 6
6
-
 7
7
-
 8
8
-
 9
9
-
 10
10
-
 11
11
-
 12
12
-
 13
13
-
 14
14
-
 15
15
-
 16
16
-
 17
17
-
 18
18
-
 19
19
-
 20
20


Electrolux ESL67070R User manual
- Category
- Dishwashers
- Type
- User manual
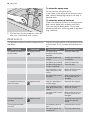
Electrolux ESL67070R is a dishwasher designed to make dishwashing effortless and efficient. It features a water softener with electronic adjustment levels, ensuring optimal cleaning results even in hard water areas. The rinse aid dispenser can be activated or deactivated, and the multi-tab function allows for the use of combined detergent tablets. The LED display provides clear information about the selected washing program, remaining time, and any malfunctions. The dishwasher also includes a red optical signal that projects onto the floor to indicate program status.
Ask a question and I''ll find the answer in the document
Finding information in a document is now easier with AI