Page is loading ...

1
PLEASE READ THIS MANUAL CAREFULLY BEFORE USING YOUR
MULTICOOKER AND KEEP IT FOR FUTURE REFERENCE.
Model MCSMC10S7
Multicooker
User’s Manual

2
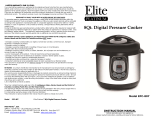
PRODUCT REGISTRATION
Thank you for purchasing a Magic Chef® product. The first step to protect your new product is to complete the product
registration on our website: www.mcappliance.com/register. The benefits of registering your product include the following:
1. Registering your product will allow us to contact you regarding a safety notification or product update.
2. Registering your product will allow for more efficient warranty service processing when warranty service is required.
3. Registering your product could act as your proof of purchase in the event of insurance loss.
Once again, thank you for purchasing a Magic Chef product.

3
CONTENTS
PRODUCT REGISTRATION . . . . . . . . . . . . . . . . . . . . . . . . . . . . . . . . . . . . . . . . . . . . . . . . . . . . . 2
PRECAUTIONS . . . . . . . . . . . . . . . . . . . . . . . . . . . . . . . . . . . . . . . . . . . . . . . . . . . . . . . . . . . . . . . 4
IMPORTANT SAFETY INSTRUCTIONS . . . . . . . . . . . . . . . . . . . . . . . . . . . . . . . . . . . . . . . . . . . 5
SPECIFICATIONS. . . . . . . . . . . . . . . . . . . . . . . . . . . . . . . . . . . . . . . . . . . . . . . . . . . . . . . . . . . . . . 7
PARTS AND FEATURES . . . . . . . . . . . . . . . . . . . . . . . . . . . . . . . . . . . . . . . . . . . . . . . . . . . . . . . . 8
ABOUT THE MAGIC CHEF MULTICOOKER . . . . . . . . . . . . . . . . . . . . . . . . . . . . . . . . . . . . . . .10
BEFORE EACH USE. . . . . . . . . . . . . . . . . . . . . . . . . . . . . . . . . . . . . . . . . . . . . . . . . . . . . . . . . . . .12
OPERATION INSTRUCTIONS. . . . . . . . . . . . . . . . . . . . . . . . . . . . . . . . . . . . . . . . . . . . . . . . . . 13
CARE AND MAINTENANCE . . . . . . . . . . . . . . . . . . . . . . . . . . . . . . . . . . . . . . . . . . . . . . . . . . . 23
TROUBLESHOOTING. . . . . . . . . . . . . . . . . . . . . . . . . . . . . . . . . . . . . . . . . . . . . . . . . . . . . . . . 24
LIMITED WARRANTY . . . . . . . . . . . . . . . . . . . . . . . . . . . . . . . . . . . . . . . . . . . . . . . . . . . . . . . . 26

4
PRECAUTIONS
EXPLANATION OF SYMBOLS
WARNING
Hazards or unsafe practices which COULD result in severe personal injury or death.
CAUTION
Hazards or unsafe practices which COULD result in minor personal injury.
WARNING: Read and understand all safety precautions. Failure to follow all instructions described in this user
manual may result in electric shock, fire and/or serious personal injury. The warnings, cautions and instructions
discussed in this user manual cannot cover all possible conditions and situations that may occur.

5
IMPORTANT SAFETY INSTRUCTIONS
WARNING: When using your Magic Chef Multicooker, basic safety precautions should always be followed.
1. Read all instructions before using the appliance.
2. This product is for household use only. DO NOT use outdoors.
3. This unit should NEVER be operated by children and extreme caution should be used when children are
present.
4. This appliance cooks under pressure. Improper use may result in scalding injury. Be sure unit is properly
closed before operating. (Refer to “Cooking Preparation” on page 14).
5. DO NOT open the multicooker until the unit has cooled and all internal pressure has been released. If the
handle is difficult to slide open, this indicates that the cooker is still pressurized – DO NOT force open. Any
pressure in the cooker can be hazardous. (Refer to “Cooking Preparation” on page 14).
6. DO NOT use multicooker for anything other than its intended use.
7. DO NOT place explosive materials in the multicooker.
8. DO NOT place unit on or near a hot gas or electric burner.
9. DO NOT place unit in a heated oven.
10. DO NOT operate the unit on an unstable surface.
11. DO NOT operate unit near water or fire.
12. DO NOT expose the unit to direct sunlight.
13. NEVER operate the unit on flammable materials, such as newspapers or paper plates.
14. DO NOT immerse cord or plug in water.
15. Keep cord away from heated surfaces.
16. DO NOT let cord hang over the edge of tables or counters.
17. DO NOT operate this appliance if it has a damaged cord or plug.
18. Unplug appliance from outlet when not in use, before removing parts, and before cleaning.
19. If any part of the unit is damaged, DO NOT use until it has been repaired by a competent service technician.
20. Only authorized personnel should repair the unit to reduce the risk of fire and electric shock.
21. NEVER use unauthorized accessories or replacement parts, since they may cause injury.
22. DO NOT use any cooking containers in the multicooker that are not heat-proof.
23. Extreme caution should be used when moving the unit containing hot liquids or hot oil.
24. CAUTION: to reduce the risk of electrical shock, cook only in the provided removable container (inner
cooking pot).
25. DO NOT touch hot surfaces. Use handles or knobs.
26. NEVER cover the pressure valves.
27. NEVER place face near exhaust or float valve.
28. ALWAYS use oven mitts when releasing pressure or when opening the lid.
29. Before each use, check the anti-block shield, float valve, and exhaust valve for obstruction and clogging.
Wipe the heating plate and inner pot surfaces to ensure they are free from debris. Make sure the exhaust
valve is in the correct spot.

6
30. NEVER deep fry or pressure fry in the unit with oil. It is dangerous and may cause a fire or serious damage.
31. The total amount of food and water should NEVER exceed the MAX level marked on the inner pot. It is
recommended to not fill the unit over
2
3
full. Some foods such as rice or dried vegetables expand during
cooking and should not be filled over the halfway point on the inner pot. Overfilling may cause the vent
pipe to clog and develop excess pressure. This could cause spillage and may damage the unit. (Refer to
“Cooking Preparation” on page 14).
32. To disconnect, press the Cancel button until the unit turns off and remove the plug from the wall outlet.
33. DO NOT move this product or attempt to remove the lid when in operation.
34. NEVER place your hands or face over the exhaust/float valves during use as it may cause scalding.
35. After cooking, use extreme caution when opening the lid. ALWAYS open the lid away from you to avoid skin
contact with any heat or steam. Serious burns can result from steam inside the unit.
36. Once cooking is complete, DO NOT touch the inner pot.
37. This appliance can be used by persons with reduced physical, sensory, or mental capabilities, or lack of
experience and knowledge if they are under the supervision of a responsible person or have been given
proper instruction.

7
SPECIFICATIONS
Height 12.8” (325 mm)
Width 13.0” (330 mm)
Depth 12.4” (315 mm)
Caliber of Inner Pot 8.7” (221 mm)
Capacity 6 Quart
Power Supply 120V~60Hz
Rated Power 1000W
Working Pressure 70kPa
Steam Release Pressure Limit 17.4 psi/120kPa
12.8” (325 mm)
12.4” (315 mm)
13.0” (330 mm)

8
PARTS AND FEATURES
PRODUCT PARTS & ACCESSORIES
a
d
c
i
m
n
o
p
g
h
b
e
j
k
l
f
Figure 1
r
s
t
q
a. Handle Cover
b. Cover
c. Exhaust Valve
d. Float Valve
e. Gasket
f. Inside of Cover
g. Gasket Ring of Float Valve
h. Anti-Block Shield
i. Inner Pot
j. Exterior Pot
k. Control Panel
l. Base
m. Condensation Collector
n. Handle
o. Housing
p. Rice Paddle Shelf
q. Stainless Steel Rack
r. Rice Scoop
s. Soup Scoop
t. Measuring Cup

9
CONTROL PANEL
Figure 2

10
ABOUT THE MAGIC CHEF MULTICOOKER
The Magic Chef Multicooker is a programmable 7-in-1 multicooker that combines the function of a slow cooker,
multicooker, sauté, rice cooker, steamer, yogurt maker, and food warmer. Using a multicooker cooks food faster
so that it doesn’t dry out and has better texture. Cooking with pressure reduces cooking time by up to 70% which
saves energy. The Fish and Steam functions use a lower pressure, which avoids overcooking delicate foods. The
multicooker is also UL certified.
FEATURES
• 14 cooking methods: Rice, Multigrain, Soup, Meat/Stew, Poultry, Fish, Steam, Beans/Chili, Yogurt, Pasteurize,
Porridge, Keep Warm, Slow Cook, and Sear
• Delay the start time of your cooking up to 24 hours so your meal is ready right on time
• Up to 90 minutes of manual cooking time to customize your Magic Chef Multicooker to your favorite recipes
• Once your selected program is completed, the keep warm function automatically starts and will keep food
warm for up to 12 hours
• Dishwasher safe stainless steel inner pot and steam rack
• Ability to adjust cooking time of presets
SAFETY FEATURES
a. Anti-Block Shield: The Anti-Block Shield is designed to prevent any blockage to the exhaust valve.
b-1. Temperature Limit Protection: If the temperature of the inside pot is too high, the unit’s thermal fuse will
automatically turn the unit off.
b-2. Thermal Limit Protection: When cooking without food, the temperature limiter mechanism will start to
turn the power off.
Figure 3
a
e
d
f
g
h
b
c

11
c. Over Current Protection: Turns off the unit if the current reaches an excessive or dangerous level.
d. Pressure Limit Protection: Once the pressure is above 110kPa, exhaust valve will automatically release steam
to keep the pressure down.
e. Over Pressure Self Release: If the pressure is abnormally too high, the inner pot will move down to leave a
gap between the sealing gasket and pot to release the pressure.
f. Open and Close Lid Safety Device: If there is pressure inside the cooker, then the lid will be set to the lock
position to prevent opening.
g. Micro Switch for Open Guard: Only when the lid is closed properly, will the pressure begin to generate.
h. Pressure Control Safety Device: Balances the pressure inside the pot between 60kPa to 80kPa through
pressure switch.

12
BEFORE EACH USE
1. Make sure the float valve (Figure 4), anti-block shield (Figure 5), and gasket are free of obstruction and
mounted correctly into place.
Disassembly and Assembly of Anti-Block Shield
Disassembly:
Screw upward
counterclockwise.
Assembly:
Screw downward
clockwise.
Anti-Block Shield
2. Before inserting the inner pot to the outer pot, remove debris and water from both.
3. Wipe the outer casing with a soft cloth if it is wet.
4. Install the condensation collector. On the back of the multicooker under the exhaust valve platform, firmly
press the condensation collector in place at the top of the base. This is used to collect excess condensation
from the lid.
Figure 4 Figure 5
Figure 6
Structure Diagram
of Float Valve
Condensation
Collector

13
OPERATION INSTRUCTIONS
STATES OF THE MAGIC CHEF MULTICOOKER
• Standby: The cooker is in standby when it is plugged in and the display will show “- - - -”.
• Preheat: Preheating occurs when the cooker is warming up to the correct temperature and pressure. This
happens after you select your cooking time and before the cooker starts the actual cooking time. Lines on
the outside of the display will circle around continuously.
• Operating: Once the preheat time is complete, the Magic Chef Multicooker will begin to cook. The display
will show the appropriate cook time.
LID OPENING
1. Before opening the lid, make sure the multicooker has finished cooking. If the cooking program is still on,
then press the “Cancel” button to stop it.
WARNING: DO NOT open the multicooker until the unit has cooled and all internal pressure has been
released. If the handle is difficult to slide open, this indicates that the cooker is still pressurized. DO NOT
force open. Any pressure in the cooker can be hazardous. (Refer to page 14.)
2. There are two ways to release the pressure from the cooker, the Natural Release and the Quick Release.
• Natural Release: Once cooking is complete, the pressure will release on its own. The natural release
time can be anywhere from 10-25 minutes. All the pressure is released once the float valve has fallen.
You can then open the lid. Placing a wet towel on the lid can help the multicooker cool down faster.
• Quick Release: If you want to release the pressure immediately after it is done cooking, then use
the quick release option. Once the cooker stops cooking, slide the exhaust valve to “Venting” to
release the pressure. All the pressure is released once the float valve has fallen. DO NOT use the
Quick Release function for foods that have a lot of starch or when a lot of liquid is in the cooker. Use
natural release for these foods. Additionally, you can use a combination of Natural Release and Quick
Release. This can be helpful if you need the extra cooking time with the Natural Release, but don’t
want to wait the full time for the pressure to be released.
WARNING:
• ALWAYS use oven mitts when releasing pressure or when opening the lid.
• After cooking, use extreme caution when opening the lid. ALWAYS open the lid away from you to
avoid skin contact with any heat or steam. Serious burns can result from steam inside the unit.
• DO NOT place face or hands by the holes on top of the exhaust valve. The steam can cause scalding.
• DO NOT try to remove the float valve or exhaust valve when steam is escaping.
Figure 7
3. Place your hand on the handle and turn the lid to the unlock position and lift. Place the exhaust position to
“Venting” when opening the lid, regardless of what pressure release option you used.
4. Once the lid is detached, you can hold it above the platform where the condensation collector is. The
excess condensation will fall into the collector and not on your food.

14
Figure 8
Figure 9
COOKING PREPARATION
1. Open the lid cover in a counter clockwise rotation until the arrow on the lid is in line with the arrow on the
base. Then lift the cover.
2. Ensure that all the parts on the lid are mounted properly including the float valve, exhaust valve, rubber
gasket, and anti-block shield. Check the float valve and exhaust valve for any obstructions. The rubber gasket
should be firmly inside its holding rack and the float valve should be able to move up and down easily.
3. Take the stainless steel inner pot out of the base and fill with the
food and liquid you want to cook. The total amount of food and
liquid should NEVER exceed the maximum level marked on the inner
pot. It is recommended to not fill the inner pot over
2
3
full. Some
foods that expand when they are cooked like rice, beans, or dried
vegetables, should not fill more than ½ of the inner pot. Over filling
may cause the vent pipes to clog which develops excess pressure
that could lead to spillage, damaging the unit, or personal injury.
(Refer to Figure 8.)
4. Remove any foreign objects from the multicooker and wipe the
inner pot and inside of the multicooker with a dry cloth. Place the
inner pot inside the multicooker and rotate slightly to ensure it has
good contact with the heating element. (Refer to Figure 9.)
5. If your desired cooking preset requires, place the lid on the multicooker (see the Preset Guidelines below).
Hold the handle and rotate the handle 30° clockwise until it locks into place, making a sound, and aligning
the arrows on the lid and base so it is the position. If the lid is not shut properly, the symbol will
light up under the Magic Chef name. (Refer to Figure 10.)
Figure 10
Figure 12Figure 11
6. For presets requiring a lid, position the exhaust valve in the correct position. When the silver float valve is up,
there is pressure inside the cooker. When it is down, there is no pressure inside the cooker. The exhaust valve can
be in two positions. The “Sealing” position maintains airtight cooking conditions and is used for most presets. The
“Venting” position allows steam to be constantly released. This position can also be used for a quick release to
allow the pressure to escape immediately, which can be helpful once cooking is complete so you don’t have to
wait for the pressure to release. See below for information on the exhaust valve position. (Refer to Figure 11 and 12.)
Exhaust valve
in venting position:
Exhaust valve
in sealing position:

15
PRESET GUIDELINES
Preset
Time (minutes)
Lid
Exhaust Valve
Position
Temperature
(°F)
Less Normal More
Soup 20 30 40 Yes Sealing 239
Poultry 10 20 30 Yes Sealing 239
Meat/Stew 25 35 45 Yes Sealing 239
Bean/Chili 30 35 40 Yes Sealing 239
Sear - 30 - No N /A 320
Rice - 14 ~ 18 - Yes Sealing 239
Multigrain 20 35 50 Yes Sealing 239
Fish 3 5 8 Yes Sealing 239
Porridge 10 20 30 Yes Sealing 239
Steam 5 15 25 Yes Sealing 239
Yogurt Adjustable Range: 4 ~ 8 hours Yes Sealing 107
Slow Cook Adjustable Range: 2 ~ 12 hours Optional Sealing/Venting 203
Keep Warm Adjustable Range: 2 ~ 12 hours Optional Sealing/Venting 158
Manual Adjustable Range: 0 ~ 90 minutes Yes Sealing 239
PRESSURE COOKING
Pressure cooking is used for the Rice, Multigrain, Soup, Meat/Stew, Poultry, Fish, Steam, Beans/Chili, Porridge, and
Manual presets.
WARNING: Please see all important safety instructions on page 5-6 prior to utilizing the unit.
1. Finish the “Cooking Preparation” according to page 14 of this manual.
2. Plug the Magic Chef Multicooker in. It will make one beep and the display will read “- - - -”, which means the
multicooker is in a standby state.
3. Select a cooking function. Once the button is pressed, the light above your selection will light up.
• If you want to select another function, you have 10 seconds to do so.
4. Once the function key is selected, choose the cooking time. See below for Manual instructions. The Magic
Chef Multicooker automatically defaults to “Normal” cooking time. To change:
• Click the “Adjust” button to switch between designated Normal, Less, and More cooking time, which
is indicated on the control panel. For the Rice function, you cannot change the time because it
automatically adjusts for the content inside.
• Manual Time Selection: To select the time for Manual, press the “-” or “+” buttons to select the time.
The maximum time you can select is 90 minutes.
5. After 10 seconds, there will be 3 beeps which indicate the program has started. Alternatively, you can press
the “Start” button to begin cooking immediately.
• The display will show lines circling around the outside of the display and the multicooker will begin
to preheat. During this time, it is normal for some steam to come out through the float valve until it
rises up. Preheating times range.

16
• When the multicooker reaches the working pressure, the display panel will show the programmed
cooking time, which counts down. There should be no steam coming out of the lid. There may be
some steam coming out from the exhaust valve and some spurts of water, which is normal.
• There also may be soft clicking sounds which are from the unit switching the heating element on and off.
• If you want to cancel the cooking program, press the “Cancel” button.
6. Once the cooking cycle is finished, the multicooker will beep and automatically go into the Keep Warm
state. The display will read “L0:00”. It will then begin to count up to a maximum of 12 hours. If the Keep
Warm cycle reaches 12 hours, it will turn off and go into standby state.
• It is not recommended to keep anything in the Keep Warm state for more than 8 hours.
7. To end the Keep Warm state, press “Cancel”. Follow the Lid Opening instructions.
SLOW COOKING
1. Finish the “Cooking Preparation” according to page 14 of this manual. The lid is optional for slow cooking.
2. Plug the Magic Chef Multicooker in. It will make one beep and the display will read “- - - -”, which means the
multicooker is in a standby state.
3. Press the “Slow Cook’ button.
4. If you want to change the cooking time, press the “– or +” buttons. Press the “Hours/Minutes” button to
switch between the hours and minutes. Time will change in 10 minute intervals and range from 2 hours to 12
hours and 50 minutes.
5. Cooking will automatically start 10 seconds after the last button is pressed or you can press the “Start”
button to immediately begin cooking.
6. Once the cooking cycle is finished, the multicooker will beep and automatically go into the Keep Warm
state. The display will read “L0:00”. It will then begin to count up to a maximum of 12 hours. If the Keep
Warm cycle reaches 12 hours, it will go into standby state.
• It is not recommended to keep anything in the Keep Warm state for more than 8 hours.
7. To end the Keep Warm state, press “Cancel”. Follow the Lid Opening Instructions.
DELAYED COOKING
The Magic Chef Multicooker has a timer function which delays the cooking start time. It can delay a minimum of
10 minutes and a maximum of 24 hours. The time you set will be the time until the unit STARTS cooking, you must
factor in the time it takes to cook and time for the pressure to release so that your food is ready on time. You
cannot use the delay timer with the Keep Warm, Yogurt, Slow Cook or Sear functions. To program the delayed
timer, use the following directions.
1. Finish the “Cooking Preparation” according to page 14 of this manual.
2. Within 10 seconds after selecting your program, press the “Delay” button. Use the – and + buttons to switch
the time. Press the “Hours/Minutes” button to switch between setting the hours and minutes of the timer.
3. 10 seconds after the last key is pressed, the delay timer will begin or you can press the “Start” button to
begin immediately. The time on the display panel counts down and the light above “Delay” will be lit up.
4. To cancel the Delay Timer function, press the “Cancel” button at any time.
5. The Magic Chef Multicooker will begin cooking once the time reaches 0:00. Once cooking is complete, the
cooker will go into the Keep Warm state.

17
• It is not recommended to use the Delay Timer function for perishable foods like meat, poultry, and
fish, as they may go bad when left at room temperature for a long time.
• It is not recommended to use the Delay Timer for rice. Rice may be excessively soft due to soaking in
the water for a long time.
• It is not recommended for porridge, oatmeal, and other foamy or sticky foods. The food may can
block the float valve and cause it to remain open which leads to food overflowing.
SEAR
1. Finish the “Cooking Preparation” according to page 14 of this manual but DO NOT put the lid on.
2. Plug the Magic Chef Multicooker in. It will make one beep and the display will show “- - - -”, which means
the multicooker is in a standby state.
3. Press the “Sear” button. The longest time you are able to sear is 30 minutes.
4. After 10 seconds, the cook time will begin or you can press “Start”. The time will begin to countdown once
the program starts.
5. When cooking is finished, the cooker will beep and go into the Keep Warm state. The display will read
“L0:00”. It will then begin to count up to a maximum of 12 hours. If the Keep Warm cycle reaches 12 hours, it
will go into standby state.
• It is not recommended to keep anything in the Keep Warm state for more than 8 hours.
• If additional searing time is needed, you can press the “Cancel” button and then press the “Sear”
button again.
6. To end the Keep Warm state, press “Cancel”.
KEEP WARM
Automatic Keep Warm
• The Keep Warm function starts automatically once cooking is complete except for the Yogurt preset.
• The maximum time is 12 hours. It is not recommended to go over 8 hours as the texture of the food may
change.
• Cooks at a temperature of 158°F.
• Display will read “L0:00” and will count up showing how long it has been on Keep Warm.
• Once the maximum time is reached, the Magic Chef Multicooker will go into Standby mode.
Manual Keep Warm
• The Keep Warm function can also be used on its own by simply pressing the “Keep Warm” button.
• Then select the time you want to use the function. This can range from 2 hours to 12 hours and 50 minutes.
It is not recommended to go beyond 8 hours as the texture of the food may change.
• Cooks at a temperature of 158°F.
• The display will show your selected time and will count down.
• Once the maximum time is reached, the Magic Chef Multicooker will go into Standby mode.

18
YOGURT
You can make yogurt in your Magic Chef Multicooker by using glass bottles. Make sure they are heat-proof.
There are two steps involved to make yogurt. The first step is to pasteurize the milk by heating it to 180°F which
sanitizes the milk and kills pathogens and bacteria. The second step is to let it cool to 115°F, add the yogurt starter,
and then press the yogurt button to actually make the yogurt.
1. Finish the “Cooking Preparation” according to page 14 of this manual.
2. Pour 1 cup of water in the inner pot and place metal rack inside.
3. Pour milk in your glass containers leaving some room to add the yogurt starter later on. Then place your
glass containers on the metal rack.
4. Close the lid and turn the exhaust valve to “Sealing”.
5. Press the “Manual” button and then press the “-” button to change the time to 1 minute. Press the “Start”
button or wait 10 seconds to begin cooking. This will boil the milk to 180°F.
6. Lines on the outside of the display will circle indicating it is preheating. Once the preheat time is complete,
it will show the 1 minute of cook time. Use the natural steam release method.
7. Allow the milk to cool to below 115°F.
8. Add the yogurt starter or fresh yogurt to the milk and stir. Place the containers back into the inner pot on
the metal rack.
9. Put the lid on and turn the exhaust valve to “Sealing”. Press the “Yogurt” button and use the “-” and “+”
buttons to select the correct time according to your recipe or yogurt starter.
10. Press “Start” or wait 10 seconds for the program to begin automatically.
11. When the program is complete, it will beep and then go into standby state.
TEST RUN
Doing a test run is a good way for you to get familiar with you Magic Chef Multicooker. This only takes about 15
minutes and can clean the unit of any residue. This is not necessary but is recommended.
WARNING: Please see all important safety instructions on page 5-6 prior to utilizing the unit.
1. Follow the “Cooking Preparation” steps on page 14.
2. Before closing the lid, pour 3 cups of water into the inner pot and then shut the lid. Position the exhaust
valve to the “Sealing” position.
3. Press the “Steam” button and then press the “Adjust” button until the light above “less” is lit up.
4. In 10 seconds the multicooker will begin to cook or you can press the “Start” button to begin cooking
immediately.
5. The Magic Chef Multicooker will begin the preheating cycle. It is normal for steam to come out during this
time. The float valve will rise up and seal the cooker. Once the working pressure is reached, the steaming
time will begin to count down.
6. When the program is complete, the unit will beep and then begin the “Keep Warm” mode. The timer will
display “L0:00” and will count up showing how long it has been in “Keep Warm”.
7. To stop the “Keep Warm” mode, press the “Cancel” button. You can use the Natural Release or the Quick
Release to release the pressure.

19
TIME ADJUSTMENTS
FOR HIGH ALTITUDE
The Magic Chef Multicooker uses
pressure to cook, which adds
pressure to the current atmospheric
pressure. Since different altitudes
have different pressures, places with
higher altitudes will have to increase
the cooking time. The chart to the
right can be used as a guideline to
adjust for the different altitudes.
Feet above Sea Level Percentage of Time to Increase By
2,000 feet 5%
3,000 feet 10%
4,000 feet 15%
5,000 feet 20%
6,000 feet 25%
7,000 feet 30%
8,000 feet 35%
9,000 feet 40%
10,000 feet 45%
COOK TIME GUIDELINES
Knowing how long to cook food, how much liquid to add, what steam release method to use, etc. can be
confusing at first. These cooking guidelines are just a reference but they can help you get used to your
multicooker. If you are using a recipe, follow the instructions for their recommended cooking time, as different
ingredients in the recipe may affect the cooking time. Also, regardless of what you are cooking, there has to be
some sort of liquid in the multicooker. If you are cooking food that is frozen, allow excess time to cook.
RICE, MULTIGRAIN, & PORRIDGE
You should use the natural release option for the rice, multigrain, and porridge functions so foam doesn’t get
into the valve. Also, NEVER fill the multicooker up more than halfway when cooking rice, grains, or other food
that expands in size. To prevent the froth that these foods create, add a little cooking oil, butter, or fat (1-2
tablespoons) to help keep the starch down so it doesn’t foam. Some rice and grains require you to rinse them
before cooking so make sure to look at the directions before cooking.
The rice program is fully automated for cooking rice. The cook time will range between 14 and 18 minutes because
it automatically adjusts the time depending on how much you are cooking. Only the pressure keeping time will
be shown once the pressure is reached. The total cooking time will not be shown, so you have to factor in the
preheat time and steam release time.
The multigrain function is used for cooking various grains and is best for harder grains. The porridge function is
used for making grains, cereal, or legume boiled in water, broth, or milk. Oatmeal and congee are a couple types
of porridge you can make using this function.
Rice
Liquid Amount (Cups)
for 1 Cup of Rice
Time
(minutes)
Arborio rice (risotto) 2 5
Basmati rice 1 ½ 4
Couscous 2 5 ~ 8
Jasmine rice 1 4
Kamut, whole 3 10
Millet
1
2
3
10
Quinoa 2 6
White rice 1 ½ 8
Multigrain
Liquid Amount (Cups)
for 1 Cup of Rice
Time
(minutes)
Barley, pearl 4 25
Barley, pot 3 25
Brown rice 2 35
Spelt berries 3 15
Wheat berries 3 35
Wild rice 3 25

20
Soup Time (minutes)
Baked potato (creamy) 4
Butternut squash 10 ~ 15
Chicken enchilada 5
Chicken noodle 5 ~ 8
Chicken soup (broth based) 8
Cream of chicken and wild rice 5
Lentil 8
Minestrone 4
New England clam chowder 5
Tomato basil (creamy) 5 ~ 8
SOUP
When cooking creamy soups, thicken the
soups after the pressure cooking is finished.
If you add it before, there is very little
liquid that can evaporate and the cooker
will not reach pressure. To save time, you
can make the roux separately and add it
in once the soup is done cooking. It is also
best to add milk, cheese, and cream once
the soup is done cooking because they can
scorch or curdle in the multicooker. Once
the soup is done cooking, wait 10 minutes
then do a quick release.
Porridge
Liquid Amount
(Cups) for 1
Cup of Rice
Time
(minutes)
Congee, thick consistency 4 ~ 5 15 ~ 20
Congee, thin consistency 6 ~ 7 15 ~ 20
Oats, quick cooking
1
2
3
6
Oats, steel-cut
1
2
3
10
Polenta, coarse 4 8
Polenta, fine 3 5
Porridge 6 15
Beef Time (minutes)
Meat Balls 10 ~ 15
Oxtail 40 ~ 50
Ribs 25 ~ 30
Shanks 25 ~ 30
Steak, rump, pot roast,
round, chuck, blade, brisket
Large: 35 ~ 40
Small: 25 ~ 30
Stew Meat 15 ~ 20
MEAT/STEW & POULTRY
When cooking meat and poultry, it is important not to add too much liquid to the multicooker unless you are
braising. This can cause the meat to lose flavor, texture, and nutrients. Add about 1 cup of liquid when you are
cooking meat for 45 minutes or less and about 1 ½ cups of liquid if you are cooking longer. To add even more
flavor, brown your meat in the Sear function before cooking it. It is usually best to use the Natural Release
method.
Poultry Time (minutes)
Breast, boneless 5 ~ 8
Chicken strips 5 ~ 8
Chicken, bone in 8 ~ 10
Chicken, whole 20 ~ 25
Ground chicken 5 ~ 10
Turkey, breast 20
Turkey, legs 25 ~ 30
Turkey, whole 25 ~ 30
/