Page is loading ...

THIS MANUAL CONTAINS IMPORTANT INFORMATION REGARDING SAFETY, OPERATION, MAINTENANCE AND
STORAGE OF THIS PRODUCT. BEFORE USE, READ CAREFULLY AND UNDERSTAND ALL CAUTIONS, WARNINGS,
INSTRUCTIONS AND PRODUCT LABELS. FAILURE TO DO SO COULD RESULT IN SERIOUS PERSONAL INJURY
AND/OR PROPERTY DAMAGE.
IF YOU SHOULD HAVE ANY QUESTIONS OR EXPERIENCE A PROBLEM WITH YOUR SNAP-ON
PRODUCT, DO NOT RETURN THIS PRODUCT TO THE STORE. PLEASE CALL OUR CUSTOMER SERVICE
DEPARTMENT AT 1-800-423-3598. BEFORE YOU CALL, HAVE THE FOLLOWING INFORMATION AVAILABLE:
MODEL No., DATE PURCHASED AND STORE LOCATION. AN ALLTRADE REPRESENTATIVE CAN RESOLVE YOUR
PROBLEM OVER THE PHONE.
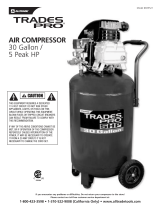
3 GALLON AIR COMPRESSOR
INSTRUCTION MANUAL
MODEL #240039

1
TABLE OF CONTENTS
CONGRATULATIONS ........................................................................................... 1
SPECIFICATIONS ................................................................................................ 2
INTRODUCTION .................................................................................................. 2
SAFETY ALERT .................................................................................................... 3
RECOGNIZE SAFETY SYMBOLS, WORDS AND LABELS ............................. 3
UNPACKING & INSPECTION .............................................................................. 4
SAFETY WARNINGS ............................................................................................ 4-8
GENERAL SAFETY WARNINGS .................................................................... 4-8
INSTALLATION AND LOCATION ......................................................................... 8-9
GROUNDING INSTRUCTIONS ............................................................................. 9-11
EXTENSION CORDS ..................................................................................... 10-11
COMPRESSOR FEATURES .................................................................................. 12-14
OPERATING THE AIR COMPRESSOR .................................................................. 15-18
INITIAL SETUP/BREAK-IN PROCEDURE ...................................................... 15-16
STARTUP ..................................................................................................... 16
SHUTDOWN AND STORAGE ........................................................................ 17
MAINTENANCE AND CLEANING ......................................................................... 17-19
TROUBLESHOOTING GUIDE ............................................................................... 19-23
PARTS LIST ......................................................................................................... 24-26
PARTS DIAGRAM ................................................................................................ 27
LIMITED WARRANTY .......................................................................................... 28-31
CONGRATULATIONS!
Thanks for choosing this product. At Alltrade, our aim is to provide you with qual-
ity products at an affordable price, and we want you to be totally satisfied with
your product and our Customer Service. If any help and advice is needed, please
contact us at 1-800-423-3598. Properly cared for, this product will give you many
years of satisfaction.

SPECIFICATIONS
SPECIFICATIONS
Two Pole Induction Motor 3450 RPM
Power 120V, 60 Hz, 8.6 Amps
Air Delivery 3.6 SCFM output @ 40 PSI
2.5 SCFM output @ 90 PSI
Maximum Pressure 125 PSI
Duty Cycle 50%
1.5 Peak HP / 1 Running HP
3 Gallon (11.35 liter) Air Tank
Oil Free Direct Drive Pump
High Flow Regulators for Precision Air Flow Control
Tank and Outlet Pressure Gauges
Quick Connect Coupler
DUTY CYCLE:
This air compressor pump is capable of running continuously. However, in order to prolong the life
of your air compressor, it is recommended that a 50% to 75% average duty cycle be maintained.
Duty cycle refers to the percentage of time a compressor can safely run within a given amount of
time expressed as a ratio. Example: Compressors are typically rated at a 50% duty cycle, meaning
that the compressor motor can run about 50% of the total time it is being used to supply air to a tool.
During the ON time, the motor is running to pressurize the tank. During the OFF time, the motor is
stopped and the tools are running off on the pressurized air stored in the tank. If your air tools are
draining pressure off of the tank too quickly, the compressor motor must run more than 50% of the
time the compressor is in use. This can lead to overheating and will significantly shorten the life of
the compressor.
INTRODUCTION
This instruction manual is intended for your benefit. Please read and follow the safety, instal-
lation, maintenance and troubleshooting steps described within to ensure your safety and
satisfaction. The contents of this instruction manual are based upon the latest product infor-
mation available at the time of publication. The manufacturer reserves the right to make product
changes at any time without notice.
2

SAFETY ALERT
Read and understand this entire instruction manual
before attempting to assemble, install, operate or maintain this air compres-
sor. Failure to comply with the instructions may result in serious personal injury and/or
property damage!
SAVE THESE INSTRUCTIONS FOR
FUTURE REFERENCE.
RECOGNIZE SAFETY SYMBOLS, WORDS AND LABELS
The safety instructions provided in this manual are not intended to cover all possible conditions
and practices that may occur when operating, maintaining and cleaning power equipment.
Always use common sense and pay particular attention to all the DANGER,
WARNING, CAUTION and NOTE statements of this manual.
DANGER
WARNING
CAUTION
NOTE
This is the safety alert symbol. It is used to alert you to
potential personal injury hazards. Obey all safety mes-
sages that follow this symbol to avoid possible injury or
death.
DANGER indicates an imminently hazardous
situation which, if not avoided, will result in death or
serious injury.
WARNING indicates a potentially hazardous
situation which, if not avoided, could result in death or
serious injury.
CAUTION indicates a potentially hazardous
situation which, if not avoided, may result in minor or
moderate injury.
CAUTION used without the safety alert symbol indicates
a potentially hazardous situation which, if not avoided,
may result in property damage.
NOTE provides additional information that is useful for
proper use and maintenance of this tool. If a NOTE is
indicated make sure it is fully understood.
3

UNPACKING & INSPECTION
See page 15 for detailed unpacking and installation procedures. After opening the carton, unpack
your new air compressor and related parts & accessories. Please inspect it carefully for any damage
that may have occurred during transit. Please check it against the photograph on carton. If any
parts are missing, please contact our Consumer Helpline: 1-800-423-3598. E-Mail us at info@
alltradetools.com.
Do not operate this air compressor if damaged during
shipment, handling or misuse. Damage may result in bursting, which
can cause serious injury or property damage. All damaged parts must be
repaired or replaced as needed prior to operating this air compressor.
Check to see that all nuts, bolts and fittings are secure before putting this air com-
pressor into service. If you have any questions, or require assistance with dam-
aged or missing parts, please contact our Consumer Helpline: 1-800-423-3598.
E-Mail us at [email protected]
Please have the serial number, model number, date of purchase, and parts list (with missing
parts identified) available for reference when calling.
MODEL NUMBER:
SERIAL NUMBER:
DATE OF PURCHASE:
SAFETY WARNINGS
READ ALL SAFETY WARNINGS BEFORE
USING AIR COMPRESSOR.
GENERAL SAFETY WARNINGS
Keep work area clean. Messy areas and cluttered workbenches invite personal injury
and/or property damage.
Keep children and visitors away. All children should be kept away from the work
area. DO NOT let children handle the compressor or extension cord. Maintain a safe dis-
tance for any person near the work area.
4

Operating any tools or equipment under the influence of drugs, alcohol, or
medication can cause personal injury to yourself and others.
Wear proper apparel. Remove your jewelry before using air compressor. Do not wear
loose clothing, necklaces, rings, bracelets, or other jewelry, which may get caught in mov-
ing parts. Nonskid footwear and electrically non-conductive gloves are highly suggested
while working. Wear protective hair covering to contain long hair.
Protect your eyes. The operation of any air compressor can result in foreign
objects being thrown into the eyes, which can result in severe eye damage.
Always wear eye protection that meets ANSI Z28.1 specifications during air compressor
operation. Eyeglasses are not always safety glasses.
Be responsible for your hearing. Wear hearing protection during extended periods
of operation.
Use the right tool. Use tools properly and for their intended task. Do not force
a small tool to do the job of a heavy-duty tool. Using the right tool to do the right job will
make doing the job safer.
Check damaged parts before use of any air tools or attachments. A guard
or other part that is damaged should be carefully checked to ensure that it will operate
properly and perform its intended function. Check for misalignment or binding of moving
parts, breakage of parts, mounting, or any other conditions that may affect tool operation.
A guard or other part that is damaged should be properly replaced. See replacement parts
list for additional details.
Avoid unintentional starting. Be sure that your air compressor is in the OFF position
before plugging it into a power cord or electrical receptacle.
Store all maintenance tools away from the immediate area before turning
ON your air compressor.
Do not overreach. Proper footing and balance is a must at all times while using tools.
Unstable support may lead to personal injury. Do not stand on the tool. Serious injury
could result if the tool tips over or you accidentally contact tool.
Never leave the air compressor running unattended. Always turn the power to the OFF
position and do not leave the air compressor until it comes to a complete stop.
When using air accessories, consult the owner’s manual provided by the
manufacturer. The use of improper accessories may cause risk of injury to yourself and
others.
5

Always make sure the tool is in the OFF position and unplugged from the
electrical receptacle when making adjustments, changing parts, or perform-
ing any maintenance.
Secure work. When possible, the use of clamps or a holding device is much
safer than holding the work piece with your hands.
Keep protective guards in place and in proper working condition.
Maintain tools and equipment with care. They will function better and more safely
when kept clean and in good working condition. Keeping the air compressor clean, dry,
and free of grime will add to its life and performance.
Childproof the workshop. The use of master switches and padlocks is highly recom-
mended. Remove starter keys where applicable.
DRAIN LIQUID FROM AIR TANK DAILY
• Use the drain valve located on the bottom of the lower air tank to drain condensed liquid.
Failure to properly drain liquid from the tank will cause rust from moisture buildup, which
weakens the tank and could lead to a violent tank explosion. Periodically inspect the tanks for
unsafe conditions such as corrosion, cracked welds, and leaks.
• Release air slowly when draining moisture or depressurizing the air compressor. Fast
moving air will stir up dust, dirt and debris that may be harmful.
RISK OF FIRE OR EXPLOSION
Avoid dangerous environments. Do not spray combustible/flammable liquid in a confined
area. Spray area must be well ventilated. Do not smoke while spraying or spray where
spark or flame is present. Arcing parts — keep compressor at least 20 ft. away from
spraying area and all explosive vapors. Do not use compressor near gasoline or other
flammable materials. Operate the air compressor in a well-ventilated area. Do not direct
paint or other spray material towards the compressor. Read and follow all safety instruc-
tions for the material you are spraying. Be sure to use an approved respirator designed for
use with your specific application.
RISK OF INJURY
Do not direct air stream at body. Use eye protection. Compressor starts automatically. Do
not touch MOVING PARTS. Keep guards in place. Compressor does not supply breathable
air.
6

RISK OF BURSTING
• Do not adjust regulator to result in output pressure greater than marked maximum
pressure of attachment. If a regulator has not been installed, use only attachment rated
at 200 PSI or higher. Do not weld on or repair tank — A DAMAGED TANK MUST
BE REPLACED IMMEDIATELY. Do not operate without proper safety valve in place.
• Never attempt to repair or make modifications to the tank or its attachments. Welding, drilling,
or any other modifications may weaken the tank, which may result in damage from rupture
or explosion. Never remove or attempt to adjust the pressure switch, safety valve, or other
components that control tank pressure. Never substitute parts or attempt to alter the factory
set operating pressures.
RISK OF ELECTRICAL SHOCK
Disconnect air compressor from power source before servicing. USE PROPERLY
grounded ELECTRICAL CONNECTIONS. Do not use in wet or damp locations or expose
to rain. Keep all connections dry and off the ground. Do not allow power cords to come
into contact with water. Do not touch the plug with wet hands. Do not pull on the electri-
cal cord to disconnect from the power outlet. Store air compressor indoors when not in
use. Any electrical wiring or repairs performed on this air compressor should be done by
authorized service personnel in accordance with federal and local electrical codes.
RISK TO BREATHING
• This air compressor is not designed, nor intended for the supply of breathable quality
air. Air produced by this unit may contain carbon monoxide or other toxic vapors. Do
not inhale air from the compressor or from a breathing device connected to it.
• Operate the air compressor in a well-ventilated area. Read and follow all safety instruc-
tions for the material you are spraying. Be sure to use an approved respirator designed
for use with your specific application.
RISK OF BURNS
Touching exposed metal such as the compressor head or exhaust tube can result in
serious burns. Keep hands and fingers away from exposed metal parts on air compressor
during or immediately after operation. Air compressors generate significant heat during
normal operation and will remain hot for some time after use. Do not reach around pro-
tective shrouds or attempt any maintenance until compressor has been allowed to cool.
7

RISK OF FLYING OBJECTS
Do not direct compressed air stream at people or pets. The powerful compressed air
stream can damage exposed skin and easily propel loose dirt and other small objects at
high-speed, resulting in serious injury. Always wear eye protection that meets ANSI Z28.1
specifications. Use only OSHA approved air blowguns. Never leave a pressurized air
compressor unattended. Shut OFF air compressor and relieve pressure before performing
maintenance or repairs. Do not move the air compressor while the air tank is pressurized.
Never attempt to move the air compressor by pulling on the air hose.
RISK OF FALLING
Portable air compressors can fall from a table, workbench, or roof causing damage to the
compressor and could result in serious injury or death to the operator. Always operate air
compressor in a stable and secure position to prevent accidental movement of the unit.
Never operate air compressor on a roof or other elevated position. Use additional air hose
to reach high locations.
RISK OF PROPERTY DAMAGE WHEN TRANSPORTING COMPRESSOR
Oil can leak or spill and could result in fire or breathing hazard, serious injury or death. Oil leaks
will damage carpet, paint, or other surfaces in vehicles or trailers.
AIR TOOLS AND ACCESSORIES
Do not exceed the pressure rating of any air tools, spray guns, air accessories, or inflat-
ables. Excess pressure can cause them to explode, resulting in serious injury. Follow the
manufacturers recommended pressure settings for all air tools and air accessories.
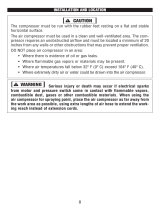
INSTALLATION AND LOCATION
The compressor must be run with the rubber feet resting on a flat and stable horizontal
surface.
The air compressor must be used in a clean and well-ventilated area. The compressor
requires an unobstructed airflow and must be located a minimum of 20 inches from any
walls or other obstructions that may prevent proper ventilation.
8

9
DO NOT place air compressor in an area:
• Where there is evidence of oil or gas leaks.
• Where flammable gas vapors or materials may be present.
• Where air temperatures fall below 32ºF or exceed 104ºF.
• Where extremely dirty air or water could be drawn into the air compressor.
Serious injury or death may occur if electrical sparks
from motor and pressure switch come in contact with flammable vapors,
combustible dust, gases or other combustible materials. When using the
air compressor for spraying paint, place the air compressor as far away
from the work area as possible, using extra lengths of air hose to extend the
working reach instead of extension cords.
GROUNDING INSTRUCTIONS
Improper installation of the grounding plug can result in a risk of electric
shock. If repair or replacement of the cord is necessary, do not connect the
grounding wire to either flat blade terminal. The wire with GREEN insulation
with or without yellow stripes is the grounding wire.
This product is for use on a nominal 120-volt circuit and has a three-prong
grounding plug that looks like the plug illustrated in Figure 1. A temporary adapt-
er similar to the adapter illustrated in sketch B (See Page 10) may be used to
connect this plug to a 2-pole receptacle as shown in illustration B when a properly
grounded outlet is not available. The temporary adapter shall be used only until
a properly grounded outlet (Illustration A) is installed by a qualified electrician.
Tab for grounding screw, lug, or similar part extending from the adapter must be
connected to a permanent ground such as a properly grounded outlet box cover.
Whenever the adapter is used, it must be held in place by a metal screw.
The use of a GFCI outlet is strongly recommended. The third prong is to
be used to ground the tool and provide protection against electrical shock.
Never remove the third prong.
Check with a qualified electrician or serviceman if the grounding instructions
are not completely understood, or if in doubt as to whether the product is
properly grounded. Do not modify the plug provided. if it will not fit the out-
let, have the proper outlet installed by a qualified electrician.

This product should be grounded. In the event of an electrical short circuit, grounding reduces
the risk of electric shock by providing an escape wire for the electric current. This product is
equipped with a cord having a grounding wire with an appropriate grounding plug. The plug
must be plugged into an outlet that is properly installed and grounded in accordance with all
local codes and ordinances.
EXTENSION CORDS
THE USE OF AN EXTENSION CORD WITH THIS PRODUCT IS NOT
RECOMMENDED as this can result in the loss of power to your air compressor which
can prevent the motor from starting or running properly. This can also cause your fuse to
blow or circuit breaker to trip. Running your air compressor on an undersized extension
cord will cause permanent damage to internal switches and overheating of the electric
motor or its capacitor. Use an additional length of air hose rather than an extension cord.
If you must use an extension cord, it should be plugged into a GFCI found in circuit boxes or
protected receptacles. Use only UL listed 3-wire extension cords that have a 3-blade grounding
plug and a 3-slot receptacle that will accept the plug on the product. Make sure your extension
cord is in good condition. When using an extension cord, be sure to use one heavy enough
to carry the current your product will draw. Refer to the guide on the next page for minimum
gauge required for extension cords.
10
FIGURE 1. CONNECTING THE AIR COMPRESSOR TO THE AC POWER RECEPTACLE
UNGROUNDED AC OUTLET
GROUNDED AC OUTLET
GROUNDING ADAPTER
POWER CORD PLUG
POWER CORD PLUG
COVERPLATE
MOUNTING SCREW
GROUNDING PIN
GROUNDING PIN
GROUNDING
RIGID EAR
A B

Use only extension cords that are intended for outdoor use. These cords are identified by a
marking “ACCEPTABLE FOR USE WITH OUTDOOR APPLIANCES, STORE INDOORS
WHEN NOT IN USE.” Examine extension cord before use. DO NOT USE DAMAGED
EXTENSION CORDS. Do not pull on cord to disconnect from receptacle; always disconnect
by pulling on plug. Keep cord away from heat and sharp edges. Always shut OFF the air com-
pressor AUTO/ON pressure switch before unplugging the compressor. Always disconnect the
extension cord from the receptacle before disconnecting the product from the extension cord.
Avoid electrical shock hazard. Never use this compres-
sor with a damaged or worn electrical cord or extension cord. Inspect all
electrical cords regularly. Never use in or near water or in any environment
where electric shock is possible. To reduce the risk of electrocution, keep
all connections dry and off the ground. Do not touch the plug with wet hands.
Guard against electrical shock. Avoid body contact with grounded services such as pipes,
ovens, stoves, and refrigerator enclosures. If not properly grounded, this air compressor can
incur the potential hazard of light trickle shock, particularly when used in damp locations. If
electrical shock occurs, there is the potential of secondary hazard such as your hands contact-
ing an operating air tool.
11
EXTENSION CORD LENGTH WIRE SIZE (AWG)
Up to 25 Feet 12
26 to 50 Feet 10
51 to 100 Feet Do Not Use

COMPRESSOR FEATURES
CONTROLS AND COMPONENTS:
1. Air Pump
2. Automatic On/Off Pressure Switch
3. Motor Shroud
4. Pressure Regulator Knob
5. Air Tank Pressure Gauge
6. Outlet Pressure Gauge
7. Air Outlet Port
8. Safety Relief Valve
12
1
12
10
13
3
11
9
(on other side
of tank)
9. Air Tank Drain Valve
(on other side of tank)
10. Air Intake Filter
11. Soft Grip Handle
12. Rubber Feet
13. Air Tank
2
8
6
5
7
4

COMPRESSOR FEATURES:
1. AIR PUMP: Oil less direct drive pump with cast-iron cylinder for durability.
2. AUTOMATIC ON/OFF PRESSURE SWITCH: This compressor is equipped with an
automatic on/off pressure switch. The compressor will only run when the switch is in
the ON/AUTO position. Once the tank has reached the desired preset pressure (“cut-out”
pressure), the pump motor will automatically shut off. While the switch is in the ON/AUTO
position, the pump motor will automatically turn back on once the pressure in the tank
drops below the minimum preset pressure (“cut-in” pressure).
Do not leave the compressor unattended while the power
switch is in the on/auto position.
3. MOTOR SHROUD: Protects motor and user.
4. PRESSURE REGULATOR KNOB: The regulators allow you to select the amount of air
pressure that is output through the air hose into tools and accessories. Each regulator
allows you to set a pressure setting independent of the other. This allows having separate
air settings for different tools/requirements. Turn the pressure regulator knob clockwise to
increase discharge pressure, and counter clockwise to decrease discharge pressure. Please
refer to the air delivery requirements of your tools for the proper pressure settings.
CAUTION: Be careful not to overtighten pressure regulator knob when it “bottoms out” as
this may damage pressure regulator.
5. AIR TANK PRESSURE GAUGE: The tank pressure gauge provides a reading of the air
pressure inside of the compressor tank.
6. OUTLET PRESSURE GAUGE: The outlet pressure gauges provide a reading of the air
pressure at the outlet side of the regulator. This pressure is controlled by the pressure reg-
ulator and is always less than or equal to the air tank pressure.
7. AIR OUTLET PORT: These ports feature quick connect couplers that are pre-installed into
standard 1/4 in. NPT (F) threads in the pressure manifolds. Use PTFE thread-sealing tape on
the threads to make sure you have an airtight connection when replacing quick connect cou-
plers.
8. SAFETY RELIEF VALVE: This compressor is equipped with a safety relief valve that is
designed to prevent system failures by relieving pressure from the system when the air
pressure reaches a predetermined level. The safety relief valve is preset by the manufactur-
er. DO NOT attempt to modify or remove the safety relief valve.
13

14
9. AIR TANK DRAIN VALVE: Moisture is produced whenever air is compressed. It is
critical to drain water from the air tank on this compressor frequently. If unit is used only
occasionally, tank should be drained after each use and prior to the next use. To drain
the tank, slowly open the tank drain fitting by turning clockwise. Once all moisture has
drained out, close the fitting securely. NOTE: Air tank will not pressurize while drain
valve is open.
10. AIR INTAKE FILTER: This compressor is equipped with an externally accessible air
intake filter that is designed to clean air coming into the pump. The filter element is easily
removed for periodic cleaning. Use compressed air to blow loose dirt and debris from the
paper filter element and reinstall. Replace paper filter element when necessary.
A dirty air filter will reduce air compressor performance and can
lead to product failure.
11. SOFT GRIP HANDLE
12. RUBBER FEET
13. AIR TANK

OPERATING THE AIR COMPRESSOR
Do not attach air hose, air tools or other air accessories
to the air outlet until break-in procedure has been successfully completed.
INITIAL SETUP / BREAK-IN PROCEDURE
1. Read and understand the entire instruction manual, including all safety warnings before
setting up air compressor.
2. Place air compressor on a flat, level surface.
3. Turn the pressure regulator knob fully clockwise to open airflow from air outlet port.
Be careful not to overtighten pressure regulator knob when it “bot-
toms out” as this may damage pressure regulator.
4. Turn the compressor power switch to the OFF position.
5. Plug power cord directly into a properly grounded power source of the correct voltage
(see Grounding Instructions on page 9 of this instruction manual).
6. Open (turn clockwise) the tank drain valve to allow air to escape preventing air pressure
buildup in the air tank.
7. Turn the compressor ON by moving the switch to the AUTO/ON position and run the air
compressor for a period of 20 minutes to break-in the air pump.
8. With the compressor still running, at the end of the 20-minute break-in period, close
(turn counterclockwise) the tank drain valve. The air compressor will build air pressure to
the maximum preset pressure (“cut-out” pressure) and automatically shut off.
9. Slowly open (turn clockwise) tank drain valve to bleed off air from the air tank. The air
compressor will automatically restart once the pressure in the air tank drops below the
minimum preset pressure (“cut-in” pressure).
10. Turn the compressor off by moving the switch to the OFF position.
11. Slowly open tank drain valve to release pressure from the system and drain moisture from
the air tank. Tilt tank to remove all moisture. Once all the moisture has drained out, close
tank drain valve securely.
NOTE: Air tank will not pressurize while drain valve is open.
12. Disconnect the power cord from the power outlet.
NOTE: Make sure the power switch is in the OFF position when connecting or discon-
necting power cord from electrical outlet.
13. Your new air compressor is now ready to use.
15

STARTUP
1. Before each startup, make sure the power switch is in the OFF position.
2. Place air compressor on a flat, level surface.
3. Slowly open tank drain valve to release pressure from the system and drain moisture from
the air tank. Once all the moisture has drained out, close tank drain valve securely.
NOTE: Air tank will not pressurize while drain valve is open.
4. Turn the pressure regulator knob fully counterclockwise to close airflow from air outlet
port.
5. Attach air hose and accessories.
Too much air pressure causes a hazardous risk of bursting.
Check the manufacturer’s maximum pressure rating for air tools and accessories. The regulator
outlet pressure must never exceed the maximum pressure rating.
6. Before connecting the compressor to the grounded outlet, check for broken components and
accessories, and check for damage to the hose.
7. Plug power cord directly into a properly grounded power source of the correct voltage
(see Grounding Instructions on page 9 of this instruction manual).
8. Turn the compressor ON by moving the switch to the AUTO/ON position and allow the
tank pressure to build. Once the air pressure reaches the maximum preset pressure (“cut-
out” pressure) it will automatically shut off.
9. Slowly turn the pressure regulator knob clockwise to open airflow from air outlet port
until desired output pressure is reached. NOTE: The air compressor will automatically
restart once the pressure in the air tank drops below the minimum preset pressure (“cut-
in” pressure).
When operating in cold weather (under 45°F) the compressor must
be allowed to warm up before use. This can be accomplished by loosening drain valve
enough to allow any air to escape the tanks. Start up compressor and allow to run with
drain valve open for approximately 3-5 minutes to warm up before closing drain valve and
proceeding with use.
16

SHUTDOWN AND STORAGE
NOTE: NEVER stop the air compressor by unplugging it from the power outlet as this may
result in damage to the compressor.
1. Turn the switch to the OFF position
2. Disconnect the power cord from the power outlet. Disconnect the power cord from the
power outlet by grabbing the plug (not the cord).
3. Turn the pressure regulator knob fully counterclockwise to close airflow from air outlet
port. Check the outlet pressure gauge to ensure that it reads 0 PSI.
4. Remove the air hose and any air accessories.
5. Drain moisture from the air tank by slowly opening the air tank drain valve by turning
clockwise. Tilt tank to remove all moisture. Once all the moisture has drained out, close
the fitting securely.
6. Allow the compressor to cool down.
7. Wipe the air compressor clean and store it in a clean, dry, and non-freezing location.
MAINTENANCE AND CLEANING
Disconnect AIR COMPRESSOR from power source and
bleed off all air pressure before attempting any maintenance or repair.
WHEN PERFORMING ANY MAINTENANCE OR SERVICE:
• The air compressor must be turned off.
• Disconnect compressor from the power source.
• Open tank drain to bleed off all air pressure before attempting any maintenance or repair.
• Allow compressor to fully cool before attempting any maintenance or repair.
Check the air compressor frequently for any visible problems and follow maintenance proce-
dures each time the compressor is used.
All air compressors contain maintenance parts that require periodic
replacement. These used parts, including air filters may contain regulated substances that
must be disposed of in accordance with local, state, and federal laws and regulations.
1. Slowly open tank drain valve to release pressure from the system and drain moisture from
the air tank. Tilt tank to remove all moisture. Once all the moisture has drained out, close
tank drain valve securely.
2. Wipe the compressor clean.
17

MAINTENANCE CHECKLIST:
Daily:
• Drain accumulated liquid from tank.
• Check for unusual noise
and/or vibrations.
• Check that all fasteners are secure.
• Wipe compressor clean.
+ Apply a solution of soapy water around joints. Look for air bubbles around joints when compres-
sor reaches the pressure cut-out limit and the pump turns off.
CHECKING SAFETY RELIEF VALVE:
Safety RELIEF valve must be replaced if it cannot be
actuated or it leaks air after the ring is released.
1. The air compressor must be turned OFF.
2. Disconnect compressor from the power source.
3. Open tank drain to bleed off all air pressure before attempting any maintenance or repair.
4. Allow compressor to fully cool before attempting any maintenance or repair.
5. Grasp the wire ring on the safety relief valve.
6. Pull and release the ring a few times to ensure that the plunger moves in and out. Replace
the safety relief valve if plunger does not move or is difficult to move.
CHECKING AIR FILTER ELEMENT:
1. The air compressor must be turned OFF.
2. Disconnect compressor from the power source.
3. Open tank drain to bleed off all air pressure before attempting any maintenance or repair.
4. Allow compressor to fully cool before attempting any maintenance or repair.
5. Remove the face of the filter body to access the filter element by pushing and rotating the
front portion of the filter body in a counter clockwise direction to release the locking tabs.
6. Use compressed air to blow loose dirt and debris from the paper filter element. Replace
filter element if it cannot be cleaned sufficiently.
7. Reinsert filter element into filter body and reinstall filter faceplate.
MOISTURE IN COMPRESSED AIR
Moisture is a normal by-product of compressing air. As the moisture builds during compressor
use, it can be carried though the air hose. When using paint spray gun or sandblasting gun, the
use of a special filter to remove moisture from the air line is highly recommended. Moisture in
18
Weekly:
• Inspect and clean air filter.
Monthly:
• Check for air leaks.
+
• Check safety relief valve.

the compressed air will cause water spots in paint jobs and cause blasting media to clog the
sandblasting gun.
TROUBLESHOOTING GUIDE
THE COMPRESSOR DOES NOT START OR RESTART:
PROBABLE CAUSE: SOLUTION:
Power cord not plugged in. Plug cord into grounded outlet.
Motor/Pressure switch in Move switch to AUTO position.
OFF position
Motor thermal overload Turn air compressor off, wait until the
switch has tripped motor is cool, then press motor thermal
overload (black) button firmly until click is
heard.
Fuse blown or circuit Replace fuse or reset circuit breaker.
breaker has tripped. Check for proper fuse amperage.
Check for low voltage conditions.
Disconnect any other electrical appliances
from circuit or operate air compressor on its
own branch circuit.
Wrong gauge wire or length Check chart in instruction manual for proper gauge
of extension cord. wire and cord length.
Air tank pressure exceeds Motor will start automatically when air tank
motor/pressure switch pressure drops below “cut-in” pressure of
“cut-in” pressure. motor/pressure switch.
Pressure release valve on Bleed the line by moving the switch to the OFF
motor/pressure switch has position.
not unloaded pump head
pressure.
Defective motor, motor Contact Consumer Helpline at 1-800-423-3598.
capacitor, motor/pressure
switch.
THE COMPRESSOR MOTOR STALLS:
PROBABLE CAUSE: SOLUTION:
Overloaded motor. Have a certified technician check the unit.
Defective check valve. Replace check valve. Contact Consumer
Service at 1-800-423-3598.
19
/