Page is loading ...

Part 1
FCC Notes:
This equipment generates, uses, and can
radiate radio frequency energy and, if not
installed and used in accordance with the
instructions manual, may cause interference to radio communications. It has been tested
and found to comply with limits for a Class A digital device pursuant to subpart J of
Part 15 of FCC Rules, which are designed to provide reasonable protection against
interference when operated in a commercial environment. Operation of this equipment
in a residential area is likely to cause interference in which case the user at his own
expense will be required to take whatever measures to correct the interference.
Warranty Limits:
Warranty terminates automatically when any person other than the authorized
technicians opens the machine. The user should consult his/her dealer for the problem
happened. Warranty voids if the user does not follow the instructions in application of
this merchandise. The manufacturer is by no means responsible for any damage or
hazard caused by improper application.
About This Manual:
Posiflex has made every effort for the accuracy of the content in this manual. However,
Posiflex will assume no liability for any technical inaccuracies or editorial or other
errors or omissions contained herein, nor for direct, indirect, incidental, consequential
or otherwise damages, including without limitation loss of data or profits, resulting
from the furnishing, performance, or use of this material.
This information is provided “as is” and Posiflex Inc. expressly disclaims any
warranties, expressed, implied or statutory, including without limitation implied
warranties of merchantability or fitness for particular purpose, good title and against
infringement.
The information in this manual contains only essential hardware concerns for general
user and is subject to change without notice. Posiflex reserves the right to alter product
designs, layouts or drivers without notification. The system integrator shall provide
applicative notices and arrangement for special options utilizing this product. The user
may find the most up to date information of the hardware from web sites:
http://www.posiflex.com or http://www.posiflex.com.tw
All data should be backed-up prior to the installation of any drive unit or storage
peripheral. Posiflex will not be responsible for any loss of data resulting from the use,
disuse or misuse of this or any other Posiflex product.
All rights are strictly reserved. No part of this documentation may be reproduced,
stored in a retrieval system, or transmitted in any form or by any means, electronic,
mechanical, photocopying, or otherwise, without prior express written consent from
Posiflex Inc. the publisher of this documentation.
© Copyright Posiflex Inc. 2005
All brand and product names and trademarks are the property of their respective holders.
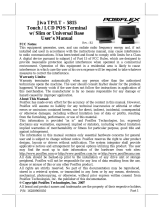
PST - 7700 Series
User’s Manual
Rev. Original
P/N: 13770900010

Part 2
ALERT TO OUR HONORABLE CUSTOMERS:
l Please always read thoroughly all the instructions and documents
delivered with the product before you do anything about it. Don’t
take any premature action before you have a full understanding of
the consequences.
l This product contains inside a Lithium battery and maybe also a
sealed type Lead acid battery if the UPS battery option is ordered.
Please always follow local environmental protection laws /
regulations for disposal of used batteries and always replace only
with battery of same type.
l If you have an UPS battery installed in the product:
² Temperature above 40°C must be strictly avoided as it
could cause termination of battery life and unexpected result
even if the battery is not in work.
² Do not power off the system just by shutting off the AC
power leaving the battery supporting the whole system till
completely exhausted. Repeatedly using it up or improper
maintenance reduces the battery life dramatically.
² Always fully recharge the battery at least once every 3
months if the battery is not connected.
² Always disconnect the UPS battery from the system if the
system is to be left OFF for more than 72 hours to prevent
possible damage. Only connect the UPS battery back right
before you are going to re-power on the system.
² Replace the battery as soon as the monitoring software
indicates the battery is out of service. Attempt to recharge a
dead battery is dangerous!
² A separate battery monitor is not required for this series.
DAILY MAINTENANCE GUIDE
For regular cleaning of the PST systems, please use only soft haired
brush or dry soft cloth. You may use moist soft cloth to remove stains when
necessary. Apply only proper amount of mild neutral detergent for obstinate
stains. Please note that never use Acryl dissolving solvent or Polycarbonate
dissolving solvent. You may apply ammonia-based glass cleaner only on the
screen surface.

Part 3
BRIEF INTRODUCTION
THE USER’S MANUAL
The purpose of this manual is to guide the user in the initial
installation and general use of the Posiflex PST7700 series of POS terminals. It
does not explain any application software that may be supplied with it.
We intend to provide our customers with all technology advantages
available by evolving the product design to incorporate appropriate changes
and improvements. So some detail differences may exist between this manual
and the equipment supplied.
For more detailed or technical information please refer to the CD-
ROM disc associated or consult our authorized dealers or visit our web site:
http://www.posiflex.com.tw/ or http://www.posiflex.com/
THE PRODUCT
The Posiflex range of PST7700 terminals have been designed and
manufactured to meet the high end demand on POS systems. It incorporates all
the advances of PC technology within a rugged housing designed for use in a
hostile retail environment. By providing an integrated design, It has retained
many of the secure features of a traditional ECR and has avoided the wiring
“spaghetti” associated with more traditional PC solutions. This Open Standard
Architecture ensures that this terminal can use the PC application software and
development tools that are now inexpensively available and abundant.
The terminal may be used as a self-contained unit or by using the
integrated network interface as one of several terminals in a network system
controlled by a “back office” computer. Versatile options can apply to it too.
An optional CD-ROM drive or an optional FDD can be installed in
the PST7700 system or supplied later as an upgrade kit. The PST7700 system
also provides an optional power management kit that includes a CR port with
status sensibility for controlling 1 or 2 Posiflex printer drive type cash drawers
and the most advanced UPS functions to safeguard the POS operation against
intermittent power failure with another option UPS battery, careless touch on
the power switch, and to support unmanned remote account consolidation
operation, etc..
THE BASIC MODELS
• PST7700 – 9” CRT monitor + matrix layout programmable keyboard
• PST7705 –12” color TFT LCD screen + matrix layout programmable
keyboard
• PST7730 – 9” CRT monitor + QWERTY layout programmable
keyboard
• PST7735 – 12” color TFT LCD screen + QWERTY layout
programmable keyboard

Part 4
THE STANDARD FEATURES
CPU: C3 1.0 GHz; HDD: 20 GB or above; RAM: 128 MB
Ethernet Networking: The standard network port works with both 10 Base T
and 100 Base T.
Programmable Keyboard: In either 112 key matrix or 136 key QWERTY
layout with 8 KB memory.
Numerical Keypad: The matrix layout keyboard contains a numerical keypad.
6 Position Key Switch: Every PST7700 system is equipped with a 6 position
key switch for several purposes. This key switch supports security lock off and
multi-page programming of the programmable keyboard, answer back code
and software switch off functions. 4 different types of keys are provided for
different accessibility.
Customer Display Port: Every PST system provides a customer display port
to drive any Posiflex customer display. However, the system case with a base
tube of a customer display is different from that without a customer display.
Serial Ports: There are 4 serial ports in a PST7700 system. COM1 is shared
by the customer display port and the direct driven cash drawer port if exists.
COM1 is capable of providing a +5 V DC supply. COM2, COM3 and COM4
each are capable of providing independently a +5 V DC or a +12 V DC supply.
All these DC supplies are achieved through internal jumper setting and they
are all defaulted to give no DC supply at delivery.
Parallel Port: Each PST system is equipped with a parallel port that supports
SPP/EPP/ECP.
USB Device Connection: The PST7700 series is equipped with two USB type
A connectors for connection of USB (Universal Serial Bus) devices.
Modem Ring-Up, LAN Or Alarm Wake-Up: The PST7700 series can be
turned on automatically upon an incoming COM port Modem call or LAN
status or data packet received on LAN or a preset time/day/week/month.
THE OPTIONAL ITEMS
a) Magnetic Stripe Reader: 2 tracks, 3 tracks or JIS I/II (JIS MSR for
factory upgrade only)
b) Customer display:
1). PD-101: 8 digits 7-segment LED display with 7 indicators
2). PD-2201: 2 line by 20 character (11.25 x 7.2 mm) VFD
3). PD-2301: 2 line by 20 character (9.03 x 5.25 mm) VFD
4). PD-7201: 2 line by 20 character (18.35 x 8.91 mm) graphic LCD
c) Bar Code Scanner:
1). CCD scanner (CD-2860K) with 80 mm width read capability
2). Long range CCD Scanner (CD-3830K) with 120 mm width and 250
mm depth read capability
d) POS printer:

Part 5
1). PP-2000 series: Friction type paper feed, 2 stations 9 pin dot matrix
impact printer.
2). PP-5600 series: Friction type paper feed, 9 pin dot matrix impact
printer
3). PP-5700 series: Sprocket type paper feed, 9 pin dot matrix impact
printer
4). PP-7000II series: Friction type auto- paper feed, High-speed thermal
sensitive line dot printer
5). PP-7000IIUSB series: Friction type auto- paper feed, High-speed
thermal sensitive line dot printer with USB interface
6). PP-7700 series: Friction type auto- paper feed, High-speed thermal
sensitive line dot printer with wireless interface.
e) Variety of Key Tops:
1). Quad key
2). Horizontal double key
3). Vertical double key
4). Single key
5). Blank key
f) DRAM Memory Expansion: Upgrade up to 1GB max.
g) Integrated CD-ROM Drive: Can be ordered before delivery or as an
upgrade kit to be installed into the already purchased PST product.
h) Integrated FDD: 3.5” 1.44 MB
i) Power management kit with CR port: The most advanced UPS
functions to safeguard the POS operation against intermittent power
failure with another option UPS battery, careless touch on the power
switch, unmanned remote account consolidation operation, etc.
j) 2-in-1 Cash Drawer Control Cable: Cable CCBLA-238, when added
to the optional CR port of the PST7700, can be used to control two
Posiflex CR-3X00 or CR-4XX0 cash drawers.
k) UPS Battery: 2.3 AH 12V lead acid battery
l) Preload OS: Win98, Win 2000, Win XP embedded, Win XP pro.
SYSTEM BOX CONTENTS
When you receive the system box you will find it contains several items:
l PST7700 system unit
l Cashier display carton for LCD model PST7705 or PST7735
l Customer display carton if an option of customer display is ordered
l PST accessories carton
l Other optional components as ordered
Main System Unit
The main system unit is supplied with the key tops of the
programmable keyboard assembled without the transparent key caps.

Part 6
Cashier Display Carton
When the order is PST7700 or PST7730, the purchased 9” VGA
mono CRT monitor will be shipped in a separate box from the main system
unit. When the order is PST7705 or PST7735, the package for the 12.1” color
TFT LCD is inserted in a side within the system box.
Customer Display Carton
This is a separate carton within the main carton and contains the
customer display (also called a pole display) when an option of customer
display is purchased with the PST system.
PST Accessories Carton
This contains most of the small parts and loose items for PST7700
and PST7705 as follows:
l This user’s manual
l 1 set of keys (4 pieces) for keyboard key switch
l 1 set of keys (2 pieces) for front door lock
l Keyboard type dependent accessories as listed below
l Recovery CD for preloaded OS or Posiflex Product Information CD
for driver utilities without OS
l Cable tie (5 pieces)
l VFD terminator (1 piece)
l COM1 terminator (1 piece)
l Main power cord (1 piece)
The content of keyboard type dependent accessories is listed below.
Please note that these parts are different in size between the KB112 for
PST7700/PST7705 and the KB136 for PST7730/PST7735. The rough
measurements in millimeters of the key surfaces are also noted below:
PST7700/PST7705 PST7730/PST7735
Accessories for models
Qty
Note Qty
Note
Legend sheet in 4 colors
(set)
1 P/N:10371297210
1 P/N:10371297211
Key cap removal tool
(key clip)
1 P/N:QC2000 1 P/N:QCH2000
Single key +
transparent cap
92 22 x 18 mm 52 18 x 18 mm
Vertical 2 22 x 37 mm Double key +
transparent cap
Horizontal
0 45 x 18 mm
1 18 x 37 mm
Quad key +
transparent cap
1 37 x 45 mm (not applicable)
Blank key 2 22 x 18 mm 2 18 x 18 mm

Part 7
INSTALLATION GUIDES
IMPORTANT
Please do not connect the power cord or turn on the main unit until
you have fully read the installation guides and followed the instructions!!!
TECHNICAL ENHANCEMENTS
Applicable technical enhancements in PST7700 series include RTC
battery replacement, COM port power supply settings, VGA port power supply
settings, DRAM upgrades, CD-ROM drive upgrade and adding a half length
PCI adapter card. All these technical enhancement operations require purchase
of applicable Technical Manual from Posiflex or consultation from Posiflex
authorized dealers and should be handled only by a qualified technician.
INSTALLING UPS BATTERY (OPTION)
First remove the CD-ROM platform if this option is installed.
Remove the battery cover by pressing down at the marked end and pushing
inward the battery cover as shown. The user may find the UPS battery lying in
the battery compartment if
this option is ordered.
Connect the cable through
the opening on the wall
toward the rear room of the
cabinet to the connector in
the rear room. Always
disconnect the UPS battery
when the system is to be left
powered off for more than
few days.. Please pay
particular attention to the
environment requirement for
UPS battery in next chapter “USING THE PST SYSTEM”.
CRT MONITOR
Upon receiving the CRT type PST7700, the monitor comes in a
separate box. Install the monitor onto the PST product as following. First take
both the main unit and the monitor out of their boxes. Referring to drawing
below hold the monitor with the screen facing downward allowing the two
mounting holes at the bottom toward the two mounting lugs on the bowl.
Match the two mounting lugs into the two mounting holes, then gently push
and rotate the monitor backward 90° to have the monitor sit on the bowl. On
completion of this maneuver the rear of the monitor will “click” into position
over the monitor hook and will be securely retained into position.
Printer
Platform
Display
Platform
Opening To
Rear Room
Battery
Cover
Press This
End Down
Push This
Way To Open

Part 8
The next step is to
pass the monitor cable through
a square hole at the back edge
of main unit. Open the back
door by sliding two back door
latches at the bottom of back
door toward the center. The
back door is easily removable.
Remove the cable cover by
pulling the latch on the
underside of the cable cover
(ref. drawing below). Connect
the VGA cable to the VGA
connector through this opening
then put the cable cover back
onto the square hole with the hook
end in position first and then press
the cover down to position. You will
hear another click sound and the
cable cover is well mounted.
To remove the monitor, first
disconnect the cable then pull the
latch on the underside of the cable
cover to remove the cable cover.
Then pull the monitor hook lever at
rear bottom of the bowl by finger,
then raise and rotate the monitor forward till the CRT front is facing downward.
LCD CASHIER DISPLAY
When the PST7705 or
PST7735 is ordered, the user
has to take the 12.1” TFT LCD
cashier display out from the
cashier display carton and
assemble it onto the main unit
per following instructions.
Unscrew and take out
the pivot that is screwed on the
display platform of the main
unit. Unfold the base of the
operator display and insert it
into the opening on the display
Monitor
Hook
Mounting
Lugs
Mounting
Holes
Bowl
Cable Cover
Latch
VGA Connector
Cable Cover
Base Of
LCD
Pivot
12.1” LCD

Part 9
platform of the main unit till it clicks. Screw the pivot back to secure the base
of the cashier display on the display platform of the main unit as in drawing
below. Remove the cable cover on the display platform (same way as the
instructions for CRT model) and connect the VGA connector of the 12.1” TFT
LCD through the cable cover opening into the rear room. Reserve some sag in
the cable so that the LCD cashier display will be allowed to turn and reinstall
the cable cover.
CUSTOMER DISPLAY
When the PST7700 series
is ordered with the customer
display option, the terminal will be
delivered with the base tube for the
display already fitted to corner of
the display platform.
The customer display head
can be easily inserted into the base
tube after first inserting the signal
cable. Pull out the release button on
the base tube to allow the inner
tube of the display head to travel
down into the base tube. Please ensure that the latching track on the inner-pole
matches up with the release button. Open the back door and find the connector
marked “customer display” or “VFD”. Please remove the VFD terminator
from this connector and store in a safe place. Insert the cable plug of the
customer display into customer display connector until a click sound is heard.
Please NOTE: The VFD connector must always be populated
either with the VFD terminator or a plug from the customer display
(Failure to do this will prevent COM1 from working correctly).
Close the back door then slide the two door latches outward and the
installation is completed. Please refer to the instructions in the part “TO USE
THE PST SYSTEM” for later adjustment on the most comfortable position
and direction of the customer display.
PROGRAMMABLE KEYBOARD
The PST terminal is equipped with an extremely versatile
programmable keyboard. The application of this keyboard requires no software
driver and is free from any software compatibility issue. This keyboard comes
in 2 different layouts : KB112 for PST7700/PST7705 and KB136 for
PST7730/PST7735. The key tops of the 2 layouts are different in their basic
sizes, so all the accessories for the 2 layouts cannot be mutually exchanged.
However, they are common in structure.
The keyboard is shipped from the factory with the key tops fitted, but
Base Tube
Release
Button
Inner
Pole
Cable
Goes In
First

Part 10
without the transparent key caps (these are in the accessories box). Also
supplied with the keyboard are 4 die cut self-adhesive A4 label sheets that may
be printed by most conventional means with whatever legends are required by
the application.
Each type of key top (with transparent key cap) listed in the table at
end of BRIEF INTRODUCTION can be separately purchased in certain
quantities and applied for variety in keyboard layout presentation.
The user may use the
key clip (to be found in the
accessory box) to pull off the
key caps and apply the printed
legend label on the key top then
recap the transparent key cap for
identification.
The user may also use
a flat bladed screwdriver (not
the key clip) to remove the key
tops for rearrangement of the
key tops. However, it is
absolutely important to correctly
orientate the key tops before they are inserted into the keyboard frame; failure
to do so could result in permanent damage. Please note that on at least one
side of the square stem of the key top, there is a small latching tab to match
with a corresponding tab on the bottom inner side of the guide hole as in the
example drawing above.
The system integrator
can program the content of the
keyboard for the application
software following the
technical guidance of Posiflex
keyboard programming
utilities.
INTERNAL KB WEDGE BARCODE SCANNER
The PST system is designed to allow several PS/2 KB interface
devices connected in a chain share the KB port. The terminal is supplied with
two devices already in the chain. The first is the programmable keyboard
followed by the magnetic stripe reader (MSR) if installed.
It is possible to add additional devices to this chain in either an
internal or external manner subject to a maximum of 5 devices. For external
connection, open the front door using the mechanical key and connect the KB
interface device to the PS/2 KB port inside. However internal connection is
Transparent key cap
Legend label
Key clip
Blank key top
Tab in the
guide hole
Latching tab

Part 11
preferred for a permanent device like a bar code scanner in POS business.
To access the internal connection you must remove the keyboard. To
do this first unlock the front door lock and then remove the two mounting
screws from the underneath of the chassis located just behind the front edge of
the terminal. Once these screws have been removed it is possible to lift the
front edge of the keyboard housing and then rotate the keyboard “up and back”.
This then exposes the keyboard controller on the underside of the keyboard.
Connector for the external KB port is normally inserted into socket on
controller board of programmable keyboard. To add an internally connected
device, remove this cable from the controller board and insert the new device
between them. Match the top edge of the programmable keyboard with rear
cabinet of main unit and close it to the bottom chassis. Before closing it, the
cables must be fixed to the bottom chassis with a cable tie and a piece of cable
cover at side of bottom chassis must be taken away. Mount back the two
screws from bottom side then the installation for internally connected KB
wedge device is done.
We strongly advise users to consult with their dealers to have an
authorized technician for such installation.
PRINTER
Assemble the printer following the instructions supplied with the
printer.
Remove the battery cover as in UPS battery section. The user may
find the UPS battery lying in the battery compartment if this option is ordered.
Connect the printer cable through the opening on the wall toward the rear room
of the cabinet to the connector marked “LPT” (if the printer is a parallel
printer). Or connect the cable to a proper “COM” port (COM 1 through COM
4) according to the definition on the application program (if the printer is a
serial printer). The 24 VDC power cable (CCBLA-146A to be separately
purchased) should be inserted to the 24 VDC connector in the rear room if the
printer is to use this power supply from the terminal. These cables should pass
through the opening on the wall where the UPS battery cover joins the case.
Replace the battery cover and connect the signal and power cables to the
appropriate connectors on the underside of the printer. Finally place the printer
on the printer platform of the terminal.
KEYBOARD
CPU BOARD
KB WEDGE
DEVICE
Male mini DIN Plug
Female mini DIN Plug
Female mini
DIN Jack
EXT. KB
PORT
Male mini DIN Plug

Part 12
CASH DRAWER
The PST7700 installed with power management kit option is able to
control most of the common cash drawers available on the market. However, it
is recommended that the Posiflex CR-3100 or CR-3200 or CR-4000 or CR-
4100 or CR-4210 be used since the terminal has been designed to compliment
these cash drawers both mechanically and electrically.
The PST7700 will directly control the cash drawer using the cash
drawer port (CR) both to operate the opening mechanism and to monitor the
drawer open status. Both functions may be accomplished under software
control of the COM1 serial port.
Use the cable supplied with the CR-3X00/4X00 cash drawer (Part No.
CCBLA-180) for connection to the CR port in PST7700. This cable has a 6
pole plug at one end and a 8 pole plug at the other. The 8 pole plug should be
inserted into the connector marked: “signal cable from POS Printer” at the rear
of the cash drawer. The 6 pole plug should be inserted in the connector marked
“CR” found in the rear room of the terminal.
The user may also use the optional 2-in-1 cash drawer control cable
CCBLA-238 to control 2 cash drawers in 1 port. It has a 6 pole plug at one end
and two 8 pole plugs at the other. The 6 pole plug should be inserted in the
connector marked “CR” found in the rear room of the terminal. Each 8 pole
plug should be inserted into the connector marked “signal cable from POS
Printer” at the rear of one of the cash drawers. The cable lengths for the two 8
pole plugs are different. Use the shorter one for the original cash drawer
“CR1” and use the longer one for the extended cash drawer “CR2” that will be
distinguished by the software command.
AC POWER
The power supply operating voltage must be checked and altered if
necessary. This must be done WITHOUT any connection to the AC power.
The operating voltage adjustment switch is located close to the power
input connector in the rear room.
The switch should indicate either 115 volts or 230 volts. When set at
115 volts the acceptable power supply voltage range is 90 volts to 130 volts
whilst at 230 volts the acceptable power supply voltage ranges from 190 volts
to 260 volts.
The power supply cable should first be connected to the power inlet
(but NOT the wall socket). This cable should be secured to the latticed bottom
of the rear room using a cable tie provided. The cable may exit either at the
side or back of the rear compartment by using the relevant breakout section in
the chassis plastic molding.

Part 13
USING THE PST SYSTEM
BEFORE POWER ON – A Check List
It is very important that you check the following operational points:
Ventilation
This terminal must NOT be operated in an environment with
restricted ventilation. There must be at least 25 mm air clearance around any
top or side ventilation holes with a free flow of air around the unit at ALL
times for the installation.
Operating Environment
The equipment must not be operated or stored in extremes of both
temperature and humidity/moisture.
(Operating range 0°C to + 35°C and up to 80% relative humidity –
non condensing max. wet bulb 26°C)
Power Supply
The operating voltage of the power supply should be checked to
confirm that it is set within the range of the local power supply. The power
cable, the power outlet and any power fusing arrangements must conform to
local safety regulations.
UPS Battery (option)
General care:
The UPS battery is consumables beyond product warranty. Please
definitely observe the alerts in beginning of this manual. If the equipment is to
be powered off for more than few days, please always disconnect the battery
from the system. Reconnect it and turn on the system to recharge the battery
for 1 ~ 2 hours every 3 months for temperature lower than 30°C. Recharge for
1 ~ 2 hours every month for temperature over 30°C. Temperature above 40°C
must be strictly avoided as it could cause termination of battery life and
unexpected result even if the battery is not in work. The UPS battery can
support basically the data preservation and smooth running of the system
during intermittent or few minutes (3 ~ 8 min. depending on loading and
battery condition) power failure if the power management option is installed.
Battery replacement:
In the preloaded OS for a PST7700 with power management option,
there is a built in utility Power Manager that will indicate the UPS battery
status of the battery. When an installed UPS battery is found to be disabled,
please replace the used up UPS battery at power off as soon as possible.
Emergency treatment:
The battery is constructed maintenance free and leakproof. Its storage

Part 14
room also provides very good protection as long as the ambient temperature
remains below 30°C and the ventilation of the PST system is free. However,
should any accident happen and the sulfuric acid from the battery spills on skin
or clothing, wash immediately with water. If the acid comes in contact with
eyes, rinse eyes with large amount of clean water and see a doctor immediately.
A larger external battery may be connected to give an extended operation.
Please check your dealer about this capability when required.
WARNING:
If there are any signs of over charging or leakage of electrolyte
please contact your dealer immediately
Printer DC Power Supply
This power supply is designed to support a Posiflex POS printer via
the right cable. Careless use of it will cause permanent damage.
VGA Display Port
The VGA port in the PST terminal supports a 12 volt DC power to the
monitor inside the VGA signal cable. This may cause permanent damage to
any other monitor not designed to use this facility. Please use only a designed
monitor with the PST equipment. Consult your dealer if you have any doubt.
(Note: 12 volt DC power is available on pin 9 of the VGA connector and
is supported by the UPS function if the power management option is installed.)
The video memory of this port shares the system memory. The video
memory size can be set in the CMOS setting to match the user’s application.
Customer Display Port
The customer display connector must always be occupied either by
the terminator plug (as supplied) or by one of the family of Posiflex customer
displays. Without this provision the COM1 port and the cash drawer control
(when power management option is installed) may fail to work correctly.
Serial Port – COM1
COM1 serial port must always be occupied by a suitable serial device
or COM1 terminator (as supplied). If this port is left vacant or connected with
something like a mouse the customer display port and the cash drawer control
(when power management option is installed) may fail to work correctly.
LED INDICATORS
Besides the LED on MSR unit there are another two LED’s on the
main unit in the area with the 6-position electronic key. The green LED at right,
called as the power LED, and the orange LED at left, called as the Standby
LED, together exhibit several different system statuses depending on whether
or not an UPS battery and the power management kit are fitted.
(a) Without an UPS battery the power LED lights to show that the system is
turned ON under presence of AC power. The standby LED indicates that

Part 15
AC power is available when the system is powered off.
(b) With a UPS battery fitted together with the power management kit:
1. The standby LED lights steadily to indicate the presence of AC
power at system powered off. The system cannot be turned on if
the AC power fails. The power LED goes ON and the standby
LED goes OFF when the system is powered up.
2. During power failure period at system turned on, the power LED
flashes to indicate that the system is running on battery power.
3. The power LED turns OFF and the standby LED flashes rather
fast as the UPS battery approaches a discharged condition to
remind the operator that power will soon finish. In few seconds,
the whole system will soon be automatically turned off and both
LED’s will be OFF.
In case the AC power resumes during the usage of the battery, the
flashing LED will keep on flashing for few seconds till the AC supply is stable.
POWER ON/OFF CONTROL
The PST7700 terminal implements electronic power control, such that
the main power to the system may be controlled by many methods as below:
1. Hardware power switch
2. Software OFF command
3. Automatic power ON control
4. Emergency power OFF
Switching from OFF to ON requires a normal supply of the AC power.
Hardware Power Switch
This button is located on the lower right hand front edge of the
keyboard and can be used to turn the system on and off alternatively if no
optional power management kit installed. When this option is installed, the
external switch can also be programmed to be an ON only switch through
software command so that when this switch is accidentally pressed during
system turned on, the system just remains on and unaffected.
Software Off Command
The system may also be shut down under software control if the
optional power management kit is installed. Please just follow the arrangement
by your system integrator for this capability.
Automatic Power On Control
The system may also turn on according to some preset conditions
such as Modem Ring Up and Alarm Clock Wake Up or LAN Wake Up.
To utilize Modem Ring Up or Alarm Clock Wake Up function, the
user should enter the CMOS setup by pressing “Del” key at system boot up,

Part 16
choose for “PM Wake Up Events” in “Power Management Setup” and make
the “Ring Power Up Control” enabled for Modem Ring Up or select the
“Power Up by Alarm” for Alarm Clock Wake Up. Save the configuration and
exit the CMOS setup program. The Preset Power On Control will then be
ready. For LAN wakeup, an operating caller system connected through LAN to
the system is required. It also requires a qualified networking technician to
check the LAN chip ID of the system for the caller system to wake up.
When the PST7700 system is turned off after a successful boot up, the
preset automatic power on functions will keep monitoring for the preset
conditions and turn on the system when the preset conditions are met.
Please note that if the PST7700 system is improperly turned off
before a complete boot up procedure, the above preset power on control
functions will be disabled until next turning off after a complete boot up.
Emergency Power Off
In case of serious system halt due to any reason, the system could fail
to be powered off through normal means. Press and hold the Power ON/OFF
Switch for Emergency Power Off. Release the switch after the system powered
off. It will take about 4 seconds if no power management kit installed and it
takes about 10 seconds if the option installed. If there appears to give a special
coded beep tone in the pattern “short, long, short, long, short” prior to the
system power off in this process, please remove the AC power and wait for
few minutes to allow the hardware registers to reset (If there is no such beep,
AC removal is not required). Then you may restart the system and take
remedial action against the precious failure.
CRT MONITOR (for PST7700/PST7730)
Mechanical Adjustments
The PST terminal has been designed with a novel support for the
monitor. Beside the usual tilt and swivel mechanism, this terminal has
incorporated “slide” capability so that the monitor position may be fully
adjusted. At all times the monitor is firmly supported on the display platform,
this gives a stable wobble free image and an absence of mechanical damage.
Display Controls
There are 1 power ON/OFF switch and 2 control knobs at front and
adjustment holes for V-size, H-phase and focus at rear.
Display Utility Driver
The end user of the PST terminals is not supposed to install the utility
drivers personally. If an optional preloaded OS is ordered, the required driver
will be already installed in the preloaded OS. However, the driver will always
be available over our web site: http://www.posiflex.com

Part 17
LCD MONITOR (for PST7705/PST7735)
Mechanical Adjustments
The 12.1” LCD color display is integrated on display platform to give
the operator the clearest view. The display may be lifted from the horizontal to
the upright position and rotated through a total of 90° (left 45° max., right 45°
max.). Please do not to attempt to exceed these limits.
Display Controls
There are some push buttons on side of the LCD panel including
power ON/OFF switch and the OSD knob. Please use OSD knob and find all
the controllable on screen display.
Display Utility Driver
Please refer to “Display Utility Driver” section for CRT monitor.
CUSTOMER DISPLAY
All customer displays of the PST series support versatile easy and
secure mechanical adjustments on sideway slide (except PD-101), height
adjustment, horizontal rotation and up/down tilt.
The display frame of PD-2201, PD-2301 and PD-7201 can slide
horizontally for a total sliding distance of 100 mm. For height adjustment,
please pull out the release button, adjust the display to the height required, and
then release the button switch. The horizontal rotation is almost 360 degrees
for any required viewing direction. The up/down tilt of PD-2201, PD-2301 and
PD-7201 provide 2 different view angles ---14.5° and 30°. However, there are
8 viewing angles for PD-101 ranging from -2.5° to 60°.
PROGRAMMABLE KEYBOARD
The standard programmable keyboard for PST7700/7705 is a 8 x 14
matrix layout keyboard coded as KB112. The keyboard for PST7730/7735 is
coded as KB136 which provides at the lower part a keyboard layout
resembling the standard PC keyboard of each country.
6 Position Key-Lock
The extraordinary 6 position key switch in programmable keyboard
on PST series provides a multi-page capability and excellent superiority
against any other similar product. The switch positions are named: LP, LCK,
L1, L2, L3, L4. The position LCK may be marked as “ ”. This position LCK
is designed to provide a “Security Lock-Off” function. With the key at this
position, all KB input is prohibited to prevent unauthorized data/command
input. With the key at any other position, the whole programmable keyboard
can be programmed as each independently different keyboard. In other words,
this keyboard has the power of 5 programmable keyboards plus a “Security
Lock-Off”. The key may only be removed from positions LCK and L1.

Part 18
There are 4 keys supplied with each keyboard and the lock is so
designed that each key may turn the 6 position key switch to correspondent
position range. The keys are named: PRG, REG, Z, GT.
The available positions for each key type are listed in the table below:
ü= accessible û= not accessible
PRG REG Z GT
LP
ü û û û
LCK
ü ü ü ü
L1
ü ü ü ü
L2
ü ü ü ü
L3
ü û ü ü
L4
û û û ü
Therefore, if each page is programmed for different level of authority,
each key can be distributed for different level of management using the system.
Instant Content Update
The system integrator may program the keyboard to allow the instant
WYSIWYG (What You See Is What You Get) update function in trade-off of
highly technical programming capability of the keyboard. The instant content
update utilizes the Hot Key programming ability of the programmable
keyboard that can be arranged in four steps:
The preparation requires a standard PS/2 keyboard connected to the
external keyboard connector of the PST7700 series in the front door area. To
enter the Hot Key programming mode, press the left “Alt” key and the “PRT
SC” (“Print Screen”) key on the PS-2 keyboard at the same time and press the
key on the programmable keyboard to be updated after two beeps from the
system. Please then use the PS/2 keyboard to type the content to be
programmed for that key. Press both the left “Alt” key and the “PRT SC”
(Print Screen) again at the end to exit the Hot Key programming mode. The
system gives 1 beep here to notify a successful input, 3 beeps for input failure.
MSR – MAGNETIC STRIPE READER
The Magnetic Stripe Reader (MSR) slot is located at the left side of
the Programmable Keyboard if the MSR option is ordered when the PST
system is equipped with the standard 112 key programmable keyboard. There
are 3 choices of the reader types -- tracks 1+2, or 2+3 or all 3 tracks separately.
For card reading, be sure to insert the card to the bottom with
magnetic stripe facing the mark aside the slot. The movement of the card can
be either inserting the card from the top surface then sliding the card down out
Enter “hot key
programming
” mode
Preparation
Input the
content to be
programmed
Exit “hot key
programming
” mode

Part 19
of the slot, or sliding the card upward from the lower side of the slot till it
reaches the top end as long as the card is a standard one. A non-standard card
recorded without complete degaussing prior to recovery may accept only one
direction in card reading.
The MSR indicator will light up in green when the MSR is ready to
read, blink during reading, and then give a green light if the reading is
successful. The MSR indicator will turn to be red if the reading fails due to
improper sliding or poor magnetic intensity of the magnetic stripe, the MSR
indicator will then turn back to green when the MSR is again ready to read.
FRONT DOOR
At the front of the programmable keyboard there is a door with a
mechanical lock to the right of it. Turning the key clockwise will release the
front door lock, the door may be fully opened by hand then. This lock also
physically locks the programmable keyboard subassembly housing to the
chassis of the main unit, which prevents unauthorized access to the internal
electronics. There are the external PC keyboard connector and the optional
1.44MB 3.5” Floppy Disk Drive (FDD) behind the door.
EXTERNAL PC KEYBOARD
From time to time it will be necessary or more convenient to use a
standard PC keyboard. This may be to reprogram the PST keyboard key
definitions, or to alter some aspects of either the DOS operating system or the
application program. The PC keyboard may be plugged into the 5 pin DIN
socket behind the front door.
This socket may also be used to trial a new device that is required to
be daisy chained to the keyboard port (e.g. a table scanner). Please keep in
mind the previously mentioned limit of 5 devices.
3.5” FDD
This option is a regular PC device, it accepts any 3.5” floppy diskette
formatted to 1.44 MB or 720 KB.
REAR ROOM
The terminal has a rear room that covers the signal and power
connector area and is designed to provide a tidy and secure termination for all
cables into and out of the terminal. Cables may be secured by attaching them
with cable ties to the lattice base of the compartment.
Access to the rear room is gained by releasing the rear door latches.
These are located under the lower edge of the door at either side of the door.
They may be located by “feeling the ridges” on the latch, sliding both latches
to the center of the door will release the door. These latches are intentionally
stiff.

Part 20
PRINTER
One of the major design features of the PST terminals is the ability to
accommodate a very large range of printers. The terminal provides a printer
platform where the printer can be mounted (use the Velcro strips in the
accessories kit for fixation aid), and also provides a regulated 24 volts DC
power line to power the printer.
The terminal can accommodate both parallel and serial interfaces.
Please consult the printer user manual before assembling and
connecting any printers to the terminal.
USB
There are two standard USB female connectors in the rear room. Both
support the Universal Serial Bus Specification standard 2.0 and also 1.1.
SYSTEM PROTECTION
In the Posiflex POS system delivered with preloaded OS, there is a
function built in for system protection. A screen as below will pop up for a
short period of time in operation system booting up stage.
In normal practice, nothing
has to be done and the system boot up
continues. However, this function is
useful for our end users to fight
against virus attacks or malicious
system invasions nowadays or even
some possible system crash. Please
connect a PS/2 keyboard to KB port of
the system to engage this function if
there in no specific instruction from
your system integrator. Press the three key combination of “Ctrl” + “Alt” +
“F12” at the above screen or press the key on programmable keyboard per
your system integrator’s arrangement.
Please follow screen display to refresh the system back up then you
can call for instruction on system restore from your system integrator once the
disaster occurs.
T31454
/