NEC NC2500S User manual

Category
Data projectors
Type
User manual
NC2500S
Users Manual
DLP Cinema
®
Projector
NEC Viewtechnology, Ltd.
WARNING
TO PREVENT FIRE OR SHOCK HAZARDS, DO NOT
EXPOSE THIS UNIT TO RAIN OR MOISTURE. ALSO DO
NOT USE THIS UNIT’S POLARIZED PLUG WITH AN
EXTENSION CORD RECEPTACLE OR OTHER OUTLETS,
UNLESS THE PRONGS CAN BE FULLY INSERTED.
REFRAIN FROM OPENING THE CABINET AS THERE ARE
HIGH-VOLTAGE COMPONENTS INSIDE. REFER
SERVICING TO QUALIFIED SERVICE PERSONNEL.
CAUTION
RISK OF ELECTRIC SHOCK
DO NOT OPEN
CAUTION
TO REDUCE THE RISK OF ELECTRIC SHOCK, DO
NOT OPEN COVER. NO USER-SERVICEABLE PARTS
INSIDE. REFER SERVICING TO QUALIFIED SERVICE
PERSONNEL.
This symbol warns the user that uninsulated
voltage within the unit may have sufficient
magnitude to cause electric shock. Therefore,
it is dangerous to make any kind of contact
with any part inside of this unit.
This symbol alerts the user that important
literature concerning the operation and
maintenance of this unit has been included.
Therefore, it should be read carefully in order
to avoid any problems.
DOC compliance Notice
This Class A digital apparatus meets all requirements of the
Canadian Interference-Causing Equipment Regulations.
Precautions: Please read this manual carefully before using your
NC2500S and keep the manual handy for future reference.
WARNING
This is a Class A product. In a domestic environment this
product may cause radio interference in which case the user
may be required to take adequate measures.
CAUTION
In order to reduce any interference with radio and television
reception use a signal cable with ferrite core attached.
Use of signal cables without a ferrite core attached may
cause interference with radio and television reception.
This equipment has been tested and found to comply with
the limits for a Class A digital device, pursuant to Part 15
of the FCC Rules. These limits are designed to provide
reasonable protection against harmful interference when
the equipment is operated in a commercial environment.
This equipment generates, uses, and can radiate radio
frequency energy and, if not installed and used in
accordance with the installation manual, may cause
harmful interference to radio communications.
Operation of this equipment in a residential area is likely
to cause harmful interference in which case the user will
be required to correct the interference at his own expense.
Important Safeguards
These safety instructions are to ensure the long life of your
projector and to prevent fire and shock. Please read them
carefully and heed all warnings.
Installation
1. Place the projector on a flat, level surface in a dry area
away from dust and moisture. Tilting the front of the
projector up or down from level could reduce lamp life.
Do not put the projector on its side when the lamp is on.
Doing so may cause damage to the projector.
2. Do not place the projector in direct sunlight, near heaters
or heat radiating appliances.
3. Exposure to direct sunlight, smoke or steam could harm
internal components.
4. Handle your projector carefully. Dropping or jarring your
projector could damage internal components.
5. To carry the projector, a minimum of five persons are
required.
Do not hold the lens part and the anamorphic lens part
with your hand. Otherwise the projector may tumble or
drop, causing personal injury.
6. Do not place heavy objects on top of the projector.
Power Supply
1. The projector is so designed that it operates with the
power supply voltage described below.
Projection Head : 0.95 kW 5A AC200-240V 50/
60Hz Single-phase
Lamp Power Supply Unit :
8.0kW 28A AC200-230V 50/
60Hz Three-phase (Star
connection),
8.0kW 16A AC380-415V 50/
60Hz Three-phase (Star
connection)
Ensure that your power supply fits this requirement before
attempting to use your projector.
2. Consult your dealer for installing the power cord to the
projector. DO NOT install the power cord by yourself.
Doing so may cause a fire or electric shock.
3. Handle the power cord carefully and avoid excessive
bending. Do not place any heavy objects on the power
cord. A damaged cord can cause electric shock or fire.
4. If the projector will not be used for an extended period of
time, shut down AC power.
5. Placing the power cord and the signal cable closely to
each other can cause beat noise. If this happens, keep
the two separated so that beat noise is not generated.
Beat noise is corruption of the picture often seen as a
rolling band moving through the image.
6. Do not touch the projector during a thunder storm. Doing
so can cause electrical shock or fire.
Cleaning
1. Shut down AC power to the projection head and the lamp
power supply unit before cleaning.
2. Clean the cabinet periodically with a damp cloth. If heavily
soiled, use a mild detergent. Never use strong detergents
or solvents such as alcohol or thinner.
3. Use a blower or lens paper to clean the lens, and be
careful not to scratch or mar the lens.
E-1
Important Information
Fire and Shock Precautions
1. Ensure that there is sufficient ventilation and that vents
are unobstructed to prevent potentially dangerous
concentrations of ozone and the build-up of heat inside
your projector. Allow at least 8 inches (20cm) of space
between your projector and a wall. Allow at least 20 inches
(50 cm) of space between the ventilation outlet of the
lamp power supply unit and an object.
Connect the projector exhaust outlet with the exhaust
equipment having a capacity of 16m
3
/min or more.
2. Prevent foreign objects such as paper clips and bits of
paper from falling into your projector. Do not attempt to
retrieve any objects that might fall into your projector. Do
not insert any metal objects such as a wire or screwdriver
into your projector. If something should fall into your
projector, disconnect it immediately and have the object
removed by a qualified service person.
3. Do not place any liquids on top of your projector. Refer
servicing to qualified service personnel if liquid has been
spilled.
4. Keep any items such as magnifying glass out of the light
path of the projector. The light being projected from the
lens is extensive, therefore any kind of abnormal objects
that can redirect light coming out of the lens, can cause
unpredictable outcome such as fire or injury to the eyes.
5. Do not cover the lens with the supplied lens cap or
equivalent while the projector is on. Doing so can lead to
melting of the cap and possibly burning your hands due
to the heat emitted from the light output.
6. When using a LAN cable:
For safety, do not connect to the connector for peripheral
device wiring that might have excessive Voltage.
CAUTION: High Pressure Lamp May Explode if Improperly
Handled. Refer Servicing to Qualified Service
Personnel.
Lamp Caution: Please read before operation
Due to the lamp being sealed in a pressurized environment,
there is a small risk of explosion, if not operated correctly.
There is minimal risk involved, if the unit is in proper working
order, but if damaged or operated beyond the recommended
hours, the risk of explosion increases. Please note that there
is a warning system built in, that displays following message
when you reach a preset operating time Bulb Over Time.
When you see this message please contact your dealer for a
replacement. If the lamp does explode, smoke will be
discharged from the vents located on the back of the unit. Do
not stand in front of the vents during the operation. This smoke
is comprised of glass in particulate form and Xenon gas, and
will not cause harm if kept out of your eyes. If your eyes have
been exposed to this gas, please flush your eyes out with
water immediately and seek immediate medical attention. Do
not rub your eyes! This could cause serious injury.
WARNING:
1. Do not look into the lens while the projector is on. Serious
damage to your eyes could result.
2. When main body is damaged, cooling fluids may come out of
internal part. DO NOT touch and drink the cooling fluid.
When the cooling fluids are swallowed or contacted with
your eyes, please consult with doctors immediately.
CAUTION
Never unplug the projection head power plug from the outlet
or disconnect the breaker connected to the AC power cord
of the lamp power supply unit under the following conditions.
Doing so can damage the projector.
While projecting images
While cooling after the projector has been turned off. (The
POWER indicator blinks in orange while the fan is rotating,
and the LCD screen is displaying cooling.... The cooling
fan continues to work for 5 minutes.)
Remote Control Precautions
Handle the remote control carefully.
If the remote control gets wet, wipe it dry immediately.
Avoid excessive heat and humidity.
Do not heat, take apart, or throw batteries into fire.
If you will not be using the remote control for a long time,
remove the batteries.
Ensure that you have the batteries polarity (+/-) aligned
correctly.
Do not use new and old batteries together, or use different
types of batteries together.
Dispose of used batteries according to your local
regulations.
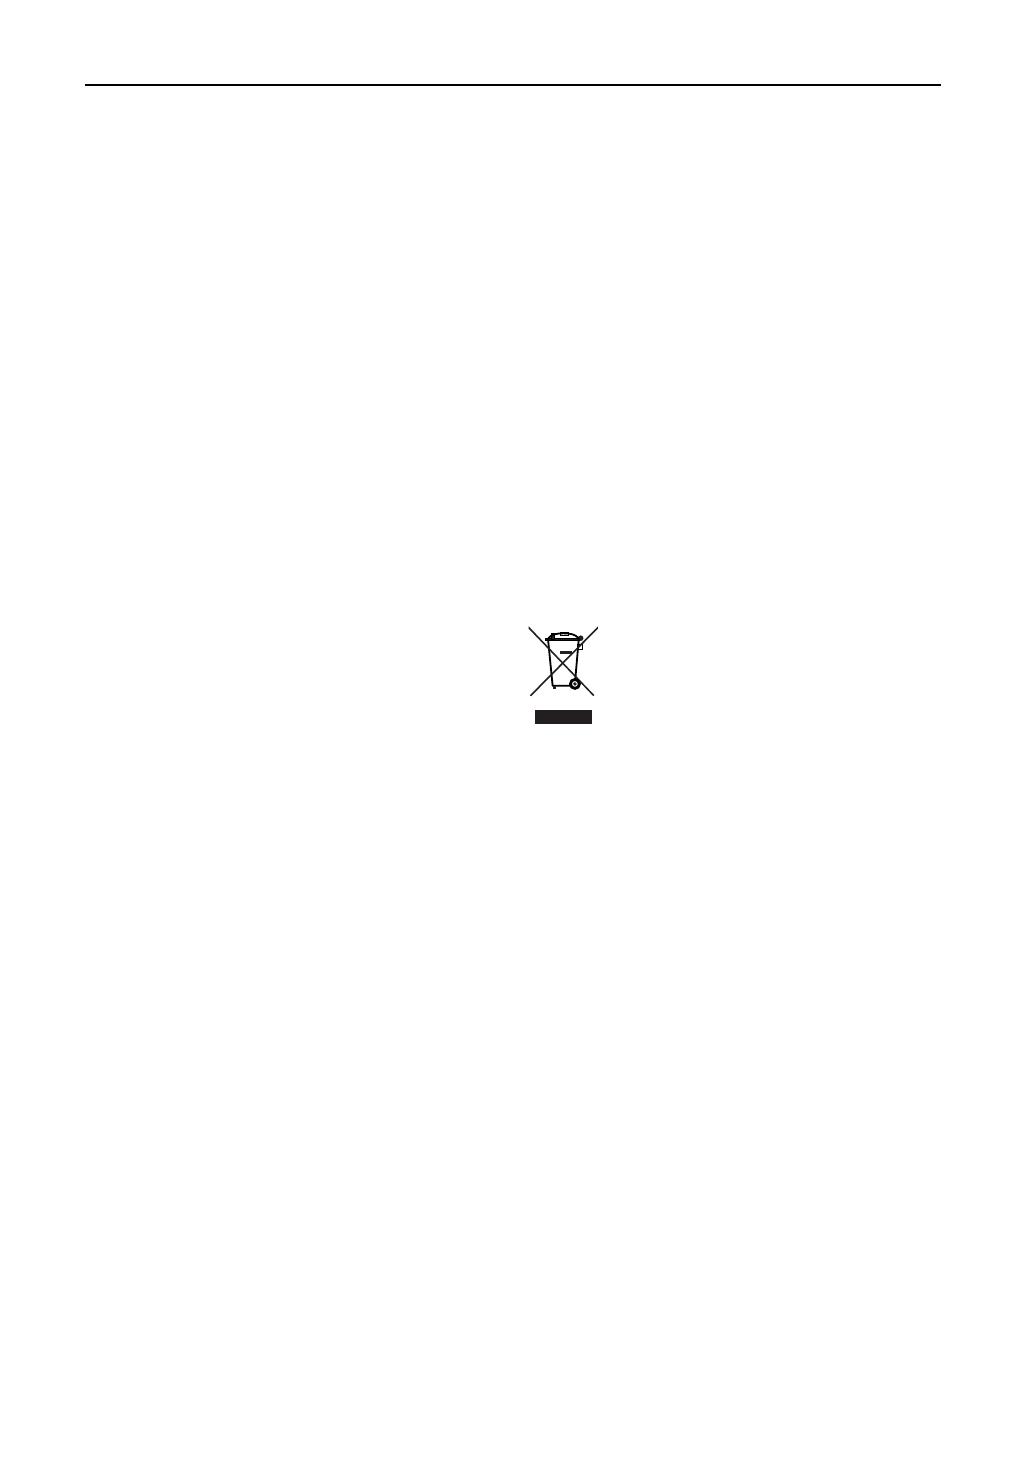
Disposing of your used product
EU-wide legislation as implemented in each
Member State requires that used electrical and
electronic products carrying the mark (left) must
be disposed of separately from normal
household waste.
This includes projectors and their electrical
accessories or lamps. When you dispose of such
products, please follow the guidance of your local
authority and/or ask the shop where you
purchased the product.
After collecting the used products, they are
reused and recycled in a proper way. This effort
will help us reduce the wastes as well as the
negative impact to the human health and the
environment at the minimum level.
The mark on the electrical and electronic
products only applies to the current European
Union Member States.
For questions relating to unclear points or repairs
Contact your dealer or the following support branches for
questions relating to unclear points, malfunctions and repairs
of the product.
In Europe
NEC Europe, Ltd. / European Technical Centre
Address: Unit G, Stafford Park 12, Telford TF3 3BJ, U.K.
Telephone: +44 1952 237000
Fax Line: +44 1952 237006
In North America
NEC Corporation of America
Digital Cinema Division
Address: 4111 West Alameda Avenue Suite 412 Burbank,
CA 91505
Telephone: 818 557 2500
*If the above line is busy, please dial as below;
Telephone: 866 632 6431
E-2
Important Information
1
Table of Contents
Table of Contents ............................................................................ 1
1.What’s in the Box? and the Names of the Projector Parts............. 2
1-1. Features ....................................................................................................................................................................2
1-2. Whats in the Box? ................................................................................................................................................... 4
1-3. Names of the Projector Parts .................................................................................................................................. 6
1-4. Names on the Remote Control .............................................................................................................................. 12
2.Installation and Connection ....................................................... 15
2-1. Steps for setting up and connecting .................................................................................................................... 15
2-2. Connecting the image input terminals ................................................................................................................. 16
2-3. Connecting the various control terminal ............................................................................................................. 17
3.Projection of Images (Basic Operation) ...................................... 18
3-1. Steps of projecting images ...................................................................................................................................18
3-2. Turning your projector on ..................................................................................................................................... 19
3-3. Selecting the title of input signal .......................................................................................................................... 21
3-4. Adjusting the position and the size of projected screen .................................................................................... 22
3-5. Turning your projector off ..................................................................................................................................... 24
4.Using Menus .............................................................................. 25
4-1. Basic operation with adjustment menus .............................................................................................................25
4-2. Table of adjustment menus ...................................................................................................................................29
4-3. Title Select .............................................................................................................................................................. 30
4-4. Configuration ..........................................................................................................................................................31
4-5. Title Setup ............................................................................................................................................................... 31
4-6. Information.............................................................................................................................................................. 32
5.Maintenance of Your Projector ................................................... 36
5-1. Cleaning the Cabinet ..............................................................................................................................................36
5-2. Cleaning the Lens ..................................................................................................................................................36
6.Appendix .................................................................................... 37
6-1. Troubleshooting ..................................................................................................................................................... 37
6-2. Indicator display list............................................................................................................................................... 38
6-3. Error code list ......................................................................................................................................................... 40
6-4. Operation using an HTTP browser ....................................................................................................................... 42
6-5. Outline Drawing ...................................................................................................................................................... 44
6-6. Specifications ......................................................................................................................................................... 46
6-7. Pin Assignment and Functions of Terminal ......................................................................................................... 49
6-8. Related products list ..............................................................................................................................................54
2
1.
Whats in the Box? and
the Names of the
Projector Parts
1-1. Features
DLP Cinema
®
dedicated projector that supports large screen needs
NEC has applied its mounting technology and leading imaging technology to newly develop lamp and optical systems as well
as a cooling system to support large screen needs.
Equipped with easy to use functions
(1) Lens memory function that can be operated with one touch, and lamp power memory function
The DLP Cinema
®
projector is provided with a lens memory function for storing lens zoom positions and shift positions to
set screens sizes for each input signal. It is also provided with a lamp power memory function for storing the brightness of
the images on the screen for each input signal.
Even if you are projecting multiple images that have different settings for image sizes and brightness, you can project them
with the conditions pre-registered for each signal, simply by selecting the corresponding signal.
(2) Equipped with a lamp output control function
You can set to any brightness setting, from low brightness to high brightness. This function makes it possible to minimize
the fluctuation (*) in brightness as brightness of the lamp decreases as a result of long-term lamp usage.
* The time for maintaining fluctuations in brightness depends on the setting value for brightness.
(3) Easy lamp replacement
The lamp can be replaced from the backside of the projector, so the lamp can be easily replaced even in narrow locations
when a film projector is setup on the side and there is not much space on the projector side.
(4) Registered signal selection buttons
The projector has been equipped with new 8 signal selection buttons that make it easy to select registered signals. To this
projector, 100 titles at most can be registered (input signal registration). Among the registered titles, any 8 titles can be
assigned to the buttons <1> to <8>.
(5) Touch panel (Optional)
An optional touch panel is available to enable easy operation of all projector functions.
(6) Supports various contents and types of usage by applying a separately-sold multimedia switch.
By connecting an optional multi-media switcher (MMS), you can input RGB/VIDEO analog signals, and digital signals in
formats not supported by the projector.
3
1. Whats in the Box? and the Names of the Projector Parts
DMD Face Dust Protection Structure
A dust contral shield is arranged between each DMD chip of R, G and B, and the spectroscopic/condenser prism to prevent
dust and dirt in the air, and oily particles in smoke associated with event halls from coming into contact with the face of the DMD
and causing operating problems.
Efficient cooling of the heat from the DMD unit by the cooling structure
The DMD unit uses a highly efficient liquid cooling method. This efficiently eliminates heat applied to the DMD by the complete
dust contral structure and high light output, thereby ensuring the reliability of the projector.
Up-to-date functions of DLP Cinema
®
available
This projector supports CineLink
TM
, CineCanvas
TM
, CinePallette
TM
and CineBlack
TM
which are the new functions for security,
subtitles, etc., developed by Texas Instruments Incorporated.
(1) CineLink
TM
: Security management
This function supports encryption of the local link between server and projector, adds a watermark to enable the tracing
of pirated films (illegal copying), and provides other functions.
(2) CineCanvas
TM
: Image management
This function enables insertion of subtitles and captions, correction of distortion, changing of resolution, etc.
(3) CinePallette
TM
: Color management
This function allows extension of color range, correction of color, etc.
(4) CineBlack
TM
: Contrast management
This function realizes a color tone scale from pitch black to pure white.
DLP, DLP Cinema and their respective logos are trademarks or registered trademarks of Texas Instruments.
CineLink, CineCanvas, CinePallette, and CineBlack are trademarks of Texas Instruments.
1. Whats in the Box? and the Names of the Projector Parts
4
1-2. Whats in the Box?
Check the content of the accessories. The accessories are packed into two boxes. One is for the main unit, and the other
contains the lamp power supply unit.
Contents of main unit box
NEC2500S projector
Remote control (RD-371E)
UM-3 AA size battery (for the remote control) x 2
Remote cable (16 m) x 1
Ferrite clamp core for DVI-D signal cable x 2
Band x 2
Lens holder (NC-PH01)
Exhaust outlet protective sheet x 1
Exhaust outlet protective sheet fastening band x 4
Small iris x 1
Lamp door key x 2
Sheet of title labels (for 20 labels) x 2
Users Manual (This document)
Users Manual
5
1. Whats in the Box? and the Names of the Projector Parts
Lamp Power Supply (With power cord)
Ferrite clamp cores for AC power code x 4
Band x 1
Dedicated interface cable x 1
Ferrite clamp core for dedicated interface cable x 1
TIP
In the event that you did not receive all of the accessories outlined above, or some are damaged, contact your
dealer/distributor.
Differs slightly from the drawings in this manual, but there is no problem in actual use.
1. Whats in the Box? and the Names of the Projector Parts
6
1-3. Names of the Projector Parts
1-3-1. Front of the projector
1
2
3
5
6
7
4
8
10
9
1. Air outlet
Connects to an exhaust device to exhaust heat from the lamp. Please contact your dealer/distributor to install the exhaust device.
2. Control panel
On the control panel, power to your projector is turned on or off, titles are selected, and various adjustments are made of
projected screen. (See page 10)
3. Connection terminals
Various image signal cable are to be connected here. (See page 9)
You can expand signal input terminals by installing an optional multi-media switcher (MMS).
4. Main power switch
While AC power is being supplied, set the main power switch to ON, then your projector will enter a standby state.
5. Lens (optional)
Images are projected from the lens. Request your dealer/distributor to install or replace the lens.
6. Touch panel mounting opening (three position on top)
Use the holder arm for the touch panel to attach the touch panel (optional).
7. Lamp power cord
This is the power cord that connects with the lamp power supply unit. Request your dealer/distributor to connect/disconnect
the power cord.
8. Dedicated interface cable
This is the interface cable that connects with the lamp power supply unit.
9. AC power cord (For projector)
This is the cord that supplies AC power to the projector head. The AC power cord is not an accessory. Consult with your
dealer/distributor about the AC power cord.
10. Interlock connector (Inside front of projector)
This is the connector for the projector safety device. This is used to control the projector from an external source. Consult
with your dealer/distributor about using this.
NOTE
Do not touch the air outlet and backside of the main unit when your projector is operating. Otherwise, the high
temperature may cause burns.
7
1. Whats in the Box? and the Names of the Projector Parts
1-3-2. Rear of the projector
1
4
5
3
2
1. Air inlet
Air is taken in here to provide cooling of the projector. Do not cover the air inlet.
2. Level adjusters (in four positions on bottom)
In the ordinary installation, you can adjust the projector inclination at 4 positions.
3. Tilt feet (in two positions on bottom)
These adjust the tilting angle of the projector. Please contact your dealer/distributor to setup and adjust this projector.
4. Lamp door
This opens to allow the lamp to be replaced. Please contact your dealer/distributor to install and to replace the lamp bulb
and lamp house.
5. Rear status indicator
These indicate the status of the projector. When the projector is operating normally, these light/blink in green or orange.
When an error occurs, they light/blink in red. When an error occurs, check the contents of the display on the LCD screen.
(See page 39)
NOTE
Do not cover the air inlet and outlet during operation. Inadequate air intake may lead to a rise in inside
temperature, thus causing a free or serious projector failure.
Caution:
Only service personnel should open the lamp door.
1. Whats in the Box? and the Names of the Projector Parts
8
1-3-3. Lamp power supply unit (LPSU)
2
3
5
4
1(Rear)
6
1. Air outlet
This exhausts heat from the lamp power supply unit.
2. Main power switch
This is the main power switch for the lamp power supply unit.
3. AC power cord
The AC power cord is not an accessory. Request service personnel to connect the power cord.
4. Two lamp power cords
These connect to the lamp power supply input terminals of the projector. Request service personnel to connect the
power cord.
5. Control terminal (Dedicated interface cable)
This connects to monitor the status of the lamp power supply unit from the projector head.
6. Air inlet
Outside air is taken in here to lower the temperature inside the projector. Do not cover this inlet.
NOTE
Do not touch the air outlet and backside of the main unit when your projector is operating. Otherwise, the
high temperature may cause burns.
Do not cover the air inlet and outlet during operation. Inadequate air intake may lead to a rise in inside
temperature, thus causing a free or serious projector failure.
9
1. Whats in the Box? and the Names of the Projector Parts
1-3-4. Connection terminals
SDI-A
SDI-B
DVI-A
DVI-B
GP I/O
LAN-A
LAN-B
REMOTE
IN
RS-232C
PC CARD
USB
CINEMA
SYSTEM
1
11
109876
2 3 4 5
1. HDSDI A input terminal (SDI-A) (BNC)
Connect a Video Server of Video source to this terminal. Use a 75 coaxial cable.
2. HDSDI B input terminal (SDI-B) (BNC)
Connect a Video Server or Video source to this terminal. Use a 75 coaxial cable.
3. DVI-D A input terminal (DVI-A) (DVI-D 24P)
Connect the DVI-D output terminal of a PC to this terminal. Use a commercially available DVI-D signal cable (Single Link).
4. DVI-D B input terminal (DVI-B) (DVI-D 24P)
Connect the DVI-D output terminal of a PC to this terminal. Use a commercially available DVI-D signal cable (Single Link).
5. External control terminal (GP I/O) (D-Sub 37P)
Use this terminal when controlling your projector from an external switcher. (See page 51)
6. Remote control input terminal (REMOTE IN) (Stereo mini)
Connect the remote control of the projector, using the supplied remote control cable.
Memo
The projectors remote control can be used by connecting with the remote control cable. (See page 14)
7. PC control signal switch (CINEMA/SYSTEM)
Use this to set data on the projector.
8. PC control terminal (RS-232C) (D-Sub 9P)
This is used when the service personnel sets the data for the projector or operates the projector from PC via RS-232C. Use
a commercially available RS-232C straight cable to connect the projector to the PC.
9. PC card slot
Set a wireless LAN card, and you can control the projector from a PC, using a wireless LAN.
Please inquire your dealer/distributor about a wireless LAN card that can be used.
Use this slot when doing maintenance on your projector.
10. USB port (USB) (type A)
Use this port when doing maintenance on your projector.
11. Ethernet port (LAN-A, LAN-B) (RJ-45)
Use this port when controlling your projector in LAN connection from a PC. Use a commercially available LAN cable
(10Base-T/100Base-T) to connect the projector to the PC.
1. Whats in the Box? and the Names of the Projector Parts
10
1-3-5. Control panel
MMS
STATUS
12 8 9
10 11 19 20
12 13 1816 17 5 6 71514
3
4
1. Remote control light reception unit
This receives signals from the remote control.
2. BACKLIGHT switch
Operate this switch to turn on/off the back light of the LCD screen and operation panel.
3. MMS STATUS indicator
This indicates the link status of the optional multi-media switcher (MMS).
Off
Green lighting
Orange lighting
Green or Orange blinking
Red blinking
When not using multi-media switcher.
When linked to built-in multi-media switcher.
When linked to external multi-media switcher.
Preparing link with multi-media switcher.
When a link error occurs.
4. LCD screen
The liquid crystal display screen shows menus and setting values for the operation of your projector.
5. POWER button
Press this button to turn on or off (standby) he power to your projector. Press this for more than three seconds.
When turning on the power to the projector, first set the main power switch to the main unit and the LPSU to ON, thereby
setting the projector in a standby state. (See page 19)
6. POWER indicator
Green lighting
Green blinking
Orange lighting
Orange blinking
When power is on.
When the douser is closed.
When the power is off (in standby state).
When the cooling fan(s) is running immediately after power-off.
7. STATUS indicator
Off
Red blinking
When the projector is operating normally.
When an error has occurred.
An error code is displayed on the LCD screen.
8. CTL (MACRO) button
Press the CTL (MACRO) button together with MACRO SELECT 1 to 8 buttons.
MACRO SELECT<1> to <8> button does not work individually.
11
1. Whats in the Box? and the Names of the Projector Parts
9. 1 to 8 buttons
Press the 1 to 8 buttons while depressing the CTL (MACRO) button to select titles (input signals) assigned to each button.
To this projector, 100 titles at most can be registered (input signal registration). Among the registered titles, any 8 titles can
be assigned to the buttons <1> to <8>.
The indicator to the left of the buttons show the assigned/selected status of titles.
Green lighting
Orange lighting
Off
When any title is assigned to the button.
When title is selected.
When any title is not assigned to the button.
10. CTL (LAMP) button
Press the CTL (LAMP) button together with the LAMP +/- buttons.
<LAMP +/-> button does not work individually.
11. LAMP +/- buttons
Press the LAMP +/- buttons while depressing the CTL (LAMP) button to adjust the output (brightness) of the lamp. (See
page 23)
12. MENU button
Press this button, and menus for various settings and adjustments will be displayed. (See page 26)
13. [MENU CTL] UP/DOWN/LEFT/RIGHT buttons
Press the [MENU CTL] UP/DOWN/LEFT/RIGHT buttons when the menu is displayed to select menu items.
14. CANCEL button
Press the CANCEL button to return to previous menu item.
15. ENTER button
Press the ENTER button, and the displayed menu item is actioned.
16. FOCUS +/- buttons
Press the FOCUS +/- buttons while depressing the CTL (LENS) button to adjust the focus of the projected image.
(See page 23)
17. ZOOM +/- buttons
Press these buttons while depressing the CTL (LENS) button, for fine adjustment of the size of projected image.
(See page 23)
18. [LENS CTL] UP/DOWN/LEFT/RIGHT buttons
Press the [LENS CTL] UP/DOWN/LEFT/RIGHT buttons while depressing the CTL (LENS) button to move (lens shift) the
position of the projected image up, down, left and right. (See page 22)
19. CTL (LENS) button
Press the CTL (LENS) button together with the FOCUS +/- button, the ZOOM +/- button, the [LENS CTL] UP/DOWN/LEFT/
RIGHT button and the DOUSER button.
The FOCUS +/-, ZOOM +/- [LENS CTL] UP/DOWN/LEFT/RIGHT and DOUSER buttons do not function when pressed alone.
20. DOUSER button
Press the DOUSER button while depressing the CTL (LENS) button to open and close the douser.
1. Whats in the Box? and the Names of the Projector Parts
12
1-4. Names on the Remote Control
1. POWER ON button
Operate this button to turn on the power to your projector.
Press it three seconds or longer.
When turning on the power to your projector, first set the main
power switch to the main unit and the LPSU to ON, which puts
your projector on standby. (See page 19)
2. POWER OFF button
Operate this button to turn off (standby) the power to your
projector. Press it three seconds or longer.
3. Numeric buttons (1 to 0 buttons)
Use these buttons to enter alphanumeric characters. (See
page 28)
4. TEST button
Press this button, and a test pattern will be displayed.
Check the test pattern on the LCD screen by pressing the
SELECT / button, then press ENTER to set your
selection.
To cancel the test pattern display, reselect the signal to
project.
5. KEYSTONE / R button
Press the KEYSTONE(R) button while depressing the CTL
button, then the red (R signal) of the test pattern will be turned
off temporarily. Press this button again while depressing the
CTL button, and the red (R signal) will be projected again.
6. AMPLITUDE / G button
Press the AMPLITUDE (G) button while depressing the CTL button, then the green (G signal) of the test pattern will be
turned off temporarily.
Press this button again while depressing the CTL button, and the green (G signal) will be projected again.
7. ENTRYLIST / B button
Press the ENTRYLIST (B) button while depressing the CTL button, then the blue (B signal) of the test pattern will be turned
off temporarily.
Press this button again while depressing the CTL button, and the blue (B signal) will be projected again.
8. POSI / LENS button
Press the POSI/LENS button while depressing the CTL button, to adjust the position of projected screen (Lens Shift Mode).
(See page 28)
9. PICT / SHUT button
Press this button to turn off image projection temporarily. Press it again, and the image will be projected again.
Press the PICT / SHUT button while depressing the CTL button, then the douser sill operate to shut off the light for
projection. The POWER indicator blinks in green while the douser is operating. Press this button again while depressing
the CTL button to cancel the operation of the douser.
NOTE
When GPIO Control is set to Enable, it is not possible to turn the power on/off and the douser function.
10. MENU button
Operate this button, and menus for various settings and adjustments will be displayed on the LCD screen. (See page 26)
- -
13
1. Whats in the Box? and the Names of the Projector Parts
11. SELECT  buttons
Press the SELECT / button when the menu is displayed, and a menu item can be selected.
Press the SELECT button when the menu is displayed, and a submenu will be displayed.
Press the SELECT button when the menu is displayed, and a menu one level above will be displayed.
During character entry, press the SELECT button while depressing the CTL button, then one character will be deleted.
12. ENTER button
Press the ENTER button, and the displayed menu item is actioned.
13. CANCEL button
Press the CANCEL button to return to the previous menu item.
14. FOCUS +/- buttons
Press the FOCUS +/- button while depressing the CTL button, to make lens focus adjustment. (See page 23)
15. ZOOM +/- buttons
Press the ZOOM +/- button while depressing the CTL button, to make lens zoom adjustment. (See page 23)
16. CTL button
The CTL button is a shift function used to access alternative functions on other buttons.
17. Back light switch
When this is turned ON, the characters on the remote controller will light up.
When using the remote control with infrared ray signals
If the remote control device is not operated for 30 seconds after turning ON the back light switch, the back light switch
will automatically extinguish itself. Thereafter, it will light again when the remote control buttons are operated.
When using the remote control connected to the remote control cable
The back light will constantly light when the power to the projector is turned on and when the projector is in standby status.
NOTE
The following buttons cannot be used with this projector:
WHITE BAL., ADJUST PICTURE, IMAGE, INFO., PIXEL., MUTE SOUND, MUTE OSD, HELP, AUTO, UNDO
Inserting the batteries
[1] Remove the battery case cover on the backside of the remote control.
[2] Insert the UM-3 size AA batteries into the case. Be careful of the direction poles on the batteries.
[3] Restore the cover.
NOTE
When replacing the batteries, always purchase two of the same type of UM-3 size AA batteries.
Effective range of the remote control
To operate the remote control using infrared rays, and not using the remote control cable, point the remote control transmission
unit toward the remote control reception unit on the projector. Signals from the remote control can generally be received within
the range shown in the figure below.
30
30
7m
Remote control
Reception unit on projector
[Range of reception in the horizontal direction]
LENS
(Top view of the projector)
(Note) The effective range depicted in the figure may differ slightly in actual use.
1. Whats in the Box? and the Names of the Projector Parts
14
Using the remote control cable
Use the remote control cable when there are objects that interrupt or obstruct the space between the remote control reception
unit on the projector and the remote control, or when you are using the remote control beyond its effective range.
Note that the remote control cable is connected first to the remote control, then to the projector head.
SDI-A
SDI-B
DVI-A
DVI-B
REMOTE
IN
RS-232C
PC CARD
USB
CINEMA
SYSTEM
Notes for use of the remote control
Do not drop or handle the remote control in a careless manner.
Do not allow the remote control to be splashed with water or any other liquid. If the remote control should get wet accidentally,
wipe the liquid off immediately.
Be sure to use the remote control in a place free from heat or dampness as far as is practicable.
The remote cable is connected first to the remote control, then to the projector head. The leading end of the remote cable is
the power supply unit, so be careful not to touch the other end of the remote cable to the projector head or other devices
while only the remote cable is connected to the projector.
15
2-1. Steps for setting up and connecting
Use the following steps for setting up your projector:
Step 1
Setup the screen and projector. (Contact your dealer to carry out the setup.)
Step 2
Connect cables to the image input terminals. (See page 16)
Connect cables to the various control terminals. (See page 17)
2.
Installation and
Connection
2. Installation and Connection
16
2-2. Connecting the image input terminals
Your projector has four image input terminals, namely, the HDSDI A input terminal, the HDSDI B input terminal, the DVI-D A
input terminal, and the DVI-D B input terminal.
HDSDI A/B input terminal (SDI A/SDI B) ------------ Inputs serial digital images from a Video Server or Video source.
DVI-D A/B input terminal (DVI A/DVI B) ------------- Inputs digital RGB signals from a PC.
SDI-A
SDI-B
DVI-A
DVI-B
GP I/O
LAN-A
LAN-B
REMOTE
IN
RS-232C
PC CARD
USB
CINEMA
SYSTEM
75 coaxial cable DVI-D signal cable
Ferrite clamp core (accessory)
Information for Reducing Radiation of Electromagnetic Waves
To reduce unnecessary radiation of electromagnetic waves, use the supplied ferrite clamp core.
Mounting the ferrite clamp core
1
Open the accessory ferrite clamp core and attach it to the DVI-D signal cable.
When doing so, attach this as close as possible to the end that goes to the projector.
* Push the catch to open the ferrite clamp core.
2
Close the ferrite clamp core tightly.
3
Fix the supplied band to the signal cable as a stopper.
Band
* Pull the end of the band to tighten it. Cut off the surplus of the band.
NOTE
Be sure to use the ferrite clamp core at the end of the DVI-D signal cable.
2. Installation and Connection
17
2-3. Connecting the various control terminal
For control, your projector comes with such ports as the PC control terminal and the Ethernet port (RJ-45).
PC control terminal (PC CONTROL) ----- Use this terminal when controlling the projector in serial connection from a PC.
Ethernet port (LAN 1/LAN 2) --------------- Use this port when controlling the projector in LAN connection from a PC.
SDI-A
SDI-B
DVI-A
DVI-B
GP I/O
LAN-A
LAN-B
REMOTE
IN
RS-232C
PC CARD
USB
CINEMA
SYSTEM
RS-232C
Ethernet cable
1 / 1

NEC NC2500S User manual

Category
Data projectors
Type
User manual

Ask a question and I''ll find the answer in the document

Finding information in a document is now easier with AI

Ask the document