Graco 310554V User manual

Type
User manual
Instructions - Parts List
PrecisionSwirl
Module
An orbital dispenser used to apply sealant and adhesive materials for a variety of
applications.
Part No. 241658, 234029, 289911 and 289912
3500 psi (24.1 MPa, 241 bar) Maximum Fluid Working Pressure
See page 2 for List of Models.
U.S. Patent No. 6,499,673
EU Patent No. 0852160
Important Safety Instructions
Read all warnings and instructions in this manual.
Save these instructions.
PrecisionSwirl
Orbital Dispenser
243402 and 243403
POWER
MOTOR FAULT RUN
MAIN
RUN / ENABLE
CONTROL SELECT
AUTOMATIC
MANUAL
MANUAL SPEED CONTROL
8037B
PrecisionSwirl Control Assembly
918616
289261 and 289262
PrecisionSwirl
Orbital Dispenser
310554V
ENG
List of Models
2 310554V
List of Models
Tool Mounted Dispensers
Part No. 241658, Series A
PrecisionSwirl Orbital Dispenser and Control Assembly
Kit includes 233123, 243403, 617829, 617870 and
918616.
Part No. 234029, Series A
PrecisionSwirl Orbital Dispenser and Control Assembly
Kit includes 233123, 243402, 617829, 617870 and
918616.
Part No. 289911, Series A
PrecisionSwirl Orbital Dispenser and Control Assembly
Kit includes 233123, 289261, 617829, 617870 and
918616.
Part No. 289912, Series A
PrecisionSwirl Orbital Dispenser and Control Assembly
Kit includes 233123, 289262, 617829, 617870 and
918616.
Part No. 918616, Series D
PrecisionSwirl Control Assembly
Cable Assemblies
Part No. 233125
6 ft (1.8 m) Motor Extension Cable Assembly
Part No. 233124
9 ft (2.7 m) Motor Extension Cable Assembly
Part No. 233123
15 ft (4.6 m) Motor Extension Cable Assembly
Part No. 617870
55 ft (16.8 m) Motor Extension Cable Assembly
Part No. 617829
40 ft (12.2 m) Robot Interface Cable Assembly
F
IG. 1
Tool Mount
8130B
List of Models
310554V 3
Contents
List of Models . . . . . . . . . . . . . . . . . . . . . . . . . . . . . . 2
Tool Mounted Dispensers . . . . . . . . . . . . . . . . . . 2
Cable Assemblies . . . . . . . . . . . . . . . . . . . . . . . . 2
Warnings . . . . . . . . . . . . . . . . . . . . . . . . . . . . . . . . . . 4
Unpacking and Repacking . . . . . . . . . . . . . . . . . . . 8
Unpacking the Product . . . . . . . . . . . . . . . . . . . . 8
Repair and Repacking the Product . . . . . . . . . . 8
PrecisionSwirl Overview . . . . . . . . . . . . . . . . . . . . 9
PrecisionSwirl Capabilities . . . . . . . . . . . . . . . . . 9
PrecisionSwirl in Basic Robotic System . . . . . . 10
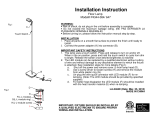
Installing the Control Assembly . . . . . . . . . . . . . . 11
Preparing to Install the Control Assembly . . . . . 11
Mounting the Control Assembly . . . . . . . . . . . . 11
Mounting the Control Assembly (continued) . . . 12
Installation . . . . . . . . . . . . . . . . . . . . . . . . . . . . . . . 13
Grounding the Control Assembly . . . . . . . . . . . 13
Connecting the Control Assembly to a Power
Source . . . . . . . . . . . . . . . . . . . . . . . . . . . . 14
Connecting the Control Assembly to a Power
Source (continued) . . . . . . . . . . . . . . . . . . . 15
Checking Resistance Between the Control
Assembly and the True Earth Ground . . . . . 15
Installing the Dispense Valve . . . . . . . . . . . . . . . . 16
Mounting the Dispense Valve . . . . . . . . . . . . . . 16
Connecting Air Lines to Dispense Valve . . . . . . 16
Connecting Material Hose to Dispense Valve . 16
Installing Cable Assemblies . . . . . . . . . . . . . . . . . 17
Connecting the Motor Control Cable . . . . . . . . 17
Connecting the Motor Control Cable (continued) 18
Connecting the Automatic Control Cable . . . . . 19
Verifying Ground Continuity . . . . . . . . . . . . . . . . . 20
Verifying Ground Continuity . . . . . . . . . . . . . . . . 20
Adjusting the Orbital Dispenser . . . . . . . . . . . . 20
Inspecting the Orbital Dispenser . . . . . . . . . . . . 20
Grounding the System . . . . . . . . . . . . . . . . . . . . 20
PrecisionSwirl Module Operation . . . . . . . . . . . . 21
Reading the PrecisionSwirl Control Assembly
Controls and Indicators . . . . . . . . . . . . . . . . 21
Setting Operation Modes . . . . . . . . . . . . . . . . . . 22
Analyzing Causes for a Motor Fault Alarm . . . . 23
Adjusting Orbital Dispenser Motor Speed . . . . . 24
Troubleshooting . . . . . . . . . . . . . . . . . . . . . . . . . . . 25
Control Assembly Service . . . . . . . . . . . . . . . . . . . 26
Servicing the Control Assembly . . . . . . . . . . . . . 26
Lamp Button and Switch Removal . . . . . . . . . . . 26
Lamp Button and Switch Replacement . . . . . . . 26
Light Bulb Removal . . . . . . . . . . . . . . . . . . . . . . 26
Light Bulb Replacement . . . . . . . . . . . . . . . . . . 26
MAIN Power Switch Removal . . . . . . . . . . . . . . 27
MAIN Power Switch Replacement . . . . . . . . . . . 27
Potentiometer Removal . . . . . . . . . . . . . . . . . . . 28
Potentiometer Replacement . . . . . . . . . . . . . . . 28
Panel Assembly Service . . . . . . . . . . . . . . . . . . . . 29
Swirl Control Board Removal . . . . . . . . . . . . . . . 30
Swirl Control Board Replacement . . . . . . . . . . . 30
RFI Filter Removal . . . . . . . . . . . . . . . . . . . . . . . 31
RFI Filter Replacement . . . . . . . . . . . . . . . . . . . 31
Relay Removal . . . . . . . . . . . . . . . . . . . . . . . . . . 32
Relay Replacement . . . . . . . . . . . . . . . . . . . . . . 32
Fuse Removal . . . . . . . . . . . . . . . . . . . . . . . . . . 33
Fuse Replacement . . . . . . . . . . . . . . . . . . . . . . 33
Control Assembly Parts . . . . . . . . . . . . . . . . . . . . . 34
Accessory Parts . . . . . . . . . . . . . . . . . . . . . . . . . . . 40
Motor Control Cable Assemblies . . . . . . . . . . . . 40
Torsional Motor Control Cable Assemblies . . . . 41
Robot Interface Cable Assembly . . . . . . . . . . . . 42
Dispenser Valve Adapter Fittings . . . . . . . . . . . . 42
Wiring Diagrams . . . . . . . . . . . . . . . . . . . . . . . . . . . 43
Motor Controller Wiring, Lines 200-238 . . . . . . . 43
Motor Controller Wiring, Lines 250-288 . . . . . . . 44
Technical Data . . . . . . . . . . . . . . . . . . . . . . . . . . . . 45
Graco Standard Warranty . . . . . . . . . . . . . . . . . . . 46
Graco Information . . . . . . . . . . . . . . . . . . . . . . . . . 46
Warnings
4 310554V
Warnings
The following warnings are for the setup, use, grounding, maintenance, and repair of this equipment. The exclama-
tion point symbol alerts you to a general warning and the hazard symbol refers to procedure-specific risk. Refer back
to these warnings. Additional, product-specific warnings may be found throughout the body of this manual where
applicable.
WARNING
EQUIPMENT MISUSE HAZARD
Equipment misuse can cause the equipment to rupture, malfunction, or start unexpectedly and result in
serious injury.
This equipment is for professional use only.
Read all instruction manuals, warnings, tags, and labels before operating the equipment.
Use the equipment only for its intended purpose. If you are uncertain about usage, call your Graco
distributor.
Do not alter or modify this equipment. Use only genuine Graco parts and accessories.
Check the equipment daily. Repair or replace worn or damaged parts immediately.
Do not exceed the maximum fluid working pressure of 3500 psi (241 bar, 24.1 MPa) to the dispenser
or manifold.
Never exceed the recommended working pressure or the maximum air inlet pressure stated on your
pump or in the Technical Data section on page 63.
Be sure that all spray/dispensing equipment and accessories are rated to withstand the maximum
working pressure of the pump. Do not exceed the maximum working pressure of any component or
accessory used in the system.
Route hoses and cables away from traffic areas, sharp edges, moving parts, and hot surfaces.
Do not expose Graco standard hoses to temperatures above 180° F (82° C) or below -40° F (-40° C).
Do not use the hoses to pull the equipment.
Use only fluids and solvents that are compatible with the equipment wetted parts. See the Technical
Data sections of all the equipment manuals. Read the fluid manufacturer’s warnings.
Always wear protective eyewear, gloves, clothing, and respirator as recommended by the fluid and
solvent manufacturers.
Comply with all applicable local, state, and national fire, electrical, and other safety regulations.
Warnings
310554V 5
SKIN INJECTION HAZARD
Spray from the applicator, hose leaks, or ruptured components can inject fluid into your body and cause
extremely serious injury, including the need for amputation. Fluid splashed in the eyes or on the skin can
also cause serious injury.
Fluid injected into the skin might look like just a cut, but it is a serious injury. Get immediate surgical
treatment.
Do not point the applicator at anyone or at any part of the body.
Do not put hand or fingers over the front of the applicator.
Do not stop or deflect fluid leaks with your hand, body, glove, or rag.
Follow the Pressure Relief Procedure from manual 309403 whenever you are instructed to: relieve
pressure; stop dispensing; clean, check, or service the equipment; or install or clean a nozzle.
Tighten all the fluid connections before operating the equipment.
Check the hoses, tubes, and couplings daily. Replace worn, damaged, or loose parts immediately.
Permanently coupled hoses cannot be repaired; replace the entire hose.
Always wear eye protection and protective clothing when installing, operating, or servicing this dis-
pensing equipment.
Do not remove or modify any part of the applicator; this can cause a malfunction and result in seri-
ous bodily injury.
Use extreme caution when cleaning or changing nozzles. If the nozzle clogs while applying material,
Always follow the Pressure Relief Procedure from manual 309403, then remove the nozzle to clean
it.
Never wipe off build–up around the nozzle or inlet cap until pressure is fully relieved.
FIRE AND EXPLOSION HAZARD
Improper grounding, poor air ventilation, open flames, or sparks can cause a hazardous condition and
result in fire or explosion and serious injury.
Ground the equipment and the object being dispensed. See Grounding on page 20.
Ground the equipment and the object being sprayed, and all other electrically conductive objects in
the dispense area. Proper grounding dissipates static electricity generated in the equipment. See
Grounding on page 20.
Do not use this equipment with flammable liquids.
Keep the dispense area free of debris, including solvent, rags, and gasoline.
If there is any static sparking or you feel an electric shock while using the equipment, stop dispens-
ing immediately. Do not use the equipment until you have identified and corrected the problem.
Be sure all electrical work is performed by a qualified electrician only.
Have any checks, installation, or service to electrical equipment performed by a qualified electrician
only.
Be sure all electrical equipment is installed and operated in compliance with applicable codes.
Be sure power is disconnected when servicing and repairing equipment.
Before operating the equipment, extinguish all open flames or pilot lights in the dispense area.
Do not smoke in the dispensing area.
Keep liquids away from the electrical components
Disconnect electrical power at the main switch before servicing the equipment.
WARNING
Warnings
6 310554V
TOXIC FLUID OR FUMES HAZARD
Hazardous fluids or toxic fumes can cause serious injury or death if splashed in the eyes or on the skin,
swallowed, or inhaled.
Provide fresh air ventilation to avoid the buildup of vapors from the fluid being dispensed.
Know the specific hazards of the fluid you are using.
Store hazardous fluid in an approved container. Dispose of hazardous fluid according to all local,
state, and national guidelines.
Always wear protective eyewear, gloves, clothing, and respirator as recommended by the fluid and
solvent manufacturer.
Avoid exposure to heated material fumes.
WARNING
Warnings
310554V 7
Unpacking and Repacking
8 310554V
Unpacking and Repacking
Unpacking the Product
The PrecisionSwirl orbital dispenser and control assem-
bly were carefully packaged for shipment by Graco.
When the package arrives, perform the following proce-
dure to unpack the units:
1. Inspect the shipping box carefully for shipping dam-
age. Contact the carrier promptly if damage is dis-
covered.
2. Unseal the box and inspect the contents carefully.
There should not be any loose or damaged parts in
the bag.
3. Compare the packing slip against all items included
in the box. Any shortages or other inspection prob-
lems should be reported immediately.
4. Store the box and packing materials in a safe place
for future use. Graco recommends that all packing
materials be saved in case the unit needs to be
shipped again.
Repair and Repacking the
Product
When the PrecisionSwirl orbital dispenser requires ser-
vice, it is the purchaser’s responsibility to have the unit
repaired. As an option, the purchaser can have the unit
repaired by an authorized Graco distributor. For addi-
tional information, read the following subsections.
On–site Service
PrecisionSwirl components are customarily serviced by
the purchaser or an authorized Graco technician. When
service is required, follow the Service procedures in this
manual.
Service by an Authorized Graco Distributor
The PrecisionSwirl orbital dispenser can be serviced by
an authorized Graco distributor after completing a
Return Goods Authorization (RGA) form. The purchaser
must re–package and ship the orbital dispenser to the
Graco distributor. When repacking the orbital dispenser,
perform the following steps:
1. Retrieve the original box and packing materials for
shipment.
2. Place the orbital dispenser and any loose or dam-
aged parts in the same bag and box used in the
original shipment. Fill the box with filler material to
minimize the possibility of damage.
3. Seal the box tightly to protect its contents and pre-
vent shipping damage.
4. Insure your shipment for the proper replacement
value of its contents.
5. Ship the orbital dispenser freight prepaid to your
authorized Graco distributor for service.
PrecisionSwirl Overview
310554V 9
PrecisionSwirl Overview
PrecisionSwirl Capabilities
The PrecisionSwirl orbital dispenser is regulated
through the control assembly. The orbital dispenser is
used to swirl sealant and adhesives in a variety of appli-
cations.
In a basic robotic system, the control assembly serves
as the interface between the robot controller and the
orbital dispenser via an interface cable. Refer to Robot
Interface Cable Assembly on page 52.
The orbital dispenser is operated either manually from
the control assembly or automatically from a robot con-
troller where the orbital dispenser is programmed to
apply material continuously, or at interrupted intervals,
or both. The orbital dispenser can be stopped, started,
and regulated to suit the application, making high quality
swirl patterns that hold form after the material is dis-
pensed.
The orbital dispenser applies a continuous swirled bead
of material directly on components in targeted areas,
such as the hem flanges on car doors, the interior
seams of the chassis, and on the fixed glass openings of
autos.
Bead profile is “pre–shaped” in a uniform pattern of
overlaid circular loops (see F
IG. 2). Bead shape is
affected by nozzle size, material composition, flow rate,
stand off distance, and orbital dispenser motor speed.
The oscillating nozzle on the orbital dispenser can apply
an accurate swirled bead of material on vertical and hor-
izontal planes.
The orbital dispenser is small enough to apply sealant
and adhesives on any type of surface or material, and
can be directed on any programmable path, including: a
series of crevices, creases, or around a maze of straight
lines, sharp angles, contours, curves, corners, and
openings.
The material source for the orbital dispenser is com-
monly supplied via a dual ram pump fluid supply system,
which can be equipped with filters, temperature condi-
tioning, and a fluid supply header.
F
IG. 2
8128B
PrecisionSwirl Overview
10 310554V
PrecisionSwirl in Basic Robotic
System
FIG. 3 shows the PrecisionSwirl components in a basic
robotic system. The following list identifies the Preci-
sionSwirl components:
No. Description
1 Control assembly (PrecisionSwirl)
2 Orbital dispenser (PrecisionSwirl)
4 Automatic control cable (PrecisionSwirl). Also
called robot interface cable in this manual.
5 6, 9, or 15 ft (1.8, 2.7, or 4.6 m) flexible motor
cable for robot mounting (PrecisionSwirl)
6 55 ft (16.8 m) motor cable (PrecisionSwirl)
7 Dispense valve (not included)
8 Sealer robot
9 Robot controller
10 Fluid supply system
11 Fluid supply header
F
IG. 3
8024B
1
2
11
4
5
6
7
8
9
10
Installing the Control Assembly
310554V 11
Installing the Control Assembly
To install the control assembly:
Prepare to install the control assembly
Mount the control assembly
Ground the control assembly (electrically)
Connect control assembly to a power source
Check resistance between the control assembly and
a true earth ground.
Preparing to Install the Control
Assembly
Before installing the control assembly:
See component manuals for specific data on com-
ponent requirements, such as a robot. Data pre-
sented here pertains to the PrecisionSwirl control
assembly only.
Have all applicable documentation available during
installation.
Use only the Graco PrecisionSwirl control assembly
with the PrecisionSwirl applicator.
Mounting the Control Assembly
1. Select a location to mount the PrecisionSwirl control
assembly. Keep the following in mind:
Allow sufficient space for mounting and using the equip-
ment:
Mount the control assembly approximately 24-67 in.
(0.6-1.7 m) above the floor.
Make sure all cables reach components without
strain.
Make sure there is sufficient space for repair, main-
tenance, and operation of the robot and applicator.
The National Electrical Code requires 3 ft (91.4 cm)
of open space in front of the control assembly.
Make sure there is sufficient clearance around the
control assembly for running fluid lines and cables to
other components.
Make sure there is easy and safe access to an
appropriate electrical power source.
2. Secure the PrecisionSwirl control assembly with
four 1/4 in. bolts through the 0.31 in. diameter holes
in the mounting flanges. See F
IG. 4 for the mounting
hole spacing in the control assembly.
ELECTROCUTION HAZARD
Installing and servicing this equipment requires access
to parts which could cause an electric shock or other
serious injury. Have only qualified electricians access
the control assembly.
EQUIPMENT MISUSE HAZARD
The PrecisionSwirl control assembly weighs approxi-
mately 23.5 lb (10.7 kg). Exercise care when mounting
and handling the control assembly to prevent equip-
ment damage or personal injury.
Installing the Control Assembly
12 310554V
Mounting the Control Assembly (continued)
FIG. 4
7.05
(171.1 mm)
16.00
(406.4 mm)
14.50
(368.3 mm)
14.50
(368.3 mm)
16.00
(152.4 mm)
NOTE: Hidden lines depict the
hole pattern for mounting the control
assembly.
NOTE: Conrol assembly must be
readily accessible and located 24-67
in. (0.6-1.7 m) above the floor.
7/8 in. diameter
hole for power
supply entry.
Robot control
cable connector
Motor cable
connector
4x 0.13 in. (8 mm) diameter
mounting holes
Installation
310554V 13
Installation
Grounding the Control Assembly
Connect a ground wire from the GND terminal in the
PrecisionSwirl control assembly (shown in F
IG. 5) to a
true earth ground.
FIRE, EXPLOSION, AND ELECTRIC SHOCK
HAZARD
To reduce the risk of fire, explosion, or electric shock:
The PrecisionSwirl control assembly must be elec-
trically connected to a true earth ground; the
ground in the electrical system may not be suffi-
cient.
All wires used for grounding must be 8 AWG (8.36
mm
2
) minimum.
A qualified electrician must complete all grounding
and wiring connections.
Refer to your local code for the requirements for a
“true earth ground” in your area.
Also read and follow the warnings on page 4.
CAUTION
If power and grounding connections are not done
properly, the equipment may be damaged and the
warranty will be voided.
CAUTION
To help avoid damage to equipment, make sure that
the robot and PrecisionSwirl equipment are grounded
to the same point.
FIG. 5




,,.0%
6!#
0(
(:


























'.$





#2 #2
#2
*
*
*
*
*
*
*
*
*
*
*
*
*
*
*
*
*
*
*
*
*
*














































'.$









'.$





'.$





'.$





'.$



L1
L2/N
PE/GND
Power Terminals
NOTE: PE is the international designation for
the primary earth ground terminal. GND may
be used elsewhere on Graco equipment.
Installation
14 310554V
Connecting the Control Assembly to a Power Source
Perform the following procedure to connect the control
assembly to a power source.
Have a qualified electrician connect the PrecisionSwirl
control assembly to a grounded electrical source that
has the following required service ratings:
To connect the control assembly to the electrical source:
1. Shut off system power at the main circuit breaker.
2. Locate the opening on the bottom of the control
assembly, labeled POWER SUPPLY. See F
IG. 6.
3. Using 16 AWG wire or larger, connect electrical
power to L1 (hot), L2 (neutral) power terminals in
the PrecisionSwirl control assembly. See F
IG. 8.
4. Use a cord grip to seal the area where wires enter
the control assembly.
5. Apply system power at the main circuit breaker.
6. Move the POWER switch to the ON position, apply-
ing power to the control assembly.
ELECTRIC SHOCK HAZARD
Do not connect the PrecisionSwirl control assembly to
a power source unless you are a trained electrician.
Failure to follow standard procedures or to observe the
necessary precautions could result in serious bodily
injury or equipment damage.
CAUTION
If power and grounding connections are not done
properly, the equipment may be damaged and the
warranty will be voided.
Description Requirements
Vac 100-240
Hz 50/60
Phase 1
Full Load Amps 0.42 at 120 Vac
Circuit Breaker 5 Amp
Power to the control assembly must be supplied
from a source with a lockable–off disconnect
switch, or by use of a cord with a plug–and–socket
connection to the source of power.
FIG. 6
Any fitting that is used to connect a power cord (or
conduit for power wiring) to the control assembly
must provide a liquid–tight seal.
0/7%2
3500,9
!54/-!4)##/.42/,
#!",%
-/4/2
#!",%
7/8 in. Diameter power supply entry
8027A
Installation
310554V 15
Connecting the Control Assembly to a Power Source (continued)
Checking Resistance Between
the Control Assembly and the
True Earth Ground
Have a qualified electrician check the resistance
between each system component and the true earth
ground. The resistance must be less than 0.25 ohms. If
the resistance is greater than 0.25 ohms, a different
ground site may be required. Do not operate the Preci-
sionSwirl module until the problem is corrected.
F
IG. 7




,,.0%
6!#
0(
(:


























'.$





#2 #2
#2
*
*
*
*
*
*
*
*
*
*
*
*
*
*
*
*
*
*
*
*
*
*














































'.$









'.$





'.$





'.$





'.$



L1
L2/N
PE/GND
Power Terminals
FIRE, EXPLOSION, AND ELECTRIC SHOCK
HAZARD
To reduce the risk of fire, explosion, or electric shock,
the resistance between the supply unit components
and true earth ground must be less than 0.25 ohms.
Installing the Dispense Valve
16 310554V
Installing the Dispense Valve
To install the dispense valve:
Mount the dispense valve
Connect the air lines
Connect material hose
Mounting the Dispense Valve
Attach the dispense valve to the mounting bracket on a
stationary support or robotic arm, using two socket head
screws (38) and flat washers (39).
Connecting Air Lines to
Dispense Valve
Securely connect air lines to dispense valve air
ports (F). Make sure to connect the appropriate air lines
to the appropriate ports.
Connecting Material Hose to
Dispense Valve
Securely connect the material hose to dispense valve
inlet port (A).
Refer to Dispense Valve manuals 308876 and 309376.
The customer must provide a four–way pneumatic
valve, activated by a separate on/off dispense sig-
nal via the robot, to control material flow.
Installing Cable Assemblies
310554V 17
Installing Cable Assemblies
Connecting the Motor Control
Cable
Motor control cables are supplied in four lengths, 6 ft
(1.8 m), 9 ft (2.7 m), 15 ft (4.6 m), and 55 ft (16.8). The
55 ft cable may be used by itself. The 6 ft, 9 ft, and 15 ft
cable must be used with the 55 ft cable.
To connect the motor cable between the control assem-
bly and the orbital dispenser, do the following:
1. Locate the receptacle on the bottom of the control
assembly that is labeled MOTOR CABLE. See F
IG.
8.
2. Connect the orbital dispenser cable (55 ft) to the
MOTOR CABLE receptacle. See F
IG. 9.
3. Check the connections to ensure the cable is con-
nected correctly.
4. Route the motor control cable and conform to the
following cable routing requirements:
Avoid a bend radius of less than 5 in. (12.7 cm).
Avoid pinch points.
Avoid cable pulling or stretching.
Keep cables from rubbing against other components
or machinery.
If a lot of robot wrist motion is required, leave suffi-
cient cable length to allow for the motion, avoiding
any cable droops that may interfere with the machin-
ery or substrate.
Route and secure the 7 in. motor cable to minimize
any movement. The 7 in. motor cable is not
intended to handle severe flexing motions.
Cable ties should only be used to loosely bundle
hoses together. Do not tighten cable ties to the point
where cable movement is restricted.
CAUTION
Always make connections to the control assembly
with power turned off.
F
IG. 8
0/7%2
3500,9
!54/-!4)##/.42/,
#!",%
-/4/2
#!",%
Motor cable receptacle
8027A
Installing Cable Assemblies
18 310554V
Connecting the Motor Control Cable (continued)
FIG. 9
0/7%2
-/4/2&!5,4 25.
-!). 25.%.!",%
#/.42/,3%,%#4
!54/-!4)# -!.5!,
-!.5!,30%%$#/.42/,
ti0657B
Motor Control Cable (15 ft)
Motor Control
Cable (55 ft)
Installing Cable Assemblies
310554V 19
Connecting the Automatic
Control Cable
The PrecisionSwirl control assembly is provided with a
9–pin receptacle for the robot interface cable.
To connect the automatic control cable (P/N 617829)
between the control assembly and the robot, perform
the following steps:
1. Locate the receptacle on the bottom of the control
assembly that is labeled AUTOMATIC CONTROL
CABLE. See F
IG. 10.
2. Connect the cable assembly to the AUTOMATIC
CONTROL CABLE receptacle in F
IG. 10.
3. Secure the cable by tightening the two mounting
screws.
4. Connect the opposite end of the cable assembly to
the applicable terminals or receptacle on the robot
controller.
For information about specific control assembly circuitry
and connections, read the chart below and see the Wir-
ing Diagrams on pages 56 and 57, and F
IG. 11.
5. Check the connections to ensure the cable is con-
nected correctly.
CAUTION
Always make connections to the control assembly
with power turned off.
Any wiring from an external source, such as a robot
controller, must follow the robot manufacturer’s
instructions and must comply with the appropriate
codes and standards.
FIG. 10
Signal Description
Enable The 24V enable signal starts the orbital dis-
penser motor.
Swirl
Speed
Command
This 0-10 VDC analog signal is used to
adjust the motor speed. (0-10 VDC =
6600-24,000 RPM)
Motor
Fault
Alarm
The alarm relay activates when the motor
speed drops below 1500 RPM or does not
start. The relay contacts are normally
closed.
A fault will be generated if any of the front
panel controls are in the wrong position for
automatic operation
Swirl
Speed
Readout
This analog signal can be used to monitor
motor speed.
(0-10 VDC = 0-24,000 RPM)
0/7%2
3500,9
!54/-!4)##/.42/,
#!",%
-/4/2
#!",%
ti0827A
Automatic control cable receptacle
F
IG. 11
0/7%2
-/4/2&!5,4
25.
-!).
25.%.!",%
#/.42/,3%,%#4
!54/-!4)#
-!.5!,
-!.5!,30%%$#/.42/,
8029A
Robot controller
Verifying Ground Continuity
20 310554V
Verifying Ground Continuity
Verify ground continuity between:
True earth ground and the control assembly ground
terminal
The orbital dispenser and the robot
Adjusting the Orbital Dispenser
The PrecisionSwirl orbital dispenser is calibrated at the
factory. No adjustment is required during initial setup.
Before applying power, read the reference information
provided about controls and indicators to become famil-
iar with the equipment.
Inspecting the Orbital Dispenser
Inspect the orbital dispenser cables, material, and air
hoses daily for leakage and other visible damage.
Grounding the System
The following grounding instructions are minimum
requirements for a basic dispensing system. Your sys-
tem may include other equipment or objects which must
be grounded. Check your local electrical code for
detailed grounding instructions for your area and type of
equipment. Your system must be connected to a true
earth ground.
1. Pump: connect a ground wire and clamp to a true
earth ground as shown in separate pump manual.
2. Orbital Dispenser: obtain grounding through the
motor cable assembly.
3. Fluid and air hoses: use only electrically conductive
material and air hoses.
4. Dispense gun: obtain grounding through the con-
nection of the hose, or cable.
5. Air compressor: follow the manufacturer’s recom-
mendations.
6. Object being sprayed: according to local code.
7. Fluid supply container: according to local code.
FIRE AND EXPLOSION HAZARD
To reduce the risk of a fire, explosion, and serious
injury, proper electrical grounding of every part of your
system is essential. Read the warning section, FIRE
AND EXPLOSION HAZARD, on page 5 and follow the
grounding instructions below.
  • Page 1 1
  • Page 2 2
  • Page 3 3
  • Page 4 4
  • Page 5 5
  • Page 6 6
  • Page 7 7
  • Page 8 8
  • Page 9 9
  • Page 10 10
  • Page 11 11
  • Page 12 12
  • Page 13 13
  • Page 14 14
  • Page 15 15
  • Page 16 16
  • Page 17 17
  • Page 18 18
  • Page 19 19
  • Page 20 20
  • Page 21 21
  • Page 22 22
  • Page 23 23
  • Page 24 24
  • Page 25 25
  • Page 26 26
  • Page 27 27
  • Page 28 28
  • Page 29 29
  • Page 30 30
  • Page 31 31
  • Page 32 32
  • Page 33 33
  • Page 34 34
  • Page 35 35
  • Page 36 36
  • Page 37 37
  • Page 38 38
  • Page 39 39
  • Page 40 40
  • Page 41 41
  • Page 42 42
  • Page 43 43
  • Page 44 44
  • Page 45 45
  • Page 46 46

Graco 310554V User manual

Type
User manual

Ask a question and I''ll find the answer in the document

Finding information in a document is now easier with AI