Page is loading ...

THIS INSTRUCTION BOOKLET CONTAINS IMPORTANT
SAFETY INFORMATION.
PLEASE READ AND KEEP FOR FUTURE REFERENCE.
Whalen Furniture Manufacturing Page 1 Factory No. 16434
Date 2014-09-27 Rev. 1 Factory: DOSHFU
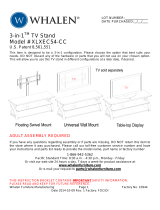
Audio Component Tower
Model # BBAT27TC
ADULT ASSEMBLY REQUIRED
If you have any questions regarding assembly or if you are missing parts, do not return this
item to the Retailer Store. Please call our toll-free customer service number and have your
instructions and parts list ready to provide the model name, part name or factory number:
1-866-942-5362 8:30 a.m. - 4:30 p.m. PST, Monday - Friday
ONLINE: www.whalenfurniture.com EMAIL: [email protected]
On-line Video Instruction Guides
Go to http://vig.sellpoints.com to view step-by-step instructional
videos for assembling and installing your product. Enter the
following product number on the website under Whalen brand.
LOT NUMBER:
DATE PURCHASE: / /
BBAT27TC

Model # BBAT27TC
Please call for replacement parts or assistance:
1-866-942-5362
Whalen Furniture Manufacturing Page 2 Factory No. 16434
QUALITY GUARANTEE
We are confident that you will be delighted with your Whalen Furniture purchase.
Should this product be defective in workmanship or materials or fail under normal use, we will
repair or replace it for up to one (1) year from the date of purchase. Every Whalen Furniture
product is designed to meet your highest expectations. We guarantee that you will immediately
see the value of our fine furniture.
This warranty gives you specific legal rights and you may also have other rights which vary from
State to State.
Customer Service: 1-866-942-5362
8:30 a.m. - 4:30 p.m., PST, Monday to Friday
www.whalenfurniture.com
MANUFACTURER: Whalen Furniture Manufacturing
CATALOG: Audio Component Tower (BBAT27TC)
DATE OF MANUFACTURE: October 2014
MADE IN CHINA
MAXIMUM RECOMMENDED WEIGHT LOADS
FITS UP TO MOST 32” FLAT PANEL TVs
MAXIMUM LOAD 80 lb. (36.3 kg)
MAXIMUM LOAD 50 lb. (22.6 kg)
THIS UNIT IS NOT INTENDED FOR USE WITH CRT TVS. USE ONLY
WITH FLAT PANEL TVS AND AUDIO/VIDEO EQUIPMENT MEETING RECOMMENDED SIZE
AND WEIGHT LIMITS. NEVER USE WITH LARGER/HEAVIER THAN RECOMMENDED FLAT
PANEL TVS OR EQUIPMENT. TO AVOID INSTABILITY, PLACE FLAT PANEL TV IN THE
CENTRE OF THE UNIT; THE BASE OF THE TELEVISION MUST BE ABLE TO REST ON THE
SUPPORTING SURFACE OF THE UNIT WITHOUT OVER-HANGING THE EDGES.
IMPROPERLY POSITIONED FLAT PANEL TVS, OR FLAT PANEL TVS OR OTHER
EQUIPMENT THAT EXCEED RECOMMENDED SIZE AND WEIGHT LIMITS COULD FALL OFF
OR BREAK THE UNIT
,
CAUSING POSSIBLE SERIOUS INJURY.

Model # BBAT27TC
Please call for replacement parts or assistance:
1-866-942-5362
Whalen Furniture Manufacturing Page 3 Factory No. 16434
Parts and Hardware List
Please read completely through the instructions and verify that all listed parts and hardware
are present before beginning assembly.
A-Top Shelf Frame (1) B- Second Shelf Frame (1) C- Third Shelf Frame (1)
D- Bottom Shelf Frame (1) E- Spine (1) F- Left Leg (1)
G- Right Leg (1) H- Top Glass (1) I- Second Glass Shelf (1)
J- Third Glass Shelf (1) K- Bottom Glass Shelf (1)
(1) Suction Cup (2) 3/4” Bolt (3) 1-1/4” Bolt (4) Lock Washer
(12+1 extra) (10+1 extra) (8+1 extra) (18+1 extra)
(5) Flat Washer (6) Glass Riser Allen Wrench Touch-up Pen Tipping Restraint Hardware Kit (1)
(18+1 extra) (5+1 extra) (2) (1) (Inside Plastic Bag)
Tools required: Allen wrench (provided).

Model # BBAT27TC
Please call for replacement parts or assistance:
1-866-942-5362
Whalen Furniture Manufacturing Page 4 Factory No. 16434
Assembly Instructions
NOTE: Please do not fully tighten all bolts until you finish assembling all parts. Once assembled,
go back and fully tighten all bolts. This will make the assembly easier.
1. Unpack the unit and confirm that you have all the hardware and required parts.
2. Locate Spine (E) on a level and protective surface with 3 oval holes facing up, as shown in
detail #1.
3. Align the pre-drilled holes of 4 Shelf Frames (A, B, C & D) at back rail with the threaded inserts
on the Spine (E). Make sure that the flush edges will face up when the unit is turned upright.
Insert eight 1-1/4” Bolts (3) with Lock Washers (4) and Flat Washers (5) through the pre-drilled
holes on back rails and screw into the Spine (E) using the provided Allen wrench. See detail
#1.
Required hardware in this step
Description: (3) 1-1/4” Bolt (4) Lock Washer (5) Flat Washer
Sketch
Qty. (8 pcs) (8 pcs) (8 pcs)
Tools required: Allen wrench

Model # BBAT27TC
Please call for replacement parts or assistance:
1-866-942-5362
Whalen Furniture Manufacturing Page 5 Factory No. 16434
Assembly Instructions
4. Pick up Right Leg (G) and align the back inserted nuts with the end brackets on all Shelf
Frames (A, B, C & D) simultaneously. Insert the 3/4” Bolts (2) with the Washers (4 & 5)
through the end brackets and screw into the Leg as shown in detail #2. DO NOT tighten the
bolts. Ensure the top of the leg is flush with Top Shelf Frame (A).
5. Repeat last step to install Left Leg (F) at the other end. Make sure that the gaps and offsets
between the wooden front rail of Top Shelf Frame (A) and both Legs are equal. Loosen the
bolts on the end brackets and Wood Front Rail and adjust, if necessary.
Required hardware in this step
Description:
(2) 3/4” Bolt (4) Lock Washer (5) Flat Washer
Sketch
Qty. (10 pcs) (10 pcs) (10 pcs)
Tools required: Allen wrench

Model # BBAT27TC
Please call for replacement parts or assistance:
1-866-942-5362
Whalen Furniture Manufacturing Page 6 Factory No. 16434
Assembly Instructions
6. Stand the unit upright. Go back and tighten all the bolts with the provided Allen wrench.
7. Put Suction Cups (1) firmly into top holes of the Lower Shelf Frame (B, C & D), as shown in
detail #3. Make sure that the Suction Cups go all the way into the pre-drilled holes to prevent
the glass shelf from falling and getting damage.
8. Securely screw the Glass Risers (6) into the top holes of the Top Shelf Frame (A) and the
Legs (F & G). See detail #3A.
9. Place the Top Glass (H) and Glass Shelves (I, J and K) in place begin with Bottom Glass Shelf
(K), as shown in detail #3. Make sure that the glass is properly centered and the black side of
glass is down. Also, be sure to press down evenly and firmly each shelf onto the Suction Cups
to make sure they securely rest onto the Suction Cups.
NOTE:
Make sure that the glass sits correctly. If glass is scratched, you can minimize the
damage by using a BLACK marker and filling in scratched area from underneath.
10. In case of uneven floor, Floor Levelers are provided at the bottom of both Legs (F & G).
Simply tilt the unit back and raise or lower floor levelers by hand to correct tilting, until the unit
is level. See detail #3A. NOTE:
When adjusting the height and tilting the unit, make sure that
you ask for assistance to prevent the glass from falling.
Required hardware in this step
Description: (1) Suction Cup (6) Glass Riser
Sketch
Qty. (12 pcs) (5 pcs)

Model # BBAT27TC
Please call for replacement parts or assistance:
1-866-942-5362
Whalen Furniture Manufacturing Page 7 Factory No. 16434
TIPPING RESTRAINT HARDWARE
We have included one set of Tipping Restraint Hardware for this unit.
When properly installed, this restraint can provide protection against the unexpected tipping
of the unit due to small tremors, bumps or climbing. We strongly recommend mounting this
hardware to a wall stud and your unit when installing.
Please carefully read the instructions printed on the plastic bag containing Tipping Restraint
Hardware Kit to attach the tip-over restraint between the unit and the wall
.
NOTE: You must install the Tipping Restraint Hardware with the unit in use to prevent
any accidents or damage to the unit.
Tools required
: Allen wrench (provided), Phillips screwdriver, Mallet, Power Drill, and 3/8” Drill Bit.
A Touch-up Pen has been provided to repair any small nicks or scratches that may occur
during assembly or shipping.
Your assembly should now be complete.
Thank you for your purchase!

IF YOU NEED TO REQUEST ANY PARTS PLEASE USE THE LIST BELOW
Audio Component Tower (BBAT27TC)
*BBAT27TC-1-LL
Left Leg
*BBAT27TC-14-3/4B
3/4” Bolt
*BBAT27TC-2-RL
Right Leg
*BBAT27TC-15-1 1/4B
1-1/4” Bolt
*BBAT27TC-3-WFR
Wooden Front Rail
*BBAT27TC-16-LW
Lock Washer
*BBAT27TC-4-TSF
Top Shelf Frame
*BBAT27TC-17-FW
Flat Washer
*BBAT27TC-5-SSF
Second Shelf Frame
*BBAT27TC-18-SC
Suction Cup
*BBAT27TC-6-TSF
Third Shelf Frame
*BBAT27TC-19-GR
Glass Riser
*BBAT27TC-7-BSF
Bottom Shelf Frame
*BBAT27TC-20-AW
Allen Wrench
*BBAT27TC-8-S
Spine
*BBAT27TC-21-TRHK
Tipping Restraint Hardware Kit
*BBAT27TC-9-TG
Top Glass
*BBAT27TC-22-TUP
Touch-up Pen
*BBAT27TC-10-SGS
Second Glass Shelf
*BBAT27TC-23-FL
Floor Leveler
*BBAT27TC-11-TGS
Third Glass Shelf
*BBAT27TC-25-OPG
Oval Plastic Grommet
*BBAT27TC-12-BGS
Bottom Glass Shelf
*BBAT27TC-26-PEC Plastic End Cap
*BBAT27TC-13-CH
Complete Hardware
*BBAT27TC-27-SEC Spine End Cap
/