- 4 -
Prepare the Mimaki Driver
1.
Check if the attached Mimaki Driver is installed.
• For the installation, refer to Installation Guide of the attached Mimaki Driver.
Prepare the RasterLink
Check that the attached software RIP [RasterLink] is prepared.
1.
Check if the attached RasterLink is installed.
• If it is installed, the icon on the right is displayed on the PC
desktop.
• For the installation, refer to Installation Guide of the attached RasterLink.
2.
Check the connection with SIJ-320UV.
(1) Is the power supply of SIJ-320UV turned ON?
(2) Is the PC in whichthe attached RasterLink is installed connected with SIJ-320UV?
3.
Double-click to start the attached
RasterLink.
• “Printer Management...” is displayed
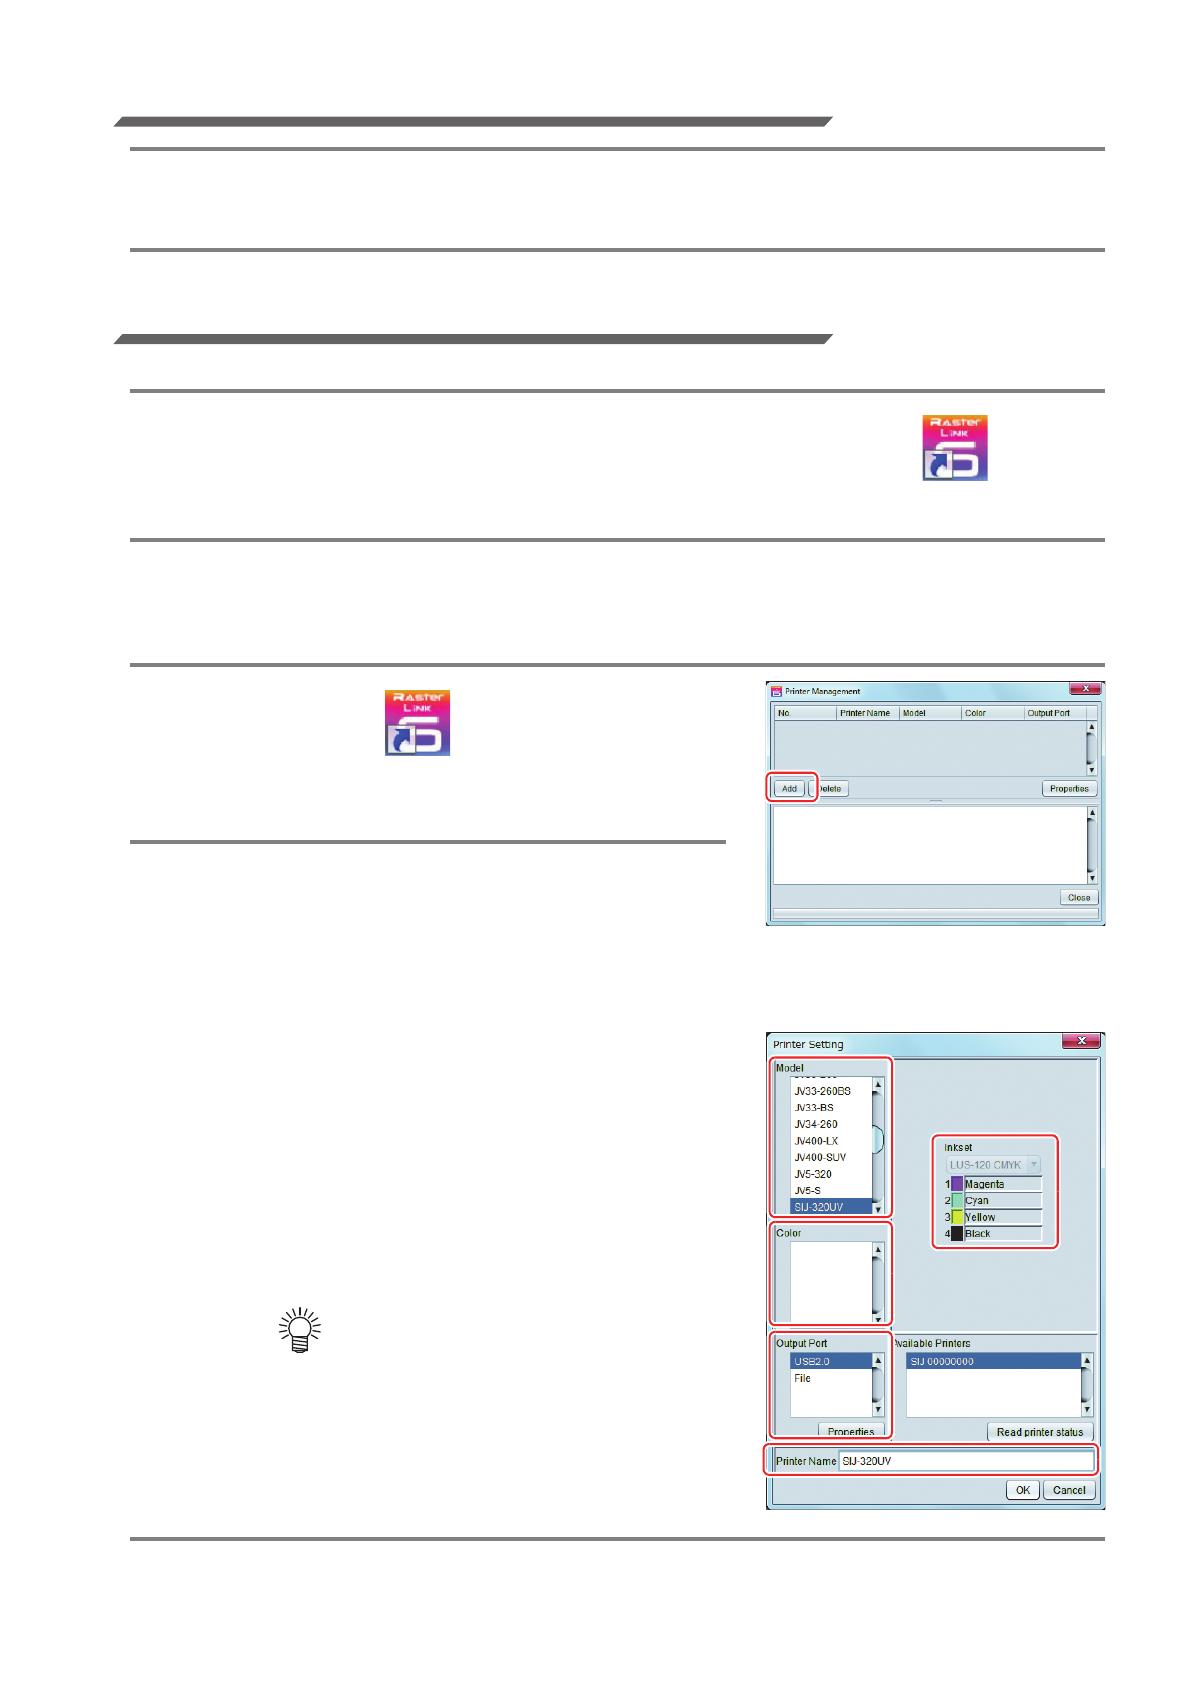
4.
Register the printer.
• For print in SIJ-320UV, the registration of the printer
into the attached RasterLink is required.
• If the printer has already been registered, this operation can be skipped.
(1) Click [Add] in the “Printer Management...” window.
(2) Set the printer information.
(The setup procedure described below assumes
that SIJ-320UV is connected. Set the printer
information in the following order:)
• Model : SIJ-320UV
• Color : Select depending on the
device.
• Output Port : USB2.0
• Available Printers : Select SIJ00000000
• Printer Name : Enter the SIJ-320UV
(3) Click [OK].
• The confirmation screen is displayed.
Clicking [OK] starts the registration of the
printer.
• The Hot folder of the name entered
here is automatically created.
• For an ink set, the information
retrieved from the printer is displayed.


