Hendi 227060 User manual

Type
User manual

This manual is also suitable for

You should read this user manual carefully before
using the appliance.
Bevor Sie das Gerät in Betrieb nehmen, sollten
Sie diese Gebrauchsanweisung aufmerksam lesen.
Alvorens de apparatuur in gebruik te nemen dient
u deze gebruiksaanwijzing aandachtig te lezen.
Przed uruchomieniem urządzenia należy koniecznie
dokładnie przeczytać niniejszą instrukcję obsługi.
Lisez attentivement ce mode d’emploi avant d’utiliser
l’appareil .
Prima di utilizzare l’apparecchio in funzione leggere
attentamente le istruzioni per l’uso.
Citiţi cu atenţie prezentul manual de utilizare înainte de
folosirea aparatului.
Внимательно прочитайте руководство пользователя
перед использованием прибора.
Πρέπει να διαβάσετε αυτές τις οδηγίες χρήσης
προσεκτικά πριν χρησιµοποιήσετε τη συσκευή.
Convection Oven H90
227060, 227374
3
EN
Dear Customer,
Thank you for purchasing this Hendi appliance. Before using the appliance for the first time, please read
this manual carefully, paying particular attention to the safety regulations outlined below.
Safety regulations
This appliance is intended for commercial use.
The appliance must only be used for the purpose for which it was intended and designed.
The manufacturer is not liable for any damage caused by incorrect operation and im
-
proper use.
Keep the appliance and electrical plug away from water and any other liquids. In the
event that the appliance should fall into water, immediately remove plug from the socket
and do not use until the appliance has been checked by a certified technician. Failure to
follow these instructions could cause a risk to lives.
Never attempt to open the casing of the appliance yourself.
Do not insert any objects in the casing of the appliance.
Do not touch the plug with wet or damp hands.
Danger of electric shock! Do not attempt to repair the appliance yourself. In case of
malfunctions, repairs are to be conducted by qualified personnel only.
Never use a damaged appliance! Disconnect the appliance from the electrical outlet and
contact the retailer if it is damaged.
Warning! Do not immerse the electrical parts of the appliance in water or other liquids.
Never hold the appliance under running water.
Regularly check the power plug and cord for any damage. If the power plug or power cord
is damaged, it must be replaced by a service agent or similarly qualified persons in order
to avoid danger or injury.
Make sure the cord does not come in contact with sharp or hot objects and keep it away
from open fire. To pull the plug out of the socket, always pull on the plug and not on the
cord.
Ensure that the power cord is positioned so that it will not cause a trip hazard.
Always keep an eye on the appliance when in use.
Warning! As long as the plug is in the socket the appliance is connected to the power
source.
Turn off the appliance before pulling the plug out of the socket.
Never carry the appliance by the cord.
Do not use any extra devices that are not supplied along with the appliance.
Only connect the appliance to an electrical outlet with the voltage and frequency men
-
tioned on the appliance label.
Connect the power plug to an easily accessible electrical outlet so that in case of emer
-
gency the appliance can be unplugged immediately. To completely switch off the appli-
ance pull the power plug out of the electrical outlet.
Always turn the appliance off before disconnecting the plug.
4
EN
Never use accessories other than those recommended by the manufacturer. Failure to do
so could pose a safety risk to the user and could damage the appliance. Only use original
parts and accessories.
This appliance is not intended for use by persons (including children) with reduced phys
-
ical, sensory or mental capabilities, or lack of experience and knowledge.
This appliance must not be used by children under any circumstances.
Keep the appliance and its cord out of reach of children.
Always disconnect the appliance from the mains if it is left unattended or is not in use,
and before assembly, disassembly or cleaning.
Never leave the appliance unattended during use.
Attention: Do not use this trays for storage and processing of acidic, alkaline or salty
food.
Special safety regulations
This appliance is only intended for cooking food. Any other use might lead to damage of
the appliance or personal injury.
Caution! Danger of burns! The temperature of accessible surfaces & door of the
appliance get very hot during use. Touch the appliance only with its handle & knobs.
• Allow at least 15cm spacings for ventilation purposes during use.
This appliance is not intended to be operated by means of an external timer or separate
remote-control system.
• Place the appliance on a heat resistant surface only.
• Do not place any objects on top of the appliance and cover the appliance during use.
Do not use this appliance for cooking food or liquids in a closed container as it may lead
to explosion.
• Do not cover the smoke vent at the rear side of the appliance.
Keep the appliance away from any hot surfaces and open flames. Protect the appliance
against heat, dust, direct sunlight, moisture, dripping and splashing water.
• Do not pour out the water towards the glass door, or the door may break during operation.
Do not place articles on top of the appliance. Do not place objects with open sources of
fire (e.g. candles) on top or beside the appliance. Do not place objects filled with water
(e.g. vases) on or near the appliance.
An equipotential bonding terminal is provided to allow cross bonding with other
equipment.
Mind that surfaces of the oven may become very hot during use. Do not touch these
surfaces.
Never cover the oven during use. This causes a fire hazard.
Do not use metal scouring pads. Parts of these may break off, and cause an electrical
hazard in the oven.
Do not use the oven to prepare food or liquids in a closed container as the container may
explode.
5
EN
Intended use
The appliance is intended for professional use.
Heating elements may be hot even though they
are not glowing. Interior surfaces of an oven be-
come hot enough to cause burns. External parts
of the oven such as the door glass, vents, and the
control panel can become hot. During and after
use, do not touch, or let clothing or other flam-
mable materials come into contact with heating
elements or interior surfaces of the oven until
they have had sufficient time to cool.
Operating the appliance for any other purpose
shall be deemed a misuse of the device. The user
shall be solely liable for improper use of the de-
vice.
Grounding installation
This appliance is classified as protection class I
and must be connected to a protective ground.
Grounding reduces the risk of electric shock by
providing an escape wire for the electric current.
This appliance is equipped with a cord having a
grounding wire with a grounding plug. The plug
must be plugged into an outlet that is properly in-
stalled and grounded.
Preparation before using for the first time
Remove all protective packaging and wrapping.
Make sure no packaging debris remain on or in-
side the appliance.
Check for completeness (4 trays and 1 tray han-
dle included) and any transport damage. In case
of damages or incomplete delivery, please con-
tact supplier (See --- > Warranty page).
Keep the packaging for storing your appliance
when not in use for an extended period of time.
Place all the trays & the tray handle inside.
Connect the power plug to a suitable electrical
wall outlet.
Select the following settings consecutively.
Control Setting
Temp control
300°C
Timer control
10 minutes
The Temp control indicator , Timer control indi-
cator and the internal light of the appliance
are all lights up.
Note: Due to the manufacturing residues, the ap-
pliance may emit a slight odor. This is normal and
does not indicate and defect or hazard. Make sure
the appliance is well ventilated.
When the set time ends, the appliance tempera-
ture and timer indicators goes off.
Allow the appliance to cool down completely and
clean it afterwards (See ---> Cleaning and main-
tenance).
6
EN
Electric diagram
-HL1
-S1- PT
L
N
E
-HL2 -EH1 -EH2-EL
M1 M2
-S2
Operation
1). Preparation:
Open the glass door using the door handle.
Insert the trays in a proper position.
Place the food on the trays and close the door.
Ensure there is enough space between the food
for the heat to be evenly distributed.
Connect the power plug to a suitable electrical
outlet.
Note: Do not overload the tray to avoid any dam-
age.
Check the recipe first for the Timer & Tem-
perature setting.
Attention: Do not use this trays for storage and pro-
cessing of acidic, alkaline or salty food.
2). Start cooking
Set the 2 controls: Timer control and the Temp
control to the desired settings. The Timer control
indicator , Temp control indicator and in-
ternal light of the appliance are all lights up. The
appliance start heating up.
Note: The ideal cooking time depends on food
type and size, as well as the selected settings.
Some types of food may get burned, if they are
baked, roasted or grilled too long. Therefore,
check the food for doneness in regular intervals
through the glass door.
When the set time ends, the temperature & timer
indicator goes off.
To terminate the cooking process manually, just
set the Timer control to the “0”.
After cooking, set the Temp control to the “0°C”.
Open the glass door using the door handle and
remove the food.
Caution! Risk of burns!
Always open the glass door using the door han-
dle.
To remove the food, use the tray handle (supplied)
and/or oven mittens (not supplied). Make sure
not to touch and damage the heating elements.
Keep hands away from steam exiting the appli-
ance.
After use, disconnect the power plug from the
wall outlet.
Allow the appliance to cool down completely be-
fore cleaning and storing.
7
EN
3). Timer control
A cooking time of maximum 120 minutes can be
set. For this purpose, set the Timer control to the
desired time. The cooking time can be increased
or decreased at any time during operation.
Note: To set time with higher precision, first turn
the Timer control over the desired time position
a little, then return back to the desired time po-
sition.
When the set time ends, the Timer control &
the Temp control indicator lights go off and a
sound will be heard.
4). Temp control
A cooking temperature of maximum MAX (300°C)
can be set. For this purpose, set the Temp control
to the desired temperature.
Similarly, the cooking temperature can be in-
creased or decreased at any time during oper-
ation.
Note: When the temperature reaches the desired
setting, the Temp control indicator will go off.
If the temperature drops, the Temp control indi-
cator will light on again. This process will be
repeated automatically.
Note: Please note that there is a safety thermal
cut out device for protection located at the lower
rear side of the appliance with a protective cap
(See ---> RESET with the SAFETY CUT-OUT ).
This is to prevent the appliance from getting too
high and turn off automatically.
Tips for cooking
Check the recipe first for the Timer control and
Temp control setting.
Ensure there is enough space between the food
for the heat to be evenly distributed.
Cooked food and parts of the appliance get very
hot for some time after cooking. Do not touch
them with bare hands while in use or shortly af-
ter use.
0
50
1
0
0
1
2
5
1
5
0
1
7
5
2
0
0
2
2
5
2
5
0
2
7
5
M
A
X
0
10
20
30
40
50
60
70
80
90
10 0
11 0
12
0
Handle
Timer knobTemperature
control knob
Timer indicator
light
Temperature
light
Fan
Wire rack
mounts
8
EN
RESET with the SAFETY CUT-OUT
Please note that there is a SAFETY CUT-OUT device
for protection located at the lower rear side of the
appliance with a protective cap. This is to turn off
the appliance automatically when the temperature
is too high.
Unplug the appliance from the electrical outlet
first.
• Allow the appliance to completely cool down.
Unscrew (tool not supplied) the black protective
cap of the “SAFETY CUT-OUT”.
Push the button to RE-SET the overload circuit.
You should hear a click sound.
Screw back the protective cap on the “SAFETY
CUT-OUT” button.
Cleaning and Maintenance
Warning!
Always disconnect the appliance and open the
door to allow it to cool down completely before
cleaning.
Never use abrasive sponges or detergents, steel
wool or metallic utensils to clean the interior or
exterior parts of the appliance.
Avoid the use of sprays as this may damage the
appliance’s surface.
The appliance should be cleaned regularly and
any food deposits removed.
Wipe out any remaining oil or fat.
Note: The trays holder on two sides can be un-
screwed (tools not supplied) to detach for clean-
ing.
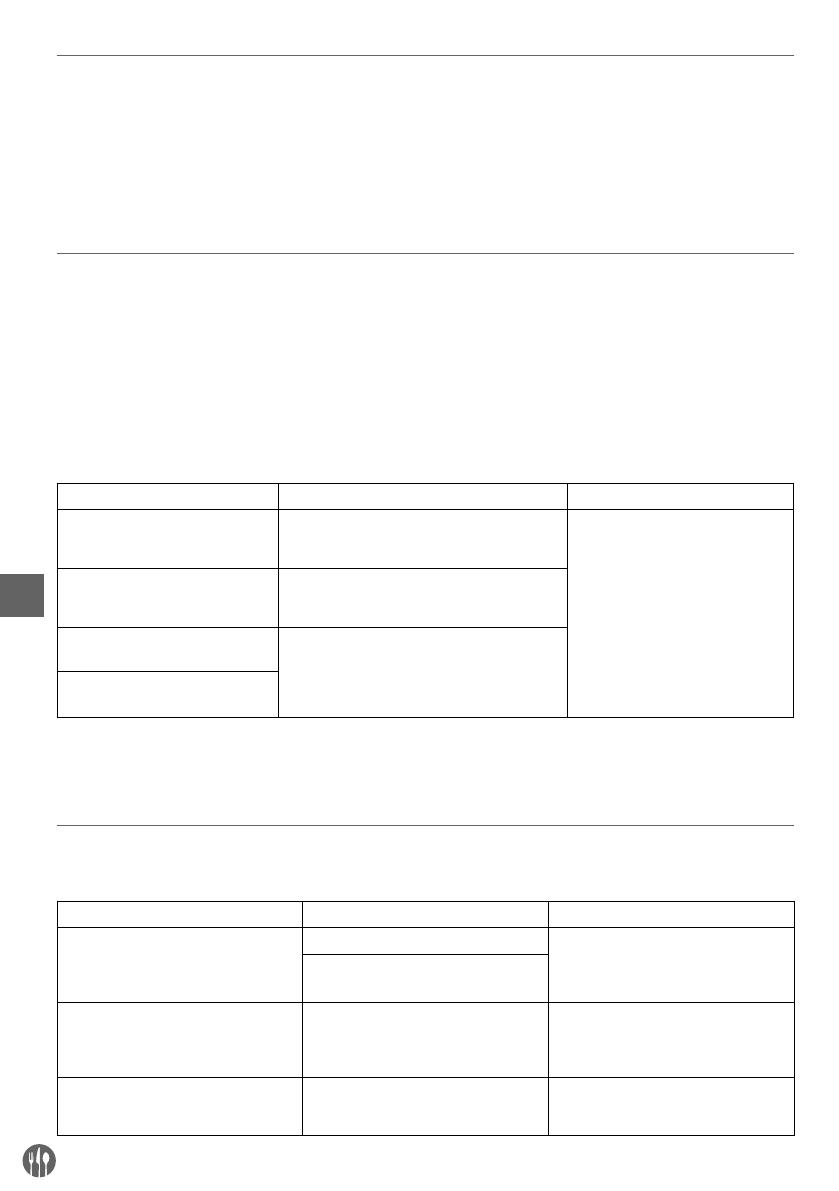
Parts How to clean Remark
All accessories such as trays, tray
handle, tray holders
- Soak in warm, soapy water for about 10 to
20 minutes
- Rinse under running water thoroughly.
Dry all parts well at last.
External housing
- Wipe clean with a soft cloth and a little mild
detergent. Make sure no water or moisture
enters inside of the appliance.
Inside of the appliance
- Remove any food deposits.
- Wipe with a damp cloth and a little cleaning
detergent to remove any spills or splatters.
- Note: Be sure not to damage the heating
elements.
Glass door
Storage
Always make sure the appliance has already
been disconnected from the electrical wall outlet
and cooled down completely.
Store the appliance in a cool and clean place.
Troubleshooting
If the appliance does not function properly, please
check the below table for the solution.
If you are unable to solve the problem, please con-
tact the supplier/service provider.
Problem Possible cause Possible solution
When connected to the electrical
power outlet, the control settings are
made & indicator lights are on. But the
appliance does not heat up.
The thermostat is defeated
Take the appliance to your supplier or
service provider for repair.
At least one of the heating element is
burnt out.
When connected to the electrical
power outlet, the control settings are
made. It heats up normally. But the
indicator is not on.
The indicator light is defective.
Take the appliance to your supplier or
service provider for repair.
Neither the indicator nor the heating
element works.
The power cord & plug is not connect-
ed firmly with the electrical power
socket.
Check again the connection. And
make sure all the connections are
firmly connected.
9
EN
Technical specification
Item no.: 227060 & 227374
Operating voltage and frequency: 220-240V~ 50/60Hz
Power: 2670W
Net weight: Approx. 35kg
Protection class: Class I
Water protection class: IPX3
Outer dimension: 595x595x(H)570mm
Remarks: Technical specification is subjected to change without prior notification.
Warranty
Any defect affecting the functionality of the ap-
pliance which becomes apparent within one year
after purchase will be repaired by free repair or re-
placement provided the appliance has been used
and maintained in accordance with the instructions
and has not been abused or misused in any way.
Your statutory rights are not affected. If the appli-
ance is claimed under warranty, state where and
when it was purchased and include proof of pur-
chase (e.g. receipt).
In line with our policy of continuous product devel-
opment we reserve the right to change the product,
packaging and documentation specifications with-
out notice.
Discarding & Environment
When decommissioning the appliance, the prod-
uct must not be disposed of with other household
waste. Instead, it is your responsibility to dispose to
your waste equipment by handing it over to a des-
ignated collection point. Failure to follow this rule
may be penalized in accordance with applicable
regulations on waste disposal. The separate col-
lection and recycling of your waste equipment at
the time of disposal will help conserve natural re-
sources and ensure that it is recycled in a manner
that protects human health and the environment.
For more information about where you can drop off
your waste for recycling, please contact your local
waste collection company. The manufacturers and
importers do not take responsibility for recycling,
treatment and ecological disposal, either directly
or through a public system.
Important notice to UK users
This appliance is fitted with a UK approved mains
plug and a 13A fuse. Should the fuse need to be re-
placed, an ASTA or BSI approved BS1362 fuse, rat-
ed at 13A must be used. The plug can be replaced
by qualified electrician if it is damaged, and ensure
that the fuse is removed beforehand. Always dis-
pose of defunct plugs and fuses immediately.
Hendi B.V.
Steenoven 21
3911 TX Rhenen, The Netherlands
Tel: +31 (0)317 681 040
Email: infohendi.eu
Hendi Polska Sp. z o.o.
ul. Magazynowa 5
62-023 Gądki, Poland
Tel: +48 61 6587000
Email: infohendi.pl
Hendi Food Service Equipment GmbH
Gewerbegebiet Ehring 15
5112 Lamprechtshausen, Austria
Tel: +43 (0) 6274 200 10 0
Email: office.austriahendi.eu
Hendi UK Ltd.
Central Barn, Hornby Road
Lancaster, LA2 9JX, United Kingdom
Tel: +44 (0)333 0143200
Email: saleshendi.co.uk
Hendi Food Service Equipment Romania Srl
Str. 13 decembrie 94A, Hala 14
Brașov, 500164, Romania
Tel: +40 268 320330
Email: officehendi.ro
PKS Hendi South East Europe SA
5 Metsovou Str.
18346 Moschato, Athens, Greece
Tel: +30 210 4839700
Email: office.greecehendi.eu
Hendi HK Ltd.
1208, 12/F Exchange Tower
33 Wang Chiu Road, Kowloon Bay, Hong Kong
Tel: +852 2154 2618
Email: info-hkhendi.eu
Find Hendi on internet:
www.hendi.eu
www.facebook.com/HendiFoodServiceEquipment
www.linkedin.com/company/hendi-food-service-equipment-b.v.
www.youtube.com/HendiEquipment
- Changes, printing and typesetting errors reserved.
- Änderungen und Druckfehler vorbehalten.
- Wijzigingen en drukfouten voorbehouden.
- Producent zastrzega sobie prawo do zmian oraz
błędów drukarskich w instrukcji.
- Variations et fautes d’impression réservés.
- Errori di cambiamenti, di stampa e di impaginazione riservati.
- Drepturi rezervate cu privire la modificări şi greşeli de imprimare.
- Изменения, печати и верстки ошибки защищены.
- Με επιφύλαξη αλλαγών, λαθών εκτύπωσης και στοιχειοθεσίας.
© 2019 Hendi BV Rhenen - The Netherlands Ver: 19-12-2019
  • Page 1 1
  • Page 2 2
  • Page 3 3
  • Page 4 4
  • Page 5 5
  • Page 6 6
  • Page 7 7
  • Page 8 8
  • Page 9 9
  • Page 10 10
  • Page 11 11
  • Page 12 12
  • Page 13 13
  • Page 14 14
  • Page 15 15
  • Page 16 16
  • Page 17 17
  • Page 18 18
  • Page 19 19
  • Page 20 20
  • Page 21 21
  • Page 22 22
  • Page 23 23
  • Page 24 24
  • Page 25 25
  • Page 26 26
  • Page 27 27
  • Page 28 28
  • Page 29 29
  • Page 30 30
  • Page 31 31
  • Page 32 32
  • Page 33 33
  • Page 34 34
  • Page 35 35
  • Page 36 36
  • Page 37 37
  • Page 38 38
  • Page 39 39
  • Page 40 40
  • Page 41 41
  • Page 42 42
  • Page 43 43
  • Page 44 44
  • Page 45 45
  • Page 46 46
  • Page 47 47
  • Page 48 48
  • Page 49 49
  • Page 50 50
  • Page 51 51
  • Page 52 52
  • Page 53 53
  • Page 54 54
  • Page 55 55
  • Page 56 56
  • Page 57 57
  • Page 58 58
  • Page 59 59
  • Page 60 60
  • Page 61 61
  • Page 62 62
  • Page 63 63
  • Page 64 64
  • Page 65 65
  • Page 66 66
  • Page 67 67
  • Page 68 68
  • Page 69 69
  • Page 70 70
  • Page 71 71
  • Page 72 72

Hendi 227060 User manual

Type
User manual
This manual is also suitable for

Ask a question and I''ll find the answer in the document

Finding information in a document is now easier with AI