Configuring the Router
Connect your computer to the router (wired or wireless).
1.
Click Quick Setup, select your time zone, and click Next.
C
Configure the router via a web browser.
2.
Enter http://tplinkwifi.net or http://192.168.0.1 in the address bar of a web
browser. Use admin for both username and password, and click Login.
Note: If the login page does not appear, please refer to FAQ > Q1.
A
Login
●●●●●
admin
http://tplinkwifi.net
Create a new username and password, then click Confirm. Re-login using the
new credentials.
B
HighMiddleLow
Confirm
User_123
New Username:
●●●●●●●●
New Password:
●●●●●●●●
Confirm New Password:
FAQ (Frequently Asked Questions)
Q1. What can I do if the login page does not appear?
A1. If the computer is set to a static or fixed IP address, change the setting to obtain an
IP address automatically.
A2. Verify that http://tplinkwifi.net is correctly entered in the web browser. Alternatively,
enter http://192.168.0.1 or http://192.168.1.1 in the web browser and press Enter.
A3. Use another web browser and try again.
A4. Reboot your router and try again.
A5. Disable then re-enable the network adapter being used.
Q2. What can I do if I cannot access the Internet?
A1. Check if the Internet is working properly by connecting a computer directly to the
modem using an Ethernet cable. If it is not, contact your Internet Service Provider.
A2. Log in to the Web Management page of the router, and go to the Basic > Network
Map page to check whether the Internet IP address is valid or not. If it is, please run
the Quick Setup again; otherwise, recheck the hardware connection.
A3. For cable modem users, log in to the Web Management page of the router. Go to
Advanced > Network > Internet > MAC Clone, click Use Current Computer MAC
Address and click Save, then reboot both the modem and the router.
A4. Reboot your router and try again.
Q3. How do I restore the router to its factory default settings?
A1. While the router is powered on, press and hold the Reset button on the back for
about 7 seconds until all LEDs go off, then release the button.
A2. Log in to the Web Management page of the router. Go to Advanced > System tools
> Backup & Restore, and click Factory Restore. The router will restore and reboot
automatically.
Q4. What can I do if I forgot my web management password?
A. Refer to FAQ > Q3 to reset the router, and then use the default admin (all lowercase)
for both username and password to log in.
Q5. What can I do if I forgot my wireless network password?
A1. If you haven’t changed the default Wireless Password, it can be found on the
product label at the bottom of the router.
A2. If you have changed the default Wireless Password, log in to the router’s Web
Management page, and go to Basic > Wireless to obtain or reset your wireless
password.
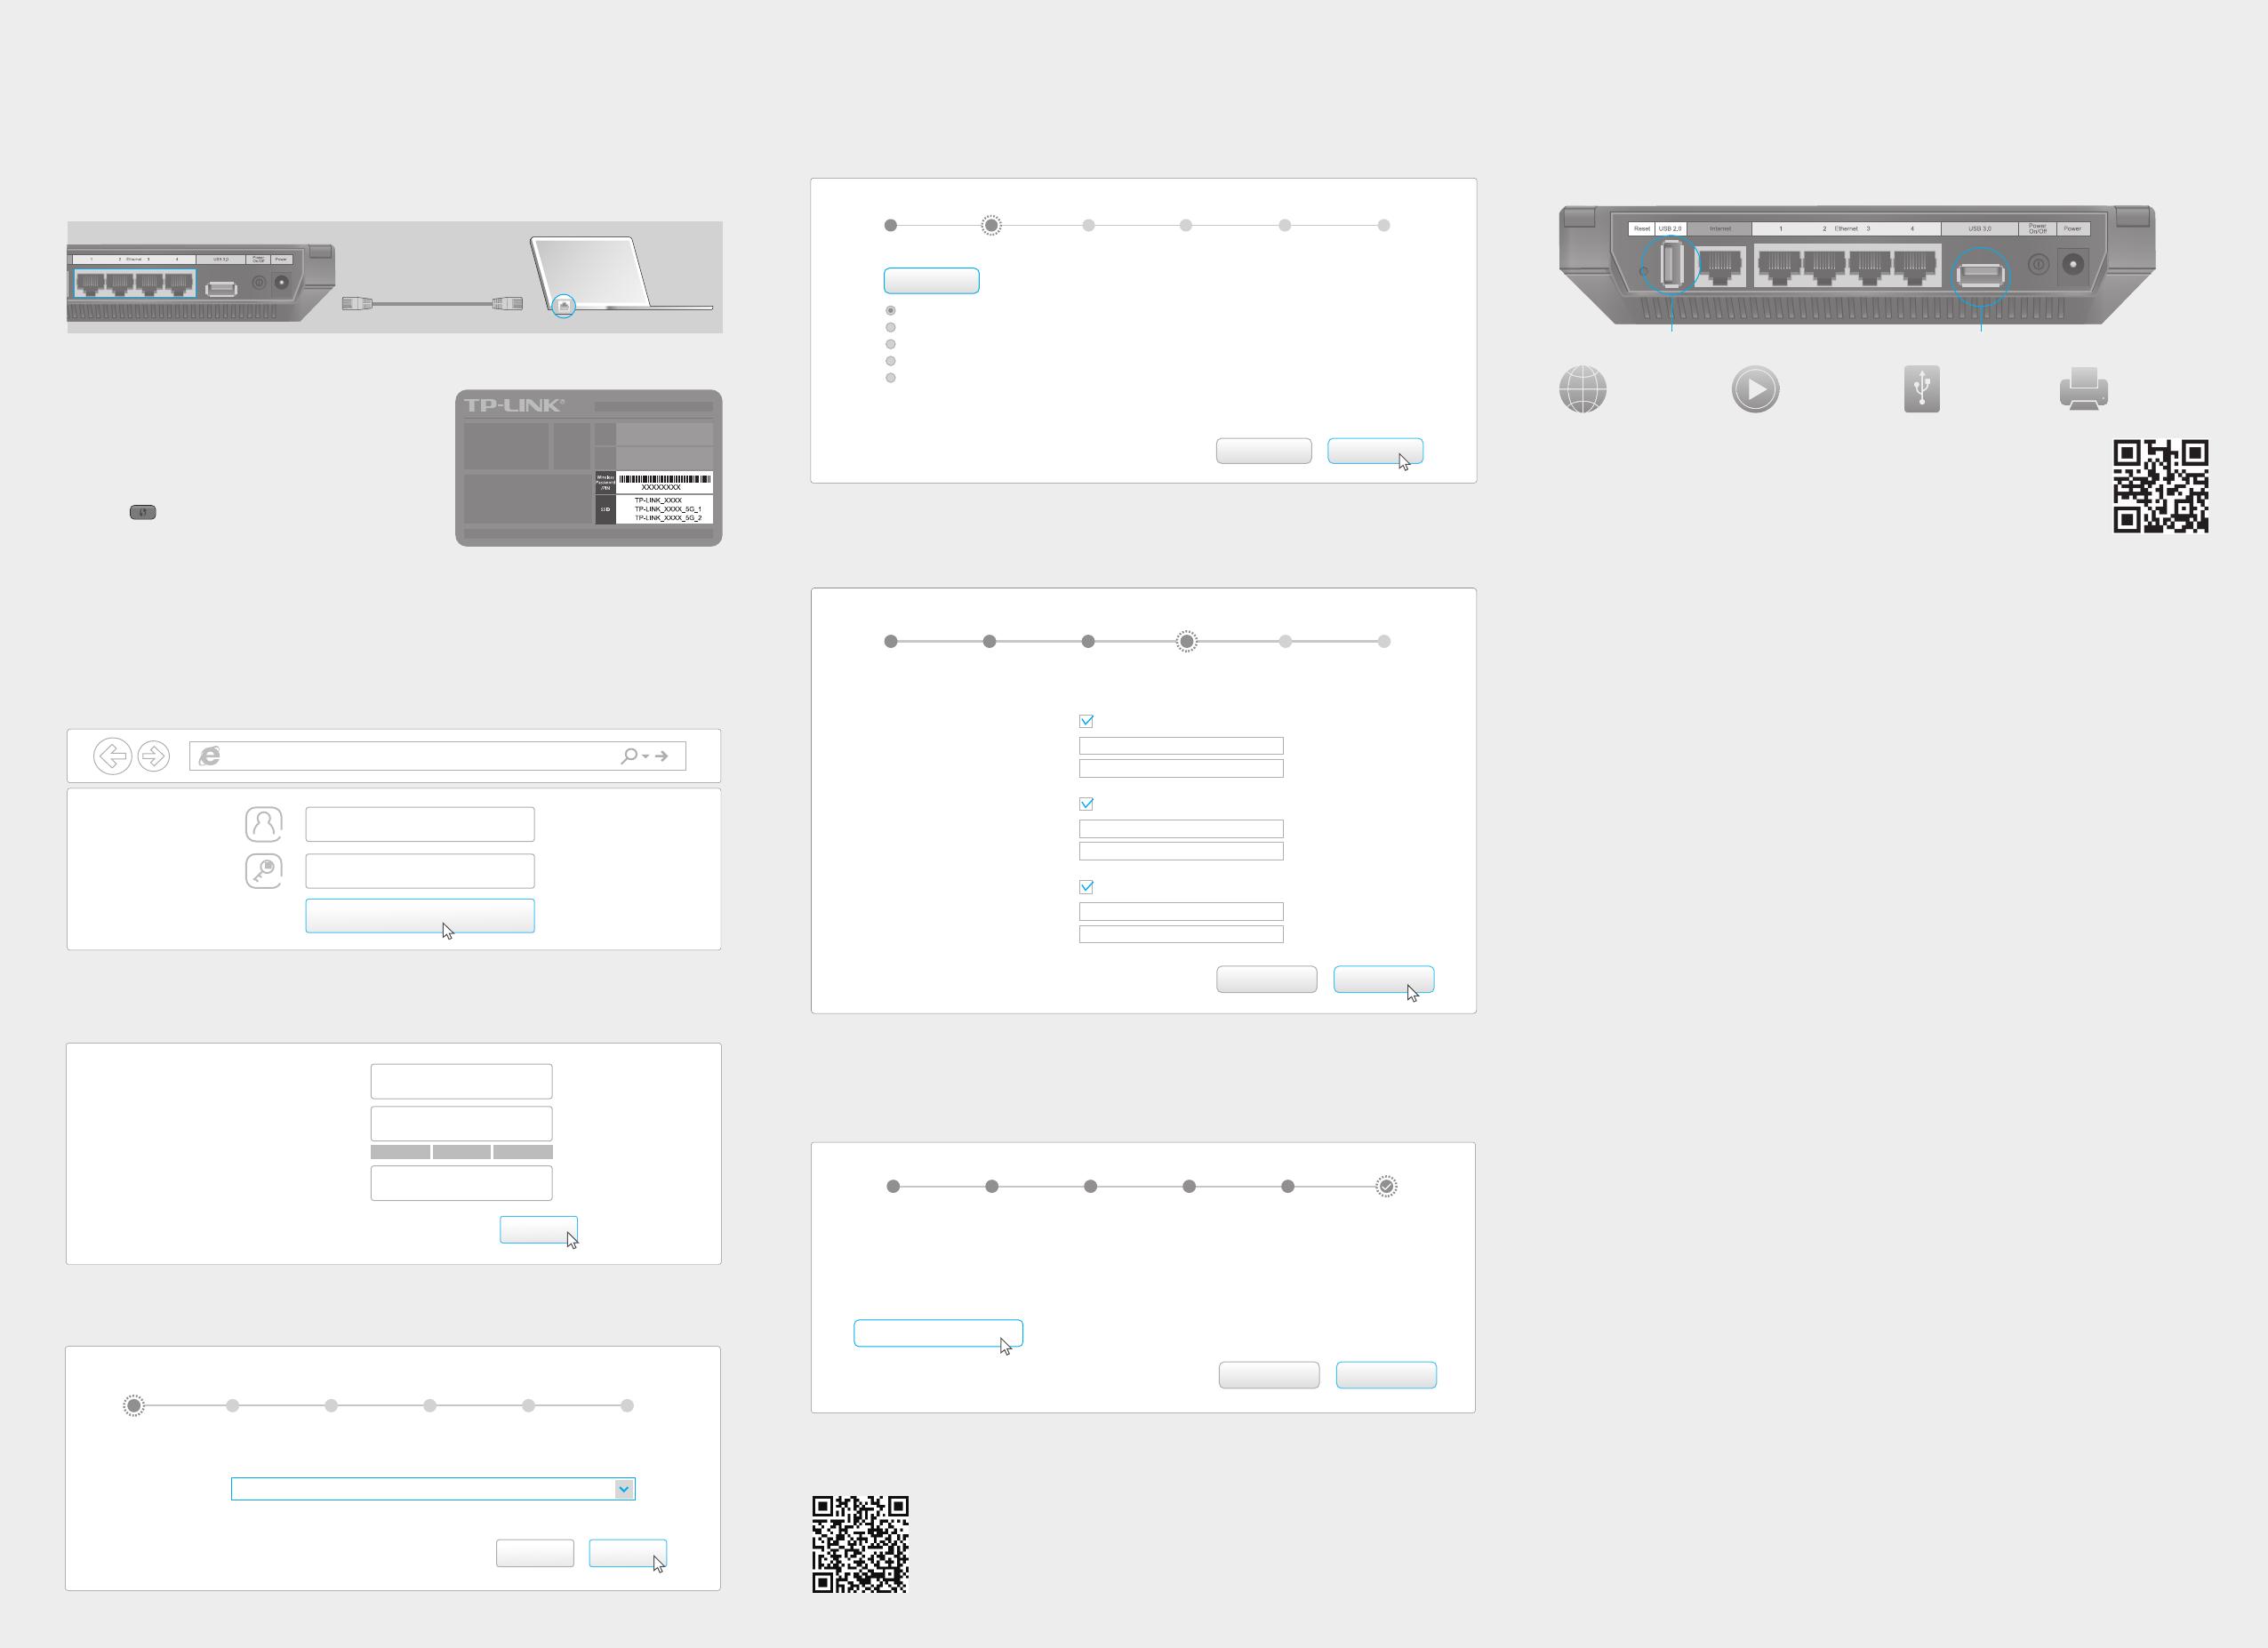
To learn more about the USB features, visit
http://tp-link.com/app/usb, or simply scan the QR code.
USB Features
Use the USB ports for media sharing, storage sharing and printer sharing across
your local network. You can also set up an FTP server to access your files remotely
through the Internet.
Remote Access
via FTP Server
Media Sharing
Local Storage
Sharing
Printer Sharing
USB 2.0 Port USB 3.0 Port
Connect wirelessly by using the SSIDs
(network names) and Wireless Password
printed on the product label at the bottom
of the router.
You can also connect by pressing the WPS
button
on the front panel of the router.
For more information about WPS, refer to
the User Guide at www.tp-link.com.
Wireless
Wired
Ethernet cable
Turn off the Wi-Fi on your computer and connect the devices as shown below.
©2016 TP-LINK
Confirm your settings, and then click Save.
F
Test your Internet connection, then click Finish to complete the Quick Setup.
G
Internet Connection Type
Wireless Settings
Summary
Connection Test
FinishBack
Congratulations!
You have completed the Quick Setup process.
Click Test Internet Connection below, then click Finish.
Test Internet Connection
Time Zone
Use the default or change the wireless settings, and click Next.
Note: If you change the default SSID and password, please note the new wireless settings.
E
Internet Connection Type
Wireless Settings
Summary
Connection Test
Next
Back
Wireless Network (2.4GHz):
Wireless Network Name(SSID):
Password:
Please set the SSIDs and passwords for 2.4GHz and 5GHz wireless networks.
TP-LINK_XXXX
12345670
Enable
Wireless Network 5GHz-1):
Wireless Network Name(SSID):
Password:
TP-LINK_XXXX_5G_1
12345670
Enable
Wireless Network 5GHz-2):
Wireless Network Name(SSID):
Password:
TP-LINK_XXXX_5G_2
12345670
Enable
Time Zone
Select your Internet Connection Type, or click Auto Detect if you are unsure of
what your connection type is. Click Next and follow the instructions.
D
Next
Auto Detect
Dynamic IP
Static IP
PPPoE
L2TP
PPTP
Note: If you are not sure which Internet Connection Type you have, use Auto Detect or contact
your Internet Service Provider (ISP) for assistance.
Back
Internet Connection Type
Wireless Settings Connection Test
Time Zone Summary
To conveniently manage your network, scan the QR code to
download the Tether app on your mobile device.
Tether App
Internet Connection Type
Wireless Settings
Summary
Connection Test
NextExit
-Please Select-
Time Zone:
Time Zone
Note: If you have customized the SSID (wireless name) and password during the configuration, you
will have to reconnect your wireless devices to the new wireless network.

