Quick Start Guide - iPhone & iPad
1. Download the “TinyCam Pro” app.
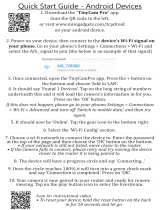
Scan the QR code to the left,
or visit www.minigadgets.com/tcpios
on your iPhone or iPad.
2. Power on your device, then connect to the device’s Wi-Fi signal
on your iPhone or iPad. Go to your Settings > Wi-Fi and connect to
the the AIS_ signal being broadcasted (the below is an example of this
signal)
3. Once connected, open the TinyCamPro app. Press the + button on
the bottom and choose ‘LAN Search’.
4. It should say ‘1 devices found’. Tap on the long string of numbers
underneath this and it will load the camera’s information in for you.
Press on the ‘Confirm’ button.
• If this does not happen, please go to your iPhone or iPads Settings >
Privacy > Local Network and make sure TinyCam Pro is enabled.
5. Your camera should say ‘Online’. Tap the gear icon to the right.
6. Select the ‘Wi-Fi Config’ section.
7. Choose a wi-fi network to connect the device to. Enter the password
at the top of the page and then choose the ‘Next’ button on the bottom.
• If your network is still not listed, move closer to the router.
• If the camera fails to connect, please retry and try moving the device
closer to the router it is being paired to.
8. The device will have a progress circle and say ‘In the connection...’
9. Once the circle reaches 100% it will turn into a green check mark
and say ‘Connection is successful’. Press on ‘Finish’.
10. Your camera is now paired to your router and ready for remote
viewing. Tap on the picture thumbnail to the left of where it says
Scan for instructional videos
• To reset your device, hold the reset button on
the back in for 10 seconds and let go