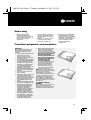
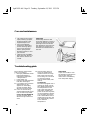
Bauknecht ETPI 5640 IN is an induction glass ceramic hob with four cooking zones of different sizes and power levels, allowing for efficient and precise cooking. It features a user-friendly control panel with touch buttons for easy selection of cooking settings, including 9 power levels and various cooking functions. The hob has residual heat indicators for each cooking zone, providing safety and convenience. Additionally, it offers safety features such as automatic switch-off, child lock, and overheating protection for added peace of mind during cooking.
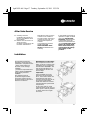
Bauknecht ETPI 5640 IN is an induction glass ceramic hob with four cooking zones of different sizes and power levels, allowing for efficient and precise cooking. It features a user-friendly control panel with touch buttons for easy selection of cooking settings, including 9 power levels and various cooking functions. The hob has residual heat indicators for each cooking zone, providing safety and convenience. Additionally, it offers safety features such as automatic switch-off, child lock, and overheating protection for added peace of mind during cooking.


-
 1
1
-
 2
2
-
 3
3
-
 4
4
-
 5
5
-
 6
6
-
 7
7
-
 8
8


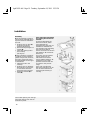
Bauknecht ETPI 5640 IN is an induction glass ceramic hob with four cooking zones of different sizes and power levels, allowing for efficient and precise cooking. It features a user-friendly control panel with touch buttons for easy selection of cooking settings, including 9 power levels and various cooking functions. The hob has residual heat indicators for each cooking zone, providing safety and convenience. Additionally, it offers safety features such as automatic switch-off, child lock, and overheating protection for added peace of mind during cooking.
Ask a question and I''ll find the answer in the document
Finding information in a document is now easier with AI
Related papers
-
Whirlpool AKM995/BA User guide
-
-
Bauknecht ETPS 5660 IN User guide
-
-
Whirlpool AKT 820/NE User guide
-
Whirlpool ETPS 6740 IN User guide
-
-
-
-
Whirlpool TGW 5500 SW User guide
Other documents
-
-
-
Whirlpool AKM 950/NB User guide
-
IKEA HOB 611 S User guide
-
-
-
Ignis PGV 200/NB/01 User guide
-
Whirlpool NUTID HIN4T Owner's manual
-
-
Whirlpool AKM 992/IX User guide