Electrolux EOB53103X User manual
- Category
- Food warmers
- Type
- User manual
This manual is also suitable for
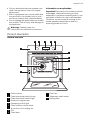
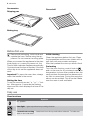
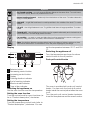
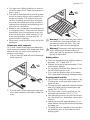
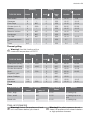
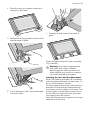
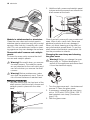
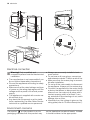
Electrolux EOB53103X is a built-in oven that offers various cooking functions for versatile meal preparation. With conventional cooking, you can bake and roast your favorite dishes. The fan-forced cooking function allows you to cook several different dishes simultaneously or dry mushrooms and fruits. The bottom heating element is ideal for baking cakes with crispy bases. Use the inner grill for small quantities of flat food items or toasting, while the full grill is suitable for larger quantities.
Electrolux EOB53103X is a built-in oven that offers various cooking functions for versatile meal preparation. With conventional cooking, you can bake and roast your favorite dishes. The fan-forced cooking function allows you to cook several different dishes simultaneously or dry mushrooms and fruits. The bottom heating element is ideal for baking cakes with crispy bases. Use the inner grill for small quantities of flat food items or toasting, while the full grill is suitable for larger quantities.


-
 1
1
-
 2
2
-
 3
3
-
 4
4
-
 5
5
-
 6
6
-
 7
7
-
 8
8
-
 9
9
-
 10
10
-
 11
11
-
 12
12
-
 13
13
-
 14
14
-
 15
15
-
 16
16


Electrolux EOB53103X User manual
- Category
- Food warmers
- Type
- User manual
- This manual is also suitable for
Electrolux EOB53103X is a built-in oven that offers various cooking functions for versatile meal preparation. With conventional cooking, you can bake and roast your favorite dishes. The fan-forced cooking function allows you to cook several different dishes simultaneously or dry mushrooms and fruits. The bottom heating element is ideal for baking cakes with crispy bases. Use the inner grill for small quantities of flat food items or toasting, while the full grill is suitable for larger quantities.
Ask a question and I''ll find the answer in the document
Finding information in a document is now easier with AI
Related papers
-
Electrolux EOA5450BAK User manual
-
-
Electrolux OED5C50Z User manual
-
Electrolux OKD5C70X User manual
-
-
-
-
-
-
Electrolux EOD5460AAW User manual
Other documents
-
Zanussi ZOB550WL User manual
-
-
-
-
LG LB642022S Owner's manual
-
-
Bauknecht BSZP 5000 IN Program Chart
-
Westinghouse WVE615W User manual
-
Westinghouse WVE615SWHG644SA User manual
-
Westinghouse WVE607S User manual