Page is loading ...

Instructions - User Manual
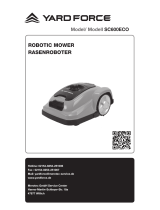
ROBOT LAWNMOWER
RC800
Millasur, SL.
Rúa Eduardo Pondal, nº 23 - Pol. Ind. Sigüeiro
15688 - Oroso - A Coruña - 981 696 465 - www.millasur.com
EN

2
ANOVA thanks you for choosing one of our products and guarantees
the assistance and cooperation that has always distinguished our brand
over time.
This machine is designed to last for many years and to be of great use
if used in accordance with the instructions contained in the user
manual. We therefore recommend that you read this instruction manual
carefully and follow all our recommendations.
For more information or doubts, you can contact us through our web
supports such as www.anova.es
INFORMATION ABOUT THIS MANUAL
Please pay attention to the information provided in this manual and on
the appliance for your safety and that of others.
• This manual contains instructions for use and maintenance.
• Take this manual with you when you go to work with the machine.
• The contents are correct at the time of printing.
• The rights to make changes at any time are reserved without
affecting our legal responsibilities.
• This manual is considered an integral part of the product and must
remain with it in case of loan or resale.
• Ask your dealer for a new manual in case of loss or damage.
READ THIS MANUAL CAREFULLY BEFORE USING THE MACHINE
To ensure that your machine provides the best results, please
read the usage and safety regulations carefully before using it.
OTHER WARNINGS:
Incorrect use could cause damage to the machine or other objects.
The adaptation of the machine to new technical requirements could
cause differences between the content of this manual and the
purchased product.
Read and follow all instructions in this manual. Failure to follow these
instructions could result in personal injury

3
INDEX CONTENT
1. SAFETY RULES AND PRECAUTIONS
2. SAFETY SYMBOLS
3. PRODUCT DESCRIPTION
4. TECHNICAL DATA
5. INSTALLATION
6. SETTINGS
7. TROUBLESHOOTING - ERROR CODES
8. SOFTWARE UPDATE
9. MAINTENANCE
10.CONNECT APP
11. ENVIRONMENT
12. WARRANTY CONDITIONS
13. EXPLODED
14.CE CERTIFICATE

4
1. SAFETY RULES AND PRECAUTIONS
General
• This annex presents safe operating practices for this type of machines which comply with
the regulations.
• It should also include information on noise levels and necessary warnings, along with the
following points.
Important: Please read the manual carefully before using the machine. Keep these
instructions for future reference. Due to our ongoing R&D&I program, the specifications in
this document are subject to change without notice.
Safe operating practices
Training
• Read the instructions carefully. Become familiar with the controls and the proper use of
the machine.
• Never allow people who are not familiar with these instructions or children to use the
machine. Local regulations may restrict the age of the operator.
• The operator and/or user is responsible for accidents or dangers that occur to other
people or their property.
Preparation
• Make sure to correctly perform the installation of the automatic perimeter delimitation
system according to the instructions.
• Make sure your grass is no longer than 4" or 100mm, if it is longer use a regular lawn
mower or grass trimmer to cut it.
• Periodically inspect the area where the machine will be used and remove all stones,
sticks, wires and other foreign objects.
• Periodically inspect the blades, blade bolts and components of the robotic lawnmower for
wear and damage. Replace worn or damaged blades and bolts in sets to preserve
balance.
• On multi-spindle machines, be careful as turning one blade can cause other blades to
rotate.
Operation and commissioning
General
• Never use the machine with faulty guards or without safety devices.
• Do not put hands or feet near or under rotating parts. Stay clear of discharge opening at
all times.
• Never lift or carry a machine while the engine is running.
• Shut down and stop the machine completely:
o Before removing any jam
o Before repairing or adjusting the machine
• Do not leave the machine running unattended if you know there are pets, children or
people in the vicinity.
Maintenance and storage
• Keep all nuts, bolts, and screws tight to ensure the machine is in safe operating

5
condition.
• Check the robotic lawnmower frequently to see if it is worn or damaged.
• Replace worn or damaged parts for safety.
• Be sure to charge the battery with the correct charger recommended by the
manufacturer. Improper use may lead to electric shock, overheating, or leakage of
corrosive liquid from the battery.
• Maintenance of the machine must be carried out in accordance with the manufacturer's
instructions.
Battery pack and charger
Before charging, please read the instructions.
• Please make sure your charger matches the outlet, make sure the connection between
battery charger and battery pack is correct model.
• Longer life and better performance can be obtained if the battery pack is charged when
the air temperature is between 18°C and 25°C.
• Do not charge the battery in ambient temperatures below 5°C or above 40°C. This is
important as it can prevent serious damage to the battery.
• Be careful with batteries. In case of electrolyte leakage, rinse with water/neutralizing
agent, and also seek medical help if it comes into contact with eyes, etc.
Battery Pack Safety Warnings
• Do not disassemble, open or crush the battery pack.
• Do not short circuit the battery pack.
• Do not store battery packs haphazardly in a box or drawer where they can short-circuit
each other or be caused by conductive materials.
When the battery pack is not in use, keep it away from other metal objects, such as
paper clips, coins, keys, nails, screws, or other small metal objects, that can make a
connection from one terminal to another. Shorting the battery terminals can cause burns
or fire.
• Do not expose the battery pack to heat or fire. Avoid storage in direct sunlight or high
temperatures.
• Do not subject the battery pack to mechanical shock.
• In the event of battery leakage, do not allow the liquid to come into contact with skin or
eyes. If contact has been made, flush affected area with plenty of water and seek
medical advice.
• Keep the battery clean and dry.
• The battery pack offers its best performance when operating at normal room temperature
(20°C ± 5°C).
• Do not use modified or damaged batteries.
• Recharge only with the charger specified by the manufacturer. Do not use any charger
other than the one provided specifically for use with this machine. A charger not
approved by the manufacturer for this battery pack may create a risk of fire and related
injury.
• Do not use any battery pack that is not designed for use with the equipment.
• Keep the battery pack out of the reach of children.
• Please retain the original product documentation for future reference.
• Properly dispose of the battery pack and charger following environmental safety
regulations.
• If the appliance is to be stored unused for a long period of time, the batteries should be
removed.

6
2. SAFETY SYMBOLS
General
Symbols on the battery pack
Warning: Read the user instructions before using the product.
Warning: Deactivate the product before working or lifting the machine.
Warning: Keep a safe distance from the machine when it is in operation. Keep
hands and feet away from rotating blades.
Warning: Do not climb on the machine. Never put your hands or feet near or
under the machine.
Use a detachable power supply as defined on the rating label next to the
symbol.
CE conformity mark.
Noise emission to the environment. The emissions of the product are indicated
in the Technical data and on the nameplate.
Disposal of this product as normal household waste is not permitted. Make
sure the product is recycled in accordance with local legal requirements.
The low voltage cable must not be shortened, lengthened or spliced. Do not
use the robotic lawnmower near the low voltage cable.
Take care when trimming the edges where the cables are placed.
Read the user instructions.
Do not throw the battery into a fire and do not expose it to a heat source.
Do not immerse the battery in water.
Recyclable brand.
Disposal of this battery pack as normal household waste is not permitted.
Make sure the battery is recycled in accordance with local legal requirements.

7
Symbols on the charger
Warning: Read all safety warnings and instructions. Failure to follow the warnings and
instructions may result in electric shock, fire, and/or serious injury.
Please read the instructions for the safe operation of the machine carefully, save all warnings
and instructions for future reference.
3. PRODUCT DESCRIPTION
You will also need:
Read the user instructions.
SMPS (Switch Power Supply Unit)
Double insulation.
SMPS (power supply unitswitched) that incorporates a switching power supply with
short-circuit proof safety isolation.
Disposal of this battery pack as normal household waste is not permitted. Make sure
the battery is recycled in accordance with local legal requirements.
Robotic lawnmower
Charging cradle
Base fastening pegs
Spare blades
Perimeter cable reel
Pegs
Charger
Guide
away

8
4. TECHNICAL DATA
Model RC800 (RMA801M20V)
Cutting area 800m2
Voltage 20V max.
No load speed 2800rpm±100rpm
Cutting diameter 180mm
Cutting height 20-60mm
Height-of-cut positions 9
Maximum angle for the work area 36% (20°)
Narrowest passage possible 0.8m
Battery type/model 5.0Ah Li-Ion
Charger time 90-100min
Charger Rating
Input: 100-240V 50/60Hz, 76W
Output:20.5V--3.0A(IP67)
Noise (sound power)
(2000/14/EC modified by 2005/88/EC, Annex V)
<62Db
Weight 8.2kg
Perimeter wire 170m
Pegs 230pcs
Blades 3pcs
Charging cradle 1 (RC500-01 / CB03A)
Batteries 1 (LBF205)
Charger 1 (CGF253)
Robot protection IPX5
Charging station protection IPX4
Power supply protection IP67
Apps Wi-Fi 2.4G + Bluetooth 4.0
Clarifications:
• Not all accessories that are described in this manual have to be included in the final
delivery of the product due to product updates.
• Measured no-load voltage: The initial battery voltage reaches a maximum voltage of 20
volts. The nominal voltage is 18 volts.
• We recommend that you purchase the original accessories from the same store that sold

9
you the tool. See the accessory packaging for details. The store staff can help you and
offer advice.
Label:
5. INSTALLATION
charging cradle
charging
cradle

10
Installation of the charging base
• The charging base can be placed near the house. When laying the perimeter wire, leave
at least 1m of straight wire without obstacles in front of the charging base.
Note: The front of the perimeter wire of the charging base must be straight for 1m without
corners or obstacles to ensure proper docking of the product.
• The charging base must be placed on level ground. It should not be placed on a slanted
surface or anywhere that will cause your plate to bend.
• The charging station must be placed on relatively level ground. It should not be placed on
a slanted surface or anywhere that will cause your plate to bend.
• We recommend that the power supply is placed on the wall at a minimum height of 30
cm and that the power cable is outside the working area of the robotic lawnmower. If not,
you can bury it if you wish.
• The perimeter wire should be stripped about 10mm at one end.
• Insert the perimeter wire terminal (RED) into the OUT side, then the perimeter wire
through the slot under the charging base plate.
• When laying the perimeter wire in the work area, cut off the unnecessary wire, strip the
perimeter wire about 10mm at the other end, insert the other wire terminal (black) to the
IN side.
Perimeter Wire Installation
• When laying the perimeter wire, use the distance gauge to keep a 30cm gap between the
wire and the perimeter. Each peg should be placed about 80cm apart, use the gauge to
ensure proper installation. The work surface is usually an irregular area, the distance
between pegs can be reduced as appropriate for the type of perimeter and terrain.
NOTE: The maximum length allowed for the perimeter wire is 300 m.
black
terminal
red
terminal

11
• If an obstacle is level with the ground and it is safe for the robotic lawnmower to drive
over it, such as a driveway or sidewalk, only 8 cm of space is needed between it and the
perimeter wire.
• Configuration requirements for islandsand aisle sizes: yesi do not want the robotic
lawnmower to go to an area such as; flowers, bushes or trees, you can placea perimeter
island for those elements of your garden. You can see the example mounting type in
figure 8.
As shown in figure 9, the robotic lawnmower can pass through a narrow passage up to
0.8m wide.
• Make sure the Perimeter Wire is perfectly straight at every corner and that all angles
made by the Perimeter Wire are 90° or greater. Avoid very sharp angles in the
installation.

12
• Slopes: Your robotic lawnmower has the ability to safely climb slopes up to 35% (20°), so
areas steeper than this should be avoided.
How to calculate the slope of your lawn: Lay the perimeter wire on slopes as shown in
figures 12 and 13.
Note: *A: Upper Perimeter Wire / B and C: Lower Perimeter Wire
Connecting the charging base to the power supply
Plug the charging base into the power supply, which in turn must be connected to an outlet in
your home.
The LED light on the charging base indicates the battery status. You can then check the
meaning of each LED light to ensure that the connection is correct.
green light on
flashing green light
flashing red light
A
C
B.

13
LED light status
Possible meaning
Action
It does not turn on no current
Confirm that the power cord is
properly connected to the charger
and that the charger is connected
to a suitable power source.
Green light on
The perimeter wire is connected
to the right; the robotic
lawnmower is fully charged
NA
flashing green light
The robotic lawnmower is
charging correctly
NA
flashing red light
Perimeter wire is not connected
Perimeter wire is broken
Check that the two ends of the
perimeter wire are connected
correctly.
Check that the perimeter wire is
not broken.
Installation check
• Set the cutting height to its maximum level (60 mm) for the first cut.
• Place your robotic lawnmower inside the work area, work for a while, then check the
perimeter wire properly.
• Check if the robotic lawnmower returns to the charging station along the perimeter wire.
• If it returns to the charging base successfully, the installation has been completed
successfully.

14
6. SETTINGS
Robotic lawnmower quick setup guide
1) After the installation of the perimeter wire, you can start using the robotic lawnmower.
2) Press the on/off button (3) until the robotic lawnmower turns on. For the first use, enter
the default PIN code 0000 by pressing four times when the number 0 is flashing. The
PIN code can be changed, see the following configuration section.
Note: The robotic lawnmower will turn off if it does not receive any input within 30
seconds after it is turned on. If an incorrect PIN code is entered ten times, the robotic
lawnmower will give an audible alarm and then turn off.
3) Press , then press to start mowing the lawn.
4) Press and then for the robot to return to the charging station.
The robotic lawnmower will run continuously until it reaches low battery power level and then it
will return to the charging base. After charging is complete, the robotic lawnmower will
automatically resume mowing or stay on the charging base according to the mowing schedule.
Change PIN code
To change the PIN code:
• Hold down the buttons Yat the same time for 3 seconds.
• The icon will flash, "PIN 1" will flash, that means you need to enter the old PIN. After
"PIN 1" is displayed, the first number will flash.
• use either to select the number and press to confirm. The next number will flash.
• Use the same method to enter your old PIN. Now you can set your new PIN.
• For example, the new PIN code is set to be 1234. After you enter your old PIN, "PIN2"
will flash and the first number will flash again. Use the same method to enter your new
1
2
3
9
4
8
7
6
5
1. Date settings icon
2. Password setting icon
3. Power on/off
4. Start work/ Upload
5.Bluetooth
6. Wi-Fi
7. Battery icon
8. Confirm (OK)
9. Return to the station / Get off

15
desired PIN code (in this example, 1234).
•Then it will appear on the screen. Your PIN code has been changed successfully.
*Note: For reference only
Set year, date and time
Setting the year, date, and time are required setup items. If you do not set these items, it will
influence the scheduling time in the following settings. These items must be set in the order of
year, date, and time. For year setting:
•For year setting, press and hold for 5 seconds until the icon and a number flash on
the screen, for example, 2020.
•use either to select the year you want.
•Then press to confirm and finish the year setting.
*Note: For reference only
•Meanwhile, the icon it will flash again and a number will be displayed to indicate the
date, for example, 08.25, which means August 25.
•When is flashing, use either to select the number and press to confirm.
Then finish the date setting.
•Meanwhile, the icon will flash and the time will be displayed, for example, 13:25. When
is flashing, use either to select the number and press to confirm.
•Now that the time setting is complete, the display will show .
Change the default start time
The default start time of 9:00 can be changed to any time by pressing the buttons Yat the
same time for 3 seconds.
For example, if you want to change the time to 1:25 p.m., when blink:
•use either to select the number and press to confirm.
•Later will appear on the screen and your mower will start mowing from 13:25, at the
same time you will hear a beep.

16
Change the default cutoff time per day
The default cutoff time is 8 hours per day, you can change it to 1-24 hours.
•Hold down the buttons for 3 seconds
•For example, if you want to change to 06h, when blink, use either to select the
number and press to confirm. then it will show on the screen.
•Then your robotic lawnmower will mow 6 hours per day, at the same time you will hear a
beep.
Change the default cutoff time per week
The default cutoff time per week is 5 days, but can be changed to 3 or 7 days.
•Hold down the buttons Yfor 3 seconds.
•For example, change to 3 days per week:
o– 05 – will flash, use either to select the number and press to confirm.
oThen will be on the screen.

17
7. TROUBLESHOOTING – ERROR CODES
Display Meaning Actions
F1 Rain delay on No action is required
E1
Robotic
lawnmower
outside the
working area
1. Check if the robot is inside the work area, if it was:
2. Check if the charging base is properly connected to the charger and if the
charger is connected to a suitable power source; if they are connected correctly,
the perimeter wires may be attached incorrectly and need to be reversed.
E11 no limit sign
1. If the robot is inside the work area, check the LED light on the charging station,
if it turns red, it means that the perimeter wire was not properly connected to the
clamps on the charging base. If it was securely attached to the clamps and the
LED still turns red, check to see if the perimeter wire is broken.
E2 wheels are locked
1. Turn off the robot and take it to an area free of obstacles.
2. turn it on Press and then .
3. If the error message is still displayed, turn it off; turn the mower over and check
for anything preventing the wheels from turning.
4. Remove any obstructions, place the robot in working position and switch it on.
Press and then .
E3 Knife disc locked
1. Turn off the mower.
2. Turn the mower over and check if there is anything preventing the blade disc
from turning.
3. Remove any obstruction.
4. Put the robot in working position and move it to an area with short grass or
adjust the cutting height.
5. Switch on the robotic lawnmower. Press and then .
E4
Obstruction
Sensors Trigger
Not Retrieved
1. Switch off the robotic lawnmower.
2. Move the robotic lawnmower to an area of your lawn that is free from obstacles.
3. Remove the float cover and check the cylindrical magnet on the float cover. If
there is no magnet, replace the floating cover.
4. Turn on the power. Press and then .
E5
The robotic
lawnmower is
raised
1. Switch off the robotic lawnmower.
2. Move the robotic lawnmower to an area of your lawn that is free from obstacles.
3. Switch on the robotic lawnmower. Press and then .
4. If the error message is still displayed; turn it off; turn the robot over. Check if
there is anything preventing the front wheel axle from slipping.
5. Remove any obstructions, place the robotic lawnmower in working position and
switch it on. Press and then .
E6
The rollover
sensor has been
activated
1. Bring the robotic lawnmower into working position. Press and then .
E7 Tilt sensors have
been activated
1. Switch off the robotic lawnmower.
2. Take the robotic lawnmower to flat ground on your lawn.
3. Switch on the robotic lawnmower. Press and then .
E8 Failed charging
connection
1. Check that the perimeter wire on each side of the charging base must be
straight for 1 m without any corners or obstacles to ensure proper docking.
2. The charging station must be placed on relatively level ground. It should not be
placed on a slanted surface or anywhere that will cause your plate to bend.
3. Manually dock the robotic lawnmower on the charging base to charge it. After
the robot is fully charged, press and then .
BP
Battery
temperature
protection
1. Check battery temperature. The temperature is too high, please wait until the
temperature has cooled down. If the temperature is too low, please wait until the
temperature is >5°C, press and then .
2. If the error message is still displayed, please replace a new battery. Restart the
robotic lawnmower. Press and then .
3. If the error occurs repeatedly, please contact your official dealer for help.
EE unknown error 1. Restart the robotic lawnmower. Press and then . If the error message is still
displayed, please contact your official dealer for help.

Attention: If the error is not corrected with the above measures, try restarting the unit. If the
error still continues, contact your nearest Anova dealer.
8. SOFTWARE UPDATE
The software can be updated when new versions are available. The latest software will be
provided through your official Anova reseller.
9. MAINTENANCE
Your robotic lawnmower needs regular maintenance and cleaning. Also, some parts will require
replacement as they wear out.
Turn off the machine before performing any service or maintenance to ensure your safety.
Blade sharpening maintenance
Warning: Before cleaning, adjusting or replacing the blades, switch off the robotic lawnmower
and put on the necessary PPE such as protective gloves or similar.
Warning: When fitting new blades, be sure to replace all blades. It is not mandatory to replace
all the screws if they are in good condition, if the screw has been damaged or cannot be fixed
then you need a new screw to mount the blade. This is important to ensure blade retention and
to balance the blade's rotating disk. Failure to use new screws could result in serious injury.
•Each cutting blade has an estimated duration of 2 months when a daily cut is scheduled.
Always check to see if the blades are broken or damaged and replace them if they are.
•When the mowing blades become dull and worn, they should be replaced with the
replacement blades supplied with your robotic lawnmower.
•Replacement blades are also available from your official Anova dealer.
Important: After screwing the blades to the cutting deck, make sure the blade can rotate
freely.
Cleaning
Warning: Before cleaning, turn off your robot. Put on protective gloves before cleaning the
cutting deck.
Note: You can clean with low pressure water (<1Mpa)
Storage
Your ride-on mower will have a longer life if it is stored properly and not used during the winter.
Before preparing your robotic lawnmower for storage, we recommend that you:
•Thoroughly clean your robotic lawnmower.
•Fully charge the battery and remove it from the robotic lawnmower.
•Turn off the power.
Warning: Protect the bottom of the robotic lawnmower from water. Do not store the robotic
lawnmower upside down outdoors.
18

19
Replacing the battery
Warning: Power off before attempting any adjustments, replacements, or repairs. Before
replacing blades, turn off your mower and put on protective gloves.
If you need to replace the battery, follow these steps:
•Turn your robotic lawnmower upside down.
•Remove the screws from the battery cover. Remove the battery cover.
•Pull out the old battery carefully. Press the latch and release the connectors.
Note: Do not pull on the cables. Hold the connectors and release the latch.
•Connect a new original battery by connecting the connectors until they click into position.
•Position the battery as shown, put the cover back in position and tighten the screws.
battery pack
Battery holder 2
Battery cover

20
10.CONNECT APP
The robotic lawnmower is an IOT (Internet Of Things) device. To get the full functionality of your
robotic lawnmower and to always keep it up to date with the latest software, it must be
connected to the Internet via your Wi-FI or Bluetooth 4.0.
Download the app
Make sure you have:
•Your WIFI network password.
•Serial number of the robotic lawnmower. It can be found on the
label under the rear hood of the machine.
•If you don't want to write down the serial number, enter it by
scanning the QR code on the label with your phone's camera.
Check your WIFI settings
•The robotic lawnmower works with 2.4 GHz.
•Make sure your lawn robot and your phone are connected in the same network
environments (router).
Please download the free app of the robotic
lawnmower first, get it from Android (4.4.2 or higher) or
others like App Store (iOS 11 or higher).
Note: Make sure the lens of your device is free of debris that prevents
QR reading.
Download the
app
Make sure you
have the Wi-Fi
password and
device serial
number
Check your Wi-Fi
settings
/