Page is loading ...

Installer: Leave this manual with the appliance. Consumer: Retain this manual for future reference.
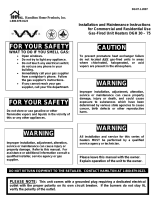
Do not store or use gasoline or other flammable vapors
and liquids in the vicinity of this or any other appliance.
-WHAT TO DO IF YOU SMELL GAS:
ǞDO NOT try to light any appliance.
ǞDO NOT touch any electrical switch, do not
use any phone in your building.
ǞLeave the building immediately.
ǞImmediately call your gas supplier from a
phone remote from the building. Follow the
gas suppliers instructions.
ǞIf you cannot reach your gas supplier, call the
Fire Department.
- Installation and service must be performed by
a qualified installer, service agency or the gas
supplier.
WARNING: If the information in these instructions are not followed exactly, a fire or explosion may result causing
property damage, personal injury or loss of life.
UNIT HEATER
FOR INDUSTRIAL/COMMERCIAL USE
WWW.HEATSTARBYENERCO.COM 1-(866)-447-2194 60364 REV B
WARNING:
FIRE OR EXPLOSION HAZARD
Failure to follow safety warnings exactly
could result in serious injury, death or
property damage.
Be sure to read and understand the
installation, operation and service instructions
in this manual.
Improper installation, adjustment, alteration,
service or maintenance can cause injury or
property damages.
This product is approved for sale and
installation in the states of California
and Massachusetts.
HSU100NGPALP
HSU100NGPAL
HSU125NGPALP
HSU125NGPAL
HSU150NGPALP
HSU150NGPAL
HSU200NGPALP
HSU200NGPAL
HSU250NGPALP
HSU250NGPAL
HSU300NGPALP
HSU300NGPAL
HSU400NGPALP
HSU400NGPAL
OPERATING INSTRUCTIONS
AND OWNER’S MANUAL
READ INSTRUCTIONS CAREFULLY: YOUR SAFETY IS IMPORTANT TO YOU AND TO OTHERS.
Read and follow all instructions. Place instructions in a safe place for future reference. Do not allow anyone
who has not read these instructions to assemble, light, adjust or operate the heater.
HSU100NGPSSP
HSU100NGPSS
HSU125NGPSSP
HSU125NGPSS
HSU150NGPSSP
HSU150NGPSS
HSU200NGPSSP
HSU200NGPSS
HSU250NGPSSP
HSU250NGPSS
HSU300NGPSSP
HSU300NGPSS
HSU400NGPSSP
HSU400NGPSS
MODELS:

Compact Unit Heater 2Operating Instructions and Owner’s Manual
WARNING:
Heaters must not be installed in locations that have
volatile, explosive, or flammable:
• Vapors (including gasoline, paint thinner, oil-based paint)
• Chemicals
• Materials
Do not install near flammable surfaces or materials such
as cardboard or paper. Follow all listed distances to
combustible walls, ceilings, floors, and materials.
WARNING:
Failure to follow the clearances to combustible materials
and surfaces listed in this manual could result in property
damage, fire, or death.
WARNING:
Do not install the heater in a corrosive atmosphere.
Corrosive atmospheres will result in severe damage to
the heater and unsafe operation.
WARNING:
Do not install unit heaters in structures that contain
space for family living quarters.
Utility Heaters may be used to heat non-living spaces
such as garages, that are attached to, adjacent to or part
of a structure that contains space for family living.
Unit heaters are NOT to be installed in structures
attached to, adjacent to, or part of family living quarters.
WARNING:
Sharp metal. This heater is made of sheet metal and
may have sharp edges. Use proper personal protective
equipment when installing or servicing.
WARNING:
Failure to provide enough air for combustion could result
in death or injury from carbon monoxide.
WARNING:
Follow these instructions and the latest
edition of local codes. In the absence of
local codes follow the National Fuel Gas
Code NFPA 54/ANSI Z223.1 in the USA
or CSA-B149.1 Natural Gas and Propane
Installation Code in Canada.
LANGUAGES
ENGLISH .......................................................... 1 - 22
SPANISH ....................................................... 23 - 44
FRENCH ......................................................... 45 - 68
CONTENTS
HEATER SPECIFICATIONS.................................................3
UNIT DIMENSIONS ....................................................... 3
RECEIVING INSTRUCTIONS ............................................ 5
HEATER INSTALLATION ................................................. 5
VENTING ...................................................................... 6
GAS INSTALLATION ..................................................... 10
ELECTRICAL INSTALLATION .......................................... 11
OPERATION PROCEDURE ............................................. 11
PROPANE AND HIGH ALTITUDE INSTALLATION ............ 14
MAINTENANCE ............................................................ 16
TROUBLESHOOTING.......................................................17
PARTS LIST ................................................................... 18
WARRANTY ................................................................ 22
WARNING:THIS PRODUCT CAN EXPOSE YOU
TO CHEMICALS INCLUDING CARBON MONOXIDE,
WHICH IS KNOWN TO THE STATE OF CALIFORNIA THAT
MAY CAUSE CANCER. FOR MORE INFORMATION VISIT
WWW.P65WARNINGS.CA.GOV

Compact Unit Heater 3Operating Instructions and Owner’s Manual
Model Size 100 125 150 200 250 300 400
Input* 100,000 BTU/Hr
(29.3 kW)
125,000 BTU/Hr
(36.6 kW)
150,000 BTU/Hr
(44 kW)
200,000 BTU/Hr
(58.6 kW)
250,000 BTU/Hr
(73.3 kW)
300,000 BTU/Hr
(87.9 kW)
400,000 BTU/Hr
(117.2 kW)
Output* 82,000 BTU
(24kW)
102,500 BTU
(30 kW)
123,000 BTU
(36 kW)
164,000 BTU
(48.1 kW)
205,000 BTU
(60.1 kW)
246,000 BTU
(72.1 kW)
328,000 BTU
(96.1 kW)
Efficiency % 82% 82% 82% 82% 82% 82% 82%
V/A/H/Phase 115 / 5 / 1 115 / 5 / 1 115 / 5 / 1 115 / 7 / 1 115 / 7 / 1 115 / 10 / 1 115 / 12 / 1
Motor HP 1/8 1/8 1/6 1/3 1/3 1/2 3/4
Motor RPM 1,440 1,440 1,050 1,140 1,140 1, 130 1, 125
Approx. Ship
Weight 152 lb. (69 kg) 159 lb. (72 kg) 161 lb. (73 kg) 208 lb. (94 kg) 224 lb. (102 kg) 249 lb. (113 kg) 302 lb. (137 kg)
UNIT DIMENSIONS - FIGURE 1
SPECIFICATIONS - TABLE 1
* Ratings shown are for elevations up to 2,000’ (610 m). For elevations about 2,000’ (610 m), please refer to “INSTALLATION – HIGH ALTITUDE”
Refer to Table on
next page

Compact Unit Heater 4Operating Instructions and Owner’s Manual
START-UP AND PERFORMANCE CHECK LIST
Customer: ___________________________ Date: _______________________________ Job Name/Number: ____________________
Unit Model No.: _______________________ Serial No.: ____________________________ Gas Inlet Pressure: _____________________
Type of Gas: _________________________ Name Plate Input: _____________________ Gas Outlet/Manifold Pressure: ___________
• A listed terminal is installed on the vent pipe and air inlet pipe termination?
• The vent system and air inlet system were inspected and determined to function properly?
• The heater, gas and electrical installation was inspected by the local authority have jurisdiction of the installation?
• The structure supporting the heater and means to attach the heater to the structure are appropriate and secure?
• The gas supply piping has been leak checked?
• The voltage has been verified to be in the acceptable range?
• The “Operation Procedure” in the manual was followed to put the heater into operation?
• All fans and motors move freely?
• For propane installations the conversion label was filled out and attached to the heater near the name plate?
• For installations above 2,000’ (610m) the high altitude label was filled out and attached to heater near the name plate?
Model Size 100 125 15 0 200 250 300 400
A36.0”
(914 mm)
36.0”
(914 mm)
33.2”
(843 mm)
40.4”
(1026 mm)
40.4”
(1026 mm)
40.4”
(1026 mm)
40.4”
(1026 mm)
B20.7”
(526 mm)
20.7”
(526 mm)
23.1”
(587 mm)
25.8”
(655 mm)
28.5”
(724 mm)
31.5”
(800 mm)
39.8”
(1012 mm)
C22.4”
(570 mm)
22.4”
(570 mm)
22.1”
(562 mm)
22.1”
(562 mm)
22.1”
(562 mm)
22.1”
(562 mm)
22.1”
(562 mm)
D22.6”
(573 mm)
22.6”
(573 mm)
22.6”
(573 mm)
29.4”
(748 mm)
29.4”
(748 mm)
29.4”
(748 mm)
29.4”
(748 mm)
E18.5”
(469 mm)
18.5”
(469 mm)
21.2”
(538 mm)
23.9”
(607 mm)
26.6”
(677 mm)
29.4”
(747 mm)
37.7”
(960 mm)
F14.4”
(366 mm)
14.2”
(360 mm)
15.1”
(384 mm)
16.8”
(426 mm)
18.1”
(459 mm)
19.7”
(500 mm)
23.6”
(600 mm)
G (Mounting
Hole)* Refer to Figure 1A and 1B 3/8 - 16 3/8 - 16 3/8 - 16 3/8 - 16 3/8 - 16
H8.9”
(226 mm)
8.9”
(226 mm)
6.2”
(158 mm)
6.3”
(159 mm)
6.3”
(159 mm)
6.3”
(159 mm)
6.3”
(159 mm)
I4.8”
(122 mm)
4.8”
(122 mm)
4.8”
(121 mm)
2.2”
(55 mm)
2.2”
(55 mm)
2.1”
(53 mm)
2.3”
(58 mm)
J7.3”
(187 mm)
6.2”
(158 mm)
2.7”
(69 mm)
2.7”
(69 mm)
2.7”
(69 mm)
2.7”
(69 mm)
2.7”
(69 mm)
K4.0”
(101 mm)
4.2”
(107 mm)
4.5”
(115 mm)
4.0”
(103 mm)
5.3”
(134 mm)
5.0”
(126 mm)
4.8”
(121 mm)
L11.3”
(287 mm)
10.6”
(269 mm)
9.4”
(239 mm)
10.8”
(275 mm)
10.2”
(258 mm)
12.1”
(309 mm)
15.2”
(385 mm)
M32.0”
(813 mm)
32.0”
(813 mm)
32.7”
(830 mm)
34.6”
(879 mm)
34.9”
(885 mm)
35.6”
(904 mm)
36.1”
(917 mm)
N (Mounting
Holes) N/A N/A 16.6”
(422 mm)
23.5”
(598 mm)
23.5”
(598 mm)
23.5”
(598 mm)
23.5”
(598 mm)
O (Mounting
Holes) N/A N/A 6.2”
(159 mm)
6.2”
(159 mm)
6.2”
(159 mm)
6.2”
(159 mm)
6.2”
(159 mm)
P3.7”
(95 mm)
3.7”
(95 mm)
3.7”
(95 mm)
3.5”
(89 mm)
3.5”
(89 mm)
3.5”
(89 mm)
3.5”
(89 mm)
Q15”
(380 mm)
15”
(380 mm)
14.9”
(380 mm)
14.9”
(380 mm)
14.9”
(380 mm)
14.9”
(380 mm)
14.9”
(380 mm)
Gas
Connection 1/2” 1/2” 1/2” 1/2” 3/4” 3/4” 3/4”
Vent
Connector Size
4”
(102 mm)
4”
(102 mm)
4”
(102 mm)
4”
(102 mm)
6”
(152 mm)
6”
(152 mm)
6”
(152 mm)
Fan Diameter 18”
(457 mm)
18”
(457 mm)
20”
(508 mm)
22”
(559 mm)
22”
(559 mm)
22”
(559 mm)
24”
(610 mm)
*Listed is the hole diameter and threads per inch to accept threaded rod.
HEATER DIMENSIONS IN INCHES (mm) - TABLE 2

Compact Unit Heater 5Operating Instructions and Owner’s Manual
RECEIVING INSTRUCTIONS
1. Before signing the bill of lading:
a. Confirm that the information on the bill of lading matches
what was received, including quantity of heaters.
b. Remove all packing material and inspect the heater for
damage.
2. If there is damage or discrepancy on the bill of lading, the
consignee should sign the bill of lading listing all damages or
discrepancies.
3. Take pictures of damage with the delivery person present.
4. If there is no damage, sign the bill of lading.
5. Confirm that the model number of the heater matches the model
number that you ordered.
HEATER INSTALLATION
1. Read the entire installation and service manual before starting the
installation.
2. Keep the installation and service manual and other literature for
future reference.
3. The installation must comply with the latest edition of:
a. All local codes, including building, plumbing, electrical and
wastewater codes;
b. In the absence of local building codes refer to:
• In the USA- The National Fuel Gas Code, NFPA
54/ANSI Z223.1
• In Canada- The Natural Gas and Propane Installation
Code, CSA B149.1
c. National codes, such as OSHA in the USA.
d. In this manual the above applicable codes are referred to as
“local/national codes”
4. Installation and service must be performed by a qualified
installation and service agency as defined in NFPA 54, or in
Canada by a licensed gas fitter.
5. Do not attach to duct work or air filters. Do not place
downstream from cooling/refrigeration units, air washers or
evaporative coolers.
6. This unit is certified with the controls furnished. For replacement
parts, please order according to the replacement parts list. The
manufacturer reserves the right to substitute other authorized
controls as replacements.
7. Do not adjust or alter the fan blade or motor operating speed.
8. The heater must be installed to maintain normal room
temperatures. Operating temperatures below 50˚F (10˚C) can
cause condensation to form in the heat exchanger system which
could result in premature failure of the heater and cause unsafe
operation. It is recommended that thermostats with a minimum
operating temperature of 50˚F (10˚C) be installed.
9. The burners cannot be operated in temperatures above 90˚F
(32˚C). Operating the burners above 90˚F (32˚C) can cause
failure of the heater and electrical components and result in
unsafe operation. To use the blower for air circulation only, your
thermostat must have a “fan only” or fan selection setting. If your
thermostat has this option, an additional wire should be run to
the “G” terminal on the thermostat connection block. Refer to
wiring schematic on page 12.
10. Do not install the heater outdoors. Avoid water spray and dripping
of water onto the heater.
11. High humidity and high salt areas can damage the heater and
reduce the life of the heater resulting in unsafe operation.
12. Verify that the heater can be safely vented to the outdoors
according to these instructions and local/national codes.
13. Do not install units in locations where the flue products can be
drawn into adjacent building openings such as windows, fresh air
intakes and doors.
14. Maintain the minimum clearances/distance to combustible
materials and recommended service clearances shown in Figure 2
and Table 3.
15. All appliances and machines generate noise. This heater
generates noise and vibration from the fan, motors and
combustion processes. This noise could be considered a nuisance
near quiet zones such as offices.
16. Utility heaters must be installed at least 18” (46 cm) above the
floor in garages.
17. The heater should be installed so that air can move freely to all
air openings on the heater. This includes combustion air and air
for the fan.
TABLE 3
Distance to Combustible Surfaces, Materials
and Access
Unit Side 100-125 150-400 Service Clearance
(Suggested)
Top and Bottom 1 in.
2.54 cm
6 in.
15.24 cm
18 in.
45.72 cm
Access Side 1 in.
2.54 cm
6 in.
15.24 cm
18 in.
45.72 cm
Non-Access Side 1 in.
2.54 cm
1 in.
2.54 cm
18 in.
45.72 cm
Rear 18 in.
45.72 cm
18 in.
45.72 cm
18 in.
45.72 cm
• All wires are tight and all gaskets intact and all plugs/caps in place?
• The air louvers are open and the access panel has been replaced?
TABLE 4
Maximum Installation Heights (Between bottom of unit and floor)
Model Size Maximum Install Height
100 12 ’
125 14’
150 14’
200 16’
250 18’
300 18’
400 20’
IMPORTANT: Environmental conditions and installations vary,
so these heights may need to be adjusted based on codes,
environmental conditions and installation variations.

Compact Unit Heater 6Operating Instructions and Owner’s Manual
FRONT VIEW OF HEATER
FIGURE 2
18. For installations in aircraft hangers, parking garages and repair
garages refer to the following standards:
• ANSI/NFPA 409 Standard on Aircraft Hangers
• ANSI/NFPA 88A Standard for Parking Garages
• ANSI/NFPA 88B Standard for Repair Garages
• CSA B149.1 Natural Gas and Propane Installation Code
19. To prevent damage to the heater, fully support the bottom of the
heater with wood, the shipping pallet or other suitable material
when using machines or forklifts to lift the heater into position.
20. The heater is to be suspended from above and is not for
installation on a combustible surface (wood, drywall, plastic). On
model sizes 100 to 400 there are four mounting holes on top of
the heater for 3/8”-16 threaded rod. Locking nuts and washers
should be used to lock the threaded rod tightly into the heater
mounting holes.
21. The threaded rod should be threaded all the way through the
threaded hole on the top of the unit until the rod is visible inside
the heater. Usually a minimum of 6 turns.
22. The structure supporting the heater must have adequate strength
to hold the weight of the heater without distortion or damage.
Refer to Table 1 for unit weights.
23. For proper operation, the unit must be installed in a level
horizontal position.
24. If the heater is mounted too high, the hot air may not reach
the work area. Mount the heater as low as possible considering
local/national codes. Consider clearances for equipment (such as
forklifts) and other guidelines from this manual for the minimum
distance/clearance to the floor, materials or personnel.
Optional Low Clearance Mounting For 100 & 125
25. The optional low clearance mounting brackets, part number
60470 in Figure 2A can be used to mount the heater directly to
the ceiling. ONLY USE THESE BRACKETS ON MODEL SIZES 100
AND 125.
26. Remove the #10 screws as indicated in Figure 3A. KEEP THESE
SCREWS. There are 3 on the front and 4 on the back.
27. Place the low clearance mounting brackets on the heater as
shown in Figure 2A.
28. Use the screws removed in the steps above to attach the low
clearance mounting brackets to the heater. Do not over tighten
the screws or you will strip out the holes.
29. This will provide the 1” (2.54 cm) of clearance required to the
ceiling for the 100 & 125.
30. Using properly sized fasteners (nuts and bolts for steel or lag
bolts for wood) secure the heater to the ceiling. 3/8” diameter
fasteners are recommended for most applications.
31. Secure the heater to structural supports capable of holding the
weight of the heater (Table 1) and with spacings shown in Figure
2B.
#10 - 1/2 screw
Low Clearance Mounting Brackets
FIGURE 2A
Low Clearance Mounting Bracket Hole Spacing
FIGURE 2B
VENTING
WARNING: If an existing heater is being replaced, it may be
necessary to resize the venting systems. Improperly sized
venting systems can result in death or injury.
WARNING: If the optional inlet air pipe is used, it must be
located in the same plane as the vent pipe on the exterior of
the building. Failure to have the vent pipe and inlet air pipe
located in the same plane (roof or wall) could result in injury
or death.

Compact Unit Heater 7Operating Instructions and Owner’s Manual
WARNING:
This heater must be vented to the outdoors.
This heater must have proper air for combustion.
Death or injury could result if these instructions are not
followed.
Follow these instructions, local codes, or in the absence of
local codes the latest edition of The National Fuel Gas Code,
NFPA 54/ANSI Z223.1 in the USA or Natural Gas and Propane
Installation Code CSA B149.1 in Canada.
1. If the heater being installed is replacing existing equipment and
using the existing vent system from that equipment, inspect the
venting system for proper size and horizontal pitch by local/national
codes and these instructions. Determine that there is no blockage or
restriction, leakage, corrosion, and other deficiencies, which could
cause an unsafe condition.
2. Refer to the “OPERATION” section of this manual to verify existing
vent systems are adequate for the new heater. If the vent system is
not sized correctly carbon monoxide can leak into the building and
condensation can form that will cause damage to the vent system.
3. This heater can be installed with two different vent systems
depending on the heater model (refer to the model number on the
heater).
a. Power Vent: Exhaust outlet vent pipe (vent pipe) and using
room air for combustion.
b. Separated Combustion: Vent pipe and using the air inlet
pipe (inlet pipe) for combustion air from outside which
is recommended. Using outside air for combustion may
improve the life expectance of the heat exchanger.
4. The heater has a vent adapter for connecting the vent pipe and
separated combustion heaters have an inlet air pipe adapter for
connecting the inlet air pipe. See Figure 3 and Table 5 on next page.
Use the same size inlet pipe and vent pipe as the connector unless
otherwise specified by local/national codes.
5. Never use vent pipe or inlet pipe that is smaller than the adapters
on the heater.
6. Never block the air openings.
7. The heater can be vented vertically as a Category I appliance or
horizontally as a Category III appliance. A Category I appliance has
a negative pressure in the vent pipe. A Category III appliance has a
positive pressure in the vent pipe.
TABLE 5
Vent and Air Connectors and Terminals
Model Size Vent/Inlet
Connector
Vent/Inlet
Terminals
100-200 4” 4” Listed Terminal
250-400 6” 6” Listed Terminal
8. Single wall vent pipe must be 6” (15.2 cm) or greater from
combustible materials. Increase the distance from materials that
can be damaged by increased temperatures.
9. Do not use PVC or plastic for any part of the vent pipe. Refer to
NFPA54/ANSI Z223.1 for appropriate material.
10. Attach the vent pipe and inlet pipe to the heater using 3
corrosion resistance #8 sheet metal screws.
11. Single wall vent pipe must not pass through any unoccupied attic,
inside wall, concealed space or floor.
12. When installing vent pipe through combustible walls (interior or
exterior) and floors, use listed thimbles.
13. Do not use vent dampers or any other restricting devices in any
portion of the vent pipe or inlet pipe.
14. All Heaters have a pressure switch. The pressure switch, along
with visual inspections, can determine if the vent system and
heat exchanger are blocked. Do not alter or remove the pressure
switch. If the pressure switch is not operational, contact a
qualified service person.
15. Do not vent into masonry chimneys.
16. Do not common vent with other appliances. The vent pipe and
inlet pipe system must not be attached to other appliances.
17. The flue products that exit the vent pipe are hot and contain
moisture. Protect exterior building surfaces and materials from
degradation due to heat and moisture. This includes vinyl siding.
18. See Table 6 on next page for vent pipe termination distances.
19. Do not terminate vent pipe above public walkways.
20. Inlet pipe can be any suitable material that will not sag, bend,
or warp and is airtight and smooth interior. The inside diameter
of the inlet pipe must be equal to or greater than the outside
diameter of the inlet pipe connector on the heater. Galvanized
single wall pipe of suitable thickness is recommended.
21. Inlet pipe connections should be airtight. This can be done with
any suitable material for the environment of the installation and
the pipe used. This includes duct tape, aluminum tape and caulk.
22. If you are installing the Separated Combustion air inlet pipe,
it must terminate in the same area and plane (vertical or
horizontal) as the vent pipe terminates. If the vent pipe terminates
vertically, the inlet pipe must be installed vertically. If the vent
pipe terminates horizontally, the inlet pipe must be installed
horizontally.
23. The inlet air pipe may need insulation to protect from
condensation that may form when cold outside air travels
through the pipe to the heater.
Vent Pipe Connector and Air Inlet Pipe Connector
FIGURE 3

Compact Unit Heater 8Operating Instructions and Owner’s Manual
TABLE 6
Distance/Clearance for Vent Terminals
(For reference only. Refer to the latest edition of
local/national codes for up to date distances)
Structure
Minimum Distance/
Clearance for Vent Terminal
Location
Air inlet supply 3’ (0.91m) above or 10’ (3m)
horizontally
Door, window, gravity
air inlet, or any building
opening
4’ (1.22m) horizontal
and below
1’ (0.3m) above
Electric meter, gas meter,
gas regulator, and relief
equipment ¹
U.S.: 4’ (1.22m) horizontal Cana-
da: 6’ (1.83m) horizontal
Adjacent public walkways 7’ (2.13m) all directions
Grade (ground level) 1’ (0.3m) above
Snow line 1’ (0.3m) above (consider drifts)
VERTICAL VENTING
WARNING: For Category I venting (vertical), if the horizontal
length of the vent pipe exceeds the allowable horizontal
length in the latest edition of local codes, or in the absence
of local codes the latest edition of The National Fuel Gas
Code, NFPA 54/ANSI Z223.1 in the USA or Natural Gas and
Propane Installation Code CSA B149.1 in Canada, then the
heater is to be installed as a Category III horizontal vented
appliance as described in the “Horizontal Venting” section of
this manual.
1. Category I vertical vent pipe, refer to local/national codes for:
a. Vent pipe size, material, and thickness
ii. Single wall vent pipe requirements
iii. Double wall vent pipe requirements
b. Maximum allowable horizontal length of vent pipe in the
system
c. Distances to roof lines for varying roof pitches.
d. Distances to other buildings, structures, or walls.
2. Vent connectors serving Category I appliances shall not be
connected into any portion of mechanical draft systems operating
under positive pressure.
3. Refer to Figures 4, 5, 6 and 7 for vertical venting
recommendations.
4. The vent pipe must have a listed vent terminal/cap securely
fastened to it. The size of the required terminal is listed in
Table 5.
5. The inlet air pipe used on separated combustion models must
have a listed vent terminal/cap. The size of the required terminal
is listed in Table 5.
6. The vent pipe must be a minimum of 5 vertical feet in height. This
means there should be a minimum of a 5’ vertical piece of vent
pipe between the appliance and the listed vent cap. Refer to local
and national codes for the maximum horizontal run of a vertical
vent system.
7. The vent cap must be at least 12” above the maximum snow load.
Consider snow drifts that may occur.
8. The heat from the flue products in the heater can cause damage
to sloped and flat roof materials. Verify the temperature rating of
the roof material and confirm that the hot flue products from the
vent pipe will not cause damage to the roof material.
9. When installing a two-pipe system vertically (Separated
Combustion with vent pipe and inlet pipe), the two pipes must
both terminate vertically and both pipes should be within the
same general area.
10. Both the vent pipe and inlet pipe should have a tee and drip/
sediment leg with a clean out cap to clean out any debris that
may get into the pipes.
11. The separated combustion air inlet pipe seams must be airtight,
so all air comes from the outdoors. The inlet pipe can be sealed
with a material suitable for the environment where the inlet pipe
is installed. Possible materials include duct tape, caulk, or silicone
sealant.
12. Condensation may form as cold air moves through the inlet pipe.
Protect equipment and materials from dripping condensation.
The inlet pipe may need to be wrapped in insulation to avoid
condensation.
13. The vent pipe must terminate at least 12” (30.5 cm) above and
12” (30.5 cm) horizontally from the air inlet pipe on Separated
Combustion Heaters.
14. Refer to Figures 4 - 7; Table 6 and local/national codes for
distances to buildings, walls, sloped roofs, and other objects.
Vertical Category I Vent System - Vent Pipe Only, Sloped Roof
FIGURE 4
Vertical Category I Vent System - Vent Pipe and Air
Inlet Pipe, Sloped Roof
FIGURE 5

Compact Unit Heater 9Operating Instructions and Owner’s Manual
Vertical Category I Vent System - Vent Pipe Only
FIGURE 6
Vertical Category I Vent System - Vent Pipe and
Air Inlet Pipe, Flat Roof
FIGURE 7
HORIZONTAL VENTING
WARNING: Proper Vent Pipe Required!
Failure to follow instructions could result in death, serious
injury, and property damage.
Never use a pipe of a diameter other than specified!
Never use PVC, ABS, or any other non-metallic pipe for
venting!
WARNING: Hazardous Flue Gas!
Failure to follow instructions could result in flue gas
leaks into the space resulting in death, serious injury, or
substantial property damage.
Do not use Type B (double wall) vent internally within the
building on horizontally vented power vented units.
1. Horizontal venting is Category III. Category III vent pipe has a
positive pressure inside the pipe. If Category III vent pipe is not
used and installed per the Category III manufacturers instructions,
carbon monoxide can leak into the building.
2. Commercial/industrial horizontally vented Category III heaters
may be vented with an agency certified (UL 1738) Category III
venting system and where allowed by code, appropriately sealed
26 gauge or heavier galvanized steel.
3. Do not attach the vent pipe or inlet pipe to any other appliances
or vent systems. This heater must have a dedicated vent pipe and
inlet pipe.
4. Do not mix different brands and types of Category III vent pipe.
5. Refer to Table 7 for total minimum and maximum vent lengths.
6. The equivalent length of a 90° elbow is 5’ (1.5 m) for 4” (10.2
cm) diameter and 7’ (2.1 m) for 6” (15.2 cm) diameter.
7. Refer to Figures 8 and 9 for horizontal venting requirements.
8. Horizontal sections of vent pipe are to be installed with a
minimum downward slope from the appliance of 1/4 inch per
foot (6.35 mm per 30.5 cm). If local code allows, a 1/4 inch per
foot upward slope can be installed.
9. Securely support horizontal vent and inlet air pipe every 3 feet
(0.91 m) with steel strapping or other material that can withstand
the temperature and rigidity required.
10. Maintain 6” clearances between the vent pipe and combustible
surfaces or materials. Greater distances may be necessary if
surfaces or materials can be damaged by high heat.
11. A tee with drip leg, cap and condensate drain should be installed
at the lowest point of the vent pipe prior to exiting the structure/
building.
12. The vent pipe and inlet pipe (separated combustion models) must
terminate with a listed vent terminal/cap with the size listed in
Table 5.
13. The vent pipe must extend 20” (50.8 cm) beyond the exterior
surface of an exterior wall or further if there is a potential for
heat damage on building materials.
14. The air inlet pipe must extend 4” (30.5 cm) beyond the exterior
surface of the exterior wall.
15. Do not terminate the vent pipe over public walkways or over
an area where condensate or vapor could create a nuisance or
hazard or could be detrimental to the operation of regulators,
relief openings, or other equipment.
16. The vent pipe and inlet pipe (separated combustion models) must
be installed 12” (30.5 cm) above the snow line. Consider snow
drifts.
17. The inlet air pipe must be a minimum of 12” (30.5 cm) apart from
the vent pipe, and 4” (10.2 cm) from the exterior wall.
TABLE 7
Vent Pipe Diameters and Total Equivalent Pipe
Lengths for Horizontal Venting
Model Size Vent Pipe
Diameter
Equivalent Vent Length
Minimum Maximum
100-150 4” (10.2 cm) 5’ (1.5 m) 30’ (9 m)
200 4” (10.2 cm) 5’ (1.5 m) 50’ (15.25 m)
250-400 6” (15.2 cm) 5’ (1.5 m) 50’ (15.25 m)

Compact Unit Heater 10 Operating Instructions and Owner’s Manual
Horizontal Vent System - Vent Pipe Only
FIGURE 8
Horizontal Vent System - Vent Pipe and Air Inlet Pipe
FIGURE 9
GAS INSTALLATION
WARNING: Do not apply more than ½ psi (3.48 kPa) of gas
pressure to the heater. Pressures in excess of ½ psi (3.48 kPa)
will damage the heater and could result in injury or death.
Never use a match or open flame to check for gas leaks. This
could result in an explosion or fire, resulting in injury or
death.
1. Installation of gas piping must conform with local/national codes.
2. In The Commonwealth of Massachusetts this heater must be
installed by a licensed plumber or gas fitter and must have a “T
handle” type gas valve.
3. The gas pipe must have the proper capacity to deliver the correct
amount of gas at the proper pressure to the heater. The maxi-
mum capacity of gas pipe is defined by local codes or NFPA 54 or
CSA B149.1. The capacity is based on:
a. The diameter of the gas pipe.
b. The length of the gas pipe.
c. Type of gas used (natural gas or propane).
d. The operating pressure of the gas.
e. The input rate, or gas flow rate of the heater.
4. With the above information and the gas flow for each heater in
Table 8, determine the proper size of gas pipe required.
5. The minimum inlet gas pressure is:
a. Natural gas = 6.0” Water column (1.49 kPa)
b. Propane = 11.0” W.C. (2.74 kPa)
6. The maximum gas pressure to the appliance is ½ PSI (14” W.C. or
3.48 kPa).
7. Install a union and a manual shut-off valve adjacent to the unit
for emergency shut-off and easy servicing of controls, including a
1/8” NPT plugged tapping accessible for test gauge connection.
See Figure 10.
Sediment Trap/Manual Shut-Off Valve Installation
FIGURE 10
TABLE 8
Gas Consumption & Orifice Information*
* Manifold Pressure: NG=3.5” W.C. (0.87 kPA) & LP=10”W.C.
(2.49 kPA).
** CFH based upon NG’s heating value=1050 Btu/ft3 (39.1 Mj/m3) &
LP’s heating value=2,500 Btu/ft3 (93.1 MJ/m3).
Model
Size
Gas
Type
CFH**
(m3/Hr)
Gal/Hr
(L/Hr)
Orifice
Size
# of
Orifices
100 NG 95.2 (2.7) - #42 4
LP 40 (1.1) 1.09 (4.1) #53
125 NG 119 (3.7) - #42 5
LP 50.0 (1.4) 1.36 (5.1) #53
150 NG 142.9 (4.0) - #42 6
LP 60.0 (1.7) 1.6 (6.2) #53
200 NG 190.5 (5.4) - #38 7
LP 80.0 (2.2) 2.2 (8.3) #52
250 NG 238.1 (6.7) - #37 8
LP 100 (2.8) 2.7 (10.3) 1.65mm
300 NG 285.7 (8.1) - #36 9
LP 120 (3.4) 3.3 (12.4) # 51
400 NG 381.0 (10.8) -#36 12
LP 160 (4.5) 4.4 (16.5) # 51
8. When attaching the gas pipe to the gas valve on the heater, care-
fully use a 2nd wrench so the gas valve does not rotate and cause
damage to the valve or heater.
9. Provide a sediment trap as close to the appliance as possible.
See Figure 10.

Compact Unit Heater 11 Operating Instructions and Owner’s Manual
10. Use thread joint compound that is approved for use with the gas
that will be used for the heater.
11. Pressure/leak test the gas supply line prior to installing the heater
per local/national code. After the heater is installed, pressure/leak
test with test pressures below ½ psi (3.48 kPa) to the appliance.
Damage will occur if the test pressure to the appliance is greater
than ½ psi (3.48 kPa). The gas valve on the appliance must be
off/closed during any pressure testing.
ELECTRICAL INSTALLATION
WARNING: Disconnect all electric power before installing or
servicing the heater.
Failure to disconnect all electric power before installing or
servicing could cause electric shock, injury, or death.
1. Installation of wiring must conform with local building codes,
or in the absence of local codes, with the National Electric Code
ANSI/NFPA 70 – Latest Edition. Unit must be electrically grounded
in conformance to this code. In Canada, wiring must comply with
CSA C22.1, Part 1, Electrical Code.
2. Two copies of the unit wiring diagram are provided with each
unit. One is located on the side access control compartment
panel and the other is in this manual (see Figure 11). Refer to this
diagram for all wiring connections.
3. Refer to Figure 1 on page 3 for the point of entry into the heater
for the supply voltage wire and thermostat wire. Standard size
knock-out holes are provided.
4. Thermostat wiring is for 24-volt thermostats only.
5. Thermostat connections are made on the circuit board inside the
heater.
6. Some thermostats may require the “C” common terminal for add-
ed functionality such as WIFI. Refer to the thermostat manufactur-
er’s instructions.
7. The supply voltage and ground connections are made in the heat-
er using the proper sized wire nut connectors to the black, white,
and green/yellow wires.
8. The power supply to the heater must be provided by a fused
circuit with a disconnected switch located as close to the heater
as possible.
9. The power supply must be within 5 percent of the voltage rating
of the heater (115V). If not, advise the utility company.
OPERATION PROCEDURE
WARNING: Failure to confirm the proper orifice size and
manifold pressure for the installation location, gas and
elevation could result in death, injury, or property damage,
including fire or premature failure of the heater.
Never adjust the input rate, manifold pressure, or orifice size
to give a higher input rate.
WARNING: Failure to confirm the proper orifice size and
manifold pressure for the installation location, gas, and
elevation, will void the warranty of the electrical components
and heat exchanger.
This unit has been fully assembled and has had operational tests
performed at the factory. The following pre-operational procedures
should be performed to verify proper on-site installation operation.
NOTE: Do not bypass or jumper any controls.
1. With the electric power turned off at the disconnect switch and
the manual gas valve turned off, perform a visual inspection to
verify the following:
a. All air openings are not obstructed or blocked.
b. The fan does not contact the fan guard or cabinet when
spun by hand.
c. All screws are tight.
d. The size of the orifice matches the data plate, or if applicable
the high altitude kit or propane conversion kit size.
e. The orifices are centered with the burners.
f. The air deflector louvers are in the desired direction and NOT
fully closed.
g. Confirm all wires and electrical connections are installed per
the wiring diagram and are securely fastened. Wires should
not be near the burner flame or other hot surfaces.
2. With the manual gas and electric disconnect turned off, install
an appropriate means and instruments to measure the inlet gas
pressure to the heater gas valve and the gas manifold pressure
(outlet pressure). Refer to Figure 12 on page 12 for the location
of the pressure taps for measuring the inlet gas pressure and gas
manifold pressure (outlet pressure).
3. Turn on the ELECTRICAL POWER ONLY at the disconnect switch.
4. The controls of this heater can determine if a pressure switch and
temperature limit switches are operating properly. Do not jumper
or bypass safety devices.
5. Make a call for heat on the thermostat and verify that the heater
controls function properly without gas. The sequence should be:
a. Call for heat from the thermostat.
b. The combustion blower pre-purge is 30 seconds.
c. The spark ignitor will turn on for 10 seconds after the pre-
purge.
d. Because the gas is turned off, the burners will not light and
the combustion blower will continue to operate.
e. After 30 seconds of inter-purge, the spark ignitor will turn on
for 10 seconds. This will repeat 1 more time for a total of 3
trials for ignition.
f. After the 3rd trial for ignition, the combustion blower will
continue to operate for 5 seconds. The LED on the control
should flash 2 times as shown in the “LED Diagnostic Code”
table located on the heater and in Table 11.
g. If the above sequence does not happen, refer to “Trouble
Shooting”.
6. Turn off the electrical disconnect. Turn on the manual gas valve.
7. Use an appropriate gas leak detector to verify there are no gas
leaks, including in the gas pressure measuring instruments for the
inlet pressure and the manifold pressure.
8. Turn on the electric power. The thermostat should still be calling
for heat.
9. Any air in the gas line should have been purged from the system
following local/national codes during the gas piping installation.

Compact Unit Heater 12 Operating Instructions and Owner’s Manual
Figure 11 - Electrical Connections and Ladder Diagrams
Model Size 100 to 300
Model Size 400 Only
* There is a 3 Amp fuse on the control board of all heaters

Compact Unit Heater 13 Operating Instructions and Owner’s Manual
10. When the burners light, verify the gas inlet pressure is between
6.0 to 14” W.C. (1.50-3.49 kPa) for natural gas and 11.0 to 14”
(2.74-3.49 kPa) for propane. If the gas pressure is not in this
range, consult with the gas supply company, installer, or qualified
service personnel to determine the cause.
11. Verify that the manifold pressure matches the value on the name
plate, or the value for the high-altitude installation or the value
for the propane conversion kit. Due to manufacturing tolerances
the gas manifold pressure may need to be adjusted to the exact
pressure for the installation.
12. To adjust the gas manifold pressure:
a. Remove the regulator cap. See Figure 12.
b. To increase the pressure, turn the regulator screw clockwise.
c. To decrease the pressure, turn the regulator screw counter-
clockwise.
d. Replace the regulator cap.
13. Verify that the circulating air fan turns on approximately 30 sec-
onds after the burner lights.
14. Remove the call for heat from the thermostat.
15. After the burners turn off, the combustion blower should operate
for an additional 5 seconds and the circulating air fan should
operate for an additional 150 seconds.
16. After the fan stops, turn off the electric power and manual gas
valve.
17. Remove the gas pressure measuring instruments and install/tight-
en any fittings that were removed/used during the gas pressure
check.
18. Turn on the electric power and manual gas valve.
19. Check for gas leaks.
20. Make another call for heat on the thermostat.
21. After the burners light, check for gas leaks after the heater gas
valve, including any gas fittings used for measuring the gas
pressure.
22. Verify that the venting system is installed correctly and free from
obstructions. Before you start, use the following steps to verify
that the venting system is adequately sized:
Figure 12 - Gas Valve Details
Model Size 100 through 200
Model Size 250 to 400
NOTE: The gas pressure taps are located
on the side and labeled as “IN P” and
“OUT P”

Compact Unit Heater 14 Operating Instructions and Owner’s Manual
a. Seal any unused openings in the venting system.
b. Inspect the venting system for proper size and horizontal
pitch, as required in the National Fuel Gas Code, NFPA 54/
ANSI Z223.1 or CSA B149.1 Installation Code – Latest Edition
and these instructions. Determine that there is no blockage
or restriction, leakage, corrosion, or other deficiencies, which
could cause an unsafe condition.
c. As practical, close all building doors and windows and all
doors between the space in which the appliance(s) connect-
ed to the venting system is (are) located and other spaces
of the building. Turn on clothes dryers and any exhaust
fans such as range hoods and bathroom exhausts, so they
shall operate at maximum speed. Do not operate a summer
exhaust fan. Close fireplace dampers.
d. Follow the lighting instructions. Place the appliance being
inspected in operation. Adjust the thermostat so that the
appliance will operate continuously.
e. After it has been determined that each appliance connected
to the venting system properly vents when tested as outlined
above, return doors, windows, exhaust fans, fireplace damp-
ers and any other gas-burning appliance to their previous
conditions of use.
f. If improper venting is observed during any of the above tests,
the venting system must be corrected.
23. After confirming the proper operation of the heater, replace the
access panel.
24. Should overheating occur, or the gas supply control system fail
to shut off the flow of gas, shut off the manual gas valve to the
heater before shutting off the electrical supply.
25. Do not use this heater if any part has been under water. Immedi-
ately call a qualified service technician to inspect the heater and
replace any gas control which has been under water.
PROPANE AND HIGH ALTITUDE INSTALLATION
All models are certified by ETL at elevations of 0’ – 2000’ (0-610m),
2,001’ – 5,400’ (610.5m-1,645m), 5,401’ – 7,800’ (1645.5m-2,377m)
and 7,801’ – 10,100’ (2,377.5m-3,078m). The input rating in this
manual is for 0’ – 2,000’ (0-610m). If a unit is to be installed at an
elevation above 2,000’ (610m), the following instructions must be
followed. Included with every heater is a high altitude label that must
be filled in with permanent marker and attached to the heater next to
the name plate.
Natural Gas High Altitude Adjustments and Conversion Kits
Table 9 lists the required manifold pressure, and pressure switch
setting if different than sea level (factory) and orifices for high altitude
natural gas installations. Orifices do not need to be changed on any
model for high altitude. Pressure switches will need to be purchased
from the factory. Part numbers are listed in the “Replacement Parts”
section of this manual.
Propane Conversions and Propane High Altitude Information
Table 10 lists the required manifold pressure, pressure switch setting
if different than sea level (factory) and orifices for all elevations for
propane. Follow the instruction sheet included with the propane
conversion kit on how to convert from natural gas to propane.
Refer to the Parts Table for “Conversion Kits” part numbers. Contact
your local sales representative or Customer Service for availability.
Refer to the “Operation” section of this manual to properly
adjust the heater.
Table 9 – Natural Gas High Altitude Information and Conversion
TABLE 9.1
High Altitude Information NG Units:
2,001’ to 5,400’ (610m to 1,645m)
Model
Size
Btu/Hr
Input
NG Manifold
Pressure
(in. w.c.)/(kPa)
Pressure
Switch
Orifice
Drill Size
(Quantity)
100 100,000 3.5/0.87 -0.80 #42 (4)
125 125,000 3.5/0.87 -0.80 #42 (5)
150 150,000 3.5/0.87 -0.80 #42 (6)
200 200,000 3.5/0.87 N/A #38 (7)
250 250,000 3.5/0.87 -1.10 #37 (8)
300 300,000 3.5/0.87 -1.20 #36 (9)
400 400,000 3.5/0.87 -1.45 #36 (12)
TABLE 9.2
High Altitude Information NG Units:
5,401’ to 7,800’ (1,645.5m to 2,377m)
Model
Size
Btu/Hr
Input
NG Manifold
Pressure
(in. w.c.)/(kPa)
Pressure
Switch
Orifice
Drill Size
(Quantity)
100 100,000 3.5/0.87 -0.80 #42 (4)
125 125,000 3.5/0.87 -0.80 #42 (5)
150 150,000 3.5/0.87 -0.80 #42 (6)
200 200,000 3.5/0.87 -0.80 #38 (7)
250 250,000 3.5/0.87 -1.10 #37 (8)
300 300,000 3.5/0.87 -1.20 #36 (9)
400 400,000 3.5/0.87 -1.40 #36 (12)
TABLE 9.3
High Altitude Information NG Units:
7,801’ to 10,100’ (2,377m to 3,078m)
Model
Size
Btu/Hr
Input
NG Manifold
Pressure
(in. w.c.)/(kPa)
Pressure
Switch
Orifice
Drill Size
(Quantity)
100 100,000 3.5/0.87 -0.75 #42 (4)
125 125,000 3.5/0.87 -0.75 #42 (5)
150 150,000 3.5 / 0.87 -0.75 #42 (6)
200 200,000 3.5/0.87 -0.75 #38 (7)
250 250,000 3.5 / 0.87 -1.10 #37 (8)
300 300,000 3.5/0.87 -1.20 #36 (9)
400 400,000 3.5/0.87 -1.35 #36 (12)
NOTE: Standard orifices are used for high altitude installations.

Compact Unit Heater 15 Operating Instructions and Owner’s Manual
Table 10.1 Propane Information: 0’ to 2,000’ (0 to 610m)
Table 10.2 Propane Information: 2,001’ to 5,400’ (610.5m to 1645 m)
Table 10.3 Propane Information: 5,401’ to 7,800’ (1,646.5 to 2,377m)
Table 10.4 Propane Information: 7,801’ to 10,100’ (2,387m to 3,078m)
*Kits may contain more orifices than needed for the specific model being converted. Extra orifices can be discarded.
*Kits may contain more orifices than needed for the specific model being converted. Extra orifices can be discarded.
*Kits may contain more orifices than needed for the specific model being converted. Extra orifices can be discarded.
*Kits may contain more orifices than needed for the specific model being converted. Extra orifices can be discarded.
Model Size 100 125 15 0 200 250 300 400
Btu/Hr Input 100,000 125,000 150,000 200,000 250,000 300,000 400,000
Orifice Drill Size 53 53 53 52 1.65mm 51 51
Orifice Qty in Kit* 6 6 6 7 8 12 12
L.P. Manifold
Pressure
(in. w.c.)/(kPa)
10.0/2.49 10.0/2.49 10.0/2.49 10.0/2.49 10.0/2.49 10.0/2.49 10.0/2.49
Pressure Switch N/A N/A N/A N/A N/A N/A N/A
Model Size 100 125 15 0 200 250 300 400
Btu/Hr Input 100,000 125,000 150,000 200,000 250,000 300,000 400,000
Orifice Drill Size 53 53 53 52 1.65mm 51 51
Orifice Qty in Kit* 6 6 6 7 8 12 12
L.P. Manifold
Pressure
(in. w.c.)/(kPa)
10.0/2.49 10.0/2.49 9.2/ 2.29 8.6/ 2.14 9.3 / 2.32 9.2 / 2.29 8.2 / 2.04
Pressure Switch -0.80 -0.80 -0.80 N/A -1.10 -1.20 -1.45
Model Size 100 125 15 0 200 250 300 400
Btu/Hr Input 100,000 125,000 150,000 200,000 250,000 300,000 400,000
Orifice Drill Size 53 53 53 52 1.65mm 51 51
Orifice Qty in Kit* 6 6 6 7 8 12 12
L.P. Manifold
Pressure
(in. w.c.)/(kPa)
9.2/2.30 9.2/2.30 8.6/2.14 8.0 / 1.99 9.0 / 2.24 8.9 / 2.22 8.1 / 2.02
Pressure Switch -0.80 -0.80 -0.80 -0.80 -1.10 -1.20 -1.40
Model Size 100 125 15 0 200 250 300 400
Btu/Hr Input 100,000 125,000 150,000 200,000 250,000 300,000 400,000
Orifice Drill Size 53 53 53 52 1.65mm 51 51
Orifice Qty in Kit* 4 5 6 7 8 9 12
L.P. Manifold
Pressure
(in. w.c.)/(kPa)
8.8/2.20 8.8/2.20 8.1 / 2.02 7.5 / 1.87 8.7 / 2.17 8.7 / 2.17 8.0/1.99
Pressure Switch -0.75 -0.75 -0.75 -0.75 -1.10 -1.20 -1.35
Table 10 – Propane (LP) Information and Conversions All Elevations

Compact Unit Heater 16 Operating Instructions and Owner’s Manual
MAINTENANCE
Annually have a qualified service agency perform the following
maintenance:
WARNING: Service and maintenance must be performed by a
qualified service person.
Use only factory authorized replacement parts.
1. Before any service, TURN OFF THE GAS AT THE MANUAL
SHUT-OFF VALVE AND TURN OFF ALL ELECTRIC POWER TO
THE HEATER.
2. Circulating air fan and motor:
a. Verify the fan blade set screw is tight with a minimum torque
of 25 inch pounds and maximum of 100 inch pounds.
b. Clean the fan blade, fan guard and motor.
c. Verify the fan blades, motor shaft and motor are not dam-
aged.
3. Burners and orifices:
a. Remove the burners from the heater and clean them with an
appropriate brush or cloth.
b. Clean the orifices and verify the holes are not blocked.
c. Check for damage, rust, or deterioration.
d. Verify the burner carry-over ports are not damaged and that
they are touching each other.
4. Spark ignitor and sensor:
a. Carefully clean the sensor and spark ignitor.
b. Check for cracks in the ceramic.
c. Check for damage or deterioration of the metal parts.
5. Wiring:
a. Check wiring for loose connections.
b. Check for heat damage to wires.
6. Gas valve and pipe:
a. Leak check gas fittings with suitable leak detectors. Do not
use a match or open flame. Make sure to turn the gas on for
this portion of the service.
b. Verify the manifold gas pressure and inlet gas pressure.
7. Combustion blower:
a. Clean dust and dirt from the air cooling blades.
b. Clean dust and dirt off the motor.
c. Verify the high temperature silicone rubber hose is not
cracked or damaged.
8. Heat exchanger and cabinet:
a. Inspect the heat exchanger for damage and cracks.
b. Inspect all hardware (screws, nuts, sight glass) on the cabi-
net, including hardware used for mounting.
9. Vent System:
a. Inspect the vent system for damage, loose fasteners, loose
supports or evidence of damage to surrounding materials.
b. Clean the vent and air inlet terminations.
c. Clean the air inlet screen on the heater.
d. Clean the drip leg.
TABLE 11
Green LED Diagnostic Codes
Steady ON Control Internal Failure
Steady OFF Internal Control Fault or No Power
Slow Flash Control OK, No Call For Heat
Fast Flash Control OK, Call For Heat Present
2 Flashes In Lockout From Failed Ignitions or Flame Losses
3 Flashes Pressure Switch Open with Inducer On or
Closed with Inducer Off
4 Flashes Limit or Rollout Switch is Open
5 Flashes Flame Sensed While Gas Valve Off
6 Flashes On-Board Microprocessors Disagree

Compact Unit Heater 17 Operating Instructions and Owner’s Manual
Symptom Possible Cause Possible Remedy
Unit does not Start 1. Power supply is off.
2. No 24V power to thermostat.
3. Thermostat malfunction.
4. LED flashes.
5. Blown fuse on control board.
6. Defective control.
1. Turn on main power.
2. Check control transformer.
a. If failed transformer – check
thermostat wire gage, length, and
defects.
3. Verify wire connections to R&W terminals
only.
a. Check/replace thermostat.
4. Check LED flash codes located on decal in
the unit or Table 11.
5. Replace fuse.
6. Replace control.
LED Light Off or Flashing 1. Blown fuse on control board.
2. Multiple causes.
1. Replace fuse.
2. Control board LED flash codes vary with
control type. A decal is installed in the unit
and Table 11 gives a brief description of the
applicable codes for your heater.
Unit Starts but Does Not
Ignite
1. Main gas is off.
2. Air in gas line.
3. Main or manifold gas pressure.
4. Check gas valve switch.
1. 1. Open manual gas valve.
2. Purge gas line following the necessary
precautions.
3. Set gas pressures per manual instructions.
4. Set gas valve switch to “ON” position.
Unit Goes Through Cycle
but the Burners Go Out in
Less than 10 Seconds
1. Reversed main power polarity.
2. Unit not grounded.
3. Flame not sensed.
1. Black wire – HOT, White Wire – NEUTRAL,
Green Wire – GROUND.
2. Ground unit and verify quality of ground
connection.
3. Check flame sensor probe and connection.
Air Circulating Fan
Inoperable
1. Loose Connections.
2. Defective control board.
3. Defective fan motor.
1. Check all connections.
2. Check control board data sheet and
function.
3. Check fan motor.
TROUBLESHOOTING

Compact Unit Heater 18 Operating Instructions and Owner’s Manual
REPAIR PARTS
When ordering parts include the complete unit model number listed on the unit rating plate.
HA - High Altitude Kit, refer to “Propane and
High Altitude Installation” section of manual
NS - Not Shown
(*) - Number of parts needed per model
14
15

Compact Unit Heater 19 Operating Instructions and Owner’s Manual
PARTS LIST (SEE BACK PAGE FOR PARTS ORDERING INFORMATION)
UNIT CAPACITY (MBH) 100 125 150 200 250 300 400
NO. OF TUBES PER MODEL 4 5 6 7 8 9 12
ITEM DESCRIPTION PN PART NO. (QTY*)
1 Flame Sensor 60366
2 Spark Igniter 60375
3Gas Valve 60376
Gas Valve 60377
4 Transformer 60387
5 Relay 60388
6
Pressure Switch 60473
Pressure Switch 60389
Pressure Switch 60390
Pressure Switch 60472
Pressure Switch 60391
7 Ignition Module 60392
8
Fan Motor 60394
Fan Motor 60395
Fan Motor 60396
Fan Motor 60397
Fan Motor 60398
9Combustion Blower 6 0 421
Combustion Blower 60422
10 Limit Switch 60 427
11
Removable Panel 60435
Removable Panel 60436
Removable Panel 60437
Removable Panel 60438
Removable Panel 6 0 474
Removable Panel 60475
Upper Removable Panel 60439
12 Air Deflectors 60453 (-7) (-7) (-8)
Air Deflectors 60454 (-9) (-10) (-11) (-14)
13 Deflector Spring 60455 (-7) (-7) (-8) (-9) (-10) (-11) (-14)
14
Fan Blade 60 410
Fan Blade 6 0 411
Fan Blade 6 0 412
Fan Blade 6 0 413
Fan Blade 60 414
15
Fan Guard 60406
Fan Guard 60407
Fan Guard 60408

Compact Unit Heater 20 Operating Instructions and Owner’s Manual
Liquid Propane to Natural Gas Conversion Kit
Model Size 100/125/150.................................................F163074
Model Size 200..............................................................F163075
Model Size 250NG.........................................................F163076
Model Size 300/400......................................................F163077
Natural Gas to Liquid Propane Conversion Kit
Model Size 100/125/150................................................F163070
Model Size 200..............................................................F163071
Model Size 250NG.........................................................F163072
Model Size 300/400......................................................F163073
UNIT CAPACITY (MBH) 100 125 150 200 250 300 400
NO. OF TUBES PER MODEL 4 5 6 7 8 9 12
ITEM DESCRIPTION PN PART NO. (QTY*)
NS Rollout Limit Switch 60463
NS 6 Pin Harness 60464
6 Pin Harness 60465
NS
Pressure Switch (HA), -0.75 60466
Pressure Switch (HA), -0.80 60482
Pressure Switch (HA), -1.10 60467
Pressure Switch (HA), -1.20 60390
Pressure Switch (HA), -1.35 60472
Pressure Switch (HA), -1.40 60469
Pressure Switch (HA), -1.45 60468
NS Low Clearance Mounting Bracket 60470 (-2) (-2)
NS Fuse, 3A - Ignition Module 60478
/