en Important safety information
4
cooking purposes, not as a heating system.
The warranty will only be valid if the appliance
is used for the purpose for which it was
designed.
This appliance is intended for use up to a
maximum height of 2000 metres above sea
level.
Do not use lids or hob guards for children
which are not recommended by the hob
manufacturer. They may cause accidents such
as those due to the overheating, ignition or
detachment of fragments of materials.
This appliance may be used by children over
the age of 8 years old and by persons with
reduced physical, sensory or mental
capabilities or by persons with a lack of
experience or knowledge if they are
supervised or are instructed by a person
responsible for their safety how to use the
appliance safely and have understood the
associated hazards.
Children must not play with, on, or around the
appliance. Children must not clean the
appliance or carry out general maintenance
unless they are at least 15 years old and are
being supervised.
Keep children below the age of 8 years old at
a safe distance from the appliance and power
cable.
(Important safety
information
Impor t ant saf et y i nf or mat i on
:Warning – Risk of deflagration!
Accumulation of unburned gas in an enclosed
area carries a risk of deflagration. Do not
subject the appliance to draughts. These
might blow out the burners. Carefully read the
instructions and warnings on the operation of
gas burners.
:Warning – Risk of poisoning!
The kitchen will become hot and humid and
combustion products produced when this gas
appliance is used. Make sure the kitchen is
well ventilated, particularly when the hob is in
operation: either keep the natural ventilation
apertures open, or install a ventilation system
(extractor hood). Intense prolonged use of the
appliance may require additional or more
effective ventilation: open a window or
increase the power of the ventilation system.
:Warning – Risk of burns!
■ The burners and their immediate vicinity get
very hot. Never touch the hot surfaces.
Keep children under 8 years old well away
from this appliance.
Risk of burns!
■ If the liquefied gas bottle is not upright,
liquefied propane/butane can enter the
appliance. Intense darting flames may
therefore escape from the burners.
Components may become damaged and
start to leak over time so that gas escapes
uncontrollably. Both can cause burns.
Always use liquefied gas bottles in an
upright position.
:Warning – Risk of fire!
■ The cooking process must be supervised. A
short cooking process must be supervised
without interruption.
Risk of fire!
■ The burners get very hot. Do not rest
inflammable objects on the hob. Do not
store objects on the hob.
Risk of fire!
■ Do not store or use corrosive chemicals,
products which produce fumes,
inflammable materials or non-food products
below or near this domestic appliance.
Risk of fire!
■ Fat or oil which is overheated can catch fire
easily. Never leave fat or oil to heat up
unattended. If oil or fats do catch fire, never
use water to put the fire out. Put the fire out
by covering the pan with a lid and switch off
the hotplate.
Risk of fire!
Getting to know your appliance en
5
■ Operating a burner with the power set too
high will result in very high temperatures
being generated. This may cause
flammable materials to ignite. The power
setting shown in the display may differ from
the power setting that has been set using
the knob. The power setting is shown in the
display purely for additional information.
Always set the power setting according to
the printing on the knob.
:Warning – Risk of injury!
■ Cracks or fractures in the glass plate are
dangerous. Shut immediately off all burners
and any electrical heating element. Unplug
the appliance from the mains or switch off
the circuit breaker in the fuse box. Shut off
the gas supply. Do not touch the appliance
surface. Never switch on a faulty appliance.
Contact the after-sales service.
Risk of injuries!
■ Pans which are damaged, are not the right
size, hang over the edge of the hob or are
not positioned correctly can cause serious
injuries. Follow the advice and warnings
provided relating to the cooking pans.
Risk of injury!
■ Incorrect repairs are dangerous. Repairs
may only be carried out, and damaged
power and gas lines replaced, by an after-
sales engineer trained by us. If the
appliance is faulty, unplug the mains plug or
switch off the fuse in the fuse box. Shut off
the gas supply. Contact the after-sales
service.
Risk of injury!
■ If a control knob is too stiff to turn or it is
loose, it must not be used. Contact our
after-sales service immediately to have the
control knob repaired or replaced.
:Warning – Risk of electric shock!
■ Do not clean the appliance using steam
cleaners.
Risk of electric shock!
■ Cracks or fractures in the glass plate could
cause electric shocks. Switch off the circuit
breaker in the fuse box. Contact the after-
sales service.
*Getting to know your
appliance
Ge t t i ng to know y our appl i anc e
You can find your appliance and the burner powers in
the model overview. ~ Page 2
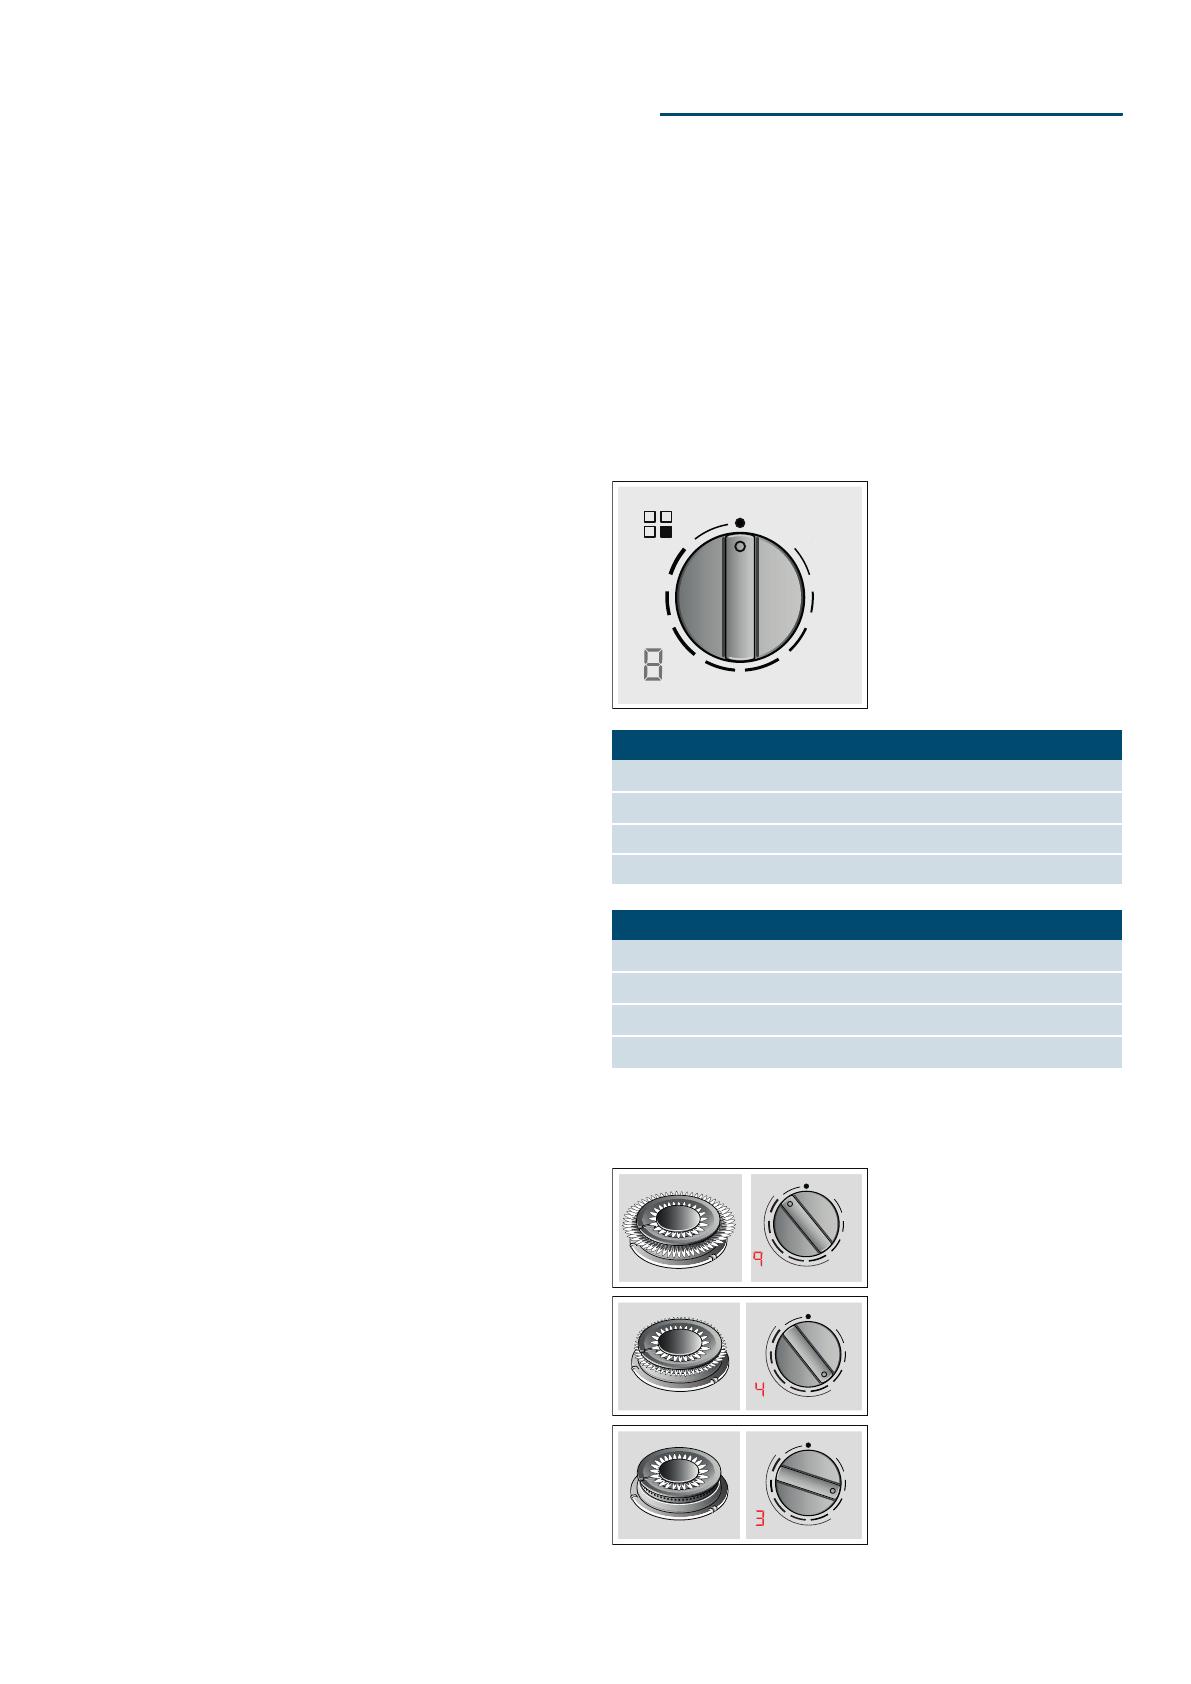
Controls and burners
Each control knob is marked with the burner it controls.
You can use the control knobs to set the output
required in each case to various positions between the
maximum and the minimum settings. Never try to switch
directly from position 0 to position 1 or from position 1
to position 0.
For dual-wok burners, the inner and outer flames can
be controlled separately. The available power levels are
as follows:
Indicators
¼
Burner controlled by control knob
Ú
Switched-off burner
9 Highest power setting and electric ignition
1 Lowest power setting
Displays
³
Electric ignition
Š-‚
Heat settings
‹
Switched-off burner
•-œ
Residual heat
Inner and outer flame on
full power.
Outer flame on low power,
inner flame on full power.
Inner flame on full power.


