Page is loading ...

Manual Revision: 11/14/2013
For the most up-to-date information, please visit: www.startech.com
DE: Bedienungsanleitung - de.startech.com
FR: Guide de l'utilisateur - fr.startech.com
ES: Guía del usuario - es.startech.com
IT: Guida per l'uso - it.startech.com
NL: Gebruiksaanwijzing - nl.startech.com
PT: Guia do usuário - pt.startech.com
ATX2PW430WH / ATX2PW500WH / ATX2PW530WH /
ATX2PW550WH / ATX2PW630WH / ATX2PW450BR /
ATX2PW450GO
ATX Power Supply - 80 Plus® Certied
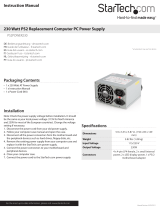
*ATX2PW430WH shown

Instruction Manual
FCC Compliance Statement
This equipment has been tested and found to comply with the limits for a Class B digital
device, pursuant to part 15 of the FCC Rules. These limits are designed to provide reasonable
protection against harmful interference in a residential installation. This equipment generates,
uses and can radiate radio frequency energy and, if not installed and used in accordance with
the instructions, may cause harmful interference to radio communications. However, there
is no guarantee that interference will not occur in a particular installation. If this equipment
does cause harmful interference to radio or television reception, which can be determined by
turning the equipment o and on, the user is encouraged to try to correct the interference by
one or more of the following measures:
• Reorient or relocate the receiving antenna.
• Increase the separation between the equipment and receiver.
• Connect the equipment into an outlet on a circuit dierent from that to which the receiver
is connected.
• Consult the dealer or an experienced radio/TV technician for help.
Use of Trademarks, Registered Trademarks, and other Protected Names and Symbols
This manual may make reference to trademarks, registered trademarks, and other
protected names and/or symbols of third-party companies not related in any way to
StarTech.com. Where they occur these references are for illustrative purposes only and do not
represent an endorsement of a product or service by StarTech.com, or an endorsement of the
product(s) to which this manual applies by the third-party company in question. Regardless
of any direct acknowledgement elsewhere in the body of this document, StarTech.com hereby
acknowledges that all trademarks, registered trademarks, service marks, and other protected
names and/or symbols contained in this manual and related documents are the property of
their respective holders.

Instruction Manual
1
Table of Contents
Introduction ............................................................................................ 2
Packaging Contents ................................................................................................................................. 2
System Requirements ..............................................................................................................................2
Installation ..............................................................................................2
Hardware Installation ............................................................................3
Specications .......................................................................................... 4
DC Output ...............................................................................................7
Connectors for ........................................................................................8
Connectors for ........................................................................................9
Technical Support ..................................................................................10
Warranty Information ............................................................................ 10

Instruction Manual
2
Introduction
Packaging Contents
• ATX Power Supply
• Quick Install Guide
System Requirements
• ATX compliant motherboard
• ATX compliant computer case that ts a full sized power supply
• Standard Computer Power Cord (Regional AC to C13)
Installation
WARNING! Computer parts can be severely damaged by static electricity. Be sure
that you are properly grounded before opening your computer case. StarTech.
com recommends that you wear an anti-static strap when installing any computer
component. If an anti-static strap is unavailable, discharge yourself of any static
electricity build-up by touching a large grounded metal surface (such as the computer
case) for several seconds.
Installation of a power supply requires some mechanical skill and requires that you
open your computer case to disconnect and reconnect wires. If you are unfamiliar
with this kind of work, consider bringing your computer and new StarTech.com power
supply to your local computer store for help.

Instruction Manual
3
Hardware Installation
1. If replacing an existing power supply, turn your computer o and any peripherals
connected to the computer (i.e. printers, external hard drives, etc.).
2. If replacing an existing power supply check to see if it has a power switch on it, set it
to the “0” position. Unplug the power cable from the rear of the power supply on the
back of the computer and disconnect all other peripheral cables.
3. Remove the cover from the computer case. For detailed steps refer to the
documentation included with your computer system, or computer case.
4. If replacing an existing power supply disconnect all of the
power connectors from the motherboard and peripheral devices (i.e. hard drives,
CD/DVD drives, etc). Make sure to take note of each connector and where they were
plugged in. Ensure there
are no devices connected to the existing power supply.
5. If replacing an existing power supply remove it from the computer case. This is
typically done by removing four (4) mounting screws on the outside face of the
power supply. Refer to documentation for your computer system or computer case
for specics.
6. Hold the new power supply into place so that the 4 screw holes around the fan are
lined up with installation holes on your computer case, and x 4 screws (included
with your computer case) through the computer case into the power supply. Refer
to documentation for your computer system or computer case for specics.
7. Connect the power connectors from the power supply to the motherboard and any
peripheral devices that require power. If you are replacing an existing power supply,
replace all power connectors that were removed. Refer to the documentation for
your motherboard and peripheral devices for details regarding power requirements.
Note: This power supply uses a 20+4 pin ATX connector, so it can be used on
motherboards with either a 20-pin or 24-pin connector. Simply detach the extra
4-pin attachment for use
on 20-pin motherboards.
8. Make sure any loose or unused cables from the power supply
are away from fans and other moving parts.
9. Place the cover onto the computer case. For detailed steps
refer to the documentation included with your computer system,
or computer case.
10. Connect the Power Cable
11. Set up your computer system. Refer to documents included
with your computer system and any attached devices.
12. The computer system is now ready to be turned on.

Instruction Manual
4
Specications
ATX2PW430WH ATX2PW500WH
Standards
ATX12V v2.3
EPS12V v2.92
Eciency Rating
80% @ 20% - 86 Watt
80% @ 50% - 215 Watt
80% @ 100% - 430 Watt
80% @ 20% - 110 Watt
80% @ 50% - 275 Watt
80% @ 100% - 550 Watt
Maximum Power
Output
430W 500W
Fans 1 x 80mm
Input Power 100 ~ 240VAC, 10 ~ 5A, 47 ~ 63Hz
Operating
Temperature
0°C to 40°C (32°F to 104°F)
Storage Temperature -20°C to 80°C (-4°F to 176°F)
Humidity 10~90% RH
MTBF 100,000
Dimensions (LxWxH) 150mm x 86mm x 140mm

Instruction Manual
5
Specications cont...
ATX2PW530WH ATX2PW550WH
Standards
ATX12V v2.3
EPS12V v2.92
Eciency Rating
80% @ 20% - 106 Watt
80% @ 50% - 265 Watt
80% @ 100% - 530 Watt
80% @ 20% - 110 Watt
80% @ 50% - 275 Watt
80% @ 100% - 550 Watt
Maximum Power
Output
530W 550W
Fans 1 x 80mm
Input Power 100 ~ 240VAC, 10 ~ 5A, 47 ~ 63Hz
Operating
Temperature
0°C to 40°C (32°F to 104°F)
Storage Temperature -20°C to 80°C (-4°F to 176°F)
Humidity 10~90% RH
MTBF 100,000
Dimensions (LxWxH) 150mm x 86mm x 140mm

Instruction Manual
6
Specications cont...
ATX2PW630WH ATX2PW450BR ATX2PW450GO
Standards
ATX12V v2.3
EPS12V v2.92
Eciency
Rating
80% @ 20% - 126
Watt
80% @ 50% - 315
Watt
80% @ 100% -630
Watt
81% @ 20% - 90
Watt
85% @ 50% - 225
Watt
81% @ 100% - 450
Watt
87% @ 20% - 90
Watt
90% @ 50% - 225
Watt
87% @ 100% - 450
Watt
Maximum
Power
Output
630W 450W 450W
Fans 1 x 80mm
Input Power 100 ~ 240VAC, 10 ~ 5A, 47 ~ 63Hz
Operating
Temperature
0°C to 40°C (32°F to 104°F)
Storage
Temperature
-20°C to 80°C (-4°F to 176°F)
Humidity 10~90% RH
MTBF 100,000
Dimensions
(LxWxH)
150mm x 86mm x 140mm

Instruction Manual
7
DC Output
+3.3V +5V +12V1 +12V2 +12V3 +12V4 -12V +5Vsb
20A 20A 37A 37A 37A 37A 0.5A 2.5A
+3.3V +5V +12V1 +12V2 +12V3 +12V4 -12V +5Vsb
20A 20A 35A 35A 35A 35A 0.5A 2.5A
+3.3V +5V +12V1 +12V2 +12V3 +12V4 -12V +5Vsb
20A 20A 33A 33A 33A 33A 0.5A 2.5A
+3.3V +5V +12V1 +12V2 +12V3 +12V4 -12V +5Vsb
20A 20A 35A 35A 35A 35A 0.5A 2.5A
+3.3V +5V +12V1 +12V2 +12V3 +12V4 -12V +5Vsb
20A 20A 41A 41A 41A 41A 0.5A 2.5A
+3.3V +5V +12V1 +12V2 +12V3 +12V4 -12V +5Vsb
20A 20A 43A 43A 43A 43A 0.5A 2.5A
+3.3V +5V +12V1 +12V2 +12V3 +12V4 -12V +5Vsb
20A 20A 50A 50A 50A 50A 0.5A 2.5A
ATX2PW450GO
ATX2PW450BR
ATX2PW430W
ATX2PW500W
ATX2PW530W
ATX2PW550W
ATX2PW630W

Instruction Manual
8
Connectors for
ATX2PW430WH / ATX2PW500WH / ATX2PW530WH / ATX2PW550WH / ATX2PW450BR
/ ATX2PW450GO
1X ATX 20+4-pin
1 x 4+4 -pin ATX 12V (8-pin
EPS12V)
1 x 6-pin PCI Express 4x 15-pin SATA
3 x 4-pin Molex Power (LP4) 1 x 4-pin
1x 6+2-Pin pin PCI Express

Instruction Manual
9
Connectors for
ATX2PW630WH
1X ATX 20+4-pin
1 x 4+4 -pin ATX 12V (8-pin EPS12V)
2 x 6-pin PCI Express 6x 15-pin SATA
3 x 4-pin Molex Power (LP4) 1 x 4-pin
2x 6+2-Pin pin PCI Express

Instruction Manual
10
Technical Support
StarTech.com’s lifetime technical support is an integral part of our commitment to
provide industry-leading solutions. If you ever need help with your product, visit
www.startech.com/support and access our comprehensive selection of online tools,
documentation, and downloads.
For the latest drivers/software, please visit www.startech.com/downloads
Warranty Information
This product is backed by a two year warranty.
In addition, StarTech.com warrants its products against defects in materials
and workmanship for the periods noted, following the initial date of purchase.
During this period, the products may be returned for repair, or replacement with
equivalent products at our discretion. The warranty covers parts and labor costs only.
StarTech.com does not warrant its products from defects or damages arising from
misuse, abuse, alteration, or normal wear and tear.
Limitation of Liability
In no event shall the liability of StarTech.com Ltd. and StarTech.com USA LLP (or their
ocers, directors, employees or agents) for any damages (whether direct or indirect,
special, punitive, incidental, consequential, or otherwise), loss of prots, loss of business,
or any pecuniary loss, arising out of or related to the use of the product exceed the
actual price paid for the product. Some states do not allow the exclusion or limitation
of incidental or consequential damages. If such laws apply, the limitations or exclusions
contained in this statement may not apply to you.

Hard-to-nd made easy. At StarTech.com, that isn’t a slogan. It’s a promise.
StarTech.com is your one-stop source for every connectivity part you need. From
the latest technology to legacy products — and all the parts that bridge the old and
new — we can help you nd the parts that connect your solutions.
We make it easy to locate the parts, and we quickly deliver them wherever they need
to go. Just talk to one of our tech advisors or visit our website. You’ll be connected to
the products you need in no time.
Visit www.startech.com for complete information on all StarTech.com products and
to access exclusive resources and time-saving tools.
StarTech.com is an ISO 9001 Registered manufacturer of connectivity and technology
parts. StarTech.com was founded in 1985 and has operations in the United States,
Canada, the United Kingdom and Taiwan servicing a worldwide market.
/


