Cobra HH330 User manual

Category
Two-way radios
Type
User manual
VHF MARINE RADIO
MR HH330 FLOAT
Printed in China Part No. 480-542-P Version A
Owner’s Manual
Nothing Comes Close to a Cobra
®
English
A1
English
Our Thanks to You and
Customer Assistance
Introduction
Our Thanks to You
Thank you for purchasing a CobraMarine
®
VHF radio.
Properly used, this Cobra
®
product will give you
many years of reliable service.
How Your CobraMarine VHF Radio Works
This radio is a battery-powered portable transceiver for use afloat. It gives you
two-way vessel-to-vessel and vessel-to-shore station communications, primarily
for safety and secondarily for navigation and operational purposes. With it, you
can call for help, get information from other boaters, talk to lock or bridge tenders,
and make radiotelephone calls to anywhere in the world through a marine operator.
Besides two-way communications, the radio can provide quick access to receive
all the NOAA (National Oceanographic and Atmospheric Administration) weather
channels and alert you to weather emergencies with a tone on a weather channel
you can select for your area.
Customer Assistance
Should you encounter any problems with this product, or not understand
its many features, please refer to this owner’s manual. If you require further
assistance after reading this manual, Cobra Electronics offers the following
customer assistance services:
For Assistance in the U.S.A.
Automated Help Desk English only.
24 hours a day, 7 days a week 773-889-3087 (phone).
Customer Assistance Operators English and Spanish.
8:00 a.m. to 5:30 p.m. Central Time Mon. through Fri. (except holidays)
773-889-3087 (phone).
Questions English and Spanish.
Faxes can be received at 773-622-2269 (fax).
Technical Assistance English only.
www.cobra.com (on-line: Frequently Asked Questions).
English and Spanish. productinfo
@cobra.com (e-mail).
For Assistance Outside the U.S.A.
Contact Your Local Dealer
Customer Assistance
©2010 Cobra Electronics Corporation
6500 West Cortland Street
Chicago, Illinois 60707 USA
www.cobra.com
A2
English
Radio Controls
and Indicators
Introduction
Instant
Channel
16/9 Button
SCAN
Button
Call/Enter
Button
Wrist
Strap
Connector
ON/OFF/
Volume Control
Speaker/
Microphone
External Cover
Antenna
Backlit
LCD
Screen
Tri-Watch
Button
Battery
Backlight/
Key Lock
Button
Memory/Escape
Button
Channel Up
Button
Push to
Talk
Button
Channel
Down
Button
Power
Level/Weather
Button
Speaker
Belt Clip
Engagement
Microphone
Battery
Clip
A3
English
Introduction
Backlit LCD (Liquid Crystal Display) Screen
UIC Active Channel Map Icons
Roger Beep Icon
Battery Power Icon
Memory Channel
Memory Channel Icon
Call Tone Icon
Weather Alert Icon
Weather Icon
Low/Medium/High Power Icons
Signal Level Icons
Tri-Watch Icon
Frequency
Band Icon
Transmit and Receive Icons
Button Lock Icon
Scan Icon
Key Tone Icon
Power Settings
Selectable power settings produce
1, 3 or 6 watts of output power for
near or distant calling.
USA/International/Canada Channels
Allows operation on any of the three (3)
different channel maps established for
these areas.
All NOAA Weather Channels
Instant access to all National Weather
Channels, 24 hours a day.
Submersible to JIS7 Standards
Waterproof to 3.3 ft (1 m) of water
for 30 minutes.
Button/Key Lock
Prevents accidental setting changes
when button lock is set.
Channel Scan/Memory Scan
Use to scan through unlimited
channels or memory locations
to find conversations in progress.
AA Battery Compatible
Can work at full power with six (6) AA
alkaline batteries. Good for emergency
backup. Requires optional AA battery tray
(P/N CM 110-011).
Instant Channel 16/9
Provides instant access to priority
Channel 16 and calling Channel 9.
Tri-Watch
Use to monitor three (3) channels
at once — Channel 16 and two (2)
programmable channels.
Floating
This radio will float if dropped overboard.
It has an orange stripe so it's easy to
retrieve.
Must use included battery to float.
120V/12V Charger Included
Use to charge battery pack, at home,
in a car or in a boat.
Locking Desktop Charger
Holds the radio or battery in place while
charging. Vertical or horizontal mounting.
.
Product Features
Active Channel
Numbers
Simplex Operation Icon
Backlit LCD Screen
and Product Features Product Features
Introduction
Call Tones (Selectable)
10 selectable call tones
Emergency Weather Alert
Receive NOAA alerts when threatening
weather is nearby.
Speaker/Mic Jack
Allows connecting optional Cobra
Lapel Speaker/Mic and other Cobra
accessories.
Unlimited Memory Channels
Allows programming of unlimited
VHF memory channels.
Signal Strength Meter
Shows the strength of incoming or
outgoing signals.
Illuminated Buttons
Allows high visibility of all function
buttons.
Roger Beep Tone (Selectable)
Confirmation tone indicates the
completion of the user’s transmission
and signals to others it is clear to talk.
On or Off selectable.
BURP
The Cobra exclusive BURP feature expels
water from the speaker grill if the unit is
dropped in the water or is subjected to
extreme rain and weather.
Product Features (continued)
A4
English
Introduction
Notes
Introduction
1
Nothing Comes Close to a Cobra
®
Table of Contents
Introduction
Our Thanks to You . . . . . . . . . . . . . . . . . . . . . . . . . . . . . . . . . . . . . . . . . . . A1
Customer Assistance . . . . . . . . . . . . . . . . . . . . . . . . . . . . . . . . . . . . . . . . . A1
Radio Controls and Indicators . . . . . . . . . . . . . . . . . . . . . . . . . . . . . . . . . . A2
Backlit LCD (Liquid Crystal Display) Screen . . . . . . . . . . . . . . . . . . . . . . . . A3
Product Features . . . . . . . . . . . . . . . . . . . . . . . . . . . . . . . . . . . . . . . . . . . . A3
Important Safety Information . . . . . . . . . . . . . . . . . . . . . . . . . . . . . . . . . . . . 2
General Precautions . . . . . . . . . . . . . . . . . . . . . . . . . . . . . . . . . . . . . . . . . . .3
Recommendations for Marine Communication . . . . . . . . . . . . . . . . . . . . . . 5
FCC Licensing Information . . . . . . . . . . . . . . . . . . . . . . . . . . . . . . . . . . . . . . 6
Installation
Included in this Package . . . . . . . . . . . . . . . . . . . . . . . . . . . . . . . . . . . . . . . 8
Wrist Strap and Belt Clip . . . . . . . . . . . . . . . . . . . . . . . . . . . . . . . . . . . . . . . 9
Batteries and Charger . . . . . . . . . . . . . . . . . . . . . . . . . . . . . . . . . . . . . . . . . 10
Operating Your Radio
Getting Started . . . . . . . . . . . . . . . . . . . . . . . . . . . . . . . . . . . . . . . . . . . . . . 14
Setup Mode Programming . . . . . . . . . . . . . . . . . . . . . . . . . . . . . . . . . . . . .19
Standby/Receive and Transmit . . . . . . . . . . . . . . . . . . . . . . . . . . . . . . . . . . 23
NOAA Weather Channels and Alert . . . . . . . . . . . . . . . . . . . . . . . . . . . . . . .25
Advanced Operation . . . . . . . . . . . . . . . . . . . . . . . . . . . . . . . . . . . . . . . . . . 27
Floating Feature . . . . . . . . . . . . . . . . . . . . . . . . . . . . . . . . . . . . . . . . . . . . . .34
Maintenance . . . . . . . . . . . . . . . . . . . . . . . . . . . . . . . . . . . . . . . . . . . . . . . . 35
Troubleshooting . . . . . . . . . . . . . . . . . . . . . . . . . . . . . . . . . . . . . . . . . . . . . 35
VHF Marine Radio Protocols
VHF Marine Radio Procedures . . . . . . . . . . . . . . . . . . . . . . . . . . . . . . . . . . 36
Voice Calling . . . . . . . . . . . . . . . . . . . . . . . . . . . . . . . . . . . . . . . . . . . . . . . 38
Radiotelephone Calls . . . . . . . . . . . . . . . . . . . . . . . . . . . . . . . . . . . . . . . . . 40
Emergency Messages and Distress Procedure . . . . . . . . . . . . . . . . . . . . . 41
Warranty and Trademark
Limited 3-Year Warranty . . . . . . . . . . . . . . . . . . . . . . . . . . . . . . . . . . . . . . 45
Trademark Acknowledgement . . . . . . . . . . . . . . . . . . . . . . . . . . . . . . . . . . .45
Customer Service
Product Service . . . . . . . . . . . . . . . . . . . . . . . . . . . . . . . . . . . . . . . . . . . . . 46
Specifications . . . . . . . . . . . . . . . . . . . . . . . . . . . . . . . . . . . . . . . . . . . . . . . 47
Appendix
VHF Marine Channel Assignments . . . . . . . . . . . . . . . . . . . . . . . . . . . . . . .48
Weather Channels Assignments . . . . . . . . . . . . . . . . . . . . . . . . . . . . . . . . . 63
Accessories . . . . . . . . . . . . . . . . . . . . . . . . . . . . . . . . . . . . . . . . . . . . . . . . 64
3
Nothing Comes Close to a Cobra
®
General Precautions
General Precautions
The following WARNINGS and NOTICE information will make you aware of RF
exposure hazards and how to assure you operate the radio within the FCC RF
exposure limits established for the radio.
WARNINGS
Your radio generates electromagnetic RF (radio frequency) energy when it is transmitting.
To ensure that you and those around you are not exposed to excessive amounts of
that energy, DO NOT touch the antenna when transmitting. KEEP the radio at least
two (2) inches (5 cm) away from yourself and others when transmitting.
DO NOT operate with more than a duty cycle of 5% transmit, 5% receive and
90% standby. The radio is transmitting when the Talk button is pressed and the
transmit information shows on the LCD screen.
ALWAYS use only Cobra authorized accessories.
DO NOT operate the radio in an explosive atmosphere, near blasting sites,
or in any area where signs are posted prohibiting radio transmissions.
NEVER place the transceiver or microphone/speaker where they might interfere
with operation of your vessel or cause injury.
DO NOT allow children or anyone unfamiliar with proper procedures to operate
the radio without supervision.
Failure to observe any of these warnings may cause you to exceed FCC RF
exposure limits or create other dangerous conditions.
Introduction
2
English
Important Safety Information
Introduction
Important Safety Information
Before installing and using your CobraMarine VHF radio, please read these
general precautions and warnings.
Warning and Notice Statements
To make the most of this radio, it must be installed and used properly.
Please read the installation and operating instructions carefully before installing
and using the radio. Special attention must be paid to the WARNING and NOTICE
statements in this manual.
WARNING
Statements identify conditions that could result in personal injury or loss of life.
NOTICE
Statements identify conditions that could cause damage to the radio
or other equipment.
Safety Training Information
This CobraMarine
®
radio is designed for, and classified as, “Occupational Use Only.”
The radio must only be used in the course of employment by individuals aware of
both the hazards and the ways to minimize those hazards. This radio is NOT intended
for use in an uncontrolled environment by the “General Population.”
This radio has been tested and complies with the FCC RF exposure limits for
“Occupational Use Only.” This CobraMarine VHF radio also complies with the
following guidelines and standards regarding RF energy and electromagnetic
energy levels as well as evaluation of those levels for human exposure:
FCC OET Bulletin 65 Edition 97-01 Supplement C, Evaluating Compliance with
FCC Guidelines for Human Exposure to Radio Frequency Electromagnetic Fields.
American National Standards Institute (C95.1-1992), IEEE Standard for Safety
Levels with Respect to Human Exposure to Radio Frequency Electromagnetic
Fields, 3 kHz to 300 GHz.
American National Standards Institute (C95.3-1992), IEEE Recommended
Practice for the Measurement of Potentially Hazardous Electromagnetic
Fields — RF and Microwave.
Introduction
Introduction
5
Nothing Comes Close to a Cobra
®
Recommendations for
Marine Communication
Recommendations for Marine Communication
The frequencies your radio uses are set aside to enhance safety afloat and for vessel
navigation and operational messages over a range suitable for nearshore voyages.
If the 6 watt maximum output of your radio is not sufficient for the distances you travel
from the coast, consider a higher powered handheld or installing a Cobra Marine fixed
mount radio with up to 25 watts of output power. (Visit www.cobra.com or your
local dealer for model availability.)
If traveling far offshore, you should consider adding even more powerful radio
equipment such as HF single side band or satellite radio for your vessel.
The U.S. Coast Guard does not endorse cellular telephones as substitutes for marine
radios. They generally cannot communicate with rescue vessels and, if you make
a distress call on a cellular telephone, only the party you call will be able to hear
you. Additionally, cellular telephones may have limited coverage over water and
can be hard to locate. If you do not know where you are, the Coast Guard will have
difficulty finding you if you are using a cellular telephone.
However, cellular telephones can have a place on board where cellular coverage
is available — to allow social conversations and keep the marine frequencies
uncluttered and available for their intended uses.
4
English
General Precautions
Introduction
NOTICE
Your radio is waterproof only when the batteries are properly installed.
AVOID using or storing the radio at temperatures below -4˚F (-20˚C) or above
140˚F (60˚C).
KEEP your radio at least 3 ft (0,9 m) away from your vessel’s magnetic
navigation compass.
DO NOT attempt to service any internal parts yourself. Have any necessary
service performed by a qualified technician.
This radio is supplied with a lithium-ion (LiON) rechargeable battery pack.
Use only the Cobra charger to recharge lithium-ion (LiON) batteries in the radio.
Do not short circuit the battery pack.
When replacing the batteries, dispose of the old batteries properly. Batteries
may explode if disposed of in a fire.
Changes or modifications to your radio MAY VOID its compliance with
FCC (Federal Communications Commission) rules and make it illegal to use.
Introduction
Introduction
7
Nothing Comes Close to a Cobra
®
FCC Licensing Information
User Responsibility and Operating Locations
All users are responsible for observing domestic and foreign government regulations
and are subject to severe penalties for violations. The VHF frequencies on your radio
are reserved for marine use and require a special license to operate from land,
including when your boat is on its trailer.
NOTE
This device complies with part 15 of the FCC Rules. Operation is subject to the
following two (2) conditions:
1. This device may not cause harmful interference, and
2. This device must accept any interference received, including interference that
may cause undesired operation.
FCC Warnings: Replacement or substitution of transistors, regular diodes or
other parts of a unique nature, with parts other than those recommended by
Cobra may cause a violation of the technical regulations of part 80 of the FCC
Rules, or violation of type acceptance requirements of part 2 of the rules.
6
English
FCC Licensing Information
CobraMarine VHF radios comply with the FCC (Federal Communications
Commission) requirements that regulate the Maritime Radio Service.
The radio operates on all currently allocated marine channels and is switchable for
use according to U.S.A., International or Canadian regulations. It features instant
access to emergency Channel 16 and calling Channel 9 as well as NOAA (National
Oceanic and Atmospheric Administration) All Hazards Radio with Alert that can be
accessed by pressing one (1) button.
Station License
An FCC ship station license is no longer required for any vessel traveling in U.S.A.
waters which uses a VHF marine radio, RADAR, or EPIRB (Emergency Position
Indicating Radio Beacon), and which is not required to carry radio equipment.
However, any vessel required to carry a marine radio on an international voyage,
carrying an HF single side band radiotelephone, or carrying a marine satellite
terminal must obtain a station license.
FCC license forms and applications for ship and land stations can be downloaded
through the Internet at www.fcc.gov. Forms can also be obtained by calling the FCC
at 888-225-5322.
International Station License
If your vessel will be entering the sovereign waters of a country other than the U.S.A.
or Canada, you should contact that country’s communications regulatory authority
for licensing information.
Radio Call Sign
Currently, the FCC does not require recreational boaters to have a license. The United
States Coast Guard recommends that the boat’s registration number and state of
registry (e.g., IL 1234 AB) be used as a call sign and be clearly visible on the vessel.
Canadian Ship Station License
You need a Radio Operators Certificate if your vessel is operated in Canadian waters.
Radio Operator training and certification is available from the Canadian Power
Squadron. Visit their website (http://www.cps-ecp.ca/english/newradiocard.html),
contact the nearest field office or write: Industry of Canada, Radio Regulatory
Branch, Attn: DOSP, 300 Slater Street, Ottawa, Ontario, Canada K1A 0C8.
Introduction
9
Nothing Comes Close to a Cobra
®
Wrist Strap and Belt Clip
Wrist Strap
The radio comes with the wrist strap already attached.
It can be easily removed if you choose not to use it.
Belt Clip
Use the spring-loaded belt clip to carry the radio on your
person.
1. Press open the belt clip, slide it over the belt and
release the clip.
2. Insert the round guide on the back of the radio into the
guide channel on the back of the belt clip. The radio must
be upside-down, as shown, to remove it from the belt clip.
3. Once the knob is inserted all the way into the belt clip
channel, the radio swings free but remains secure.
Wrist Strap
Belt Clip Secured to Belt
Insert Knob onto Belt Clip
Secure Radio
VHF Marine Radio Protocols
Installation
8
English
Included in this Package
You should find all of the following items in the package with
your CobraMarine VHF radio:
Radio Wrist Strap Drop-In Battery Charger
Battery Charger Power Cord
For connection to 12-volt and 120-volt
power sources.
LiON Battery Pack
Operating Instruction Manual Spring-Loaded Belt Clip
VHF Marine Radio Protocols
Installation
VHF Marine Radio Protocols
Installation
11
Nothing Comes Close to a Cobra
®
Batteries and Charger
Initial Charge
The Cobra-provided LiON battery pack may be charged at
home, in a car or in a boat using the appropriate 12V or
120V power cord with the charger.
1. Insert one (1) of the power cords into the back of the
drop-in charger.
2. Insert the other end of the power cord into the appropriate
12V or 120V power source.
3. Remove the spacer from the charger and insert the entire
radio/battery into the charger. The metal charge contacts
on the battery will contact the mating prongs in the
charger to transfer the charging current.
4. Observe that the red light on the front of the charger
glows to indicate that the battery pack is properly seated
and the charger is operating.
5. Allow the batteries to charge for five (5) to six (6) hours
before use. The light will change back to green when the
battery is fully charged.
WARNING
Only the rechargeable LiON battery pack can be
recharged. You MUST use one of the charging devices
provided with this radio. Do not substitute any other
type of charging adapter or charger base for this
radio. Battery damage, fire or explosion may result.
It is equally important to prevent the lithium-ion
(LiON) battery pack from freezing to obtain best
performance from the battery pack.
NOTE
If the drop-in charger is used on a boat, Cobra
recommends you attach it to a horizontal shelf or
vertical bulkhead (using the screw holes provided)
to prevent possible damage due to the boat rolling or
pitching. The charging base has been designed to hold
the battery pack in place during rough sea conditions.
Power Sources
Initial Battery Charge
VHF Marine Radio Protocols
Installation
10
English
Batteries and Charger
The radio is shipped with a sealed lithium-ion (LiON) battery
pack (P/N CM 110-021) that is rechargeable.
WARNING
The charger provided for this radio is only to be used
to charge the battery pack provided. Do not charge
any other type of batteries in the charger as fire,
explosion or battery damage will occur. Avoiding
extreme room temperatures will also help prolong
the life of the battery pack for the radio.
When your rechargeable batteries begin to discharge too
quickly, it is time to install a new battery pack. Your radio
will also operate with six (6) high-quality AA alkaline
batteries, using the optional alkaline battery tray.
Installing the Battery Pack
1. Position the battery pack to line up the two (2) external
alignment tabs to the alignment slots in the radio.
2. Engage the battery pack into the radio until battery pack
is fully seated against the radio housing.
3. Pivot the locking tab up until it snaps into place on the
back of the battery pack.
Install Battery Pack
LiON Battery Pack
VHF Marine Radio Protocols
Installation
13
Nothing Comes Close to a Cobra
®
Maintaining the Battery Charge
As you use your radio, the battery power icon will show the
battery power remaining. When the icon begins to flash, it is
time to recharge or change the batteries.
NOTICE
Use only the drop-in charger provided by Cobra. Do
not use the charger with alkaline batteries; only the
LiON battery pack is rechargeable. Spent alkaline
batteries must be discarded and replaced.
It is a good idea to keep a set of fresh, high-quality AA
alkaline batteries with your radio. Should the rechargeable
battery pack become discharged and no electrical power
source is available, you can insert the optional alkaline
battery tray with fresh alkaline batteries and continue to
use your radio.
NOTE
Some radios with LiON batteries have AA or AAA
battery packs which only allow low-power transmit.
The optional AA battery tray for the MR HH330 and a
fresh set of alkaline batteries will allow for full-power
emergency transmissions.
Batteries and Charger
Fully Charged
Partially Charged
Fully Discharged
VHF Marine Radio Protocols
Installation
12
English
Batteries and Charger
To Remove Battery Pack from Radio
1. Pivot the locking tab off of the back of the battery pack
to unlock.
2. Lift the bottom of the battery pack slightly to remove
it from the radio housing.
3. Pull battery pack out of the radio housing.
NOTE
The LiON battery pack can also be charged in the
battery charger without being installed in the radio.
Insert the spacer into the battery charger to support
the battery pack during this charging process. Follow
the same procedures in “Initial Charge” to charge the
battery pack.
NOTICE
Lithium-ion (LiON) batteries are toxic. Please dispose
of properly. Some marine suppliers accept old battery
packs for recycling and some municipal waste disposal
agencies have special provisions for battery disposal.
Alkaline Batteries
An optional alkaline battery tray (P/N CM 110-011) can be
purchased for this radio. The alkaline battery tray acts as
a backup or “Emergency” power source should the battery
pack run low on power and needs to be recharged. The
radio will transmit at full power when using six (6) new
AA alkaline batteries.
WARNING
Never attempt to recharge alkaline batteries. They are
not made to be recharged, and should be disposed of
in a proper manner.
Locking Tab
Alkaline Battery Tray
Battery Pack Charging Only
VHF Marine Radio Protocols
Operating Your Radio
15
Nothing Comes Close to a Cobra
®
Getting Started
Radio Speaker and Microphone
The internal Radio Speaker and Microphone are located on the
bottom front face of the radio below the lower control buttons.
An optional Speaker/Microphone port is located at the top
of the radio between the antenna and the Power/Volume
control. Unthread the Speaker/Microphone port cover to access
and install an optional speaker or microphone into this port.
Talk Button
Press and hold the Talk button to transmit messages.
Release the Talk button to stop transmitting.
Speaker/Mic Port
Talk Button
VHF Marine Radio Protocols
Operating Your Radio
14
English
Getting Started
Getting Started
Refer to the foldout at the front of this manual to identify the
various controls and indicators on your radio. Throughout
this manual you will be instructed to “Press” or to “Press
and Hold” various buttons (except “Push to Talk”) on the
radio. “Press” means a momentary press of approximately
one (1) second. “Press and Hold” means to hold the button
down for approximately two (2) seconds.
Whenever you press any button except the Talk button on
your radio, a brief tone (beep) will sound to confirm the
button press. With all button presses, the appropriate icon
will appear on the LCD and the backlight will turn On. The
backlight will stay On for 10 seconds after the button is
released.
At times, you will hear two (2) other sounds. Two (2) beeps
will sound to confirm your setting changes and three (3)
beeps will sound to notify you of an error.
Common Radio Functions
The following procedures define common operating functions of the radio when in
either Marine Standby or Weather (WX) Standby modes.
Power/Volume Control
Power On/Off Control
The On/Off/Volume control is located at the upper right
side of the radio. Turning the On/Off/Volume control
past the detent position will turn the radio On or Off.
Volume Control
Volume is controlled by turning the On/Off/Volume
control.
To increase the volume, turn the On/Off/Volume
control clockwise.
To decrease the volume, turn the On/Off/Volume
control counterclockwise.
On/Off/Volume Control
(Counterclockwise)
On/Off/Volume Control
(Clockwise)
HH330 Radio
VHF Marine Radio Protocols
Operating Your Radio
17
Nothing Comes Close to a Cobra
®
Getting Started
Channel Up/Down Buttons
Your radio will Receive (Rx) and Transmit (Tx) VHF signals
on the channel indicated on the LCD display. You can change
the channel at any time using the Channel Up/Down buttons.
To Change Channels:
Press the Channel Up/Down button.
If you are on Channel 88, pressing the Channel Up
button will advance to Channel 01. If you are on
Channel 01, pressing the Channel Down button will
advance to Channel 88.
You can press and hold the Channel Up/Down button
for fast advance. The beep sound will occur only at the
first press of the button and not during fast advance.
If the new channel selected is restricted to low power,
the radio will automatically switch to Low Power mode
and the Low Power icon will appear on the LCD.
If the radio is in the Key Lock mode, the channel will
not change and the three (3) beep error signal will sound.
SCAN Button
Press and release the SCAN button to scan all channels. The
SCAN icon will display on the LCD display. Scanning begins
at lower channels, and scans to higher channels. Press the
Channel Up/Down button to change the scan direction.
When a signal is received in SCAN mode, the radio will pause
10 seconds before resuming SCAN operation. The scan will
stop when the Talk button is pressed.
In Memory mode, press and release the SCAN button to
scan all memory channels. Because the unit is already in the
Memory Channel mode, only the channels in the memory
bank will be displayed.
NOTE
Memory channels need to be saved to effectively
enter the Memory Channel mode and scan all
memory channels.
SCAN Button
Channel Up/Down Buttons
Currently On Channel 88
VHF Marine Radio Protocols
Operating Your Radio
16
English
Getting Started
Backlight/Key Lock Button
The LCD will be illuminated by the backlight as long as any
button is pressed and will remain On for 10 seconds after the
button is released.
To Display the Backlight Momentarily:
Press the Backlight/Key Lock button. The backlight will
remain On for 10 seconds. If the backlight is already
On, another press of the Backlight/Key Lock button
will turn it Off.
Key Lock
To prevent accidental changes to your settings, you can
lock all of the following buttons:
Channel Up Button
Channel Down Button
SCAN Button
MEM/ESC Button
WX/H-M-L Button
16/9 Button
TRI-WATCH Button
Call/Enter/Setup Button
To Lock or Unlock the Buttons:
Press and hold the Backlight/Key Lock button for two
(2) seconds. The Key Lock icon will appear or disappear
in the LCD. When Key Lock is On, pressing any of the
listed buttons on the front of the radio will result in a
three (3) beep error message.
Both the Backlight/Key Lock button and the Talk button
are active — you can Receive (Rx) or Transmit (Tx)
a message with Key Lock On, but you cannot change
the channel.
Backlight/Key Lock Button
Key Locked Buttons
Key Lock Icon
VHF Marine Radio Protocols
19
Nothing Comes Close to a Cobra
®
Setup Mode Programming
The following series of procedures is designed to allow you to set the programmable
features of your radio. Correctly following these steps results in a minimal amount of
radio setup programming time.
NOTE
When in the Setup mode, if you stop programming for longer than 15 seconds,
your entry will be saved and the radio will go back to the Marine Standby
mode. When you return to Setup mode and continue programming you will
see the last “value” displayed. While in the Setup mode, you will not receive
any signal reception.
Programming these features will allow you to customize certain features of this radio
to enhance your “On-Water” audio needs.
Start from Marine Standby mode to begin Marine (VHF) Setup programming.
Press and hold the Call/Enter/Setup button for two (2) seconds to enter the
programming mode.
The mode programming follows this sequence:
Squelch Level Set
UIC Channel Map
Tone Alert On/Off
Call Tone Select
Roger Beep On/Off
Key Tone On/Off
Marine (VHF) Mode Programming
VHF Marine Radio Protocols
18
English
Getting Started
High/Medium/Low (H-M-L) Power Button
Your radio can transmit selectively at 1, 3 or 6 watts of
power. Cobra suggests you maintain the low power setting
for short-range communications. You will conserve battery
life and avoid overpowering nearby stations with a low power
setting signal. Use the high power setting for long-range
communications or when you do not receive a response to
a signal sent at 1 watt.
To Toggle Between H-M-L Power Modes:
Press the H-M-L Power button. The LCD will show
which mode is in effect. Some channels are restricted
for a maximum use of 1 watt. Your radio will
automatically set the power to Low Power mode
when you select those channels.
NOTE
Some channels, frequency bands and countries of use
might not be able to operate in High Power mode.
Call /Enter/Setup Button
The Call/Enter/Setup button has multiple functions. It is
generally used in the following ways:
Press and release to transmit your unique Call Tone signal
to another radio.
Press and hold to enter any Setup menu.
Functions as an Enter button when making a selection
in any Setup menu.
H-M-L Power Button
Call/Enter/Setup Button
Operating Your Radio
VHF Marine Radio Protocols
Operating Your Radio
21
Nothing Comes Close to a Cobra
®
Setup Mode Programming
USA/International/Canada Channel Maps
Three (3) sets of VHF Channel Maps have been established
for marine use in the USA, Canada, and the rest of the world
(International). Most of the channels are the same for all
three (3) maps, but there are definite differences (see table in
the Apendix on page 52). Your radio has all three (3) maps
built into it and will operate correctly in whichever area
you choose.
To Set Channel Map Operating Area:
1. The Channel Map mode is the second mode on
the Marine (VHF) Setup programming.
2. U, I and C will display, with the current setting
(the U icon is the default) flashing.
3. Press Channel Up/Down button to select the
U, I or C icon.
4. Press Call/Enter/Setup button to save this entry
and move to the next Setup mode programming.
NOTE
One or two of the channel maps might have been
disabled for sales of this radio in some countries.
Call Tone Alert
If Call Tone Alert is set to On, the radio will alert you to a call
from a compatible Cobra radio with a Call Alert.
To Set Call Tone On or Off:
1. Display will show Call Tone icon and ON or OFF
flashing.
2. Press Channel UP/Down button to select ON or OFF.
3. Press the Call/Enter/Setup button to save this entry
and move to the next Setup mode programming. The
Call Tone icon will show in the Standby mode when
set to ON.
Call Tone Alert
VHF Marine Radio Protocols
Operating Your Radio
20
English
Setup Mode Programming
Active Channel Map Icon
Channel Up/Down Buttons
Squelch Control
Squelch Control filters weak signals and radio frequency (RF)
noise so that you will clearly hear the signals you want.
The Squelch Control on this radio is set through the following
keypad operation.
To Set Squelch Control:
1. With the power On, push and hold Call/Enter/Setup
button to access the Setup menu.
2. Squelch control will be the first menu item to appear.
Press the Channel Up and Channel Down buttons to
set level. The signal level bar graph shows squelch
level while you are in Setup mode on the squelch
adjust function.
3. To tune your squelch, press the Channel Down
button until you hear a hissing sound, then press
and release the Channel Up button until the hissing
stops. This will establish a “Baseline” squelch.
4. By pressing the Channel Up button further, you will
filter weak and medium strength signals. By pressing
Channel Down button, you will receive weaker
signals.
5. Press the Call/Enter/Setup button to save this entry
and move to the next Setup mode programming.
NOTE
If the Squelch is set so that you can hear a continuous
hissing sound, the Memory Scan and Tri-Watch
functions will be blocked.
Squelch Control
Channel Up/Down Buttons
23
Nothing Comes Close to a Cobra
®
Roger Beep Mode
Call Tone Select
VHF Marine Radio Protocols
Operating Your Radio
22
English
Setup Mode Programming
Call Tone Select
This setting will also allow you to transmit a unique
Call Tone alert to identify your radio when you transmit
messages. You can select from one of 10 different
Call Tone signals.
To Set Call Tone:
1. From the previous press of the Call/Enter/Setup
button, the LCD will display the letter “C” and the
current Call Tone number (01 through 10).
2. Press the Channel Up/Down button to select a
different Call Tone. An example of each call tone will
sound for 1.5 seconds.
3. Press Call/Enter/Setup button to save this entry and
move to the next Setup mode programming.
NOTE
Call Tones are not usually used for Marine VHF
communications. We allow you to turn it On for your
unique communication needs.
Roger Beep Mode
In Roger Beep mode, your listener will hear an audible tone
when you release the Talk button. This alerts your listener
that you are finished talking and it is OK for them to speak.
To Set Roger Beep On or Off:
1. Display will show ROG icon and ON or OFF flashing.
2. Press Channel Up/Down button to select ON or OFF.
ROG will be displayed when On.
3. Press Call/Enter/Setup button to save this entry and
move to the next Setup mode programming.
Key Tone Mode
In Key Tone mode, an audible tone will sound each time a
button is pressed or you change a setting.
To Set Key Tone On or Off:
1.
Display will show Key Tone icon and ON or OFF flashing.
2. Press Channel Up/Down button to select ON or OFF.
3. Press Call/Enter/Setup button to save entry.
You have now ended Marine (VHF) Setup mode
programming and will enter Marine Standby mode.
VHF Marine Radio Protocols
Operating Your Radio
Standby/Receive
and Transmit
Programming these features will allow your radio to listen to all NOAA Hazard Alert
radio channels.
Start from WX Alert Standby mode to begin WX Alert Setup programming. Press and
hold the Call/Enter/Setup button for two (2) seconds to enter the programming mode.
To Set WX Alert On or Off:
1. WX Alert mode is the first mode that begins
WX Alert Setup programming.
2. Display will show WX Alert icon and ON or OFF flashing.
3. Press Channel Up/Down button to select ON or OFF.
4. Press Call/Enter/Setup button to save this entry and
move to the next setup programming mode.
To Set WX Auto Search (SCAN) On or Off:
1. Display will show Weather icon and SCAN icons,
ON or OFF is flashing.
2. Press Channel Up/Down button to select ON or OFF.
3. Press the Call/Enter/Setup button to save entry.
You have now ended the WX Setup programming mode and
will enter the WX Alert Standby mode.
NOTE
When WX Auto Search (SCAN) is set to On, weather
channel scanning will start automatically and scan all
available weather channels until the strongest channe
l
is found. This will happen under the following
conditions:
WX Alert is engaged.
Radio is in VHF Standby.
WX received signal level falls below
a preset level.
Weather (WX) Mode Programming
WX Alert On/Off
WX Auto Search (SCAN)
Key Tone Mode
VHF Marine Radio Protocols
Operating Your Radio
25
Nothing Comes Close to a Cobra
®
Standby/Receive
and Transmit
Standby/Receive and Transmit
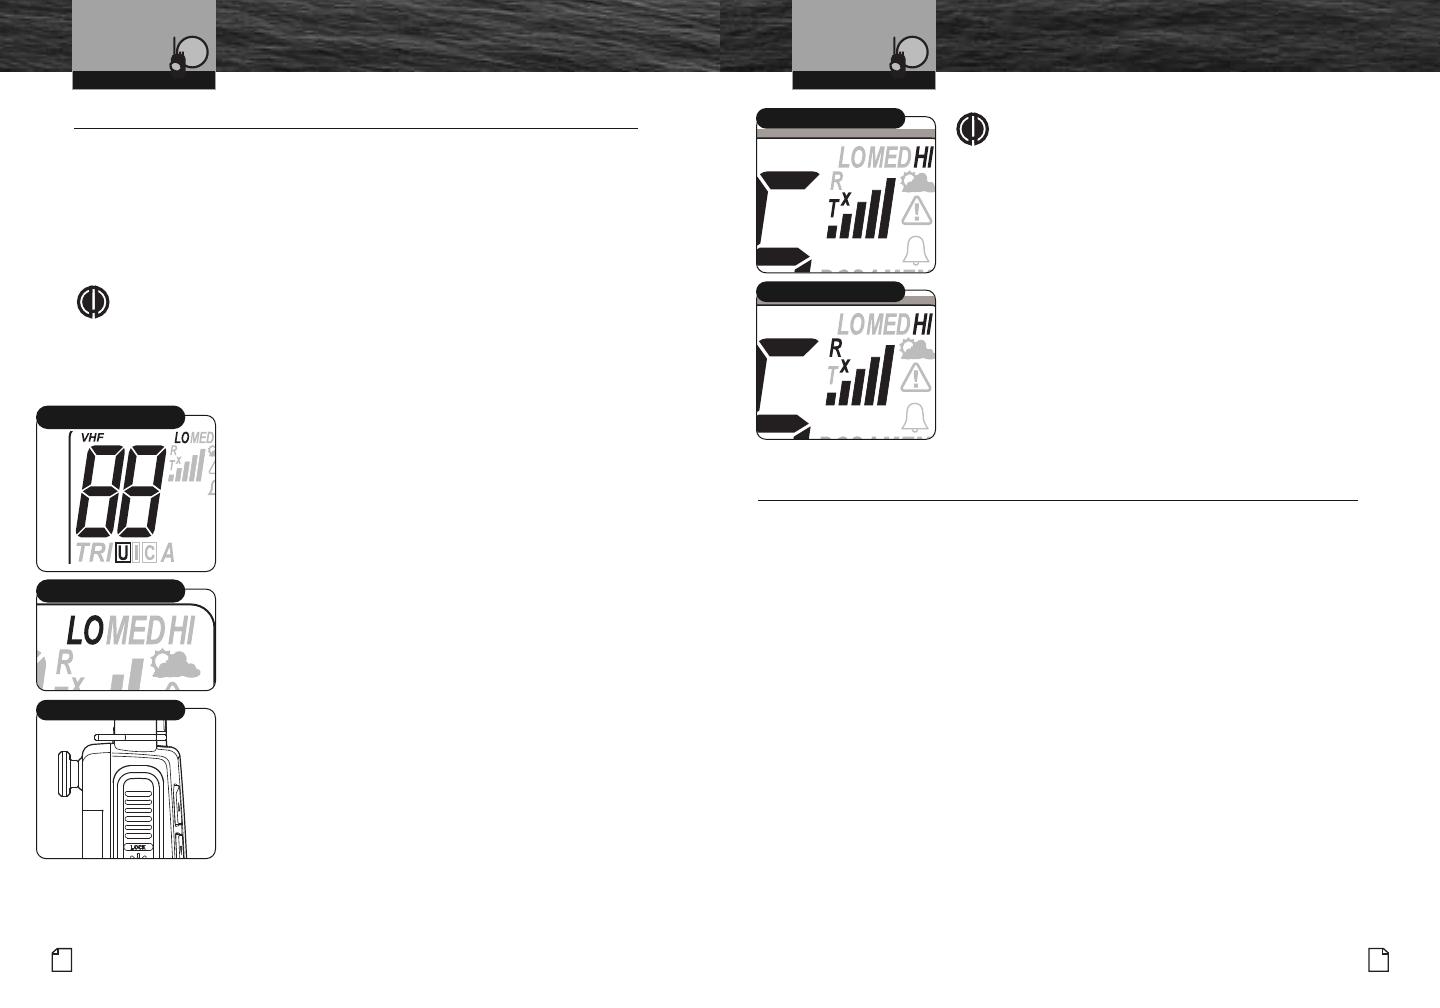
Marine Standby and Receive (Rx) Mode
Marine Standby mode is the default mode for the radio whenever it is turned on.
From this mode, you can change current settings by becoming familiar with the
different key functions in Marine Standby mode. While in Marine Standby mode, the
user will be able to transmit by pressing the Push to Talk (Talk) button. Signals in
Receive (Rx) mode will be received on the selected channel(s), and alerts broadcast
by NOAA will activate the corresponding NOAA weather alert channels in your radio.
NOTE
Coast Guard alerts are broadcast on Channel 16. You must have the WX Alert
turned On to receive NOAA weather alerts. While in Marine Standby mode, you
will receive any messages sent on the channel to which you are tuned.
Transmit (Tx) Mode
Transmit (Tx) mode gives you the ability to interact with
safety services, other vessels and shore stations. When you
use this capability, be sure to follow the procedures and to
observe the courtesies that govern its use so everyone
benefits. See Appendix to help you select the proper
channels.
To Transmit a Message:
1. Check to see that your radio is set to a proper channel for
the type of message you plan to send.
2. Toggle to the Low Power setting.
3. With the microphone about 2 in. [51 mm] from your
mouth, press and hold the Talk button and speak into the
microphone. The Transmit icon will appear on the LCD.
4. Release the Talk button when you are finished speaking.
Your radio can only operate in either Transmit (Tx) or
Receive (Rx) mode at any given time. You will not hear
the response to your message unless the Talk button is
released. If the Battery Power icon begins blinking on the
LCD when the Talk button is pressed, the radio will NOT
transmit.
24
English
VHF Marine Radio Protocols
Operating Your Radio
Standby/Receive
and Transmit
NOTE
If the Talk button is held down for five (5) minutes,
the radio will automatically sound a series of beeps
and cease transmitting to prevent unwanted signal
generation and battery drain. As soon as the Talk
button is released, it can be pressed again to
resume transmission.
NOAA Weather Channels and Alert
Monitoring the weather will probably be a frequent use of your radio. NOAA provides
continuous, around-the-clock broadcasts of the latest weather information. Taped weather
messages run every four (4) to six (6) minutes and are revised every two (2) or three (3)
hours, or as needed. The Coast Guard also announces weather and other safety warnings
on Channel 16. Smart boaters keep an eye on safety and an ear to the radio — and never
let the weather catch them unaware.
NOAA Emergency Weather Alert
In the event of a major storm or other weather condition requiring vessels at sea or on
other bodies of water to be notified, NOAA broadcasts a 1050 Hz tone that receivers such
as your CobraMarine VHF radio can detect and warn you of a weather alert condition.
When the Weather Alert mode on your radio is On, this signal will produce a loud tone
from the speaker in the radio and will automatically
switch to the alerting weather channel
so the alert broadcast
can be heard.
NOAA Test Alert System
To test this system, NOAA broadcasts the 1050 Hz signal every Wednesday sometime between
11 a.m. and 1 p.m. in each local
time zone. Any receiver that can detect the weather alert tone may
use this service to verify that this system is functioning properly.
Low Power Mode
Check Channel Number
Talk Button
Transmit (Tx) Icon
Receive (Rx) Icon
VHF Marine Radio Protocols
Operating Your Radio
27
Nothing Comes Close to a Cobra
®
Standby/Receive
and Transmit
Weather (WX) Standby Mode
To enter the WX Standby mode, press and hold the
WX/H-M-L button.
Receiving a Weather Alert
NOAA broadcasts weather information as described in the
NOAA weather channels section on page 63 of this manual.
When NOAA broadcasts a weather alert signal and your radio
is in WX Alert Standby mode, the following items will be
displayed on the LCD display:
The WX icon (cloud/sun) icon will be displayed.
The last used weather channel will be displayed.
The bar graph will display received signal strength level.
The WX Alert icon (safety triangle) will be displayed.
NOTE
Only one (1) or two (2) of the weather channels will
be operating in any given location [only in Receive
(Rx) mode]. You will need to select the channel with
the strongest signal in your location.
NOTE
When in the WX Alert mode, and NOAA sends the
1050 Hz alert tone, the radio will sound a series of
loud beeps regardless of the volume control setting.
WX/H-M-L Button
26
English
VHF Marine Radio Protocols
Operating Your Radio
Advanced Operation
Advanced Operation
Channel 16/9 Mode
Channel 16/9 mode gives you quick access to calling on
Channel 16 and Channel 9 from any operational mode.
To Switch to Channel 16 or Channel 9:
1. Press the Channel 16/9 button to change to
Channel 16.
2. Press the Channel 16/9 button again to change
to Channel 9.
3. Press the Channel 16/9 button a third time and
return to the last used Standby channel.
Channel 16/9 Button
Channel 16 or Channel 9
VHF Marine Radio Protocols
Operating Your Radio
29
Nothing Comes Close to a Cobra
®
Advanced Operation
Using Tri-Watch
Tri-Watch Scan Mode:
1. From Marine Standby mode, press the TRI-WATCH
button. The TRI icon will appear on the LCD display
and the radio will scan through the three (3) Tri-Watch
memory channels.
2. A signal on any one (1) of the three (3) channels will
stop the scan for 10 seconds to allow you to listen to
the traffic on that location.
NOTE
After the Tri-Watch scan stops to monitor a channel,
as long as you do not press any buttons within 10
seconds, your radio will automatically resume
scanning the Tri-Watch channels.
3. Press the Channel Up/Down button to resume
scanning the Tri-Watch channels or to change the
scan direction.
4. To EXIT the Tri-Watch scan, press the TRI-WATCH
button again. The TRI icon will disappear from the
LCD and the radio will return to Marine Standby
mode.
TRI-WATCH Button
Tri-Watch Scan Mode
VHF Marine Radio Protocols
Operating Your Radio
28
English
Advanced Operation
Tri-Watch Mode
Tri-Watch mode gives you one (1) button access to scan
a total of three (3) channels of most importance to you.
Channel 16 is preprogrammed and will always be one (1)
of the scanned locations. Two (2) other channels of your
choice can be stored in the radio. These channels can be
edited and/or recalled during future engagements of
Tri-Watch mode.
NOTE
The radio must be squelched for Tri-Watch mode to
function. See page 20 for Squelch procedure.
Tri-Watch Setup
To Program or Edit the Tri-Watch Channels:
1. Press and hold the TRI-WATCH button for two (2)
seconds to activate Tri-Watch Setup mode. The
TRI and MEM icons on the display will turn On.
NOTE
The main channel number will flash to indicate channel
position. If there is no input activity for 15 seconds, the
radio will sound two (2) beeps and return to Marine
Standby mode.
2. Press Channel Up/Down button to select the desired
Tri-Watch channel.
3. Press and release TRI-WATCH button or
Call/Enter/Setup button to confirm entry.
4. Repeat steps 2 and 3 to program the remaining
additional Tri-Watch memory channel.
5. After programming both Tri-Watch memory
channels the radio will immediately engage
Tri-Watch mode.
TRI-WATCH Button
TRI and MEM Icons
Channel Up/Down Button
VHF Marine Radio Protocols
Operating Your Radio
31
Nothing Comes Close to a Cobra
®
Advanced Operation
To Recall a Stored Memory Location:
1. Press the MEM/ESC button. The MEM icon will be
turned On.
2. Press the Channel Up/Down button to select the
memory location. If a memory location has been
programmed, its associated channel will display on
the LCD. Your radio is now in Marine Standby mode
on the selected memory location.
To Exit Memory Location Mode:
Press the MEM/ESC button to return the radio to
Marine Standby mode. The last channel used in
Marine Standby mode will now be displayed on the
LCD and the MEM icon will disappear.
To Erase Stored Memory Locations:
1. Press and hold the MEM/ESC button for two (2)
seconds. The memory location number will start
flashing and the MEM icon will be turned On.
2. Use the Channel Up/Down button to advance to the
memory location you want to erase.
3. Press the MEM/ESC button to select the memory
location. The memory channel number will stop
flashing and the channel number will start flashing.
4. Use the Channel Up/Down button to change to the
channel to read “00” at the selected memory
location.
5. Press the MEM/ESC button to erase that channel.
Repeat steps 2 through 5 to erase as many additional
memories as you want.
6. Press and hold the MEM/ESC button for two (2)
seconds. This will return the radio to Memory mode.
7. Press and release the MEM/ESC button again to
return to Marine Standby mode.
MEM Icon
VHF Marine Radio Protocols
Operating Your Radio
30
English
Advanced Operation
Memory Location Mode
Your radio has unlimited memory locations for storing your
most frequently used channels. These memory locations can
be selected individually or can be scanned. (See page 33
under Memory Location Scan.)
To enter Memory mode, press MEM/ESC button. The display
will show the MEM icon and the Memory Channel bank will
be activated and displayed.
To Program Memory Locations:
1. Press and hold the MEM/ESC button for two (2)
seconds. The memory location number will start
flashing and the MEM icon will be turned On.
2. Use the Channel Up/Down button to advance to the
memory location (00-99) you want to program.
3. Press the MEM/ESC button to select the memory
location. The memory channel number will stop
flashing and the channel number will start flashing.
4. Use the Channel Up/Down button to change to the
channel you want to store into the selected memory
location.
5. Press the MEM/ESC button to program that channel.
The memory location number will flash again.
Repeat steps 2 through 5 to program as many
additional memories as you want.
6. Press and hold the MEM/ESC button for two (2)
seconds. This will return the radio to Memory mode.
7. Press and release the MEM/ESC button again to
return to Marine Standby mode.
MEM/ESC Button
Memory Location Number
Channel Up/Down Buttons
Channel Number
33
Nothing Comes Close to a Cobra
®
Advanced Operation
Memory Location Scan Mode
During Memory Location Scan mode, the radio will rapidly
scan through all pre-assigned memory channels.
NOTE
The radio must be squelched for Memory Location
Scan mode to function. See page 20 for Squelch
procedure.
NOTE
If there are fewer than two (2) memory locations
programmed in the radio, the Memory Location Scan
option will not be available. To program at least two
(2) memory locations, see page 30.
To Enter Memory Location Scan:
1. From Marine Standby mode, press the MEM/ESC
button.
2. Press the SCAN button. The radio will immediately
begin to scan all pre-assigned memory channels.
The SCAN and MEM icons will show on the LCD.
3. A signal on any channel will stop the scan for 10
seconds to allow you to listen to the traffic on that
location.
4. Press the Channel Up/Down button to resume
scanning the Memory Location Scan channels or
to change the scan direction.
5. To EXIT Memory Location Scan mode, press the
SCAN button again. The SCAN and MEM icons will
disappear from the LCD and the radio will return to
Marine Standby mode.
Memory Location Scan
VHF Marine Radio Protocols
Operating Your RadioVHF Marine Radio Protocols
32
English
Advanced Operation
Channel Scan Mode
During Channel Scan mode, the radio will rapidly switch
from channel to channel through all the channels.
NOTE
The radio must be squelched for Channel Scan mode
to function. See page 20 for Squelch procedure.
To Enter Channel Scan:
1. From Marine Standby mode, press the SCAN button.
The radio will immediately begin to scan the entire
channel map selected in the active channel map.
The SCAN icon will show on the LCD.
2. A signal on any channel will stop the scan for 10
seconds to allow you to listen to the traffic on that
location.
3. Press the Channel Up/Down button to resume
scanning the Channel Scan channels or to change
the scan direction.
4. To EXIT Channel Scan mode, press the SCAN button
again. The SCAN icon will disappear from the LCD
and the radio will return to Marine Standby mode.
SCAN Button
SCAN Icon
Scanning
Channel Up/Down Buttons
Operating Your Radio
MEM/ESC Button
SCAN Button
VHF Marine Radio Protocols
Operating Your Radio
35
Nothing Comes Close to a Cobra
®
Maintenance and
Troubleshooting
No display on LCD when
radio is turned On
Batteries are exhausted
Batteries not installed
properly
Recharge or
replace batteries
Remove batteries and
reinstall according to
polarity markings
Batteries run
down quickly
Batteries are at the
end of their life
Replace with new batteries
Will transmit at
one (1) or three (3) watts,
but not at
six (6)
watts
Batteries are low
Selected channel is imited
to one (1) watt
Recharge or
replace batteries
Switch to
another channel
Will not transmit Selected channel is limited
to receive only
Switch to
another channel
No sound from speaker Volume level is too low or
squelch level is too deep
Re-adjust volume
and squelch
No response to
button press
Button lock is On Press Backlight/
Key Lock button
No answer to calls Out of range of
other station
Signal is blocked
by terrain
Switch to three (3) or six
(6) watts or move closer
Move until you have aline-
of-sightto the other station
Problem Possible Cause(s) Solution(s)
Maintenance
Very little maintenance is required to keep your CobraMarine VHF radio
in good operating condition:
Keep the radio and charger clean by wiping with a soft cloth and mild detergent.
Do not use solvents or harsh or abrasive cleaners, which could damage the case
or scratch the LCD screen.
If the radio is exposed to salt water, wipe with a soft, moist cloth at least once a day to
prevent buildup of salt deposits, which could interfere with button operation.
If the radio will be stored for a long period, such as over the winter,
remove the batteries from the battery tray and store them in a separate
package. This is especially important if you are using alkaline batteries.
Troubleshooting
VHF Marine Radio Protocols
Operating Your Radio
34
English
Floating Feature
Burp Feature
Cobra’s Burp feature allows the operator to expel water from
inside the speaker grill. This is especially useful if the radio is
dropped overboard or during extreme foul weather conditions.
In these conditions, water can become trapped in the
speaker grill and muffle the audio.
To Activate Burp:
1. Press and release the 16 and SCAN keys at the
same time.
2. The Burp tone(s) at maximum level will sound
from the internal speaker for eight seconds.
3. During this time, the LCD will display the following
“burp” as shown to the left.
4. Hold the radio with the speaker grill down to help
the water drain out.
5. Press the ESC key at any time to cancel the
BURP feature.
Floating Radio
This radio is designed to float if dropped overboard. The orange
center makes it visible and easy to retrieve. This
rugged radio
is also designed to meet JIS7 (IPX7) specifications
. This means
it’s designed to operate properly
after being submerged in
one meter deep water for 30 minutes.
NOTE
Do not leave the radio floating in water permanently.
This could cause premature corrosion of the battery
contacts and other damage.
The radio is only designed to float with its included
Lithium-ion battery. Using other approved batteries
might cause the radio to sink. This includes the optional
AA battery tray, depending on the weight of the AA
batteries used.
Burp Feature
Burp Feature
Floating Radio
  • Page 1 1
  • Page 2 2
  • Page 3 3
  • Page 4 4
  • Page 5 5
  • Page 6 6
  • Page 7 7
  • Page 8 8
  • Page 9 9
  • Page 10 10
  • Page 11 11
  • Page 12 12
  • Page 13 13
  • Page 14 14
  • Page 15 15
  • Page 16 16
  • Page 17 17
  • Page 18 18
  • Page 19 19
  • Page 20 20
  • Page 21 21
  • Page 22 22
  • Page 23 23
  • Page 24 24
  • Page 25 25
  • Page 26 26
  • Page 27 27
  • Page 28 28
  • Page 29 29
  • Page 30 30
  • Page 31 31
  • Page 32 32
  • Page 33 33
  • Page 34 34
  • Page 35 35

Cobra HH330 User manual

Category
Two-way radios
Type
User manual

Ask a question and I''ll find the answer in the document

Finding information in a document is now easier with AI