13
English
OPERATING THE HAND BLENDER
2
Use the arrow buttons to adjust the
speed, using the LED display as a guide.
TIPS FOR GREAT RESULTS
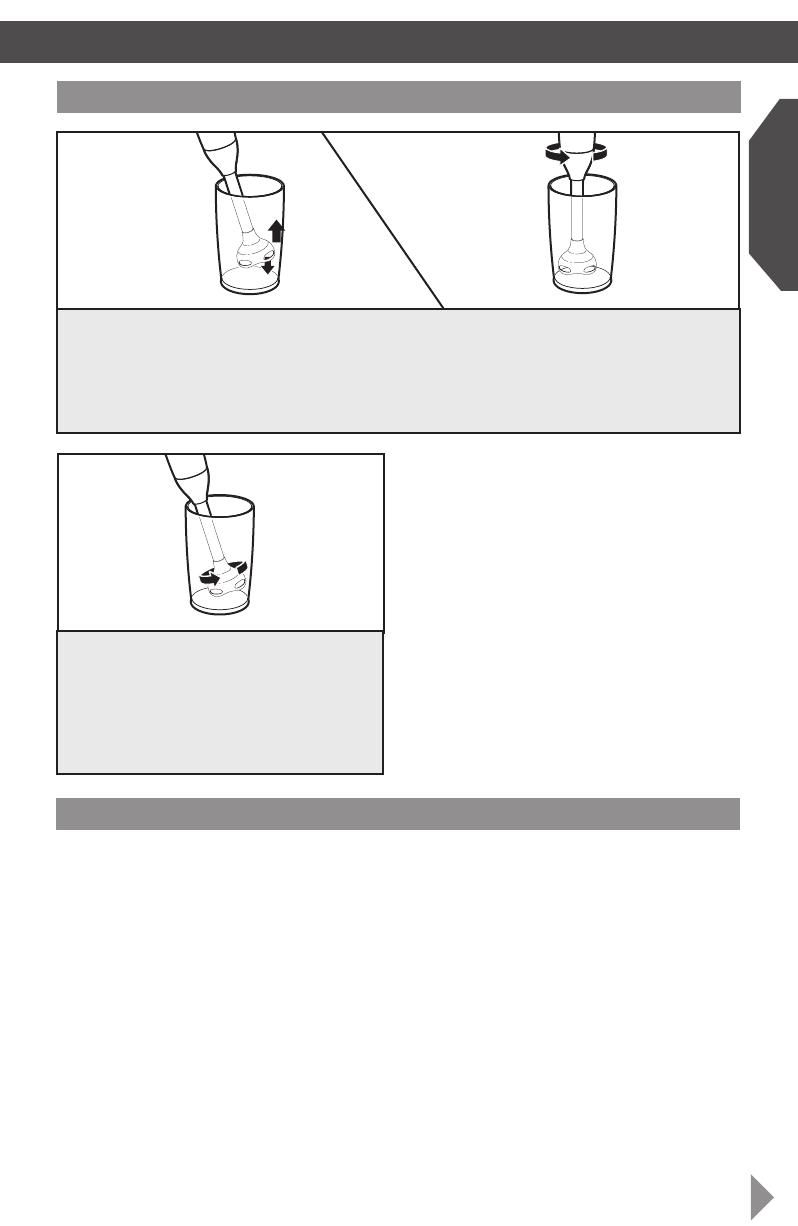
Drawing up
Wrist
movement
Techniques for better blending and crushing
For better blending: Rest the Hand Blender on the bottom of the container momentarily, then
hold at an angle and using a light circular motion, slowly draw it upwards against the side of the
container. Allow your wrist motion and the weight of the Hand Blender to do the work. As you
draw up the Hand Blender, you will notice the ingredients from the bottom of the container rising
up. When the ingredients are no longer rising from the bottom, return the Hand Blender to the
bottom of the container and repeat until mixture is at the desired consistency.
For better crushing: Insert Hand Blender
with blending arm attached into the
container. For hard, frozen fruits or ice,
add a small amount of liquid until the
S-blade is submerged. Remember to stop
the Hand Blender before removing it from
the container to avoid splashing.
TIP: To prevent overow, allow room
in the container for the mixture to rise
when blending.
Operating tips
• Do not let the Hand Blender sit in a hot
pan on the cooktop when not in use.
• The Hand Blender is equipped with
thermal protection from high operating
temperatures. Should the Hand Blender
suddenly stop during use, press the
UNLOCK button once, then press
the PULSE button. If the unit does not
operate, but shows information on the
battery indicator bar, allow 10 minutes
to automatically reset. If the unit does
not display information on the battery
indicator bar, charge the battery. If the
battery is already fully charged, and the
unit fails to operate, see the “Service
and Warranty” section.
• When blending in a saucepan on
a cooktop, remove the pan from
the heating element to protect the
Hand Blender from overheating.
• Cut solid foods into small pieces
for easier blending.
• Do not use Hand Blender to process
coffee beans or hard spices such as
nutmeg. Processing these foods may
damage the blades.
W10532509A_01_EN_Final4.indd 13 12/11/12 1:34 PM


