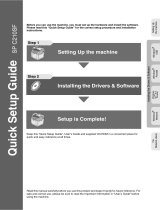
Setting Up the Machine
13
11 Setting tone or pulse dialling
mode
Your machine comes set for a Tone dialling service. If
you have a Pulse dialling service (rotary), you need to
change the dialling mode.
1 Press Menu, 0, 4.
2 Press a or b to choose Pulse (or Tone).
Press OK.
3 Press Stop/Exit.
12 Setting the phone line type
If you are connecting the machine to a line that
features PBX or ISDN to send and receive faxes, it is
also necessary to change the phone line type
accordingly by completing the following steps.
1 Press Menu, 0, 6.
2 Press a or b to choose PBX, ISDN (or
Normal).
Press OK.
3 Press Stop/Exit.
PBX and TRANSFER
The machine is initially set to Normal, which lets the
machine connect to a standard PSTN (Public
Switched Telephone Network) line. However, many
offices use a central telephone system or Private
Automatic Branch Exchange (PBX). Your machine
can be connected to most types of PABX. The
machine’s recall feature supports timed break recall
only (TBR). TBR will work with most PABX systems
allowing you to gain access to an outside line or send
calls to another extension. The feature works when
the Tel/R key is pressed.
Note
You can program a Tel/R key press as part of a
number stored in a Speed-Dial location. When
programming the Speed-Dial number, press Tel/R
first (the LCD shows ‘!’), then enter the telephone
number. If you do this, you do not need to press
Tel/R each time before you dial using a
Speed-Dial location.
(See Storing numbers for easy dialling in the
User’s Guide.)
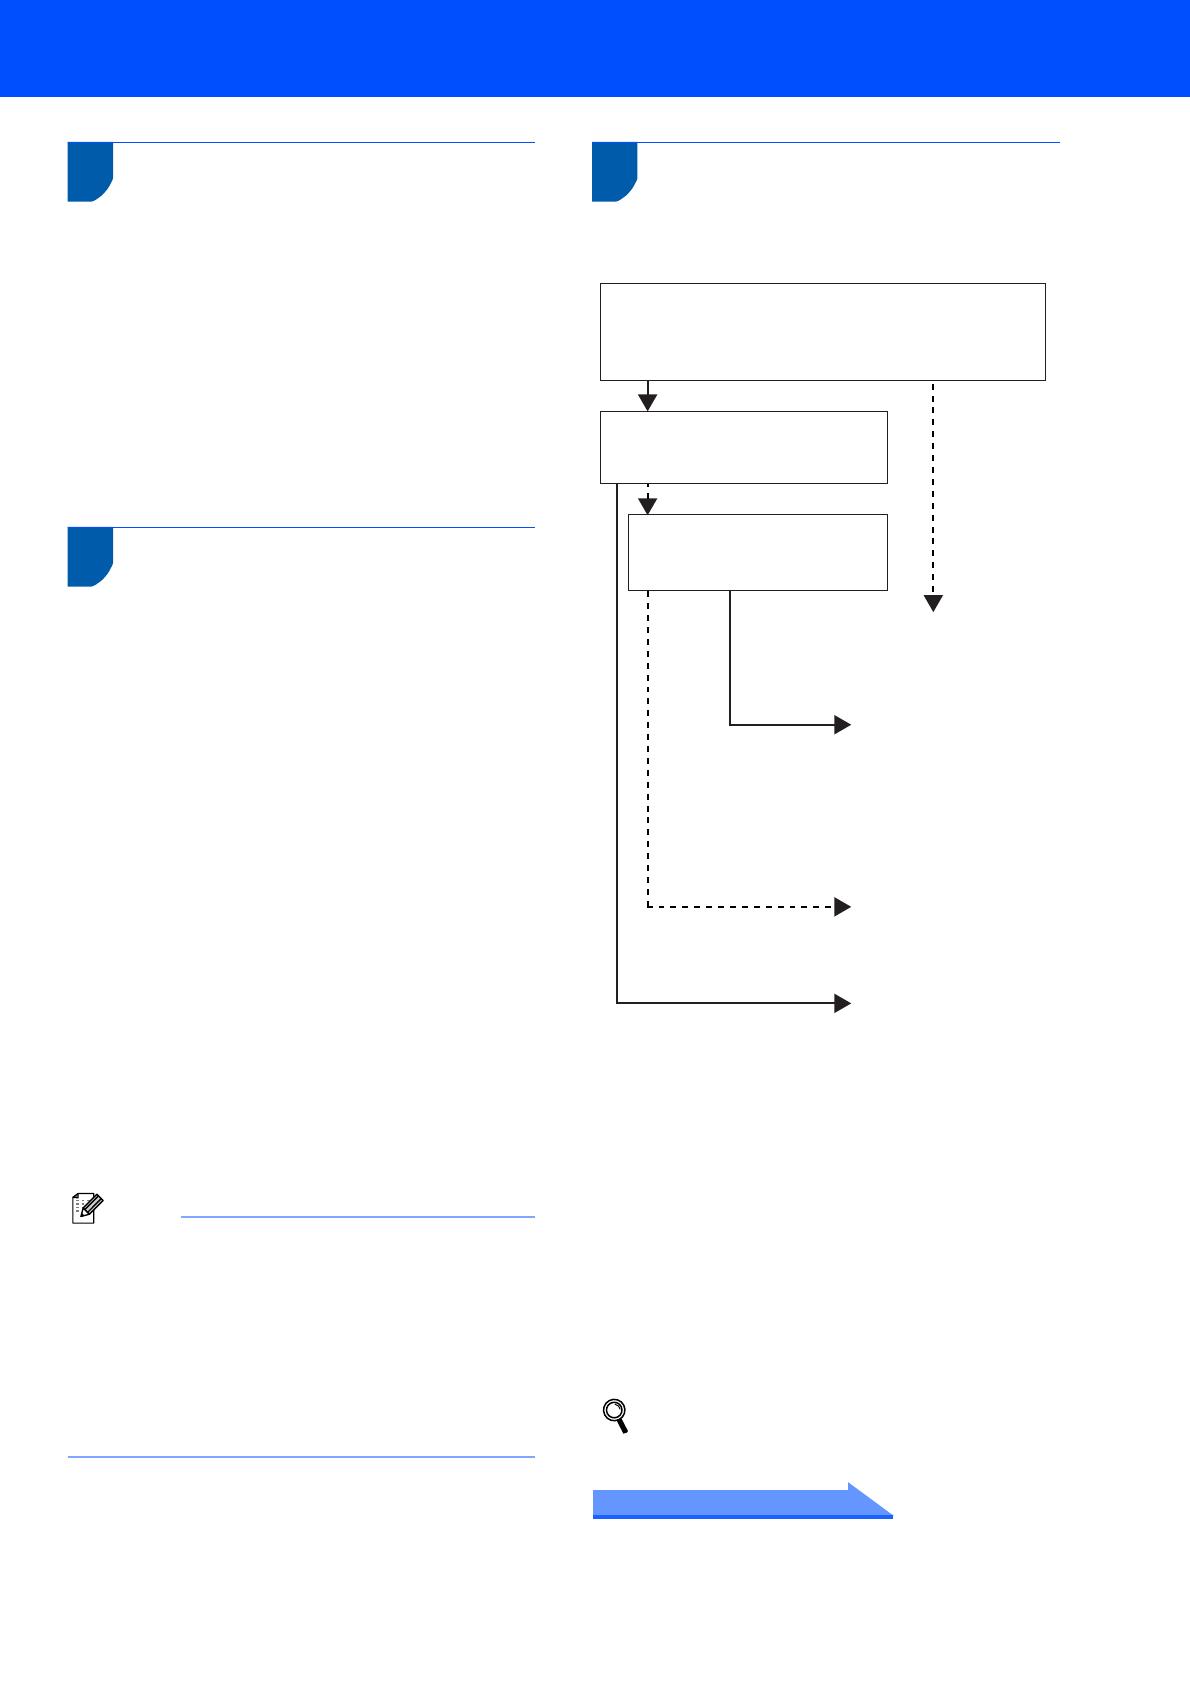
13 Choosing a Receive Mode
There are four possible receive modes: Fax Only,
Fax/Tel, Manual and External TAD.
1 Press Menu, 0, 1.
2 Press a or b to choose the mode.
Press OK.
3 Press Stop/Exit.
For details, see Using receive modes in
Chapter 6 of the User's Guide.
Now go to
Go to Supplied CD-ROM ‘MFL-Pro Suite’ on
the next page to install the drivers.
Do you want to use the telephone features of your
machine (if available) or an external telephone or
external telephone answering device connected on the
same line as the machine?
Your machine
automatically answers
every call as a fax.
Your machine controls
the line and
automatically answers
every call. If the call is
not a fax, the phone will
ring for you to pick up
the call.
Your external telephone
answering device (TAD)
automatically answers
every call. Voice
messages are stored
on the external TAD.
Fax messages are
printed.
You control the phone
line and must answer
every call yourself.
Do you want the machine to
answer fax and telephone calls
automatically?
Manual
Fax Only
Fax/Tel
External TAD
No
Yes
Yes
No
No
Yes
Are you using the voice message
function of an external telephone
answering device?