Page is loading ...

www.argonaudio.com
1
R a d i o 1
Dear Customer,
Quality has always been our driving force and founding Argon Audio is
a natural extension of this philosophy.
We have 20 years’ experience in creating and specifying high quality products,
manufacturing them and selling them on to end users with Value-for-Money as the
primary aim. And Argon Audio is a brand fully compliant with these values.
Design, and engineering is done in Denmark and manufacturing takes place in the Far
East, where quality vendors are highly competitive - and as a result supply outstanding
Value-for-Money products.
- To the delight of both ourselves and our customers!
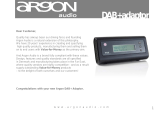
Congratulations with your RADIO1, may it bring years of enjoyment.

www.argonaudio.com
2
R a d i o 1
Table of Content
1
Introduction
page
3
1.1
Safety
page
3
1.2
Contents of the box
page
3
2
Usage, controls and connections
page
4
3
Using Your Argon RADIO1
page
5
3.1
Quick Start
page
5
3.2
DAB mode
page
5-7
3.3
FM mode
page
7-8
3.4
AUX mode
page
8
4
Using Basic Functions
page
9
4.1
Storing and recalling your stations
page
9
4.2
Setting EQ
page
9
4.3
Setting the alarm
page
9-10
4.4
Using of the Snooze function
page
10
4.5
<System> settings/info
page
10-12
5
Specifications
page
12

www.argonaudio.com
3
R a d i o 1
1. Introduction
1.1 Safety Instructions
• Do not use this product near water or moisture. Clean only with a dry cloth.
Unplug this product from the wall outlet before cleaning.
• Place the unit on a solid surface.
• Do not put it in a closed bookcase or a cabinet that may keep air from flowing through its
ventilation openings.
• Do not install near any heat sources, such as radiators, stoves or other appliances that
produce heat.
• Protect the power cord from being walked on or pinched, particularly at plugs and the point
where they exit from the product.
• Servicing is required when the product has been damaged. Do not attempt to service this
product yourself. Opening or removing covers may expose you to dangerous voltages or
other hazards. Please contact the manufacturer to be referred to an authorized service center
near you.
• To prevent risk of fire or electric shock, avoid over loading wall outlets, extension cords, or
integral convenience receptacles.
• Do not let objects or liquids enter the product.
• Use proper power sources. Plug the product into a proper power source, as described in the
operating instructions or as marked on the product.
1.2 Contents of the box;
• ARGON AUDIO RADIO1
• DC12V 1,5A Power adapter
• Bass port foam plug
o Inserted into the bass port on the back of the RADIO1 it will lower the bass level – this
can be useful if you place the RADIO1 close to a wall.
• Quick Start Guide - English.
• We recommend that you keep the original box and packing material for future
transportation.
• We also recommend that you keep this User Manual for future use.

www.argonaudio.com
4
R a d i o 1
2. Usage, controls and connections
This chapter describes and shows you the location of the various controls and connections on
your Argon RADIO1
Usage, controls, connections
Function
1. Preset buttons
Press to recall a stored radio station.
2.Autotune button
Press to perform quick scan or full scan in DAB mode. Press
to perform an automatic scan in FM mode.
3.Tuning knob
Turn to select options, scan or switch stations. Press to
confirm selection or activate a function.
4.EQ
Press to choose your preferred EQ (sound) setting.
5.Display button
Press this button to change the display information shown.
6.Source button
Press to switch between DAB and FM and Aux in mode.
7.Alarm button
Press to activate and set your alarm.
8.Volume knob
Turn to adjust the volume of your radio.
9. Power button
Press to switch between Stand By and Playing Mode.
10. Antenna
You can adjust the antenna direction for better Reception.
11. Head phone connection
Connect stereo headphones with a 3.5mm (1/8") stereo plug
to this jack.
12. Line out
Use this jack to provide the sound to other audio products.
13.Aux In connection
Connect an external device such us a Mobile to this jack with
a 3.5 mm stereo-to stereo cable.
14. Power connection
Connect the power adapter to this connector.
15.Display
Backlit OLED display.
16.Snooze button
Press to temporarily turn off your alarm or press to mute
sound in general.

www.argonaudio.com
5
R a d i o 1
3. Using Your Argon RADIO1 radio
3.1 Quick start
3.1.1 Start up
1. Extend the Antenna
2. Plug the Power supply into an electric outlet and into the back of the Radio.
3. Press “Power” (9) on
4. The Radio will start searching for DAB stations automatically. This may take a few minutes
and the progress will be shown in the display.
5. Once finished searching, the Radio will start playing the first found station.
3.1.2 Basic Operating
1. Stations can be chosen by turning the “Tuning/Select” (3) knob/button.
2. Once the prefer station is found press the “Tuning/Select” (3) knob/button and the chosen
station will start playing.
3. To store a station on one of the 1-6 preset buttons, press and hold the wished preset
button for 3 sec., while playing the station that you want to store.
4. When stored, the display will show “Preset X saved”
5. To change between the Modes DAB, FM, AUX, press the “Source” (6) button repeatedly
until you reach the preferred Mode.
6. To tune stations in FM Mode press and hold the “Autotune” (2) button for 3 sec. and the
RADIO1 will scan to the next available station. You can store FM stations like mentioned
in point 3.
3.2 DAB mode
1. If you are not in DAB mode, press the Source (6) button continuously, until it shows
“DAB”. It will start playing on the last played station.
The radio displays the correct time in DAB and FM mode, after a full scan has been
performed in DAB mode (normally done automatically at first time installation). Your radio
retrieves the time information from the DAB network.
2. While in DAB mode, press the Source (6) button, and the radio switches to FM mode.
3. While in FM mode, press the Source (6) button, and the radio switches to AUX IN mode.
4. You can switch the DAB/FM/AUX IN by pressing Source (6) button at any time.
3.2.1 Scanning stations in DAB mode
There are two ways to scan for stations:
• Automatic full scan (autotune (2))
• Manual scan
To do an automatic full scan:
1. Press and hold the Display (5) button for three seconds and <Full scan> will show in the
display.
2. Press the Tuning/select (3) button/knob and automatic full scan will start.
This may take a few minutes, during which you will see the displays in the sequence
below.
When there scan is finished the first found station, starts to play immediately.
3. To preview another station, turn the Tuning (3) knob until the name of another station
appears.
4. Press the Tuning/select (3) button/knob to select and listen to the new station.

www.argonaudio.com
6
R a d i o 1
To do a manual scan
1. Press and hold the Display (5) button for three seconds until the text in the display
changes.
2. Turn the Tuning/select (3) button/knob until the display shows <Manual Tune>.
3. Press the Tuning/select (3) button/knob to activate manual tune.
4. To choose another frequency turn the Tuning/select (3) button/knob
5. and confirm by pressing the Tuning/select (3) button/knob.
3.2.2 Viewing additional Information (Display Information)
Display information containing useful ones such as; time, date, station name, signal strength,
program type, frequency, signal error, kbps quality, including radio services, song titles, and
special announcements sent by your DAB provider.
1. While playing a station in DAB mode, press the Display (5) button shortly. Additional
information appears at the bottom row of the display.
2. Each time you press Display (5) button, new Display information will appear.
There are nine different types of Display information available for DAB mode:
• Programs being played. Station information with text messages such as song title,
artiste name etc, can be displayed on some stations.
• Signal strength
• Station category
• Broadcast system/block
• Stations DAB+ broadcast frequency.
• Signal error
• Kbps quality and DAB reception type
• Time obtained automatically from a DAB transmission in your country or region.
• Date obtained automatically from a DAB transmission in your country or region.
3.2.3 Additional Menu functions in DAB mode
1. Pressing and holding the Display (5) button for 3 seconds, will bring you into the DAB
Menu.
2. In the Menu you will find these options, by turning/using the Tuning/select (3)
button/knob:
<Full scan>
see point 3.2.1 page 5
<Manual tune>
see point 3.2.1 page 6 (top of this page)
<DRC> Dynamic range compression
This function reduces the difference between the loudest and quietest audio being broadcast.
Effectively, this makes quiet sounds comparatively louder and loud sounds comparatively
quieter.
Note: DRC only works if it is enabled by the broadcaster for a specific station.
There are three settings High, Low and Off.
1. Chose your preference by turning the Tuning/select (3) button/knob, confirm your choice
by pressing the Tuning/select (3) button/knob.

www.argonaudio.com
7
R a d i o 1
<Prune>
This function removes all invalid stations, indicated in the station list with a ‘?’ in front of the
station name.
1. Choose “Yes” or “No” using the Tuning/select (3) button/knob
2. Confirm your choice by pressing the Tuning/select (3) button/knob.
<System>
See point 4.5 page 10
No matter if you are in DAB, FM or AUX mode the “System” settings/information will be the
same.
To enter the System settings:
1. Press and holding the Display (5) button for 3 seconds.
2. Turn Tuning/select (3) button/knob until you see <System> in the display.
3. Confirm your choice by pressing the Tuning/select (3) button/knob.
3.3 FM Mode
3.3.1 Selecting FM mode
If you are not in FM mode:
1. Press the Source (6) button continuously, until it shows “FM”. It will start playing on the
last played station.
.
3.3.2 Scanning stations in FM mode
To do an autoscan:
Make sure you are in FM mode.
1. Press the Autotune (2) button to scan for FM stations in ascending frequency.
2. To scan in descending frequency, press and hold the Autotune button for 3 seconds.
Automatic scanning for an FM station begins.
Once a station is successfully scanned it will start playing.
To do a manual scan:
1. Turn the Tuning/select (3) button/knob clockwise or anticlockwise until you hear an FM
stations broadcast, or see the frequency you want.
3.3.3 Viewing additional Information (Display Information)
Display information containing useful ones such as; time, date, station name, signal strength,
program type, frequency, signal error, kbps quality, including radio services, song titles, and
special announcements sent by your DAB provider.
1. While playing a station in FM mode, press the Display (5) button shortly. Additional
information appears at the bottom row of the display.
2. Each time you press Display (5) button, new Display information will appear.
There are seven different types of Display information available for FM mode:
• Station information along with text messages such as song title, artiste name etc, are
displayed (if the station broadcasts RadioText).
• Signal strength
• Station category
• Stations broadcast frequency
• Stereo/Mono broadcast
• Time obtained automatically from a FM transmission in your country or region.
• Date obtained automatically from a FM transmission in your country or region.

www.argonaudio.com
8
R a d i o 1
3.3.4 Additional Menu functions in FM mode
1. Pressing and holding the Display (5) button for 3 seconds, will bring you into the FM
Menu.
In the Menu you will find these options by turning/using the Tuning/select (3)
button/knob.
<Scan setting>
see point 3.3.2 on page 7
<Audio setting>
This function is used for selecting audio mode (Auto or Mono)
Follow the steps below to set your radios audio output to Auto or Mono.
1. Use the Tuning/select (3) button/knob and turn until the display shows <Audio setting>
2. Press the Tuning/select (3) button/knob, A new menu appears
3. Using the Tuning/select (3) button/knob you can now choose between:
<Stereo allowed> or <Forced mono>
4. Make your choice and confirm/save your choice by pressing Tuning/select (3)
button/knob
In Auto mode, the radio plays the programs default output: stereo or mono.
In Mono mode, the radio plays mono output only. Some stations sound better in this mode if the
signal is not strong enough to receive noiseless stereo signal.
<System>
See point 4.5 page 10
3.4 AUX Mode
Using the AUX IN jack
1. Use a 3.5mm stereo-to-stereo cable (mini-jack) to connect an external device, like your
Mobile phone, Laptop or iPod to the AUX IN jack, on the back of your radio.
2. Press the Source (6) button until the display shows “Aux”. Once connected to the 3,5 mm
plug on the back your radio will start playback of the music on the connected external
device.
3. To adjust the radio volume level, you may need to adjust the volume on your external
audio device. In other words you can adjust the sound level both on the Radio and on the
External device.

www.argonaudio.com
9
R a d i o 1
4. Using Basic Functions
4.1 Storing and recalling your stations
Your radio can store up to 6 DAB and 6 FM radio stations as presets.
1. To store a station you are listening to, press and hold any one of button 1~6 number you
want to store the station in.
2. Hold until Preset x stored (Where x is anyone of the 1~6 number selected) appears in the
Display.
a. A new preset overrides an existing one when you store a new station over it.
3. To recall a station you press any one of the 1~6 number buttons, you will hear the
corresponding station that you stored with the corresponding number buttons.
4.2 Equalizer (EQ) setting
This function gives you the choice to optimize the sound to your specific needs. Ex. If you use
the RADIO1 mainly for talk-radio you will get optimal sound performance by choosing “Speech”
setting in EQ. EQ setting can be changed at any time.
1. Press EQ (4) button and it will show “Equalizer < Normal > (or the setting you have
chosen previously).
2. For changing the EQ setting, turn the Tuning/select (3) button/knob.
3. Each time you turn the Tuning/select (3) button/knob a new EQ setting will be displayed.
And the sound will change according to the EQ setting type.
4. There are six different preset EQ’s Normal, Classic, Jazz, Pop, Rock, Speech and one
adjustable preset – My EQ
5. Confirm your wished choice by pressing the Tuning/select (3) button/knob.
6. To set your own EQ press Tuning/select (3) button/knob, when “My EQ” is shown in the
display. You can adjust Treble and Bass levels to your own wish.
7. When Treble or Bass is shown in the display press the turn the Tuning/select (3)
button/knob to enter the setting then turn the Tuning/select (3) button/knob for +/- level.
8. When you reach your wished Treble or Bass level press the Tuning/select (3)
button/knob and your setting is saved.
9. To exit the EQ setting press Display (5) button
4.3 Setting the alarm
The Radio has two Alarm presets
1. When your radio is in ON mode (playing), press the Alarm (7) button. The display will
show “Alarm 1 setup”. If you press one more time it will show “Alarm 2 setup”.
Press the Tuning/select (3) button/knob on either “Alarm 1 setup” or “Alarm 2 setup”
depending on which Alarm you want to activate and the Alarm Wizard will start up.
2. Hours will start blinking in the display. Adjust time (hours) by turning the Tuning/select (3)
button/knob until you reach the hour you want the alarm to start. Confirm by pressing the
Tuning/select (3) button/knob
3. Next “minutes will start blinking. Adjust time (minutes) by turning the Tuning/select (3)
button/knob until you reach the minutes you want the alarm to start. Confirm by pressing
the Tuning/select (3) button/knob
4. Next Source will start blinking showing “Buzzer”. Turn the Tuning/select (3) button/knob
and scroll between Alarm start on “Buzzer”, “DAB” or “FM” and confirm your choice by
pressing the Tuning/select (3) button/knob.
5. Next choose “Last listened” on DAB and FM by pressing the Tuning/select (3)
button/knob.
Next by turning the Tuning/select (3) button/knob you can choose if the alarm has to be
activated: Once, Daily, Weekdays or Weekend. Confirm you choice by pressing the
Tuning/select (3) button/knob.

www.argonaudio.com
10
R a d i o 1
6. Next Date will start blinking, choose the date by turning the Tuning/select (3) button/knob
and after you choose day, month and year remember to press the Tuning/select (3)
button/knob to confirm each step.
7. Next the volume scale will show in the display. Choose your wished Alarm sound level by
turning the Tuning/select (3) button/knob until you reach the volume level you want.
8. Finally a screen appears that shows “Alarm 1 OFF” where the “OFF” is blinking. Turn the
Tuning/select (3) button/knob to show “YES” and press the Tuning/select (3)
button/knob to confirm the whole alarm setup. When the Radio is turned off a Bell (alarm
sign) is shown in the top right corner of the display. And you are ready.
4.3.1 To deactivate the alarm
1. Press Snooze (16) button to temporary stop the alarm.
2. To totally stop the alarm in Radio standby mode press the Alarm (7) button continuously
until both Alarm 1 and Alarm 2 shows OFF.
4.4 Use of the Snooze function
1. When the radio is playing, you can press the Snooze (16) button to mute the radio.
2. To turn off the mute function, press the Snooze (16) button again.
Notice that the Snooze function only mutes the build in speaker of the Radio. If you have
connected your Radio to an external amplifier, the Snooze function will not work.
3. In alarm mode the Snooze function will, when pressing the button, mute the alarm for 5
minutes. After 5 minutes the alarm will sound again.
4.5 <System> settings and information
The radio has a system menu with various functions and information. The system menu can be
accessed from all playback modes.
1. To enter the system settings press and hold the Display (5) button for three seconds.
2. Turn the Tuning/select (3) button/knob until it shows <System> in the display.
3. Activate the System menu by pressing the Tuning/select (3) button/knob.
4. Once in the system menu you can scroll through all the options by turning the
Tuning/select (3) button/knob.
There are eight different system menu functions:
Sleep function, Equalizer (you also have as direct button on the front of the Radio), Time,
Backlight, Inactive Standby, Language, Factory Reset, SW version.
4.5.1 Sleep
Setting and checking the sleep timer
This option turns the radio off automatically after a specified period.
1. Press the Tuning/select (3) button/knob and it will show “Sleep off”.
2. Turn the Tuning/select (3) button/knob and for each “turn” it will increase the sleep
intervals of 15 minutes, up to a maximum of 90 minutes.
3. Confirm your wished choice by pressing the Tuning/select (3) button/knob.
Your sleep function is now activated and an “S” will appear in the top right corner of the
display.
4. To deactivate the sleep function follow the steps above, but confirm “Sleep off” instead of
a Sleep time.

www.argonaudio.com
11
R a d i o 1
4.2.1 Checking the sleep timer setting
1. Sleep time will show in the top right corner of the display if 15 minutes has been chosen it
will show “S15” and it will count down
2. To deactivate the sleep function follow the steps as in point 4.5.1, but confirm “Sleep off”
instead of a Sleep time. Notice: When you press the Power (9) button, the sleep delay
mode is deactivated.
4.5.2 Time
1. Access Time settings by pressing the Tuning/select (3) button/knob when <Time> is
shown in the display.
2. In the Time menu you can choose either to <Set Time/Date> manually or to <Auto
update>
3. Choose which one you want and confirm by pressing Tuning/select (3) button/knob.
It’s recommended to have the setting on <Auto update>. This way the time and date will
be updated automatically from either FM or DAB broadcasts.
4.5.3 Backlight
1. Access Backlight settings by pressing the Tuning/select (3) button/knob when
<Backlight> is shown in the display.
2. Back light has 5 levels (1-5) turn the Tuning/select (3) button/knob until you reach your
desired setting.
3. Press the Tuning/select (3) button/knob to confirm your choice.
4.5.4 Inactive standby
1. Press the Display (5) button for about 3 seconds until the menu appears.
2. Then turn the round Tuning/Select (3) button until is shows "System" in the display and
select this with a press on the Tuning/Select (3) button.
3. Turn the round Tuning/Select (3) button until "Inactive Standby" appears in the display
and select this by pressing the Tuning/Select (3) button.
4. Then by turning the Tuning /Select (3) button select " Timeout: 2,4,5,6 hours or Off"
(factory setting is 2 hours). Activate the selected time by pressing the Tuning/Select (3)
button.
5. Exit the setup menu by repeatedly pressing the Display (5) button.
4.5.5 Language
1. Access Language settings by pressing the Tuning/select (3) button/knob when
<Language> is shown in the display. Language choices are: English, French, German
and Italian.
2. Scroll through the language options by turning the Tuning/select (3) button/knob.
3. Press the Tuning/select (3) button/knob to confirm your choice.
4.5.6 Factory reset
1. Access Factory reset settings by pressing the Tuning/select (3) button/knob when
<Factory reset> is shown in the display. You may want to erase your settings on your
radio, including your presets and alarm and sleep delay settings.
2. Press the Tuning/select (3) button/knob to confirm. The Radio is now reset.

www.argonaudio.com
12
R a d i o 1
4.5.7 Software version (SW version)
1. Access Software version information by pressing the Tuning/select (3) button/knob when
<SW version> is shown in the display.
2. Press the Tuning/select (3) button/knob to confirm.
The display now shows the software version of your Radio.
5. Specifications
Broadcast Frequency ranges supported:
DAB and DAB+: Band III: (174~240MHz)
FM: 87.5~108MHz
Audio Frequency Range: 80Hz ~ 20 kHz
Amplifier power/speaker: 10w/ One 3” long stroke, full range speaker with double magnet,
Bass reflex port/tube construction.
OLED display: 128x32 (2 line)
Input voltage: 12V DC/1,5A
Input connector: 3.5mm auxiliary input (AUX IN) for audio players like a Phone
Output connector: 3.5mm jack for connection to an external amplifier (stereo output)
Headphone connector: 3.5mm jack for headphone (stereo signal)
Dimensions (W x H X D): 205mmx138mmx113mm
Weight: 1.815 (1.379) kg
/