Page is loading ...

0099001919-02
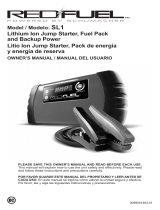
PLEASE SAVE THIS OWNER’S MANUAL AND READ BEFORE EACH USE.
This manual will explain how to use the unit safely and effectively. Please read
and follow these instructions and precautions carefully.
MODELS
DSR5221, DSR5222
Professional Battery Boosters
OWNERS MANUAL
DSR5221
DSR5222

• 2 •
IMPORTANT: READ AND SAVE THIS SAFETY AND INSTRUCTION MANUAL.
SAVE THESE INSTRUCTIONS – Charge the booster’s internal battery immediately after purchase, after every
use and every 30 days. It is highly recommended to leave the booster on permanent charge when not in use. This
manual will show you how to use your booster safely and effectively. Please read, understand and follow these
instructions and precautions carefully, as this manual contains important safety and operating instructions.
The signal word indicates the level of the hazard in a situation.
Indicates an imminently hazardous situation which, if not avoided, will result in death or serious injury
to the operator or bystanders.
Indicates a potentially hazardous situation which, if not avoided, could result in death or serious injury
to the operator or bystanders.
Indicates a potentially hazardous situation which, if not avoided, could result in moderate or minor
injury to the operator or bystanders.
Indicates a potentially hazardous situation which, if not avoided, could result in damage to the
equipment, vehicle or property.
DS BOOSTERS CONTAIN SEALED, NON-SPILLABLE LEAD-ACID BATTERY.
MUST BE DISPOSED OF PROPERLY.
WARNING: Possible explosion hazard. Contact with battery acid may cause
severe burns and blindness. Keep out of reach of children.
Markings and symbols
Contact the equipment
supplier for details on how to
properly dispose
of this product within a
specic country, per WEEE
requirements.
Read manual
before using.
Fuse –
see Section
8 for fuse
replacement
instructions.
Do not
expose
to rain.
Use in a
well-ventilated
area.
Keep away from
sparks and ame – battery
could emit explosive gases.
If auto engine does not start,
stop and wait for at least
3 minutes, then go back
to step 4 – see Section 7.1.4.
Caution, risk of
electric shock.
12V 2A
Charging
Port – see
section 6.7.1
For indoor
use only.
Warning
Class II
Charger
DANGER
WARNING
CAUTION
IMPORTANT

• 3 •
1. IMPORTANT SAFETY INSTRUCTIONS – SAVE THESE INSTRUCTIONS.
This manual contains important safety and operating instructions.
RISK OF ELECTRIC SHOCK OR FIRE.
1.1 Read the entire manual before using this product. Failure to do so could result
in serious injury or death.
1.2 Keep out of reach of children.
1.3 This booster is not intended for use by persons (including children) with
reduced physical, sensory or mental capabilities, or lack of experience and knowledge, unless they have been
given supervision or instruction concerning the use of the booster by a person responsible for their safety.
1.4 Do not put ngers or hands into the product.
1.5 Do not expose the booster to rain or snow.
1.6 Use only recommended attachments. Use of an attachment not recommended or sold by the manufacturer
may result in a risk of re, electric shock or injury to persons or damage to property.
1.7 To reduce the risk of damage to the electric plug or cord, pull by the plug rather than the cord when
disconnecting the booster.
1.8 To reduce the risk of electric shock, unplug the booster charger from the outlet before attempting any
maintenance or cleaning. Simply turning off the controls will not reduce this risk.
1.9 Do not operate the booster or charger with a damaged output cable; have the damaged part replaced
immediately by a qualied service person.
1.10 Do not operate the booster if it has received a sharp blow, been dropped or otherwise damaged in any way;
take it to a qualied service person.
1.11 Do not disassemble the booster or charger; take it to a qualied service person when service or repair is
required. Incorrect reassembly may result in a risk of re or electric shock.
RISK OF EXPLOSIVE GASES. PREVENT FLAMES AND SPARKS.
PROVIDE ADEQUATE VENTILATION DURING CHARGING.
1.12 WORKING IN THE VICINITY OF A LEAD-ACID BATTERY IS DANGEROUS. BATTERIES
GENERATE EXPLOSIVE GASES DURING NORMAL OPERATION. FOR THIS REASON, IT IS
IMPORTANT THAT YOU FOLLOW THESE INSTRUCTIONS EACH TIME YOU USE THE BOOSTER.
1.13 The booster and lead-acid battery of the vehicle must be placed in a well-ventilated area.
1.14 To reduce the risk of a battery explosion, follow these instructions and those published by the battery
manufacturer and the manufacturer of any equipment you intend to use in the vicinity of the battery. Review the
cautionary markings on these products and on the engine.
1.15 This booster employs parts, such as switches and circuit breakers, that tend to produce arcs and sparks. If used
in a garage, locate this booster 46 cm or move above oor level.
WARNING
Do not use with non-rechargeable batteries. Use only with lead-acid type rechargeable batteries.
2. PERSONAL PRECAUTIONS
RISK OF EXPLOSIVE GASES. A SPARK NEAR THE BATTERY
MAY CAUSE A BATTERY EXPLOSION. TO REDUCE THE RISK
OF A SPARK NEAR THE BATTERY:
2.1 NEVER smoke or allow a spark or ame in the vicinity of a
battery or engine.
2.2 Do not permit the internal battery of the booster to freeze. Never charge a frozen battery.
2.3 When charging the internal battery, work in a well ventilated area and do not restrict the ventilation in any way.
2.4 Be sure the area around the battery is well ventilated while the booster is being used.
2.5 Remove personal metal items such as rings, bracelets, necklaces and watches when working with a lead-acid
battery. A lead-acid battery can produce a short-circuit current high enough to weld a ring or the like to metal,
causing a severe burn.
2.6 Be extra cautious, to reduce the risk of dropping a metal tool onto the battery. It might spark or short-circuit the
battery or other electrical part that may cause an explosion.
2.7 To prevent sparking, NEVER allow clamps to touch together or contact the same piece of metal.
2.8 Consider having someone close enough by to come to your aid when you work near a lead-acid battery.
2.9 Have plenty of fresh water and soap nearby in case battery acid contacts your skin, clothing or eyes.
WARNING WARNING WARNING
WARNING
WARNING
WARNING

• 4 •
2.10 Wear complete eye and body protection, including safety goggles and protective clothing. Avoid touching your
eyes while working near the battery.
2.11 If battery acid contacts your skin or clothing, immediately wash the area with soap and water. If acid enters
your eye, immediately ood the eye with cold running water for at least 10 minutes and get medical attention
right away.
2.12 If battery acid is accidentally swallowed, drink milk, the whites of eggs or water. DO NOT induce vomiting.
Seek medical attention immediately.
2.13 This appliance can be used by children aged from 8 years and above and persons with reduced physical,
sensory or mental capabilities or lack of experience and knowledge if they have been given supervision or
instruction concerning use of the appliance in a safe way and understand the hazards involved.
2.14 Children shall not play with the appliance.
3. PREPARING TO USE THE BOOSTER
RISK OF CONTACT WITH BATTERY ACID.
BATTERY ACID IS A HIGHLY CORROSIVE SULFURIC ACID.
3.1 Clean the battery terminals before using the booster. During
cleaning, keep airborne corrosion from coming into contact with your
eyes, nose and mouth. Use baking soda and water to neutralize the
battery acid and help eliminate airborne corrosion. Do not touch your eyes, nose or mouth.
3.2 Read, understand and follow all instructions for the booster, battery, vehicle and any equipment used near the
battery and the booster.
3.3 Determine the voltage of the battery by referring to the vehicle owner’s manual and make sure that the output
voltage of the booster is correct.
3.4 Make sure that the booster cable clamps make tight connections.
4. FOLLOW THESE STEPS WHEN CONNECTING THE BOOSTER TO A BATTERY
A SPARK NEAR THE BATTERY MAY CAUSE A BATTERY EXPLOSION. TO REDUCE THE RISK
OF A SPARK NEAR THE BATTERY:
4.1 Attach the output cables to the battery and chassis, as indicated below. Never allow the output
clamps to touch each other.
4.2 Position the DC cables to reduce the risk of damage by the hood, door and moving or hot
engine parts. NOTE: If it is necessary to close the hood during the jump starting process, ensure that the hood
does not touch the metal part of the battery clamps or cut the insulation of the cables.
4.3 Stay clear of fan blades, belts, pulleys and other parts that can cause injury.
4.4 Determine which post of the battery is grounded (connected) to the chassis. If the negative post is grounded to
the chassis (as in most vehicles), see step 4.5. If the positive post is grounded to the chassis, see step 4.6.
4.5 For a negative-grounded vehicle, connect the POSITIVE (RED) clamp from the booster to the POSITIVE
(POS, P, +) ungrounded post of the battery. Connect the NEGATIVE (BLACK) clamp to the vehicle chassis or
engine block away from the battery. Do not connect the clamp to the carburetor, fuel lines or sheet-metal body
parts. Connect to a heavy gauge metal part of the frame or engine block.
4.6 For a positive-grounded vehicle, connect the NEGATIVE (BLACK) clamp from the booster to the NEGATIVE
(NEG, N, -) ungrounded post of the battery. Connect the POSITIVE (RED) clamp to the vehicle chassis or
engine block away from the battery. Do not connect the clamp to the carburetor, fuel lines or sheet-metal body
parts. Connect to a heavy gauge metal part of the frame or engine block.
4.7 When disconnecting the booster, remove the clamp from the vehicle chassis, then remove the clamp from the
battery terminal, in that order.
WARNING WARNING WARNING
WARNING

• 5 •
5. FEATURES
1
2
3
4
5
6
7
8
9
10
11
1. 12V DC power outlet
2. Jump starter ON/OFF switch –
DSR5221: OFF or 12V position
DSR5222: OFF, 12V or 24V position
3. Digital display
4. Display button
5. USB button
6. USB Port
7. Heavy-duty battery clamps
8. Charger
9. Power LED
10. Charging status LED
11. Bad Battery LED
6. CHARGING THE INTERNAL BATTERY OF THE BOOSTER
IMPORTANT: CHARGE IMMEDIATELY AFTER PURCHASE, AFTER EACH USE AND AS OFTEN
AS POSSIBLE. THE BOOSTER CAN BE LEFT PERMANENTLY CONNECTED TO THE AUTOMATIC
CHARGER. NEVER WAIT UNTIL THE BOOSTER IS COMPLETELY DISCHARGED BEFORE RECHARGING.
6.1 Digital Display on the Booster
When not connected to a vehicle battery and when the booster clamps are stored on their plastic storage
holders:
A – With the rotary switch in the OFF position: the digital display can be used to indicate the percent of charge of
the voltage of the booster’s internal battery.
To check the internal battery’s charge status, press the display button on the front of the booster. The digital
display will show the battery’s percent (%) of charge. A fully charged battery will read 100%. Charge the internal
battery if the display shows it is under 100%.
B – With the rotary switch in the ON position: Select the voltage 12V (or 24V), the digital display can be used to
check the voltage level of the booster’s internal battery. The display will indicate the battery’s voltage.
NOTE: The internal battery’s percent of charge or Voltage level is most accurate when the booster has been
disconnected from all devices and charging sources for a few hours.
6.2 LED Indicators on the Charger
POWER (green) LED lit: The charger is connected to AC power.
CHARGING (yellow/orange) LED pulsing slowly: The charger is charging the battery inside the booster
or is in maintaining mode.
CHARGING (yellow/orange) LED ashing rapidly: The charger has detected a problem with the battery.
See Troubleshooting section for more information.
BAD BATTERY (red) LED lit: The charger has detected a problem with the battery.
See Troubleshooting section for more information.

• 6 •
6.3 Charging the Booster’s Internal Battery using the Included Charger
IMPORTANT
Only use the charger that was included with the booster to charge the internal battery of the
booster. Using any other charger or using the included charger for any other purpose could
result in personal injury or property damage.
RISK OF ELECTRIC SHOCK OR FIRE.
6.4 This battery charger is for use on a nominal 230V, 50 Hz circuit. The plug must
be plugged into an outlet that is properly installed in accordance with all local codes
and ordinances. The plug pins must t the receptacle (outlet).
6.5
DANGER
Never alter the AC cord or plug provided – if it does not t the outlet, have a proper outlet
installed by a qualied electrician. An improper connection can result in a risk of an electric shock or electrocution.
6.6 An extension cord should not be used unless absolutely necessary. Use of an improper extension cord could
result in a risk of re and electric shock. If an extension cord must be used, make sure:
• That the pins on the plug of the extension cord are the same number, size and shape as those of the plug on
the charger.
• That the extension cord is properly wired and in good electrical condition.
• That the wire size is large enough for the AC ampere rating of the charger.
Recommended minimum AWG size for extension cord:
• 30.5 meters long or less – use a 1.0 mm
2
extension cord.
• Over 30.5 meters long – use a 1.25 mm
2
extension cord.
6.7 Charging
1. Make sure that both the charger and booster are placed on a dry, nonammable surface. To charge the
booster, connect the charger included into the charging port that is located on the side of the booster.
2. Conrm the AC outlet voltage matches the input voltage of the charger.
3. Connect the charger into the electrical wall outlet and conrm that the green POWER LED on the
charger turns on.
4. Check that the yellow CHARGING LED in charger starts pulsing slowly to indicate that charge process
has started. To know status of the charge, check the percentage shown at the display in booster.
5. When the display in booster shows 100 (%), the internal battery is fully charged and the booster is ready
to use. Complete charging may take up to 24 hours.
NOTE: The yellow CHARGING LED on the charge will remain ashing after display shows 100%,
because charger enters automatically into maintaining mode.
6. After charge is complete, disconnect the charger from the AC outlet, then disconnect the charger from booster.
7. OPERATING INSTRUCTIONS
7.1 Jump Starting a Vehicle Engine
A SPARK NEAR THE BATTERY MAY CAUSE A BATTERY EXPLOSION.
TO REDUCE THE RISK OF A SPARK NEAR THE BATTERY:
1. Turn the vehicle’s ignition OFF before making cable connections.
2. Connect the booster to the vehicle’s battery as described in section 4. If you have connected the
clamps backward, an audio alarm will sound. DO NOT turn the booster ON/OFF switch to the ON
position. This could cause serious damage to the booster or the vehicle. Reverse the connections
and the audio alarm will stop.
3. Turn the booster ON/OFF switch to the ON position.
4. Crank the engine. If the engine does not start within 8 seconds, stop cranking and wait at least 3 minutes
before attempting to start the vehicle again. This permits the booster battery to cool down.
5. After the engine starts, immediately turn the booster ON/OFF switch to the OFF position.
6. Disconnect the booster from the vehicle, as described in section 4.6.
7. Return the battery clamps to the clamp holders. Recharge the booster as soon as possible after use.
7.2 When using the other features of the booster, always observe the following steps:
1. Ensure the battery clamps are securely clipped in the storage holders.
2. Charge the booster as soon as possible after using the feature.
WARNING
WARNING
WARNING

• 7 •
7.3 Powering a 12V DC Device:
The booster is a power source for all 12V DC accessories that are equipped with a 12V accessory plug.
1. Make sure the device to be powered is OFF before inserting the 12V DC accessory plug into the 12V DC
accessory outlet.
2. Open the protective cover of the DC power outlet on the front of the booster.
3. Plug the device into the outlet and turn the device on (if required).
4. If the device draws more than 15A or has a short circuit, the circuit breaker of the booster will trip and
disconnect the power to the device. Disconnect the device and the beaker will automatically reset. The
DC power outlet is wired directly to the internal battery. Extended operation of a 12V device may result in
excessive battery drain. Recharge immediately after unplugging the device.
7.4 Powering a USB Device:
The booster is a power source for all accessories that are equipped with a USB plug. The USB port provides
up to 2.1A at 5V DC.
1. Ensure the battery clips are securely clipped on the storage holders.
2. Press the USB button on the front of the unit.
3. Plug the device into the USB port on the front of the unit.
4. Turn the USB device on.
5. Reverse these steps when nished using the USB port.
NOTES: The USB port will shut-off automatically after 60 minutes, if no device is connected.
Extended operation of a USB device may result in excessive battery drain. Recharge the booster immediately
after unplugging the device.
8. FUSE REPLACEMENT
The Portable Power is equipped with an inline fuse, to protect the battery from overload.
Fuse Specication
Model DSR5221: Fast blow, DC automotive type, rated 32 V, 300 A (Bussman/Audio Ohm Srl).
Model DSR5222: Fast blow, DC automotive type, rated 32 V, 500 A (Bussman/Audio Ohm Srl).
WARNING
Keep away from sparks and ame – battery could emit explosive gases.
1. Allow the fuse to cool down completely (approximately 5 minutes).
2. Make sure the switch is in the OFF position and the unit is unplugged from the external charger.
3. Remove the positive (RED) clamp from the storage compartment on the side of the unit
and locate the fuse holder.
4. Open the fuse holder by removing its cover.
5. Using a wrench, remove the rst nut and bolt securing the fuse on the positive cable.
Repeat the same steps for the second nut and bolt. Remove the open fuse and replace it
with a new one of the same type and rating.
6. Tighten the nuts and bolts to secure the fuse, and then replace the cover of the fuse holder.
7. The unit is now ready to use.
9. MAINTENANCE INSTRUCTIONS
9.1 Cleaning and user maintenance should not be done by children without supervision.
9.2 Unplug the charger from the booster and the mains power before attempting any maintenance or cleaning.
9.3 Use a dry cloth to wipe all battery corrosion and other dirt or oil from the charger, battery clamps, cords and the
booster case. Do not use cleaning uids.
9.4 Ensure that all of the components are in place and in good working condition.
9.5 All other servicing should be performed by qualied service personnel.
9.6 If the supply cord is damaged, it must be replaced by the manufacturer, its service agent or similarly qualied
persons, in order to avoid a hazard.
10. MOVING AND STORAGE INSTRUCTIONS
10.1 Store the booster and charger in an upright position, inside, in a cool, dry place.
10.2 Always make sure the booster is fully charged before storing. When not in use, it is highly recommended to
leave the booster on charge.
IMPORTANT
Do not use and/or store the booster in or on any area or surface where damage could occur if
the internal battery should unexpectedly leak acid.

• 8 •
11. TROUBLESHOOTING
Booster
PROBLEM POSSIBLE CAUSE REASON/SOLUTION
The booster won’t jump start
my car.
Clamps are not making a good
connection to the battery.
The booster battery is not charged.
The vehicle’s battery is defective.
The fuse has blown.
Check for poor connection to battery
and frame. Make sure connection
points are clean. Rock clamps back
and forth for a better connection.
Check the battery charge status by
pressing the button on the front of the
booster. See LED Indicators section of
this manual.
Have the battery checked.
Replace the fuse. (See Section 8).
The booster won’t power my 12V
device.
The 12V device is not turned on.
The booster battery is not charged.
The 12V device draws more than
15A or has a short circuit.
Turn on the 12V device.
Check the battery charge status by
pressing the button on the front of the
booster. See LED Indicators section of
this manual.
Disconnect the 12V device. The
internal breaker will automatically
reset after a minute or two. Try the
12V device again. If it happens again,
replace the 12V device.
The battery in the booster won’t
hold a charge.
The battery is bad
(will not accept a charge).
Have the battery checked.
Charger
PROBLEM POSSIBLE CAUSE REASON/SOLUTION
The green POWER LED does
not light when charger is properly
connected.
AC outlet is dead.
Poor electrical connection.
Check for open fuse or circuit breaker
at the supplying AC outlet.
Check power cord and extension cord
for a loose tting plug.
The red BAD BATTERY LED
is lit and yellow/orange CHARGING
LED is ashing rapidly.
Desulfation was unsuccessful. The battery may be defective. Make
sure there are no loads on the battery.
If there are, remove them. If there are
none, have the battery checked or
replaced.

• 9 •
12. SPECIFICATIONS
Boosters
DSR5221
Internal Battery Type ..................................................................................... Maintenance-free AGM lead-acid
Output Voltage ......................................................................................................................................12V DC
Rated Capacity ......................................................................................................................................... 22 Ah
DC Power Outlet (Max. Continuous Load) ..................................................................................... 12V DC/15A
Product Weight ..................................................................................................................................... 10.82 kg
DSR5222
Internal Battery Type ..................................................................................... Maintenance-free AGM lead-acid
Output Voltage .................................................................................................................... 12V DC or 24V DC
Rated Capacity .................................................................................................................................. (2x) 22 Ah
DC Power Outlet (Max. Continuous Load) ..................................................................................... 12V DC/15A
Product Weight ..................................................................................................................................... 17.74 kg
Charger
Input .................................................................................................................................230V AC~50Hz, 0.5A
Output ...............................................................................................................................................12V
2A
13. REPLACEMENT PARTS
Charger ...................................................................................................................................... 2299003058IZ
Fuse – 300A (for model DSR5221) ................................................................................................3999002113
Fuse – 500A (for model DSR5222) ................................................................................................3999002114
14. DISPOSAL INFORMATION
14.1 Internal battery
• The battery must be removed from the appliance before it is scrapped.
• The appliance must be disconnected from the supply mains before removing the battery.
• The battery must be disposed of safely.
14.2 WEEE Directive
This marking indicates that this product should not be disposed with other household wastes. To prevent
possible harm to the environment or human health from uncontrolled waste disposal, recycle it
responsibly to promote the sustainable reuse of material resources. To return your used device,
please use the return and collection systems or contact the retailer where the product was purchased. They
can take this product for environmentally-safe recycling.

• 10 •
15. LIMITED WARRANTY
WARRANTY TERMS AND CONDITIONS
Schumacher Electric Corporation (the “Manufacturer”) or the resellers authorized by the Manufacturer (the
“Reseller”) warrant this Jump Starter (the “Product”) for one (1) year and the internal battery for ninety (90)
days, according to the following stipulations. Any and all warranties, other than the warranty included herein, are
hereby expressly disclaimed and excluded to the fullest extent permissible under applicable law. Legislation may
imply warranties or conditions or impose obligations on Manufacturer which cannot be excluded, restricted or
modied in relation to consumer goods.
Consumer End-User Warranty
Any claims under this warranty must be communicated to Reseller within 2 months after discovery of the non-conformity.
Resellers/Professional End-User Warranty
The Manufacturer provides a limited warranty for hidden defects or non-conformities. This warranty is subject to the
following conditions:
a. The Manufacturer only warrants hidden defects in material or workmanship present in their root cause at the
moment of the rst sale by the Manufacturer;
b. Manufacturer’s obligation under this warranty is limited to repairing or replacing the Product with a new or
reconditioned unit at the sole option of the Manufacturer;
c. Manufacturer does not have any warranty obligations if the alleged defects were caused by abnormal usage,
fair wear and tear, unauthorized use of the Product or use of the Product differing from the description in the
applicable manual or other specications given by the Manufacturer, insufcient care, repairs carried out by
persons or entities or with parts not approved by Manufacturer, poor care, accidents, unauthorized changes or
modications, incorrect transport, storage or treatment of the Product;
d. In order to exercise this right, the Product must be returned complete and in its original state and packaging,
with mail costs prepaid, along with proof of purchase to the Manufacturer or its authorized representatives in
order for repair or replacement to occur.
Common Warranty Provisions
The warranty mentioned above only applies to the rst professional or consumer user having legally acquired the
Product from the Manufacturer or a Reseller. No warranty is extended towards clients, agents or representatives
of those buyers.
The Product is sold under the specications, for the use and purpose in accordance with the provisions of this
manual, with express exclusion and disclaimer of warranty of any other specications, uses and purposes.
Authorized Resellers are prohibited from making any statements or providing any warranty in excess of the
above warranties. Non-authorized resellers may only sell the product under the condition that they assume all
warranty obligations with the total exclusion of any warranty provided by the Manufacturer.
Manufacturer does not provide any warranty for any accessories used with the Product that are not manufactured
by Schumacher Electric Corporation.
This warranty does not exclude or diminish any claims the Manufacturer may have against the distributors of
The Product.
THE MANUFACTURER NEITHER ASSUMES NOR AUTHORIZES ANYONE TO ASSUME OR MAKE ANY
OTHER OBLIGATION TOWARDS THE PRODUCT OTHER THAN THIS WARRANTY.
Warranty, Repair Service and Distribution Centers:
Australia/New Zealand:
Schumacher Asia Pacic
29-51 Wayne Goss Drive
Berinnba QLD, 4117

• 11 •

• 12 •
/