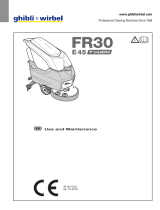
Ghibli & Wirbel ROYAL 15 M 38 BC LITHIUM Use And Maintenance

Category
Floor Machine
Type
Use And Maintenance

This manual is also suitable for

www.ghibliwirbel.com
Professional Cleaning Machines Since 1968
ROYAL 15
E 38
M 38 BC
M 38 BC PLUS
EN
Use and Maintenance
49.0321.00
ed. 06/2023
49032100_Copertina ROYAL15_3ed_06-2023.indd 149032100_Copertina ROYAL15_3ed_06-2023.indd 1 21/06/2023 10:33:5521/06/2023 10:33:55
www.ghibliwirbel.com
Professional Cleaning Machines Since 1968
2
2%
MADE IN ITALY
IPX3
Scrubber Dryer
GVW: .........kg
Mod: ................................
............................................. Art.: ..................
.............................................
Year: .............
s/n: .........................
1
2
3
8
7
6
5 9
4
49032100_Copertina ROYAL15_3ed_06-2023.indd 249032100_Copertina ROYAL15_3ed_06-2023.indd 2 21/06/2023 10:33:5521/06/2023 10:33:55
www.ghibliwirbel.com
Professional Cleaning Machines Since 1968
3
1 2 3
IT Produttore Caratteristiche elettriche N° Matricola
EN Manufacturer Electrical characteristics Serial N°
FR Producteur Caractéristiques électriques N° Matricule
DE Hersteller Elektrische Eigenschaften Serien-Nr.
ES Fabricante Características eléctricas N° Matrícola
PT Produtor Características elétricas Número de série
NL Producent Elektrische eigenschappen Serienummer
CS Výrobce Elektrické údaje Výrobní č.
RU Изготовитель Электрические характеристики Заводской №
PL Producent Specykacja elektryczna Numer seryjny
AR   
4 5 6
IT Grado di protezione Peso in ordine di marcia Anno di costruzione
EN Degree of protection Weight in running order Year of manufacture
FR Degré de protection Poids en ordre de marche Année de construction
DE Schutzgrad Gewicht bei Betrieb Baujahr
ES Grado de protección Peso en orden de marcha Año de fabricación
PT Grau de protecção Peso em ordem de marcha Ano de construção
NL Beschermingsgraad Gewicht in rijklare toestand Bouwjaar
CS Úroveň ochrany Hmotnost v provozním stavu Rok výroby
RU Βαθμός προστασίας Βάρος στην λειτουργία Έτος κατασκευής
PL Stopień zabezpieczenia Ciężar podczas eksploatacji Rok produkcji
AR   
7 8 9
IT Codice articolo Modello Massima pendenza superabile
EN Item code Model Maximum superable slope
FR Référence de l’article Modèle Pente maximum surmontable
DE Artikelnummer Modell Maximal befahrbare Steigung
ES Código del artículo Modelo Máxima pendiente que se puede superar
PT Código do artigo Modelo Máximo declive transponível
NL Artikelcode Model Maximaal berijdbare hellingsgraad
CS Kód položky Model Maximální překonatelný sklon
RU Код изделия Модель Максимальный преодолимый наклон
PL Kod artykułu Model Maksymalne superable stoku
AR   
49032100_Copertina ROYAL15_3ed_06-2023.indd 349032100_Copertina ROYAL15_3ed_06-2023.indd 3 21/06/2023 10:33:5521/06/2023 10:33:55
www.ghibliwirbel.com
Professional Cleaning Machines Since 1968
4
49032100_Copertina ROYAL15_3ed_06-2023.indd 449032100_Copertina ROYAL15_3ed_06-2023.indd 4 21/06/2023 10:33:5521/06/2023 10:33:55
www.ghibliwirbel.com
Professional Cleaning Machines Since 1968
5
EN English .............................................................................................................EN - 1
(Translation of original instructions)
49032100_Copertina ROYAL15_3ed_06-2023.indd 549032100_Copertina ROYAL15_3ed_06-2023.indd 5 21/06/2023 10:33:5521/06/2023 10:33:55
49032100_Copertina ROYAL15_3ed_06-2023.indd 649032100_Copertina ROYAL15_3ed_06-2023.indd 6 21/06/2023 10:33:5521/06/2023 10:33:55
www.ghibliwirbel.com
Professional Cleaning Machines Since 1968
ENGLISH - 1
Dear Customer,
Thank you for choosing one of our cleaning products.
The floor scrubber dryer that you have purchased has been designed to satisfy the user
in terms of ease of use and reliability over time.
We are aware that in order for a good product to stay that way, over time, it requires
continuous updates aimed at meeting the expectations of those who use it on a daily
basis. For this reason, we hope that you will not only be a satisfied customer but also a
partner who does not hesitate to give us your opinions and ideas originating from your
personal day-to-day experience.
49032100_Manuale ROYAL15_3ed_06-2023.indd 149032100_Manuale ROYAL15_3ed_06-2023.indd 1 21/06/2023 10:27:4921/06/2023 10:27:49
www.ghibliwirbel.com
Professional Cleaning Machines Since 1968
ENGLISH - 2
INDEX
INDEX ............................................................................................................................................. 2
TECHNICAL DATA ......................................................................................................................... 3
1.1 - INTRODUCTION .................................................................................................................. 4
2.1 - GETTING TO KNOW THE MACHINE (Fig. A) .................................................................... 4
3.1 - UNPACKING ........................................................................................................................ 4
3.1.a - Preliminary operations (Fig. B) ..................................................................................... 4
3.1.b - Positioning of the handle (Fig. B) ................................................................................. 5
3.1.c - Unloading the machine from the wooden pallet (Fig. B) ............................................... 5
4.1 - ASSEMBLY COMPONENTS ............................................................................................... 5
4.1.a - Brush installation (Fig. C) ............................................................................................. 5
4.1.b - Squeegee installation (Fig. D) ...................................................................................... 5
4.1.c - Battery connection (for Lithium version) ....................................................................... 5
4.1.d - Electrical connection (for cord version) (Fig. E) ............................................................ 6
5.1 - CHARGING THE BATTERY (Fig. F) .................................................................................. 6
6.1 - MACHINE CONTROLS ....................................................................................................... 7
6.1.a - Control panel (Fig. A) .................................................................................................... 7
7.1 - DISPLAY ..............................................................................................................................8
8.1 - MACHINE HANDLING (Fig. A) ........................................................................................... 8
9.1 - DETERGENT SOLUTION TANK ......................................................................................... 8
9.1.a - Tank lling (Fig. G) ........................................................................................................ 8
10.1 - OPERATION ....................................................................................................................... 9
10.1.a - Checks before use (Fig. A) ........................................................................................... 9
10.1.b - Preparing the machine and choosing the cycle (Fig. A) ............................................... 9
10.1.c - Using the machine (Fig. A) ........................................................................................... 9
10.1.d - End of use and switching off (Fig. A) .......................................................................... 10
10.1.e - Parking the machine (Fig. A) ...................................................................................... 10
11.1 - DRAINING THE RECOVERY WATER (Fig. H) ................................................................. 10
12.1 - MAINTENANCE AND CLEANING .................................................................................... 10
12.2 - OPERATIONS TO PERFORM DAILY ............................................................................... 11
12.2.a - Emptying and cleaning the detergent solution tank (Fig. G) ....................................... 11
12.2.b - Cleaning the recovery water tank (Fig. H-I) ................................................................ 11
12.2.c - Squeegee cleaning (Fig. J) ......................................................................................... 11
12.3 - OPERATIONS TO PERFORM WEEKLY ........................................................................... 11
12.3.a - Cleaning the solution lter (Fig. G) ............................................................................. 11
12.4 - OPERATIONS TO PERFORM WHEN NECESSARY ........................................................ 12
12.4.a - Brush cleaning / replacement (Fig. C) ........................................................................ 12
12.4.b - Squeegee rubber blades cleaning / replacement (Fig. K) .......................................... 12
12.4.c - Squeegee incidence set up (Fig. K) ........................................................................... 12
12.4.d - Lithium battery replacement (Fig. M) .......................................................................... 13
13.1 - PARAMETER SETTING (Fig. A) ....................................................................................... 13
13.1.a - OPERATOR parameters ............................................................................................. 13
14.1 - FUSE CHECK/REPLACEMENT........................................................................................ 15
15.1 - ALARMS DURING THE FUNCTIONING........................................................................... 15
16.1 - TROUBLESHOOTING ....................................................................................................... 16
17.1 - DEMOLITION OF THE MACHINE ..................................................................................... 17
18.1 - WIRING DIAGRAM ............................................................................................................ 17
18.1.a - Wiring diagram (E version) ......................................................................................... 18
18.1.b - Wiring diagram (BC version) ...................................................................................... 18
49032100_Manuale ROYAL15_3ed_06-2023.indd 249032100_Manuale ROYAL15_3ed_06-2023.indd 2 21/06/2023 10:27:4921/06/2023 10:27:49
www.ghibliwirbel.com
Professional Cleaning Machines Since 1968
ENGLISH - 3
TECHNICAL DATA
ROYAL 15 E - BC - BC PLUS
Driving type Walk behind
Features
Operation power (cord) Power supply 100-240 V~ 50/60 Hz
Operation power (24V Lithium battery) 312 Wh - 547 Wh
Supply power 24V dc
Installed power 470 W
Running time 1 h (312 Wh) - 2 h (547 Wh)
Washing track width 385 mm
Suction width 477 mm
Productivity theoretical / practical 1540 m2/h / 924 m2/h
Hand-arm vibration system 1,0 m/s2
Sound pressure (LpA) 64 dB(A)
Sound pressure in silent mode 61 dB(A)
Uncertainty KpA 0,75 dB(A)
IP code IPX3
Operating temperature 5ºC ÷ 40ºC
Brush
Diameter / pad / number 385 mm / 15” x 1
Motor power / number 280 W x 1
Brush speed 130 rpm
Specific pressure 52 g / cm2
Traction
Forward movement Manual
Maximum slope of use during work 2 %
Suction
Motor power 150 W
Depression (water column) 140 mbar / 1427 mmH2O
Air flow 21 l / s
Tank
Typology Double tank
Recirculation No
Solution capacity 15 l
Recovery capacity 17 l
Dimensions
Machine dimensions (length x width x height) 772 x 477 x 731 / 1122 mm
Machine width - Brush deck 392 mm
Machine width - squeegee 477 mm
Battery compartment dim. (length x width x height) 154 x 233 x 134 mm
49032100_Manuale ROYAL15_3ed_06-2023.indd 349032100_Manuale ROYAL15_3ed_06-2023.indd 3 21/06/2023 10:27:4921/06/2023 10:27:49
www.ghibliwirbel.com
Professional Cleaning Machines Since 1968
ENGLISH - 4
ROYAL 15 E - BC - BC PLUS
Weight
Empty weight 44 kg - 45 kg - 45,4 kg
Weight with power supply / battery 46 kg - 47,2 kg - 48,6 kg
Gross vehicle weight (GVW) 63 kg - 65,6 kg - 65,6 kg
1 -
1.1 - INTRODUCTION
NOTE:
The numbers and the figure references
shown in brackets refer to the components
indicated in the annexed illustrative sheet.
DANGER:
Before using the machine carefully
read the “Safety instructions for
scrubber dryer machine” manual an-
nexed to this one.
2 -
2.1 - GETTING TO KNOW THE
MACHINE (Fig. A)
(1) Driving handle.
(2) Control console.
(3) Squeegee operating pedal.
(3a) Pedal position for squeegee raised.
(3b) Pedal position for squeegee down.
(4) Operator presence lever.
(5) Lever for rotating handle positions.
(6) Recovery water tank.
(7) Recovery water tank cover.
(8) Detergent solution tank.
(9) Right door with socket and battery
charger cable housing (BC version).
Right door with power plug (E version).
(10) Left door for loading the detergent solu-
tion tank.
(11) Rear door for access to the recovery wa-
ter discharge hose and squeegee water
suction hose.
(12) Wheels.
(13) Brush deck.
(14) Brush.
(15) Squeegee group.
(16) Squeegee rubbers.
(17) Squeegee wheels.
(18) Squeegee bumper.
(19) Detergent solution valve.
(19a) Open valve.
(19b) Closed valve.
(20) Cleaning solution lter.
(21) Detergent solution drain valve.
(21a) Closed valve.
(21b) Open valve.
(22) Display.
(23) Main button/brush rotation.
(24) Cleaning solution button.
(25) Vacuum system button.
(26) ECO button.
3 -
3.1 - UNPACKING
3.1.a - Preliminary operations (Fig.
B)
Once the packaging has been removed as
indicated in the instruction sheet on the pack-
aging itself, check the integrity of the ma-
chine and all the components supplied.
If any obvious damage is found, contact your
local dealer and carrier within 3 days of re-
ceipt.
- Remove the bag and boxes (27) contain-
ing the supplied accessories:
(14) 1 brush.
(15) Squeegee group.
- Take the documentation from the appro-
priate envelope.
(28) Machine use and maintenance manual
and Safety instructions for scrubber dry-
er machine.
(29) Battery charger instruction manual (only
for BC version).
(30) Lithium battery instruction manual (only
for BC version).
- Accessories supplied only for E version:
(31) Cord with snap hook.
(32) Tear-proof hook.
(39) 15 m extension cable.
49032100_Manuale ROYAL15_3ed_06-2023.indd 449032100_Manuale ROYAL15_3ed_06-2023.indd 4 21/06/2023 10:27:5021/06/2023 10:27:50
www.ghibliwirbel.com
Professional Cleaning Machines Since 1968
ENGLISH - 5
3.1.b - Positioning of the handle
(Fig. B)
- Unlock the driving handle (1) by pulling
one of the levers (5) and lift it positioning it
at the desired angle.
- Release the lever (5) to lock the handle
in position.
3.1.c - Unloading the machine from
the wooden pallet (Fig. B)
- Remove the wooden blocks (33) posi-
tioned in front of the wheels.
- Turn the ramp (34) in front of the wooden
pallet.
- With the help of your hands on the driving
handle (1), slightly raise the front of the
machine body, then carefully get o the
pallet.
4 -
4.1 - ASSEMBLY
COMPONENTS
4.1.a - Brush installation (Fig. C)
- Lift the machine in front by levering the
handle grips (1) and remove the card-
board support (35).
- Place the brush (14) on the ground.
- Place the brush deck (13) on top of the
brush (14) so that the driving ange (36) is
centered with the brush engagement hole.
- Press the button (23) to start the ma-
chine.
- Check the “ ” icon on the display (22),
otherwise press the button (23) again.
- Press the levers (4) to start the rotation of
the brush until you hear the “CLICK” of the
brush attachment, then release the levers
(4).
- Press the button (23) for 3 sec. to turn
o the machine.
WARNING:
Use only brushes provided by the
manufacturer according to the model
of the machine.
Using other types of brushes may
compromise the safety of the ma-
chine.
4.1.b - Squeegee installation (Fig.
D)
- Lower the squeegee support using the
pedal (3) to position (3b).
- Manually rotate the brush deck (13) to one
side of the machine.
- Mount the wiper (15) on the two slots
of the support (37), then tighten the two
handwheels (38).
- Reposition the brush deck unit in line with
the machine.
- Lift the squeegee assembly using the
pedal (3) into position (3a).
WARNING:
Before lifting the squeegee unit, make
sure that it is in line (A) with the run-
ning direction of the machine.
In case the pedal has locked the sys-
tem (B), rotate the brush deck unit
outwards, press the pedal back into
position (3b Fig. A) and align the
brush deck unit with the machine di-
rection, then press the pedal into po-
sition (3a Fig. A).
4.1.c - Battery connection (for
Lithium version)
NOTE:
The machine is delivered with the battery
already installed, connected and with a per-
centage charge for initial use.
To recharge or replace it, see the specific
chapter and paragraph.
49032100_Manuale ROYAL15_3ed_06-2023.indd 549032100_Manuale ROYAL15_3ed_06-2023.indd 5 21/06/2023 10:27:5121/06/2023 10:27:51
www.ghibliwirbel.com
Professional Cleaning Machines Since 1968
ENGLISH - 6
4.1.d - Electrical connection (for
cord version) (Fig. E)
- Mount the carabiner lanyard (31) on the
handle (1) of the machine.
- Insert the extension cable (39) into the
anti-tear hook (32), locking it as shown in
the gure.
- Secure the snap hook (32) to the carabi-
ner (31).
- Open the right door (9) and connect the
plug (40) of the machine to the socket (41)
of the extension cable (39).
- Connect the power plug of the extension
cord to a socket with a minimum capacity
of 10A.
WARNING:
Make sure that the mains system is
equipped with an RCD (circuit break-
er).
Unwind the power supply extension
cable completely before operating
the appliance.
Use the electric extension cable only
if in perfect condition.
Never let the power cable run over
sharp edges and do not tread on it.
5 -
5.1 - CHARGING THE
BATTERY (Fig. F)
DANGER:
Charge the batteries in well-ventilat-
ed areas which comply with stand-
ards in force in the country of use.
For safety-related information, follow
what is described in chapter 1.1 of
this manual.
WARNING:
For information and warnings about
the battery and the battery charger,
follow what is described in the bat-
tery and battery charger manual en-
closed with this document.
Check that the mains voltage is com-
patible with the operating voltage of
the battery charger.
NOTE:
Charge the battery at each end of work
or whenever the battery symbol on the
display (22 Fig. A) displays 10% resid-
ual charge.
With the lithium battery it is possible to
carry out partial recharges.
- Bring the machine to the vicinity of a
mains power outlet.
- Open the right door (9), retrieve and un-
wind the charger cable (42).
- Connect the cable terminal (43) to the
machine socket (44), then connect the
plug (45) to the mains socket (the mains
voltage and frequency must be equal to
the corresponding values of the charger,
shown on the license plate of the ma-
chine).
NOTE:
When the battery charger is connected to the
electrical mains, all machine functions are
automatically disabled.
- On the display (22 Fig. A), when the seg-
ments light up in sequence on the battery
symbol, this means that the battery charg-
er is charging the battery.
- When all segments in the battery symbol
are lit steadily, the charging cycle is n-
ished.
- Disconnect the plug (45) of the charger
cable (42) from the mains and the terminal
(43) from the machine socket (44), rewind
it to the appropriate seat (46) and close
the right door (9).
6 -
49032100_Manuale ROYAL15_3ed_06-2023.indd 649032100_Manuale ROYAL15_3ed_06-2023.indd 6 21/06/2023 10:27:5121/06/2023 10:27:51
www.ghibliwirbel.com
Professional Cleaning Machines Since 1968
ENGLISH - 7
6.1 - MACHINE CONTROLS
6.1.a - Control panel (Fig. A)
(22) Display
- See the specic chapter.
(23) Main button / brush rotation
- Press to turn on the machine; at startup,
the display (22) indicates the working
hours of the machine, then displays the
battery charge status and the amount of
cleaning solution set.
- Check the “ ” icon on the display, oth-
erwise press the button (23) again.
- The start of the brush rotation is enabled
by the levers pressed (4).
- To turn o the machine, press the button
(23) for 3 seconds.
NOTE:
The machine switches off automatically after
5 minutes of inactivity, press the button (23)
again to restart it.
(24) Detergent solution button
- When starting the machine with the main
button, the cleaning solution prepares the
last chosen setting.
- Press the button (24) to set the amount
of cleaning solution dispensed during the
work cycle, the amount is indicated by the
icon on the display;
- Minimum supply.
- Average supply.
- Maximum supply.
- No supply.
- The delivery of the cleaning solution is
enabled by the levers (4) pressed.
(25) Vacuum system button
- When the machine is started with the main
button, the suction system is switched o.
- Press the button (25) to operate the nor-
mal operation (“ ” icon on the display).
- The next time the button (25) is pressed,
silent mode operation is activated (“
icon on the display).
- The next time the button (25) is pressed,
the suction system stops.
NOTE:
Switching from silent operation to power o
(ashing “ ” icon on display), the vacuum
system runs for 5 seconds before stopping.
- The operation of the suction system is
enabled by the levers (4) pressed.
(26) ECO SYSTEM button
- During work, pressing the button (26) on
the display shows the “ ” icon, the pa-
rameters of cleaning solution and suction
take the following values:
Cleaning solution = minimum delivery.
Suction = silent mode.
(4) Operator presence levers
- Press the levers (4) and hold them down
to start the brush rotation and work func-
tions.
(5) Tilt adjustment levers handle
- By pulling one of the levers (5) it is possi-
ble to vary the position of the driving han-
dle (1); by releasing the levers, the handle
is positioned and locked in the closest re-
quired position.
NOTE:
By positioning the driving handle (1) verti-
cally, it is possible to effect a more thorough
cleaning of corners by rotating the machine
on itself.
7 -
49032100_Manuale ROYAL15_3ed_06-2023.indd 749032100_Manuale ROYAL15_3ed_06-2023.indd 7 21/06/2023 10:27:5421/06/2023 10:27:54
www.ghibliwirbel.com
Professional Cleaning Machines Since 1968
ENGLISH - 8
7.1 - DISPLAY
With the machine on, the following icons
shown on the display (22):
Hour meter
The number indicate the work time of
the machine.
Battery (BC version only)
Indicates the battery charge status:
100% 70% 50% 30% 10% 0%
- With 10% battery, the brush function is
disabled. The suction system remains in
operation to be able to collect water resi-
dues on the oor.
- With 0% the machine is completely deac-
tivated.
Brush
It shown on the display indicating the brush
function.
Press the button (23) to deactivate (icon
absent) or reactivate the brush function.
Detergent solution
Indicates the amount of detergent solution
dispensed during the work cycle.
Press the button (24) to change the set-
ting.
Vacuuming
It shown on the display when the button (25)
is pressed indicating the vacuum func-
tion in standard mode.
Silent mode vacuuming
It shown on the display when the button (25)
is pressed, indicating the vacuum func-
tion in low-speed mode.
ECO mode
It shown on the display when the button (26)
is pressed.
8 -
8.1 - MACHINE HANDLING
(Fig. A)
- With the help of the hands on the driving
handle (1), slightly lift the front of machine
body, then drive the machine up to the af-
fected area.
9 -
9.1 - DETERGENT SOLUTION
TANK
9.1.a - Tank lling (Fig. G)
WARNING:
Only add clean mains water to the
tank at a temperature no greater than
50°C.
- Open the left door (10).
- Remove the extractable hose (47) and
connect it to a water outlet.
- Open the tap and ll the detergent solu-
tion tank (8) leaving a few inches from the
brim.
WARNING:
Always visually check the fill level to
avoid the risk of floor wetting.
- Add the liquid detergent in the concentra-
tion and in the method indicated on the
label by the detergent manufacturer.
NOTE:
Use non-foamy detergents only. For the
quantities, follow the instructions provided by
the detergent manufacturer according to the
type of dirt.
49032100_Manuale ROYAL15_3ed_06-2023.indd 849032100_Manuale ROYAL15_3ed_06-2023.indd 8 21/06/2023 10:27:5621/06/2023 10:27:56
www.ghibliwirbel.com
Professional Cleaning Machines Since 1968
ENGLISH - 9
DANGER:
If the detergent comes in contact with
the eyes and/or skin or if swallowed,
refer to the use and safety informa-
tion booklet provided by the manu-
facturer of the detergent.
- At the end of lling the tank, reposition the
extractable tube (47) in its seat and close
the left door (10).
10 -
10.1 - OPERATION
10.1.a - Checks before use (Fig. A)
Check that the cleaning solution tap (19) is
correctly in the open position (19a).
- Check the state of charge of the batteries
as indicated in the “Display” paragraph.
10.1.b - Preparing the machine and
choosing the cycle (Fig. A)
- Press the button (23) to turn on the
machine.
- Lower the squeegee unit (15) by acting on
the pedal (3), releasing it from its coupling
(3b).
- The machine has the possibility to per-
form 5 work cycles:
Washing, brushing, drying cycle:
- Press the button (25) to start the suc-
tion system.
- Press the button (24) to arrange the
delivery of the cleaning solution, then
press the levers (4) to start the cycle.
Washing, brushing, drying cycle, ECO
SYSTEM mode:
- Press the button (26) to start the suc-
tion system and the delivery of the clean-
ing solution in low consumption mode,
then press the levers (4) to start the cycle.
Drying only cycle:
- Repeatedly press the button (24) to
deactivate the cleaning solution delivery
system (“ ” icon on the display).
- Press the button (25) to start the suc-
tion system, then press the levers (4) to
start the cycle.
Washing, brushing cycle:
- Lift the squeegee assembly using the
pedal (3) into position (3a).
- Press the button (25) until the suction
system stops.
- Press the button (24) to arrange the
delivery of the cleaning solution, then
press the levers (4) to start the cycle.
Brushing only cycle:
- With the cleaning solution and the suction
system deactivated, press the levers (4)
to carry out the brushing cycle only; re-
leasing the levers (4) the brush stops.
10.1.c - Using the machine (Fig. A)
- After starting the machine and choosing
the type of cycle, start the cleaning opera-
tions by pressing the levers (4) and keep-
ing them pressed to start the rotation of
the brush and the dispensing of the de-
tergent solution; then push the machine
using the driving handle (1).
NOTE:
Releasing the levers (4) stops the rotation of
the brush and the dispensing of water.
To avoid damaging the floor, do not use the
machine in a fixed position with brush rota-
tion activated
The correct way of cleaning and drying the
oor is to move the machine forwards. Mov-
ing the machine backwards damages the
blades as well as not allowing correct aspira-
tion of the water present on the oor.
49032100_Manuale ROYAL15_3ed_06-2023.indd 949032100_Manuale ROYAL15_3ed_06-2023.indd 9 21/06/2023 10:27:5621/06/2023 10:27:56
www.ghibliwirbel.com
Professional Cleaning Machines Since 1968
ENGLISH - 10
- If necessary, adjust the amount of delivery
of the cleaning solution using the button
(24) .
- (Only for BC version) Check the state of
charge of the batteries as indicated in the
“Display” paragraph.
10.1.d - End of use and switching off
(Fig. A)
- At the end of the cleaning operations, be-
fore turning o the machine, stop the de-
livery of the cleaning solution by pressing
the button (24) , stop the rotation of
the brush by releasing the levers (4) and
continue with the suction system activated
to suck up all the liquid present in the oor.
- Lift the squeegee assembly using the
pedal (3) into position (3a).
- Turn o the machine by pressing the but-
ton (23) for 3 seconds.
WARNING:
Always lift up the squeegee at the
end of cleaning in order to prevent
the deformation of the rubber blades.
10.1.e - Parking the machine (Fig. A)
At the end of work, before leaving the ma-
chine:
- Remove the brush by operating as indi-
cated in the specic paragraph.
- Make sure the squeegee unit (14) is
raised.
- Empty the recovery water tank (6) as indi-
cated in the specic paragraph.
- Perform the planned maintenance after
using the machine (see chapter Mainte-
nance and cleaning).
- Lift the machine in front by levering the
handle (1) and move the machine to a dry
and clean place prepared for storage.
- Make sure that the machine cannot move
independently.
NOTE:
When parking the machine, it is recommend-
ed to place a spacer under the brush hub (36
Fig. C) to keep the brush deck raised
11 -
11.1 - DRAINING THE
RECOVERY WATER (Fig. H)
At the end of the washing cycle or when the
recovery water tank (6) is full, it is necessary
to empty the tank by proceeding as follows:
NOTE:
To dispose of the recovery water, comply
with the standards in force in the country in
which the machine is used.
- Position yourself with the machine near
an exhaust drain.
- Open the rear door (11).
- Detach the drain hose (48) from the sup-
port.
- Remove the cap (49) from the tube (48)
and completely drain the water contained
in the tank.
- Replace the cap (49) and reposition the
drain hose (48) on the relative support.
- Close the rear door (11).
12 -
12.1 - MAINTENANCE AND
CLEANING
WARNING:
For information and warnings related
to maintenance and cleaning opera-
tions please follow what is indicated
in the “Safety instructions for scrub-
ber dryer machine” annexed to this
one.
49032100_Manuale ROYAL15_3ed_06-2023.indd 1049032100_Manuale ROYAL15_3ed_06-2023.indd 10 21/06/2023 10:27:5721/06/2023 10:27:57
www.ghibliwirbel.com
Professional Cleaning Machines Since 1968
ENGLISH - 11
12.2 - OPERATIONS TO
PERFORM DAILY
12.2.a - Emptying and cleaning the
detergent solution tank (Fig.
G)
WARNING:
At the end of the washing operations
it is mandatory to drain and clean the
detergent solution tank (8) to avoid
deposits or encrustations.
After draining the recovery water tank (6),
drain the cleaning detergent solution tank (8)
as follows:
- Position yourself with the rear side of the
machine on an exhaust drain.
- Open the cleaning solution drain tap (21b)
and let the contained liquid completely
drain.
- Wash the inside of the tank leaving the
drain tap open and introducing clean wa-
ter from the extractable tube (47) of the
tank.
- At the end of the cleaning, close the drain
tap (21a), reposition the extractable tube
(47) in its seat and close the left door (10).
12.2.b - Cleaning the recovery water
tank (Fig. H-I)
WARNING:
At the end of the washing operations,
it is compulsory to clean the recov-
ery water tank to prevent deposits or
scaling and the proliferation of bacte-
ria, odours or mould.
- Drain the recovery water as shown in the
relative paragraph, positioning the ma-
chine over a drain outlet.
- Remove the cover (7) and clean the inside
of the cover and the aspirator safety oat
(50) with running water.
- Leaving the hose (48) lowered and the cap
o, add water through the upper opening
(51), cleaning the inside of the tank until
clean water comes out of the drain hose.
- Replace all the components in reverse
order.
12.2.c - Squeegee cleaning (Fig. J)
To clean the squeegee (15) correctly, remove
it as follows:
- Lower the squeegee assembly using the
pedal (3 Fig A) to position (3b).
- Manually rotate the brush deck (13) to one
side of the machine.
- Loosen the knobs (36) and remove the
squeegee (15).
- Wash the squeegee and especially the
rubber (52) and (53) and the inner frame
of the suction tting (54).
NOTE:
If, during washing, it is clear that the rubber
blades (52) and (53) are damaged or worn,
it is necessary to replace them or turn them
over.
- Replace all the components in reverse
order.
12.3 - OPERATIONS TO
PERFORM WEEKLY
12.3.a - Cleaning the solution lter
(Fig. G)
- Close the detergent solution tap (19b).
- Unscrew the transparent cover (54) of the
lter and remove the lter (55).
- Clean the lter (55) with running water, re-
place it if it is clogged.
- Replace all the components in reverse
order.
- Open the detergent solution tap (19a).
49032100_Manuale ROYAL15_3ed_06-2023.indd 1149032100_Manuale ROYAL15_3ed_06-2023.indd 11 21/06/2023 10:27:5721/06/2023 10:27:57
www.ghibliwirbel.com
Professional Cleaning Machines Since 1968
ENGLISH - 12
12.4 - OPERATIONS
TO PERFORM WHEN
NECESSARY
12.4.a - Brush cleaning / replace-
ment (Fig. C)
It becomes necessary to replace the brush
when it is worn with bristles shorter than 2
cm or it must be replaced according to the
type of floor to wash; to replace it, proceed
as follows:
- Make sure the machine is switched o.
- Lift the machine (67) at the front.
- With the brush deck (13) up, take the
brush (14) by hand and rotate it decisively
in the direction of rotation (68) causing the
release.
- Clean and wash the brush with water and
detergent or replace the brush.
- Place the brush deck (13) on top of the
brush (14) so that the driving ange (36) is
centered with the brush engagement hole.
- Press the button (23) to start the ma-
chine, verifying the presence of the “
icon on the display (22).
- Press the levers (4) to start the rotation of
the brush until you hear the “CLICK” of the
brush attachment, then release the levers
(4)
- Press the button (23) for 3 sec. to turn
o the machine.
12.4.b - Squeegee rubber blades
cleaning / replacement (Fig.
K)
When it becomes clear that drying the floor
is difficult or traces of water remain on the
floor, it is necessary to check the wear on the
squeegee rubber blades:
- Remove the squeegee assembly (15) as
indicated in the “squeegee cleaning” para-
graph.
- Fully untighten the lug nuts (36) and
knobs (69) completely, then remove the
rubber squeegee group (70) from the
closing frame (71).
- Remove the inner rubber (52) and the
outer rubber (53) disengaging them from
the squeegee grooves (72).
- Clean and wash the rubber blades with
water and detergent.
NOTE:
When the rubber blades (52) or (53) are worn
on one side, on one occasion they may be
turned over.
- Replace or turn over the rubber blades
(52) or (53) without inverting them.
- Replace all the components in reverse
order.
NOTE:
Two types of rubber are available:
Para rubber for all types of flooring and poly-
urethane rubber for workshop floors with oily
residues.
12.4.c - Squeegee incidence set up
(Fig. K)
- Lower the squeegee unit (15) by acting
on the pedal (3) releasing it from its hook
(3b).
- Start the suction system as indicated in
the paragraph “Machine preparation and
cycle choice” and proceed for a few me-
tres, then switch o and stop the machine.
- Check the incidence of the tires on the
oor.
A = too squashed
B = too raised
C = correct position.
- To adjust, loosen the nut (73) of the rear
wheel (74) and move the wheel vertically
along the slot; lifting the wheel increases
the incidence, vice versa it decreases.
49032100_Manuale ROYAL15_3ed_06-2023.indd 1249032100_Manuale ROYAL15_3ed_06-2023.indd 12 21/06/2023 10:27:5721/06/2023 10:27:57
www.ghibliwirbel.com
Professional Cleaning Machines Since 1968
ENGLISH - 13
12.4.d - Lithium battery replacement
(Fig. M)
WARNING:
The battery must be installed by qual-
ified personnel only.
The electrical components of the ma-
chine can be seriously damaged if
the battery is not installed and con-
nected correctly.
Handle the battery with great care.
- Make sure the machine is switched o.
- Check that the recovery water tank is
empty, otherwise discharge the liquid as
indicated in the specic paragraph.
- Close the cleaning solution tap (19b).
- Open the rear door (11).
- Disconnect the suction pipe (75) from the
recovery water tank (6).
- Detach the drain hose (48) from the sup-
port.
- Lift and remove the recovery water tank
(6) to access the battery compartment.
- Unhook the cleanser pipe (76) to facilitate
the removal of the battery.
- Untighten the two lug nuts (76) and the
positive and negative battery terminals,
and disconnect the (77) and (78) power
cables.
- Using its handle, lift and replace the bat-
tery (79).
- Replace all the components in reverse
order.
WARNING:
Be careful to reconnect the cleanser
pipe (76) correctly.
13 -
13.1 - PARAMETER SETTING
(Fig. A)
13.1.a - OPERATOR parameters
It is possible for the operator to have access
to the menu to set the following parameters:
Language
Type of batteries
Display - Contrast
Display - Luminosity
To enter the menu act as follows:
- Press and hold the buttons (26) , (24)
simultaneously and then the button
(23) to display the following screen
(22):
password:
password:
- Release the buttons pressed.
- Enter the 4-digit Password “0010” by
pressing the button (23) to switch be-
tween the digits and the buttons (26)
or (24) to change the number of the
ashing digit.
- Press the button (23) to conrm and
go to the next digit, to nally conrm the
password and have access to the param-
eters list.
- Press the button (26) or (24) to
scroll through the parameters and then
the button (23) to access the chosen
parameter.
49032100_Manuale ROYAL15_3ed_06-2023.indd 1349032100_Manuale ROYAL15_3ed_06-2023.indd 13 21/06/2023 10:27:5821/06/2023 10:27:58
www.ghibliwirbel.com
Professional Cleaning Machines Since 1968
ENGLISH - 14
Language setting:
Language
Language
selection:
selection:
ITA
ITA
Language selection: Selezione lingua
- Choose the language using the buttons
(26) or (24) , then press the button
(23) to conrm the choice;
-ITA = Italian
-ENG = English
Setting the type of battery:
Battery
Battery
type:
type:
24Li-Ion
24Li-Ion
Battery type: Selezione tipo di batteria
NOTE:
This parameter is fixed and cannot be edited.
Display setting - Contrast:
Display
Display
tune:
tune:
min:0
min:0
max:10
max:10
5
5
Display tune Contrasto display
- Choose the type of contrast of the display
by setting a value from “0 to 10” using the
buttons (26) or (24) , then press
the button (23) to conrm the choice.
Display setting - Brightness:
Display
Display
brghtnss:
brghtnss:
min:0
min:0
max:10
max:10
5
5
Display brghtnss Luminosità display
- Choose the type of brightness of the dis-
play by setting a value from “0 to 10” us-
ing the buttons (26) or (24) , then
press the button (23) to conrm the
choice.
Exit - Operator parameters:
- Navigate to the main menu with the button
(26) to the following screen:
EXIT
EXIT
- Press the button (23) to exit the op-
erator parameter setting and restart the
machine.
14 -
49032100_Manuale ROYAL15_3ed_06-2023.indd 1449032100_Manuale ROYAL15_3ed_06-2023.indd 14 21/06/2023 10:28:0021/06/2023 10:28:00
  • Page 1 1
  • Page 2 2
  • Page 3 3
  • Page 4 4
  • Page 5 5
  • Page 6 6
  • Page 7 7
  • Page 8 8
  • Page 9 9
  • Page 10 10
  • Page 11 11
  • Page 12 12
  • Page 13 13
  • Page 14 14
  • Page 15 15
  • Page 16 16
  • Page 17 17
  • Page 18 18
  • Page 19 19
  • Page 20 20
  • Page 21 21
  • Page 22 22
  • Page 23 23
  • Page 24 24
  • Page 25 25
  • Page 26 26
  • Page 27 27
  • Page 28 28

Ghibli & Wirbel ROYAL 15 M 38 BC LITHIUM Use And Maintenance

Category
Floor Machine
Type
Use And Maintenance
This manual is also suitable for

Ask a question and I''ll find the answer in the document

Finding information in a document is now easier with AI