Page is loading ...

Setup Guide
NOTICE; Install your other hardware before installing the
keypads. Do not connect the USB6 Keypad Hub to the USB
port until told to in the instructions that follow.
NOTICE: CasaTunes hardware is designed for professional
installation only. Follow all NEC (National Electrical Code)
national wiring rules, as well as local codes. The Cat5 cables
connecting between the USB6 Keypad Hub and the Keypads
(Step 1 Below) should not be routed outside the home (to
prevent risk of lightning damage and shock) and are not
meant to be connected to any other equipment, such as
Ethernet switches.
NOTICE: The DC inlet on the USB6 Keypad Hub (just
below the USB connector on the front of the wall plate) is to
be used only with a CasaTunes optional 5VDC power supply
with positive center conductor. For future use with higher
powered Keypads.
Hardware Installation Steps:
1. Pre-wire the house with CAT5, CAT5e, CAT6 (or better) cables, wir-
ing from the Keypad locations to a location close to where the
CasaTunes server PC will be placed. In this guide we will call the ca-
bles CAT5 cables, for convenience. Check your local building codes
and make sure you use cable that is approved for in-wall home wiring.
Do not route cables outside the house, since this improves the chance of
lightning caused damage. Crimp RJ45 connectors to both ends of each
cable. You can use any standard wiring scheme for these connectors as
long as both ends are the same. These cables should NOT use “cross-
over” wiring . Please use a good quality tool and verify that all connec-
tions are proper.
2. Mount single gang electrical boxes or low-voltage mounting rings at
the location of each Keypad. If you will be mounting alongside AC
switches or other high voltage devices, make sure you follow NEC, UL
and local government codes. Specifically, all high voltage wires for the
AC devices must be enclosed and the low voltage Keypad wires cannot
be in the same enclosure as the high voltage wires. This means that if
you use a dual gang box for an AC switch and the CasaTunes Keypad,
there MUST be a divider between the two halves of the box.
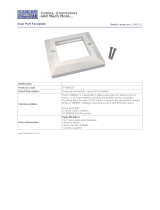
3. Mount a single gang electrical box or low-voltage mounting ring for the
USB6 Keypad Hub. The USB6 should be mounted close to where the
CasaTunes server computer is to be installed. If you have more than 6
Keypads and need to mount two (or more) USB6 devices, make sure
you separate the boxes so that the built-in wallplates of the USB6s do
not interfere with each other. At this time, CasaTunes does not supply a
dual mounting USB6 wallplate. Also, because of the built-in wallplate,
the USB6 cannot be mounted in a multi-gang electrical box with other
devices.
4. At the Keypad location, simply plug the CAT5 cable into the back of
the Keypad and mount the Keypad to the box or ring using the supplied
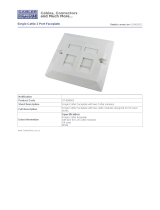
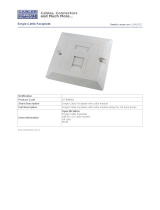
6-32 x1” screws. Attach any Decora® style wallplate. If you prefer
“screwless” wallplates, our Keypad works perfectly with Lutron®’s
line of screwless Decora style wallplates, and they also work well with
the Leviton® Decora screwless wallplate. If you need a Keypad in a
color other than Almond, we also have faceplates in Black, Ivory and
White. They are easily replaced using a size 1 Phillips head screw-
driver. (Included in box). Instructions are included with the replace-
ment faceplates.
5. At the computer end, take the CAT5 cables from the Keypads and plug
them into the back of the USB6 Keypad Hub and mount the Hub into
the box or mounting ring using the supplied 6-32 x 1” screws. You can
plug any CAT5 from any Keypad into any RJ45 socket of any USB6
Keypad Hub.
6. Plug the supplied USB cable between the USB6 Keypad Hub and a
USB connector on the computer. We Supply a 6’ USB cable with each
USB6 Keypad Hub. If you need to use other lengths, we recommend
that you use a good quality USB 2.0 certified cable. Also, the USB6
works will with USB extenders (even with USB 1.1 extenders) if the
computer is not near the USB6 Keypad Hub. If you are using multiple
USB6 Keypad Hubs in a large home and need more USB ports you can
use a powered USB Hub.
1. If you are installing the Keypads as part of a complete CAsaTunes
system, follow the guide included with the system for instructions on
installing CasaTunes software. If you are adding the Keypads to an
existing system, go to www.castunes.com/downloads.aspx to
download and install the latest version of CasaTunes. During instal-
lation make sure you check the “Install the CasaTunes Keypad
Driver Software” box. Even if you are not changing the version of
the CasaTunes software, you should reinstall the latest version in
order to install the Keypad driver.
2. After CasaTunes solftware is installed and the computer is running,
plug the USB cable from the USB6 Keypad Hub into any USB con-
nector on the PC.
3. Go to each Keypad and assign the zone that the Keypad controls
a. Turn on the Keypad (hit the lower right button)
b. Press and hold the Source button until you see a menu
c. Use the up and down buttons to highlight “Zone Setup” and press
the right button to enter setup
d. Use the up and down buttons to highlight the zone name for the
room that the Keypad is in and press the Source button to select this
zone name.
4. The Keypads are now ready to use
For more details, see the operation guide
1. When the power in the room is off, you will see a display with no
backlighting and with “CasaTunes” in the first line and the time of
day in the second line. The Keypad gets the time from the
CasaTunes Server computer.
2. When the power in the room is on, you will see a three line display
with status information on the top line, information about the cur-
rently playing music, such as the artist and song, or the radio station
if listening to internet radio, in the middle line, and the song progress
in the bottom line.
3. The power in the room can be turned on and off with the lower right
button
4. The top and bottom buttons in the ring of buttons turn the volume up
and down
5. The center button changes the source, or player, that you are listen-
ing to
6. The left and right buttons change the song to the Next or Previous
song or station, depending on whether you are listening to a playlist
or a internet radio station
7. Holding the source button in for more than 3 seconds takes you to a
menu where you can change Music, Bass, Treble, Balance, Loud-
ness, and the DND (Do Not Disturb) and other settings.
NOTE: Decora and Leviton are registered trademarks of Leviton Manufactur-
ing Co. Lutron is a registerd trademark of Lutron Electronics, Inc.
General Information
The Keypads are controlled by the CasaTunes program and interface to the
CasaTunes Server via the USB6 Keypad Hub that connects to the computer
using the computer’s USB port. Each USB6 Keypad Hub can support up to
six keypads, so you will need one USB6 Keypad Hub for one to six Key-
pads and additional USB6 Keypad Hubs as you add more Keypads. The
Keypads and the USB6 Keypad Hub mount into electrical boxes or low-
voltage rings in a fashion similar to electrical outlets.
Hardware Installation
Basic Keypad Instructions
Please leave your Keypads and the USB6 Keypad Hub in
their protective bags until you are ready to install them in
the electrical box or mounting ring in steps 4 and 5 of the
hardware installation section below. When handling these
devices, try to keep yourself grounded as much as possible
to minimize the possibility of damage due to electrostatic
discharge.
Additional information:
See the CasaTunes Operation’s Guide on the CD-ROM that came with the
device for more information on the following:
Troubleshooting information
Important safety notices and regulatory information
Detailed user instructions
/