Page is loading ...

nabi 2 User Manual
Updated: 09/26/2012

Contents
01
02
03
04
At a Glance 06
1.1 About nabi 06
1.2 What’s New on Monarch OS 06
1.3 Overview 08
1.4 Home Screen 09
1.5 Touch and Navigation 12
1.6 Sleep Mode 13
1.7 Status Icons 14
Getting Started 16
2.1 What’s in the Box 16
2.2 Charging nabi 16
2.3 nabi
™
Setup 18
Basics for nabi
™
Mode 21
3.1 About nabi
™
Mode 21
3.2 Settings 22
3.3 Connecting to Wi-Fi 23
3.4 Customizing the Home Screen 23
3.5 Using the On-Screen Keyboard 26
3.6 Switching and Adding Kids 27
3.7 Using the Camera 28
3.8 Using Gallery 28
3.9 Playing Music 29
3.10 Preloaded Apps 30
3.11 Switching to Mommy/Daddy Mode 31
Basics for Mommy/Daddy Mode 32
4.1 About Mommy/Daddy Mode 32
4.2 Android 4.0 Basics 32
4.3 Switching Between Modes 35
4.4 Settings 35
4.5 Wi-Fi 36
4.6 Using the Camera 36
4.7 Using the On-Screen Keyboard 37
4.8 Managing nabi
™
Mode Apps 38
4.9 Using Apps 39

05
06
07
08
09
App Zone 43
5.1 About App Zone 43
5.2 Browsing and Searching 43
5.3 Purchasing and Downloading Apps 44
5.4 Updating Apps 45
5.5 Managing Credit Card Information 45
5.6 Writing Reviews 45
5.7 Managing nabi
™
Coins 45
Spinlets+ Music 47
6.1 About Spinlets+ Music 47
6.2 Creating and Managing Spinlets+ Music Account 47
6.3 Finding Music 48
6.4 Purchasing Music 48
6.5 Downloading Music 49
6.6 Listening to Music 50
6.7 Creating Playlists 50
6.8 Transferring Music 51
Spinlets+ TV 52
7.1 About Spinlets+ TV 52
7.2 Finding Videos 52
Fooz Kids on nabi 53
8.1 About Fooz Kids 53
8.2 Fooz Kids
™
University and N-SITE 53
8.3 Fooz Kids
™
Web, Videos and Crafts 54
8.4 Fooz Kids
™
Books 54
8.5 Switching Kid Accounts 54
8.6 Parental Dashboard 55
Chore List 57
9.1 About Chore List 57
9.2 Adding Chores 58
9.3 Editing Chores 58
9.4 Managing Chores 58
9.5 Viewing Chore List in nabi
™
Mode 59
9.6 Purchasing nabi
™
Coins 59

11
12
13
14
10
Treasure Box 60
10.1 About Treasure Box 60
10.2 Searching and Browsing 60
10.3 About nabi
™
Coins 61
10.4 Earning nabi
™
Coins 62
10.5 Redeeming nabi
™
Coins 62
nabi
™
Sync 63
11.1 About nabi
™
Sync 63
11.2 Setting up nabi
™
Sync 63
11.4 Compatible File Formats 69
11.5 Using My Library 69
11.6 Software Updates 70
nabi
™
Cloud 71
12.1 About nabi
™
Cloud 71
12.2 nabi
™
Cloud Settings 72
12.3 Adding and Deleting Folders 73
12.4 Uploading and Deleting Files 73
12.5 Using Folders on nabi 73
nabi
™
MD 75
13.1 About nabi
™
MD 75
13.2 Using nabi
™
MD 75
nabi
™
MD 76
14.1 Battery and Charging 76
14.2 Wi-Fi 76
14.3 Screen 77
14.4 Speaker and Microphone 78
14.5 Transferring Files 78
14.6 Storage 80
14.7 nabi
™
Account Management 80
14.8 Resetting nabi 80
14.9 Over the Air Software Updates 82
14.10 Extending Battery Life 82

15
16
17
Connecting to Devices 83
15.1 Connecting to TV 83
15.2 Connecting to Bluetooth Devices 83
Important Safety and Handling Information 84
Fuhu One (1) Year Limited Warranty 88

6
Section
0
1
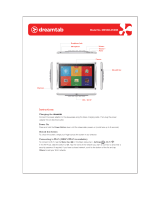
01 At a Glance
At a Glance
1.1 About nabi
nabi is the world’s fastest and most powerful seven-inch tablet, made just for kids. As parents ourselves,
we designed nabi and the Monarch OS using “Learn. Play. Grow ... for Life” as our guiding principle to
deliver rich, engaging experiences for your children. This user manual will walk you through all of the
features in detail, but feel free to email us at [email protected] if you have any questions.
1.2 What’s New on Monarch OS
nabi
™
Monarch OS has more than 150 new features. Its easy-to-use and intuitive user interface keeps
nabi
™
years ahead. Key Monarch highlights include:
“This is the coolest app ever! I want it, Mom!”
App Zone presents more than 500 mom-selected, kid-
approved apps and games categorized and filtered by age.
Apps include parental advisory guidance and ratings.
“Check out all my new songs!”
Music to their ears and yours – Spinlets+ Music is the most
comprehensive music solution for kids. It features more than
9,000 children’s albums and 19 million tracks from all genres,
as well as an integrated music player and the ability to sync
with your computer.

7
Section 01
At a Glance
“I can watch all my favorite TV shows?!”
Saturday morning shows are always on. Spinlets+ TV offers
unlimited instant streaming of more than 700 hours of Cookie
Jar shows like “Strawberry Shortcake,” “Paddington Bear,”
“The Busy World of Richard Scary,” “Horseland” and much more.
“I wanna be a Fooz Kid!”
nabi is designed especially for learning. Fooz Kids
™
University
provides state-standardized, core curriculum in English, Math,
Science and Social Studies for K to 5th grade. You can also
track your child’s development with N-SITE, which provides
a detailed understanding of skills mastered and areas in need
of improvement.
“Wow! I get coins for cleaning my room?! I’m gonna use them
to get that new app!”
Chore List encourages children to be more responsible and
make good choices. You can reward your kids for completing
their chores with nabi
™
Coins, which they can redeem for apps,
games, music and accessories in Treasure Box.
“Can you save my stuff, Mom?”
Your content on nabi … made easy. Back up and transfer your
nabi
™
apps, photos, music and videos from your computer to
the cloud and from the cloud to your nabi with nabi
™
Cloud
and nabi
™
Sync.

8
Section 01
At a Glance
1.3 Overview
Front View:
1. Charging Indicator: Displays the charging status.
2. Front-Facing Camera: Takes photos and records videos.
3. Touchscreen Display: Enables direct interaction with the tablet.
Back View:
1.Kinabi
™
Grid: Allows you to fully personalize your nabi using Kinabis.
2.Stereo Speakers: Play audio from songs and other media.

9
Section 01
At a Glance
Angle View (Ports and Buttons)
1. Power/Lock Button: Press down and hold the Power Button for three seconds to turn nabi on or
off. Short press the Power Button to put nabi to sleep or to wake it from sleep mode.
2. Volume Buttons: Press the Volume + Button to increase the sound level of apps, movies, songs and
other media; press the Volume – Button to decrease it.
3. Microphone: Use to speak or to record an audio message.
4. 5mm Headset Jack: Use to connect headphones or external speakers.
5. Mini HDMI Port: Plug in a Mini HDMI cable to view photos or videos on an HDTV.
6. Micro USB Port: Use to transfer files to or from a computer with a Micro USB cable.
7. MicroSD Card Slot: Insert a MicroSD card to expand memory or access external content.
8. Power Charger Port: Insert the USB charging cable plug to charge the battery.
1.4 Home Screen
The home screen is where you will find your apps and folders. nabi
™
Mode and Mommy/Daddy Mode
have different home screens and different options for management and customization. For more
information about nabi
™
Mode, please visit Section 3. For more information about Mommy/Daddy
Mode, please visit Section 4.

10
Section 01
At a Glance
nabi
™
Mode Home Screen
1. All Apps Icon: Tap to view all of your applications and widgets on the All Apps screen.
2. Screen Panel Indicator: nabi
™
Mode comes with nine screen panels; this indicator displays the
position of the current screen within the nine panels.
3. Status Bar: Displays Status Icons that show battery power, time and Wi-Fi. For more information on
Status Icons, please visit Section 1.7.
4. Back Key: Tap to return to the previous screen.
5. Home Key: Tap to return to the home screen.
6. Menu Key: Tap to display the menu for the current screen. Tap to go to Mommy/Daddy Mode.
Mommy/ Daddy Mode Home Screen

11
Section 01
At a Glance
1. All Apps Icon: Tap to view all of your applications and widgets on the All Apps screen.
2. Shortcuts: App icons that open your favorite or frequently used applications; shortcuts can be
placed on the home screen for quick access.
3. Status Bar: Displays app notifications and Status Icons that show battery power, time and Wi-Fi. For
more information on Status Icons, please visit Section 1.7.
4. Back Key: Tap to return to the previous screen.
5. Home Key: Tap to return to the home screen.
6. Recents Key: Tap to view a list of recently used apps on the Recents screen.
Orientation:
nabi can be viewed in either portrait or landscape orientation. For most screens, you can automatically
change the screen orientation by rotating your nabi. Some applications and screens are limited to either
portrait or landscape orientation.
You can also disable auto-rotation:
In nabi
™
Mode: Ta p Menu Key > Settings > Auto-Rotating, then tap and slide the switch to Off.
In Mommy/Daddy Mode: Tap All Apps Icon > Settings Icon > Display > Auto-rotate
screen and deselect this option.

12
Section 01
At a Glance
1.5 Touch and Navigation
Tap:
When you need to select an item on the screen, simply touch the item once with your finger.
Tap and Hold:
To select icons you want to move on the screen, tap and hold down.
Drag and Drop:
Move an item across the screen by tapping and holding the icon, then drag it to any open spot.
Release your finger to drop the item in its final position.

13
Section 01
At a Glance
Swipe:
To move vertically or horizontally across the screen, simply swipe your fingers left and right or up and
down on the screen.
Zoom In and Out:
Using two fingers, pinch the screen together to zoom in or apart to zoom out. When viewing photos or
a web page, double-tap the screen to zoom in; double-tap it again to zoom out.
1.6 Sleep Mode
Sleep Mode helps save battery power when nabi is not being used. To manually put nabi into Sleep
Mode, short press the Power Button to turn the screen off. To wake nabi from Sleep Mode, short press
the Power Button and unlock the screen. nabi will automatically go into Sleep Mode when it has not
been in use for a while.
You can adjust the Sleep Mode settings in Mommy/Daddy Mode by tapping All Apps Icon >
Settings Icon > Display > Sleep.

14
Section 01
At a Glance
Using the Lock Screen
To unlock the screen, tap and hold anywhere on the screen. Drag your finger in any direction, as shown
by the Open Lock Icon .
You can also access the Camera app from the lock screen. To open the Camera app from the Lock
screen, tap the Camera Icon located on the bottom left corner of the screen.
1.7 Status Icons
The Status Bar on the bottom of your screen displays app notifications and Status Icons that show
battery power, time, Wi-Fi and more.
Status Icons
Battery is charging
Battery is full
Battery is low
Battery is partially drained
Battery is very low
Bluetooth file sharing
Bluetooth is on
Connected to a Wi-Fi network

15
Section 01
At a Glance
Notification Icons (Only in Mommy/ Daddy Mode)
Downloading data/ Download complete
Music is playing
Software update available
Tablet is connected via USB cable
Uploading data
Spinlets+ Music is playing
Spinlets+ song is downloading
Please note: Notification icons only display in Mommy/Daddy Mode. If you are not sure what a
notification icon means, tap the icon for a tip.

16
Section
0
2
02 Getting Started
Getting Started
2.1 What’s in the Box
The following items are included with nabi:
nabi
™
Tablet with Red Bumper Micro USB Cable USB Power Adapter
USB Charging Cable Quick Start Guide
2.2 Charging nabi
Battery
nabi uses a rechargeable Lithium-Polymer battery. The battery will be partially charged when you open
your nabi. However, we recommend fully charging your nabi for four hours after taking it out of the box.
Charging the Battery
There are two ways to charge nabi: You can connect nabi to an electrical outlet or you can charge nabi
by connecting it to your computer.

17
Section 02
Getting Started
Connect to an electrical outlet: Plug the tip of the USB charging cable into the nabi power charger
port and plug the other end into the USB Power Adapter. Then plug the USB Power Adapter into an
electrical outlet.
Connect to a computer: Plug the tip of the USB charging cable into the power charger port on nabi,
and plug the other end into the USB port on your computer.
Please note: Only the USB charging cable will charge nabi when connected to a computer. A Micro
USB cable will not charge nabi. Only use the Micro USB cable for transferring files onto nabi.
Important: When charging nabi via a computer, it may take longer to charge. The computer may not
provide enough power to charge nabi. If this is the case, switch to the wall charger and connect nabi
to an electrical outlet.
If the battery is completely depleted, nabi may display the battery-charging screen indicating that nabi
needs to charge for 15 minutes before you can use it. Leave nabi plugged in so it can charge while
you use it.

18
Section 02
Getting Started
Charging Light Indicator
When the battery is charging, the charging indicator will display an orange light. Once it’s fully charged,
the light will turn green.
Extending Battery Life
To extend the battery life of your nabi, fully charge the battery for four hours prior to using nabi for the
first time. Charge for up to four hours whenever the battery is depleted.
!
Caution: Only use a nabi
™
USB Power Adapter and USB charging cable to charge your device. Using a
different charger may damage your nabi.
Please note: Only a Fuhu Authorized Service Provider should replace the battery. Any attempt to
remove or replace your battery, other than through an Authorized Service Provider, may damage your
nabi and will void your warranty.
2.3 nabi
™
Setup
When you power on nabi for the first time, you will see the nabi
™
Welcome screen. Before you set up
your nabi, you can watch a video that will briefly walk you through some of the newest nabi
™
features.

19
Section 02
Getting Started
To set up nabi, simply follow these step-by-step instructions:
Step 1: Terms and Conditions
Please read the Terms and Conditions carefully before you start using your nabi. Once you are done,
tap Agree to continue.
Step 2: Wi-Fi Setup
nabi will automatically detect nearby Wi-Fi networks. Tap to select your preferred network and enter a
Wi-Fi security password if required. If you have a closed network, simply tap Add a Network to add
your Wi-Fi network. Once nabi has connected to your network, you will see “Connected to Internet”
underneath your network’s name. Tap Continue to proceed to Step 3: Sign Up/Sign In.

20
Section 02
Getting Started
Please note: Although Wi-Fi is not mandatory for the initial setup, it is strongly recommended so you can
enjoy the full nabi
™
experience right away. To learn more about Wi-Fi settings, please visit Section 4.5.
Step 3: Sign Up/Sign In
You are required to create a nabi
™
ID before you can use nabi for the first time. With a nabi
™
ID, you
will be able to control the apps and games available for your child to use, register for nabi cares online
support, shop for apps and games with one-tap buy and much more.
Simply follow the on-screen instructions to create your nabi
™
ID. Check the box next to Mom to display
Mommy Mode on nabi; check the box next to Dad to display Daddy Mode.
You may already have a nabi
™
ID created if you are a Fooz Kids
™
user or if you own more than one nabi.
If this is the case, you will be required to Sign In. To Sign In, simply tap the Sign In link on the lower left
corner of the Sign Up window.
/