Page is loading ...

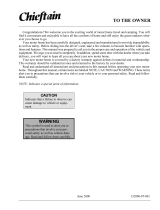
SECURELY BEFORE REMOVING TIRES OR CRAWLING UNDER VEHICLE.
UNDERSTAND OPERATOR’S MANUAL BEFORE USING. BLOCK FRAME AND TIRES
CAUTION!
OFF
NOT IN
HWH HYDRAULIC LEVELING
ON
DUMPSTORE

OPERATOR’S MANUAL
MP15.0
30MAY01
CAUTION !
READ THE ENTIRE OPERATOR’S MANUAL BEFORE OPERATING.
BLOCK FRAME AND TIRES SECURELY BEFORE CRAWLING UNDER VEHICLE. DO NOT USE LEVELING JACKS
OR AIR SUSPENSION TO SUPPORT VEHICLE WHILE UNDER VEHICLE OR CHANGING TIRES. VEHICLE MAY
DROP AND OR MOVE FORWARD OR BACKWARD WITHOUT WARNING CAUSING INJURY OR DEATH.
KEEP ALL PEOPLE CLEAR OF THE VEHICLE WHILE LEVELING SYSTEM AND ROOM EXTENSIONS ARE
BEING OPERATED.
KICK-DOWN JACKS MAY ABRUPTLY SWING UP WHEN THE FOOT OF THE JACK CLEARS THE GROUND
OR WHEN THE JACK REACHES FULL EXTENSION.
NEVER PLACE HANDS OR OTHER PARTS OF THE BODY NEAR HYDRAULIC LEAKS. OIL MAY PENETRATE
THE SKIN CAUSING INJURY OR DEATH.
WEAR SAFETY GLASSES WHEN INSPECTING OR SERVICING THE SYSTEM TO PROTECT EYES FROM DIRT,
METAL CHIPS, OIL LEAKS, ETC. FOLLOW ALL OTHER APPLICABLE SHOP SAFETY PRACTICES.
IF THE VEHICLE IS EQUIPPED WITH KICK-DOWN STYLE JACKS, DO NOT OVER EXTEND THE REAR JACKS.
IF THE WEIGHT OF THE VEHICLE IS REMOVED FROM ONE OR BOTH REAR WHEELS, THE VEHICLE MAY
ROLL FORWARD OR BACKWARD OFF OF THE JACKS.
NOTE: KEEP THE CONTROL VALVE LEVERS IN THE STORE POSITION WHEN JACKS ARE NOT IN USE.
IMPORTANT: IF VEHICLE IS EQUIPPED WITH A ROOM EXTENSION, READ ROOM EXTENSION SECTION
BEFORE OPERATING LEVELING SYSTEM.
HOW TO OBTAIN WARRANTY SERVICE
THIS IS NOT TO BE INTERPRETED AS A STATEMENT OF WARRANTY
HWH CORPORATION strives to maintain the highest level of
customer satisfaction. Therefore, if you discover a defect or
problem, please do the following:
(563) 724-3396 OR (800) 321-3494. Give your name and
coach was purchased, or the date of system installation,
Notify the dealership where you purchased the
vehicle or had the leveling system installed. Dealership
management people are in the best position to resolve
the problem quickly. If the dealer has difficulty solving
the problem, he should immediately contact the Customer
Service Department, at HWH CORPORATION.
If your dealer cannot or will not solve the problem,
notify the Customer Service Department:
HWH CORPORATION 2096 Moscow Rd. Moscow IA. 52760
address, coach manufacturer and model year, date the
SECOND:
FIRST:
authorization of an independent service facility, to be
defective part, either by appointment at the factory or by the
CORPORATION will authorize repair or replacement of the
determine whether or not your claim is valid. If it is, HWH
HWH CORPORATION personnel will contact you to
during business hours (8:00 a.m. till 5:00 p.m. c.s.t.).
description of the problem, and where you can be reached
determined by HWH CORPORATION. All warranty repairs
must be performed by an independent service facility
authorized by HWH CORPORATION, or at the
HWH CORPORATION factory, unless prior written approval
has been obtained from proper HWH CORPORATION
personnel.

SECURELY BEFORE REMOVING TIRES OR CRAWLING UNDER VEHICLE.
UNDERSTAND OPERATOR’S MANUAL BEFORE USING. BLOCK FRAME AND TIRES
CAUTION!
HWH HYDRAULIC LEVELING
CONTROL IDENTIFICATION
CONTROL FUNCTIONS
BUTTON
Operated Air Dump.)
suspension to the TRAVEL mode when pushed. (See Pilot
"TRAVEL" BUTTON:
will retract their respective jack pairs to lower the vehicle.
relay on the pump, the LEVELING lights and the 4 red
system. It provides control power to operate the electrical
RETRACT BUTTONS (DOWN ARROWS) :
EXTEND BUTTONS (UP ARROWS) :
"STORE" BUTTON :
extend their respective jack pairs to lift the vehicle.
CONTROL BUTTONS
"OFF" BUTTON :
the same time.
leveling system.
WARNING lights.
"ON" BUTTON :
This button will return the vehicle
These buttons
This button will retract all four jacks at
This button turns off control power to the
This is the "ON" button for the leveling
These buttons will
"TRAVEL" BUTTON
"OFF" BUTTON
"STORE" BUTTON
"ON" BUTTON
POWER ON LIGHT
"NOT IN PARK/BRAKE" LIGHT
LEFT SIDE EXTEND
STORE
OFF
ON
BRAKE
PARK/
NOT IN
LEFT SIDE RETRACT
be on when one or more jacks are extended approximately
This indicator light is on
A buzzer will sound if a jack is
This light will be on when the system is in
with a dash mounted master "JACKS DOWN" light which will
position and the system is on. Some vehicles are equipped
1 to 2 inches, provided the ignition is in the "ACC" or "ON"
ever the corresponding jack is extended approximately
A red WARNING light will be on when-
one yellow LEVELING light can be on at a time. The vehicle
extended 1 to 2 inches or more and the ignition switch is in
the appropriate jack pairs to put out the yellow light. Only
indicates a side, corner, or end of the vehicle is low. Extend
If a yellow LEVELING light is on, that
This light indicates the system is on.
when the panel is on, but the hand/auto park brake is not set.
INDICATOR LIGHTS
1 to 2 inches, if the ignition is in the "ON" position.
WARNING BUZZER:
WARNING LIGHTS:
is level when all yellow lights are out.
LEVELING LIGHTS:
"NOT IN PARK/BRAKE" LIGHT:
POWER ON LIGHT:
STORE LIGHT:
the store mode.
BUTTON
MP25.3220
09AUG01
REAR RETRACT BUTTON
REAR EXTEND BUTTON
LEVELING LIGHTS
RIGHT SIDE RETRACT
RIGHT SIDE EXTEND
WARNING LIGHTS
FRONT EXTEND BUTTON
FRONT RETRACT
(4-Yellow)
(4-Red)
BUTTON
BUTTON
BUTTON
the "ON" position.
DUMP
"DUMP" BUTTON
"DUMP" BUTTON:This button will dump air from the
suspension when pushed. (See Pilot Operated Air Dump.)
STORE INDICATOR LIGHT: This light will be on when the
system is in the store mode.
STORE LIGHT

OPERATING PROCEDURES
SITE SELECTION
soft ground or asphalt paving, wood blocks or pads should
be placed under the jacks.
Maintain adequate clearance in all directions for vehicle, room
extensions, awnings, doors, steps, etc. Vehicle may move in
any direction due to jack extending or retracting, settling of
jacks or vehicle, equipment malfunction, etc. If parking on
PREPARATION FOR TRAVEL
off. If a jacks down warning indicator is on, retract jacks as
Before traveling, the jacks down warning indicators must be
described in the JACK RETRACTION Section.
All room extensions must be fully retracted before moving the
vehicle.
If the jacks are retracted but a warning indicator is on, the
system needs to be serviced.
CAUTION: DO NOT MOVE THE VEHICLE WHILE
THE LEVELING JACKS ARE STILL IN CONTACT WITH
THE GROUND OR IN THE EXTEND POSITION.
THIS VEHICLE IS EQUIPPED WITH STRAIGHT-ACTING
JACKS. MOVING THE VEHICLE WITH THE LEVELING
THE JACKS AND OR THE VEHICLE AND CREATE A
DRIVING HAZARD. DO NOT RELY SOLELY UPON
WARNING LIGHTS. IT IS THE OPERATOR’S
RESPONSIBILITY TO VISUALLY CHECK THAT ALL JACKS
ARE FULLY RETRACTED INTO THE STORE/TRAVEL
POSITION AND THE VEHICLE’S SUSPENSION HAS
RETURNED TO THE PROPER RIDE HEIGHT FOR TRAVEL.
DO NOT MOVE THE VEHICLE IF ANY ROOM EXTENSION
IS EXTENDED. ROOMS MUST BE FULLY RETRACTED
BEFORE MOVING THE VEHICLE. SEE THE MANUAL
ROOM RETRACT PROCEDURE IF THE ROOM CANNOT
BE RETRACTED WITH THE ROOM EXTENSION
If the jacks cannot be retracted according to the JACK
RETRACTION Section, retract the jacks according to the
MANUAL JACK RETRACTION Section. The system should
LEVELING PROCEDURE
IMPORTANT: Do not operate the room extension without
first leveling and stabilizing the vehicle.
NOTE: The leveling system will not function while a room is
being operated.
1. Place gear selector in the parking position, apply park
brake and block tires securely.
NOTE: If the hand/auto park brake is not set, the
"NOT IN PARK/BRAKE" light will come on when the "ON"
button is pushed. The panel will turn on, but the system will
2. Turn ignition switch to "ACCESSORY".
3. Push the "ON" button on the touch panel. The POWER
ON light will be lit. Push the "DUMP" button. The air will
5. A lit yellow LEVEL light indicates that end, side or corner
is low. Push an EXTEND (up arrow) button to extend jack
pairs according to a lit yellow light. ALWAYS LEVEL THE
VEHICLE FROM SIDE TO SIDE BEFORE LEVELING THE
VEHICLE FRONT TO REAR. Only one yellow LEVEL light
can be on at one time. Extend jack pairs accordingly until all
yellow lights are out. If the ground is too uneven, the jacks
may not have enough stroke to level the vehicle. The vehicle
6. After the vehicle is level, the jacks not used for leveling
may be extended until they touch the ground and slightly lift
the vehicle. This provides additional stability against wind
and activity in the vehicle. Do this by pushing the front
and/or rear EXTEND buttons as needed to extend any
remaining jacks. Do not use the right or left EXTEND buttons.
7. Push the "OFF" button on the touch panel.
8. Turn the ignition switch off.
NOTE: The leveling system should be cycled once a month
or whenever the vehicle is used, to keep the system in
operating condition.
09AUG01
MP35.100C
exhaust from the suspension air bags. Wait until the air is
completely exhausted before continuing. Place a pad under
JACKS EXTENDED CAN CAUSE SEVERE DAMAGE TO
OPERATOR’S PANEL.
then be checked.
not operate.
each jack, if necessary at this time.
may have to be moved.

OPERATING PROCEDURES
PILOT OPERATED AIR DUMP
09AUG01
MP35.105C
The vehicle ignition switch must be in the "ON" or "ACC"
DUMP
position and the park brake must be set.
To dump air from the suspension, set the park brake, turn the
ignition to "ON" or "ACC". Push the "ON" button on the
The suspension will stay in the dump mode until the park
brake is released or the "TRAVEL" button is pushed, if the
ignition is in the "ON" or "ACC" position.
CAUTION:
TRAVEL
To return the vehicle to travel the ignition key must be in the
"ON" or "ACC" position. The suspension will return to the
travel mode if the "TRAVEL" button is pushed. The leveling
system panel does not have to be on. If the ignition is in
"ON" or "ACC" the suspension will also return to the travel
mode if the park brake is released.
CAUTION: IT IS THE OPERATOR’S
RESPONSIBILITY TO CHECK THAT THE VEHICLE IS AT
THE PROPER RIDE HEIGHT FOR TRAVELING BEFORE
MOVING THE VEHICLE. THE VEHICLE MAY ROLL
FORWARD OR BACKWARD WHEN THE PARK BRAKE IS
THE VEHICLE WILL DROP QUICKLY
WHEN THE "DUMP" BUTTON IS PUSHED. MAKE SURE
PEOPLE AND OBJECTS ARE CLEAR OF THE VEHICLE
leveling system panel. Push the "DUMP" button. Air will
exhaust from the suspension airbags.
BEFORE PUSHING THE "DUMP" BUTTON.
RELEASED.

OPERATING PROCEDURES
CAUTION:
RETRACT PROCEDURES
THE OPERATOR MUST BE SURE THAT
THERE ARE NO OBJECTS UNDER THE VEHICLE AND THAT
ALL PEOPLE ARE CLEAR OF THE VEHICLE.
4. The system will automatically shut down approximately two
minutes after the four individual red WARNING lights are out.
out, even though the jack is fully retracted, the system
will continue to store. Push the "OFF" button and have
procedure see MANUAL JACK RETRACTION Section.
CAUTION:
MANUAL JACK RETRACTION
KEEP AWAY FROM THE WHEELS, DO
NOT CRAWL UNDER THE VEHICLE, KEEP A SAFE DISTANCE
IN FRONT AND REAR OF VEHICLE. THE VEHICLE MAY
DROP AND/OR MOVE FORWARD OR BACKWARD WITH-
OUT WARNING AS THE VALVE RELEASE IS OPERATED.
Use the valve release "T" handles for retracting only
if the "STORE" button on the control panel will not retract the
jacks for travel.
1. Locate the 4 valve release "T" handles on the solenoid valves.
The solenoid valves are located on the pump/valve assembly.
2. Allow clearance for vehicle to lower.
3. Retract the front jacks by opening the two center valves.
Slowly turn the "T" handles counter clockwise. The handles
may turn easily at first but as an internal spring is
compressed, turning may become more difficult. The valves
need only to be opened enough to retract the jack.
4. Retract the rear jacks by opening the two outer valves as
described in Step 3.
5. Check that all four jacks are now retracted.
6. Close the valves by turning the release handles clockwise.
Once the internal spring tension has been released, the handles
will turn free for several turns. Once the "T" handles are snug,
DO NOT tighten the handles past this point as internal damage
may occur to the solenoid.
7. The system should now be repaired before using again.
2. Press the "STORE" button. As each jack retracts, its red
NOTE: If jacks cannot be retracted by the above
5. Turn the ignition switch to the "OFF" position or proceed to travel.
IMPORTANT: If any one red WARNING light does not go
CAUTION:
IMPORTANT: DO NOT interrupt power to the leveling
IMPORTANT: Do not retract the leveling system until all
rooms are fully retracted.
NOTE:
1. Turn the ignition switch "ON" or start the engine and press
the "ON" button one time. The ON indicator light will glow steady.
WARNING light will go out.
3. Press the "TRAVEL" button. The vehicle will return to ride
height. The vehicle can be moved as soon as the red WARN-
ING lights are out, provided the jacks are in the "STORE/TRA-
VEL" position (See FIGURE 1) and the vehicle has returned to
the proper ride height for traveling.
NOTE: If a room is operated after pushing the "STORE"
button, this will interrupt the store mode. The STORE
process will stop until the room control switch is
released. The STORE process will continue after the
system while it is in the STORE mode. DO NOT push the
"OFF" button or turn the ignition key. The system must
be allowed to completely finish the STORE mode. If the
engine was started before putting the system in the
STORE mode, the vehicle may be moved when the jacks
are in the "STORE" position. This will interrupt the store
DO NOT MOVE THE VEHICLE WHILE THE
LEVELING JACKS ARE STILL IN CONTACT WITH THE GROUND
OR IN THE EXTEND POSITION. THIS VEHICLE IS EQUIPPED WITH
STRAIGHT-ACTING JACKS. MOVING THE VEHICLE WITH THE LEV-
ELING JACKS EXTENDED CAN CAUSE SEVERE DAMAGE TO THE JACKS
06JUL05
MP35.325F
AND OR THE VEHICLE AND CREATE A DRIVING HAZARD.
DO NOT RELY SOLELY UPON WARNING LIGHTS. IT IS THE
OPERATOR’S RESPONSIBILITY TO CHECK THAT ALL JACKS
ARE FULLY RETRACTED INTO THE STORE/TRAVEL POSITION
AND THE VEHICLE HAS RETURNED TO THE PROPER RIDE
HEIGHT FOR TRAVELING.
the system serviced.
procedure.
to the ground then retract the jacks again.
extended for an extended period of time and the jacks
NOTE: If the vehicle is parked or stored with the jacks
fail to retract completely, extend the jacks back down
switch is released.

5 AMP
10 AMP
10 AMP
10 AMP
5 AMP
#10 GROUND
WIRE - 6230
RIGHT REAR
#10 POWER WIRE -
ACC.
RIGHT FRONT FUSE
RIGHT REAR FUSE PUMP FUSE
PUMP - 8600
LEFT REAR FUSE
PART NUMBER AND
10 AMP
LEFT FRONT FUSE
TOUCH PANEL
CABLE INPUT
15 PIN
TOUCH PANEL CABLE
SLIDE OUT
SWITCH
FUSE
AND SERIAL NUMBER
PARK BRAKE - 9000
LEFT REAR
SOLENOID VALVE -
LEFT FRONT
SOLENOID VALVE -
RIGHT FRONT
SOLENOID VALVE -
6-PARK BRAKE
7-GROUND
8-DUMP
9-STORE
10-PUMP
11-LEFT FRONT
12-LEFT REAR
13-RIGHT REAR
14-BLANK
15-RIGHT FRONT
5-STORE RETURN
4-FUSED ACCESSORY
(TO TOUCH PANEL)
3-SWITCHED ACCESSORY
(FROM TOUCH PANEL)
2-FUSED ACCESSORY
(FROM TOUCH PANEL)
SOLENOID VALVE -
PRESSURE SWITCH -
8100
FROM +12 ACC. -
6120
JACK DOWN
WARNING SENSOR
3400
JACK INTERRUPT - 8601
CONNECTION
LABEL
(USE P19643) TRAVEL
25NOV02
MP85.300F
TRAVEL - 9301
DUMP - 9300
4400 2400
1400
6100
ELECTRICAL CONNECTION DIAGRAM
CONTROL BOX
310 SERIES LEVELING SYSTEM
(WITH PILOT AIR)
DUMP FUSE
5 AMP
5 AMP
TRAVEL FUSE

SECURELY BEFORE REMOVING TIRES OR CRAWLING UNDER VEHICLE.
UNDERSTAND OPERATOR’S MANUAL BEFORE USING. BLOCK FRAME AND TIRES
CAUTION!
HWH HYDRAULIC LEVELING
TOUCH PANEL
AWAY FROM THE PANEL WHEN PLUGGED IN.
ALL WIRE CONNECTIONS WILL POINT
CONNECTION DIAGRAM
310 SERIES LEVELING SYSTEM WITH PILOT AIR DUMP
(TO CONTROL BOX)
MASTER
WARNING
INDICATOR
PIGTAIL
8-CONTROL - 7699
6-BLANK
7-BLANK
9-BLANK
NOTE:
2-FUSED ACCESSORY
(TO CONTROL BOX)
3-SWITCHED ACCESSORY
4-FUSED ACCESSORY
5-STORE RETURN
6-PARK BRAKE
8 - DUMP
7-GROUND
STORE
OFF
ON
PARK/
BRAKE
NOT IN
CABLE CONNECTIONS
WARNING
WHITE-COMMON-5
YELLOW-LEFT SIDE-4
GREEN-RIGHT SIDE-2
INPUTS
4-LEFT FRONT - 1000
5-COMMON - 6235
1-LEFT REAR - 4000
2-RIGHT REAR - 3000
3-RIGHT FRONT - 2000 SWITCH
TRAVEL
TOUCH PANEL
BLACK-FRONT-3
RED-REAR-1
MP85.400F
09AUG01
INPUTS
UNIT
LEVEL
SENSING
LEFT FRONT - 11
RIGHT FRONT-15
LEFT REAR - 12
PUMP - 10
STORE - 9
KEY N.C.-14
RIGHT REAR-13
1-JACK DOWN
WARNING
SENSOR
DUMP
/