RQTV0215
3
3
ENGLISH
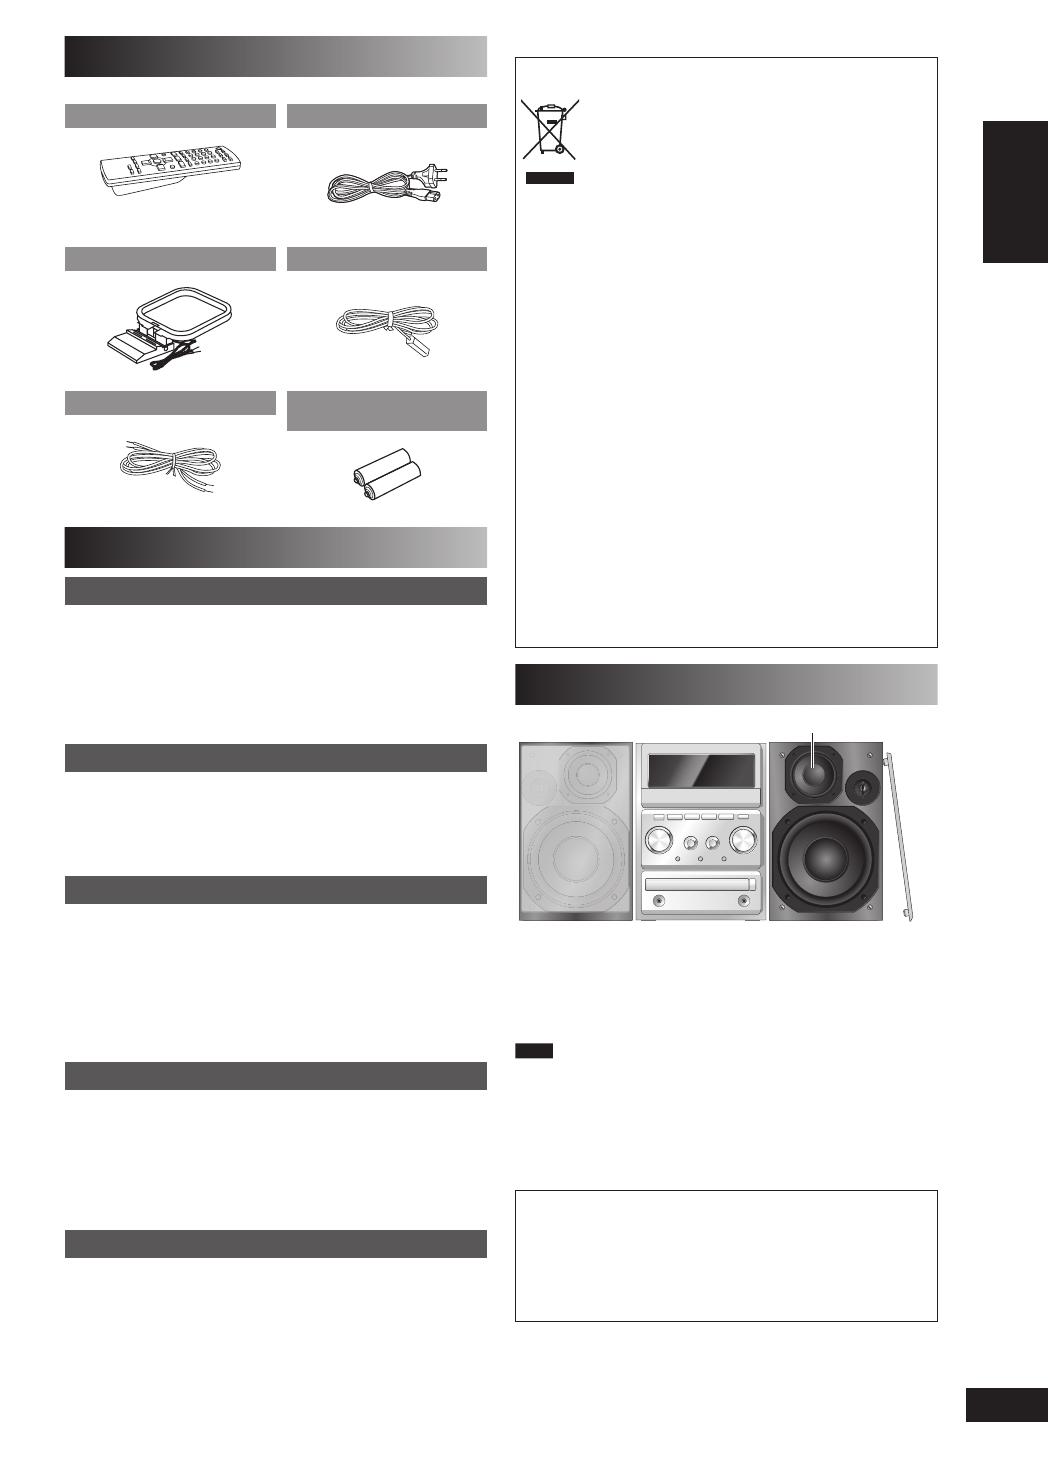
Placement of speakers
Tweeter
Place the speakers so that the tweeter is on the inside.
Use only the supplied speakers.
The combination of the main unit and speakers provide the
best sound. Using other speakers can damage the unit and
sound quality will be negatively affected.
Note
• Keep your speakers at least 10 mm away from the system for
proper ventilation.
• These speakers do not have magnetic shielding. Do not place
them near televisions, personal computers or other devices easily
infl uenced by magnetism.
• To avoid damage to the speakers, do not touch the speaker cones
if you have taken the nets off.
Caution
• Use the speakers only with the recommended
system. Failure to do so can damage the amplifi er
and speakers, and can cause fi re. Consult a qualifi ed
service person if damage occurs or if a sudden
change in performance is apparent.
• Do not attach these speakers to walls or ceilings.
– If you see this symbol –
Information on Disposal for Users of Waste Electrical &
Electronic Equipment (private households)
This symbol on the products and/or
accompanying documents means that used
electrical and electronic products should not be
mixed with general household waste.
For proper treatment, recovery and recycling, please take
these products to designated collection points, where they
will be accepted on a free of charge basis. Alternatively, in
some countries you may be able to return your products
to your local retailer upon the purchase of an equivalent
new product.
Disposing of this product correctly will help to save valuable
resources and prevent any potential negative effects on
human health and the environment which could otherwise
arise from inappropriate waste handling. Please contact
your local authority for further details of your nearest
designated collection point.
Penalties may be applicable for incorrect disposal of this
waste, in accordance with national legislation.
For business users in the European Union
If you wish to discard electrical and electronic equipment,
please contact your dealer or supplier for further
information.
Information on Disposal in other Countries outside the
European Union
This symbol is only valid in the European Union.
If you wish to discard this product, please contact your
local authorities or dealer and ask for the correct method
of disposal.
Supplied accessories
Please check and identify the supplied accessories.
1 x Remote control
(N2QAYB000082)
1 x AC mains lead
1 x AM loop antenna 1 x FM indoor antenna
2 x Speaker cables 2 x Remote control
batteries
Safety precautions
Placement
Set the unit up on an even surface away from direct
sunlight, high temperatures, high humidity, and excessive
vibration. These conditions can damage the cabinet and
other components, thereby shortening the unit’s service life.
Place it at least 15 cm away from wall surfaces to avoid
distortion and unwanted acoustical effects.
Do not place heavy items on the unit.
Voltage
Do not use high voltage power sources. This can overload
the unit and cause a fi re.
Do not use a DC power source. Check the source carefully
when setting the unit up on a ship or other place where DC
is used.
AC mains lead protection
Ensure the AC mains lead is connected correctly and not
damaged. Poor connection and lead damage can cause fi re
or electric shock. Do not pull, bend, or place heavy items on
the lead.
Grasp the plug fi rmly when unplugging the lead. Pulling the
AC mains lead can cause electric shock.
Do not handle the plug with wet hands. This can cause
electric shock.
Foreign matter
Do not let metal objects fall inside the unit. This can cause
electric shock or malfunction.
Do not let liquids get into the unit. This can cause electric
shock or malfunction. If this occurs, immediately disconnect
the unit from the power supply and contact your dealer.
Do not spray insecticides onto or into the unit. They contain
fl ammable gases which can ignite if sprayed into the unit.
Service
Do not attempt to repair this unit by yourself. If sound is
interrupted, indicators fail to light, smoke appears, or any
other problem that is not covered in these instructions occurs,
disconnect the AC mains lead and contact your dealer or
an authorized service center. Electric shock or damage to
the unit can occur if the unit is repaired, disassembled or
reconstructed by unqualifi ed persons.
Extend operating life by disconnecting the unit from the
power source if it is not to be used for a long time.
PMX2_E_EN.indd 3PMX2_E_EN.indd 3 3/7/07 2:56:03 PM3/7/07 2:56:03 PM