Page is loading ...

USER MANUAL
MW803 • MW804
Pocket-size
pH/EC/TDS/Temperature
Meters
SPECIFICATIONS
Range
0.00 to 14.00 pH
0to3999μS/cm(MW803)
0to2000ppm(MW803)
0.00to20.00mS/cm(MW804)
0.00to10.00ppt(MW804)
0.0to50.0°C/32.0to122.0°F
Resolution
0.01 pH
1μS/cm/1ppm(MW803)
0.01mS/cm/0.01ppt(MW804)
0.1°C/0.1°F
Accuracy (@25°C)
0.05 pH
2%FS(EC/TDS)
0.5°C/±1°F
TDS Factor
0.45to1.00(CONV)
Temperature Compensation
Automatic,withß=0.0to2.4%/°C
Calibration
Automatic,1pointforECand1or
2pointsforpH
Probe Replaceable MI60P
Environment
0to50°C;100%RHmax.
Battery Type
4x1.5V;IECLR44,A76
Battery Life
Approx.100hoursofuse
Auto-off
After8min.ofnon-use
Dimensions / Weight
200xdia38mm/100g
Makesurethegasketisinplacebeforescre-
wing back the cap. Batteries should only be
replacedinasafeareausingthebatterytype
speciedinthisinstructionmanual.
ACCESSORIES
MI60P Replaceableprobefor
MW803&MW804
M10030B12.88mS/cmcalibration
solution,20mlsachet,25pcs
M10031B1413μS/cmcalibrationsolution,
20mlsachet,25pcs
M10032B1382ppmTDSCalibrationSolution,
20mlsachet,25pcs.
M10038B6.44pptTDSCalibration,
20mlsachet,25pcs.
MA906012.88mS/cmcalibrationsolution,
230mlbottle
MA9061 1413μS/cmcalibrationsolution,
230mlbottle
MA9062 1382ppmTDSCalibration
Solution,230mLbottle
M10016BCleaningsolution,20mlsachet,
25pcs
M10000BRinsesolution,20mlsachet,
25pcs
M10004BpH4.01buffer,20mlsachet,
25pcs.
M10007BpH7.01buffer,20mlsachet,
25pcs.
M10010BpH10.01buffer,20mlsachet,
25pcs.
MA9004pH4.01buffer,230mlbottle
MA9007pH7.01buffer,230mlbottle
MA9010pH10.01buffer,230mlbottle
MA9006 pH6.86buffer,230mlbottle
MA9009 pH9.18buffer,230mlbottle
MA9015Electrodestoragesolution,230ml
• ThesecondaryLCDdisplays“ESC”for1se-
condandthenthemeterreturnstothenormal
measurementmode.
• To reset to the default values and clear a
previous calibration, press the SET/HOLD
button after entering the calibration mode
andbeforetherstpointisaccepted.
• The secondary LCD displays “CLR” for 1
second,themeterresetstothedefaultcalib-
rationandtheCALtagontheLCDturnsoff.
• If avalid buffervalueis detected,the REC
messageisdisplayedandthemetercomp-
letesthecalibrationprocedure.
• TheLCDshowstheacceptedvaluewiththe
“OK2”messageandtheinstrumentreturns
to the normal measurement mode. Other-
wise,ifnovalidbufferisdetected,themeter
displaystheWRNGmessage.
PROBE REPLACEMENT
• Removetheprotectivecapandunscrewthe
plasticringonthetopoftheprobe.
• PullouttheMI60Pprobeandreplaceitwith
anewone.
• Make sure the gaskets are in place before
screwingbackthering.
BATTERY REPLACEMENT
Whenthebatteriesbecomeweak,thebattery
symbolontheLCDwilllightuptoadvisethat
onlyafewhoursofworkingtimeisremaining.
ThemeterisalsoprovidedwithBEPS(Battery
Error Prevention System), which avoids any
erroneous readings due to low battery level
byautomaticallyswitchingthe meter off.It is
recommendedtoreplacethebatteriesimme-
diately.
To replace the batteries unscrew the battery
compartmentcapandreplaceallfour1.5Vbat-
terieswhilepayingattentiontotheirpolarity.

OPERATIONAL GUIDE
• Removetheprobecapandturnthemeteron
bypressingtheON/OFF/CALbutton.Allthe
usedsegmentsontheLCDwillbevisiblefor
1secondoraslongasthebuttonispressed.
• Immersetheprobeinthesolutiontobetes-
tedand select either pH, ECorTDS mode
withSET/HOLDbutton.
• Stirgentlyandwaitforthereadingtostabilize,
i.e.thestabilityindicatorontheLCDturnsoff.
The pH and EC (or TDS) values are auto
-
maticallycompensatedfortemperatureand
will be displayed on the main LCD, while
thetemperatureisshownonthesecondary
LCD.
• To freeze the display,whileinmeasurement
mode, press and hold the SET/HOLD but
-
ton. The “HOLD” message appears on the
secondary display and the reading will be
frozenontheLCD.
• Press any button to return to normal
mode.
• To turn the meter off,presstheON/OFF/CAL
button. The “OFF” message will appear on
thesecondarydisplay.Releasethebutton.
Notes:
• Before taking any measurement, make sure
themeteriscalibrated(theCALtagison).
• After use alwaysturn the meter OFF, rinse
theprobewithwaterandstoreitwiththepro-
tectivecap.
Measuring unit
on main LCD
Main LCD
Temperature reading
Secondary LCD
Low battery indicator
Automatic temperature
compensation
Calibration indicator
Stability indicator
SETUP
Setup mode allows the selection of tempera-
ture (°C or °F), calibration buffer set, in pH
modeonly,TDSconversionfactor(CONV)and
temperature coefcient (BETA), in EC mode
only.ToentertheSetup mode,presstheON/
OFF/CALbuttonuntil“CAL”onthesecondary
LCD is replaced by “TEMP” and the current
temperatureunit(e.g.TEMP°C).Then:
In EC and pH mode:
• for °C/°F selection:
usetheSET/HOLDbutton,thenpresstheON/
OFF/CALbuttontogointhesettingsmenuand
toreturntothenormalmeasurementmode.
InECmodeonly:
• to change the TDS factor value:
aftersettingthetemperatureunit,pressON/
OFF/CALbuttononcetoshowthecurrentval-
ue(e.g.0.50CONV).Selectthedesiredvalue
byusingtheSET/HOLDbutton,thenpressON/
OFF/CALbutton twice toreturnto the normal
measurementmode.
• to change the temperature coefcient:
after setting the TDS factor, press ON/OFF/
CAL button to show the current value of the
temperaturecoefcientß(e.g.2.1BETA).Use
theSET/HOLDbuttontosetthedesiredvalue,
thenpressON/OFF/CALbuttontoreturntothe
normalmeasurementmode.
InpHmodeonly:
• to change the calibration buffer set:
after setting the temperature unit, press ON/
OFF/CALbuttononceandselectthebufferset
(“pH7.01BUFF”forpH4.01/7.01/10.01or“pH
6.86 BUFF” for NIST set 4.01/6.86/9.18) by
using the SET/HOLD button. Press ON/OFF/
CALbutton to return to the normal measure-
mentmode.
EC MEASUREMENT AND CALIBRATION
PROCEDURE
Select the EC or TDS mode with the SET/
HOLDbutton.
Submerge the electrode in the solution to be
tested. The measurements should be taken
whenthestabilityindicator⌛onthetopleftof
theLCDdisappears.
• For better accuracy, frequent calibration of
the tester is recommended. Calibration is
alsonecessaryafterprobereplacement,after
testingaggressive chemicalsand where ex-
tremeaccuracyisrequired.FromnormalEC
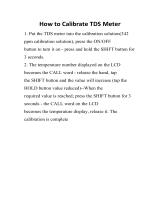
operationmode,pressandholdtheON/OFF/
CALbuttonuntilthe“OFF”messageonthe
secondaryLCDissubstitutedby“CAL”.Re-
leasethebutton.
• Immerse the probe in the proper calibration
solution: M10031 (1413 μS/cm) for MW803
andM10030(12.88mS/cm)forMW804.
• Once thecalibrationhas beenautomatically
performed,theLCDwillshow“OK”for1sec-
ondandthemeterwillreturntonormalmea-
surementmode.
• Sincethereisaknownrelationshipbetween
ECandTDSreadings,itisnotnecessaryto
calibratethemeterinTDSifitwaspreviously
calibratedinECmode.
pH MEASUREMENT AND CALIBRATION
SelectthepHmodewiththeSET/HOLD
button.Submergetheelectrodeinthesolution
tobetested.Themeasurementsshouldbeta-
kenwhenthestabilityindicator⌛onthetopleft
oftheLCDdisappears.
Forbetteraccuracy,frequentcalibrationofthe
tester is recomanded. Calibration is also ne-
cessaryafterelectrodereplacement,aftertes-
tingaggressivechemicalsandwhereextreme
accuracyisrequired.
• From normal operation mode, press and hold
theON/OFF/CALbuttonuntiltheOFFmessage
onthesecondaryLCDissubstitutedby“CAL“.
Releasethebutton.
• The instrument enters the calibration mode
by displaying “pH 7.01 USE“ (or ‘‘pH 6.86
USE“iftheNISTbuffersetwasselected).
• For a single-point calibration, immerse the
electrodeinanybuffer,i.e.pH4.01,7.01(or
6.86),10.01(or9.18).
• The meter activates the automatic buffer
recognition.Ifnovalidbufferisdetected,the
meterkeepstheUSEindicationactivefor12
seconds,andthenreplacesitwithWRNGin-
dicating that the sample being measured is
notavalidbuffer.Otherwise,ifavalidbuffer
is detected, then its value is shown on the
main display, and REC appears on the se-
condaryLCD.
• IfthepH7.01(or6.86)wasused,pressthe
SETbuttontoexittheCalibrationmodeand
the “OK 1” message willappear on thedis-
play. The calibration point is stored and the
meterreturnstonormalmeasurementmode.
Forbetteraccuracy,itisalwaysrecommended
toperforma2-pointcalibration.
• For a 2-point calibration, immerse the elec-
trodeinpH7.01(or6.86)buffersolution.
• After the rst point has been accepted, the
meterwillthenaskforthesecondbufferand
themessage“pH4.01USE”willappear.
• Rinsetheelectrodeandimmerseitinthese-
condsolution(pH4.01,10.01or9.18).
Notes:
• When the calibration procedure is completed,
theCALtagisturnedon.
• To quit the procedure and return to the last
calibrationdata,afterenteringthecalibration
modepresstheON/OFF/CALbutton.
/


