Page is loading ...

THE BINOCULARS COME EQUIPPED WITH:
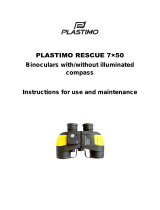
• Binoculars Futurus Pro™
• Neck Strap
• Light Filters 2*
• Padded Carrying Case
• Instruction Manual
• Lens Cloth
• Tripod Adapter
• Warranty Card
* 22061NF, 22062NF, 22064NF models come without light filters
DISTINGUISHING FEATURES OF THE FUTURUS PRO™ SERIES BINOCULARS:
• Innovative structural design which allows long distance viewing in a compact package
• Wide-angle optics for a wide field-of-view
• Built-in distance-measuring reticule
• Porro prism system which yields higher magnification and greater depth perception
• BAK4 optical glass for optimum light transmission and reduced distortion at the edges
• TRUE COLOR™ multilayer lens coatings that provide bright images and natural color reproduction
• Center focus mechanism
• Ergonomic body for easy operation
• ECLIPSE™ protective lens caps smartly engineered into the body
• Rubber-armored, shock-proof carbon plastic body
• IPX4 rating against water intrusion
• Tripod mountable
• High viewing range
• High image quality
• A set of light filters for various viewing conditions
• Stylish and durable case

FUNCTIONAL FEATURES OF THE FUTURUS PRO™ SERIES BINOCULARS
Model Magnification Key Features: Recommended for…
Wide-angle 7х50WА 7x
Largest exit pupil diameter
Extra long eye relief
Marine and wide open space
observation.
Wide-angle 10х50WА 10x
Clear and bright image for
dawn or dusk
The most versatile model
Optimal balance between
magnification
and field of view
Nature observation,
hunting, shooting, sporting
events, twilight conditions.
Mountaineer 16x50 16x
Extra magnification for long-
distance viewing
Highest practical
magnification
Mountainside observation,
detailed long distance
observation.
USING YOUR FUTURUS PRO™ SERIES BINOCULARS
Before using your binoculars for the first time, please review all of the instructions contained within
the instruction manual. Carefully following the instructions, you will get the most out of this precision
instrument.
Protect your binoculars by exercising caution when in the company of children or people unfamiliar
with the proper use of optical instruments.
ATTENTION!
Always protect your eyes and never look directly at the sun or any other source of bright light
through the binoculars!
ATTENTION!
When setting the Interpupillary Distance, be careful not to jam the tips of your fingers in the
folding action of the two barrels of the binoculars.
Setting the interpupillary distance (IPD)
• Remove the binoculars from their case and flip open all four lens caps on both the large objective (1)
and the smaller eyepiece lenses (2).
• For utmost utility, the objective lens caps (1) are constructed to lie flat against the housing. For your
convenience, you can rotate the opened lens caps to about their center until you find the most unobtrusive
position.
• Pick an object off in the distance of at least 30m (100 ft) away from you, and aiming in its direction,
fix your gaze on the object through the binoculars. Moving the two halves of the binoculars up or down close
to the central pivot (3), adjust the Interpupillary Distance until you see a single circular field.
FOCUSING THE BINOCULARS AND DIOPTRIC ADJUSTMENT
• Aiming the binoculars at any distant object with the right lens cap closed, turn the large center focus
wheel (3), until you see a sharp image through the left fixed eyepiece.
• With the image in the left eyepiece now focused, you can proceed to Dioptric Adjustment. This will
address the natural differences between the right and the left eyes and reduce eyestrain from prolonged use.
• With the left lens cap now closed, look through the right eyepiece at the distant object and turn the
Diopter Knob of the right eyepiece (4) until you get a crisp image.
• Reopen the lens cap and attentively turn the central focusing wheel (3) until you get a sharp image
through both barrels.
• As you continue viewing, you may find that you need to refocus the image. This should be done only
using the central focusing wheel (3) as you have already tuned the binoculars to your individual needs.
• Special characters “+ | -“ and “^”, located near the right eyepiece (4), will help you to easily mark and
remember your personal setting for the Diopter Knob.

SUGGESTED APPLICATIONS OF LIGHT FILTERS
• The orange filter is recommended for viewing objects that are farthest away from you. The filter will
also enhance the quality of the image in poor conditions such as fog, haze, storm, sand storm, etc.
• The protective filter is necessary in harsh conditions, so as to shield the objective lenses from dirt,
sand, dust, and scratches. It is also recommended in environments unshielded from UV rays, such as on the
water or in the mountains.
INSTALLING THE LIGHT FILTER
• Select the appropriate pair of light filters according to the conditions.
• Be careful not to touch any glass surface, and grip the light filter by its outer metal rim (The light filter
should be held with the index finger and the thumb).
• One at a time, insert both light filters into the binoculars' rubber surrounds, just in front of the
objective lenses.
• To remove the light filter, again grip it with your fingers and give about a 1/3 to 1/4 turn, at the same
time lightly pulling it towards you.
USING THE DISTANCE-MEASURING RETICULE
Located in the right eyepiece, the distance-measuring reticule enables you to determine the distance to
your subject. The distance-measuring reticule is calibrated to the height of the withers of a wild boar at 0.7m
and the average height of a buck with antlers at 1.75m.

MEASURING THE DISTANCE
• Align the imaginary line just underneath the animal's hooves with the large horizontal line in the lower
half of the distance-measuring reticule.
• Select the tick mark that corresponds to the height of the animal being observed.
• Now you can determine the distance in meters by reading the number next to the tick mark.
MOUNTING THE BINOCULARS ONTO A TRIPOD
• During periods of extensive observation in a stationary position, it is recommended to mount the
binoculars onto a tripod. To mount them properly, please use the tripod adapter that comes included.
• Secure the adapter to the tripod.
• Remove the protective screw from the 1/4” threaded socket in the base of the binoculars.
• Now, screw in the adapter screw into the binoculars' 1/4” threaded socket. The binoculars are now
securely mounted.
PROPERLY STORING AND CARING FOR YOUR BINOCULARS
• Aim to keep the lenses free of any dirt accumulation, as much as the conditions allow.
• Before cleaning the lenses, blow on them to remove sizable particles of sand and dust.
• When wiping optical surfaces, please use the lens cloth which comes standard with the set. If a lens
cloth cannot be found, you can use any soft, clean fabric (soft cotton cloth, flannel, silk, or a cotton swab are
best).
• Any grease should be removed with a tissue soaked in rubbing alcohol. In field conditions or if you do
not have rubbing alcohol, breathe right onto the surface of the lens and dry the condensation off with a soft,
clean cloth.
Attention!
In order to avoid damaging the lens' coatings, never use paper (dry or wet) to clean the lens
nor apply rubbing alcohol directly onto the lens.
• To clean the binoculars' exterior, please use a dry tissue. For sheen, apply a few drops of Vaseline ora
similar substance to the tissue.
• The binoculars are a sensitive optical instrument; do not drop them. Safeguard them from any other
physical damage.
• Do not subject the binoculars to prolonged exposure to direct sunlight or high temperatures. Do not
leave near a heater or heating appliances.
• When not in use, keep your binoculars in the included carrying case in a warm, dry, and well-ventilated
space.
/