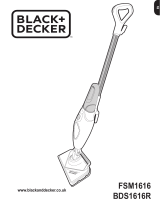
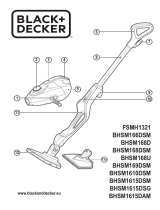
BLACK+DECKER FSM1630 User manual

Category
Steam cleaners
Type
User manual

This manual is also suitable for

4
ENGLISH
(Original instructions)
Intended use
Your Black & Decker steam mop has been designed for
sanitising and cleaning sealed hardwood, sealed laminate,
linoleum, vinyl, ceramic tile, stone and marble oors and for
refreshing carpets. This appliance is intended for indoor
household use only.
Warning! Read all of the 'Safety, Maintenance,
Service' manual carefully before operating
this appliance.
Read all of this manual carefully before operating
the appliance.
Features
This appliance includes some or all of the following features.
1. ON/Off switch
2. Autoselect
TM
button
3. Removable water tank
4. Handle
5. Steam head
6. Steam head cleaning pad
7. Delta head cleaning pad
8. Resting mat
9. Carpet glider
10. Bottom cable tidy hook
11. Top cable tidy hook
12. Cable management clip
Assembly
Warning! Before attempting any of the following operations,
make sure that the appliance is switched off and unplugged
and that the appliance is cold and does not contain any water.
Attaching the handle (Fig. A)
u Slide the bottom end of the handle (4) into the top end
of the steam mop body (13) until it clicks into place. The
arrow on the handle (4) should be aligned with the top of
the steam mop body (13).
Attaching the steam head (Fig. B)
u Slide the bottom end of the steam mop body (13) onto the
steam head (5) until it clicks into place.
u The steam head can be removed from the Steam mop
body by pressing the steam head release button (14) and
pulling the steam mop body (13) off the steam head (5).
Attaching the water jug (Fig. C)
u Clip the water jug (3) onto the handle (4).
u Slide the water jug (3) down into the Steam mop body
(13), ensure that the water jug is rmly seated.
Attaching a cleaning pad (Fig. D)
Replacement cleaning pads are available from your Black &
Decker dealer:- (cat. no. FSMP20-XJ).
Steam head cleaning pad - cat. no. FSMP20-XJ).
Delta head cleaning pad - cat. no. FSMP30-XJ (FSM1630
Only).
u Place a cleaning pad (6 or 7) on the oor with the ‘hook &
loop’ side facing up.
u Lightly press the steam mop down onto the cleaning pad
(6 or 7).
Caution! Always place your steam mop on the resting mat (8)
with the handle (4) in the upright position when stationary and
make sure the steam mop is turned off when not in use.
Removing a cleaning pad (Fig. E)
Caution! Always wear suitable shoes when changing the
cleaning pad on your steam mop. Do not wear slippers or
open toed footwear.
u Return the handle (4) to the upright position and turn the
steam mop ‘OFF’.
u Place the steam mop on the resting mat and wait until it
cools down. (approximately ve minutes)
u Place the front of your shoe onto the cleaning pad removal
tab (15) and press down rmly.
u Lift the steam mop up off the cleaning pad.
Caution! Always place the steam mop on the resting mat (8)
with the handle (4) in the upright position when stationary and
make sure the steam mop is turned off when not in use.
Filling the water tank (Fig. F)
The watertank on your steam mop is removable for convi-
enient and easy lling.
This Steam Mop incorporates an anti-calc system to help
prolong the life of the system.
Note: Fill the water tank with clean tap water.
Note: In areas of very hard water, the use of de-ionised water
is recommended.
u Remove the water tank (3).
u Open the ller cap (19) by pressing the release button
(20).
u Fill the water tank (3) with water.
Warning! Your water tank has a 0.5 litre capacity. Do not over
ll the tank.
u Re-t the ller cap (19).
u Re-t the water tank (3).
Note: Ensure the ller cap is rmly secured.
Note: Do not use chemical cleaners with your steam mop..
Attaching the carpet glider (Fig. G) (For use on
carpets only)
u Place carpet glider on the oor.
u Attach a cleaning pad (6) to the unit.
5
ENGLISH
(Original instructions)
u Lightly press the steam mop down onto the carpet glider
(9) until it clicks into place.
Caution! Always place the steam mop on the resting mat (8)
with the handle (4) in the upright position when stationary and
make sure the steam mop is turned off when not in use.
Removing the carpet glider (Fig. G)
Caution! Always wear suitable shoes when changing the
carpet glider on your steam mop. Do not wear slippers or
open toed footwear.
u Return the handle (4) to the upright position and turn the
steam mop ‘OFF’.
u Place the steam mop on the resting mat and wait until it
cools down. (approximately ve minutes)
u Place the front of your shoe onto the carpet glider removal
tab (16) and press down rmly.
u Lift the steam mop up off the carpet glider (9).
Caution! Always place the steam mop on the resting mat (8)
with the handle (4) in the upright position when stationary and
make sure the steam mop is turned off when not in use.
The Delta Head (Fig. H)
This Steam Mop incorporates a built in delta head which
enables you to access into tight corners and narrow gaps.
Caution! Always wear suitable shoes when accessing the
delta head on your steam mop. Do not wear slippers or open
toed footwear.
u Return the handle (4) to the upright position and turn the
steam mop ‘OFF’.
u Place the steam mop on the resting mat and wait until it
cools down. (approximately ve minutes)
u Place the front of your shoe onto the steam head removal
tab (18) and press down gently.
u Lift the delta head (17) up off the steam head (5).
u Fit the delta head cleaning pad to the bottom of the delta
head.
Note: Remove the cleaning pad before re-tting the delta
head to the steam head.
u To ret the delta head, place the tip of the delta head into
the steam head then press down rmly ensuring that the
delta head clicks into place.
Caution! Always place the steam mop on the resting mat (8)
with the handle (4) in the upright position when stationary and
make sure the steam mop is turned off when not in use.
Use
Important! This unit will kill 99.9% of bacteria & germs when
used in accordance with this manual and with the micro bre
pad tted and a continuous run time of 90 seconds.
Switching on and off
u To switch the appliance on, press the ON/OFF button (1).
It takes approximately 15 seconds for the steam mop to
heat up.
Note: When the steam mop is rst turned on the water res-
ervoir will glow red. Once the steam mop is ready to use the
water reservoir will glow blue.
u To switch the appliance off, press the ON/OFF button (1).
Caution! Never leave the steam mop in one spot on any
surface for any period of time. Always place the steam mop on
the resting mat (8) with the handle (4) in the upright position
when stationary and make sure the steam mop is turned off
when not in use.
Caution! Always empty the steam mop after use.
Note: When rst lled or after running dry it can take up to 45
seconds for steam to be produced.
Autoselect
TM
Technology (Fig. I)
This steam mop is tted with an Autoselect
TM
button (2)
which shows various cleaning applications. They are used to
select the correct operating mode for your particular cleaning
operation.
Using Autoselect
TM
, choose from one of the following applica-
tions by pressing the autoselect button (2) until the required
setting is selected:
Wood/Laminate
Stone/Marble
Tiles/Vinyl
The steam mop will select the correct volume of steam
required for your particular cleaning operation.
Note: Always check you are using the correct setting before
using your steam mop. For convienience the steam mop will
remember the last setting you chose.
Steam burst (Fig. I)
The steam mop is equipped with a steam burst button to aid in
the removal of stubborn marks and stains.
u During use, press the steam burst button (21) to apply
extra cleaning power.
Note: The stem burst will last for 10 seconds then the steam
mop will return to the chosen setting.
6
ENGLISH
(Original instructions)
Hints for optimum use
General
Caution! Never use the steam mop without rst attaching a
cleaning pad.
u During use you can use the cable management clip (12) to
keep your cable out of the way of the work area.
u Always vacuum or sweep the oor before using the steam
mop.
u The easiest way to use the machine is to tilt the handle to
a 45˚ angle and clean slowly, covering a small area at a
time.
u Do not use chemical cleaners with your steam mop. To
remove stubborn stains from vinyl or linoleum oors, you
can use the steam burst button to apply extra steam to
the area or pre-treat with a mild detergent and some water
before using the steam mop.
Steam cleaning
u Place a cleaning pad (6 or 7) on the oor with the ‘hook &
loop’ side facing up.
u Raise the steam mop off the resting mat (8) and lightly
press it down onto the cleaning pad (6 or 7).
u Place the steam mop on the resting mat.
u Connect the steam mop to the mains.
u Press the ON/OFF button (1). It takes approximately 15
seconds for the steam mop to heat up.
u Press the Autoselect
TM
button (2) till the required setting is
reached.
u Pulling the handle (4) back will activate the steam pump.
After a few seconds steam will start to come out of the
steam head.
Note: When rst lled or after running dry it can take up to 45
seconds for steam to be produced.
u It takes a few seconds for steam to enter the cleaning pad.
The steam mop will now glide easily over the surface to be
sanitised/cleaned.
u Push and pull the steam mop slowly across the oor to
thoroughly steam clean each section.
Note: During use you may turn off the steam pump by return-
ing the handle to the upright position, this convenient feature
will allow you to place the steam mop on the resting mat for
a short time so that you may move items of furniture, then
continue cleaning without the need to switch the appliance off.
u When you have nished using the steam mop, return the
handle (4) to the upright position and turn it ‘OFF’, place it
on the resting mat (8) and wait until the steam mop cools
down. (approximately ve minutes)
Caution! It is important to monitor the water level in the water
tank. To rell the water tank and continue to sanitise/clean,
return the handle (4) to the upright position and turn the steam
mop ‘OFF’. Unplug the unit from the electrical wall outlet,
remove and rell the water tank (3).
Caution! Never leave the steam mop in one spot on any
surface for any period of time. Always place the steam mop on
the resting mat (8) with the handle (4) in the upright position
when stationary and make sure the steam mop is turned off
when not in use.
Carpet refreshing
u Place a cleaning pad (6) on the oor with the ‘hook & loop’
side facing up.
u Raise the steam mop off the resting mat (8) and lightly
press it down onto the cleaning pad (6).
u Place the carpet glider (9) on the oor.
u Lightly press the steam mop down onto the carpet glider
(9) until it clicks into place.
u Place the steam mop on the resting mat. (8)
u Connect the steam mop to the mains.
u Press the ON/OFF button (1). It takes approximately 15
seconds for the steam mop to heat up.
u Press the Autoselect
TM
button (2) to the Wood/Laminate
setting.
u Pulling the handle (4) back will activate the steam pump.
After a few seconds steam will start to come out of the
steam head.
Note: When rst lled or after running dry it can take up to 45
seconds for steam to be produced.
u Push and pull the steam mop slowly across the carpet to
thoroughly refresh each section.
Note: During use you may turn off the steam pump by return-
ing the handle (4) to the upright position, this convenient
feature will allow you to place the steam mop on the resting
mat (8) so that you may move items of furniture with out the
need to switch the appliance off.
u When you have nished using the steam mop, return the
handle (4) to the upright position and turn it ‘OFF’, place it
on the resting mat (8) and wait until the steam mop cools
down. (approximately ve minutes)
Caution! It is important to monitor the water level in the water
tank. To rell the water tank and continue to sanitise/clean,
return the handle (4) to the upright position and turn the steam
mop ‘OFF’. Unplug the unit from the electrical wall outlet,
remove and rell the water tank (3).
Caution! Never leave the steam mop in one spot on any
surface for any period of time. Always place the steam mop on
the resting mat (8) with the handle (4) in the upright position
when stationary and make sure the steam mop is turned off
when not in use.
After use (Fig. J & K)
u Return the handle (4) to the upright position and turn the
steam mop ‘OFF’,
u Place the steam mop on the resting mat (8) and wait until
the steam mop cools down. (approximately ve minutes)
u Unplug the steam mop from the electrical wall outlet.
7
ENGLISH
(Original instructions)
u Empty the water tank (3).
u Remove the cleaning pad (6 or 7) and wash it ready for
next use. (Take care to follow the wash care instructions
printed on the cleaning pad).
u Wrap the supply cable around the cable tidy hooks (10 &
11).
Note: The top cable tidy hook (11) rotates to easily release the
cable ready for next use.
u Clip the supply cable onto itself using the cable tidy clip
(22) close to the plug.
u Place steam mop on the resting mat (8) for storage.
Note: With the handle (4) in the upright position, the cable
neatly wrapped around the cable tidy hooks (10 & 11) and
secured with the cable tidy clip (22) your steam mop will stand
on its own for storage. Alternatively there is a hanging bracket
(23) built into the hand grip (24) which will allow your steam
mop to be hung from a suitable hook on the wall. Always
ensure that your wall hook is capable of supporting the weight
of the steam mop safely.
Technical data
FSM1630
(Type 1)
Voltage V
ac
230
Power W
1600
Tank capacity ml
500
Weight kg 3.4
Troubleshooting
If your appliance seems not to operate properly, follow the
instructions below. If this does not solve the problem, please
contact your local Black & Decker repair agent.
Problem Step Possible solutions
The steam mop is
not turning on.
1
Check the unit is plugged in at the wall
socket.
2
Check the unit is switched on using the on/
off switch (1).
3 Check the fuse in the plug.
The digital controls
do not light up.
4
Check that the handle (4) of the steam mop
is pushed rmly into the steam mop body
(13). Check that the arrow on the handle is
ush with the top of the steam mop body
(13).
5 Check steps 1, then 2, then 3.
Problem Step Possible solutions
The steam mop is
not producing
steam.
6
The steam mop will only produce steam
once the handle is pulled back from the
upright position.
7
Check that the water tank (3) is full and
correctly tted.
NOTE: When rst lled or after running dry it
can take up to 45 seconds for steam to be
produced.
8
Check that the Steam head (5) is rmly
docked into the steam mop body (13).
9 Check steps 1, then 2, then 3.
The digital controls
go out during use.
10 Check steps 4, then 5, then 1, then 2, then 3
The steam mop
stops producing
steam during use.
11 Check steps 6, then 7, then 8, then 4, then 3.
The steam mop is
producing too
much steam during
use.
12
The steam mop has 3 settings. Press the
autoselect button (2) to reduce the amount of
steam being produced.
13
Check that the steam burst button (21) has
not been pressed.
The steam mop is
producing too little
steam during use.
14
The steam mop has 3 settings. Press the
autoselect button (2) to increase the amount
of steam being produced.
15
Press the steam burst button (21) to
temporarily increase the amount of steam.
Steam is escaping
from unexpected
areas of the unit.
16
Refer to the assembly chapter of the manual
for correct tting instructions of all parts and
accessories.
Where can I get
further information
/ accessories for
my steam mop.
17 www.blackanddecker.co.uk/steammop
www.blackanddecker.ie/steammop
www.2helpU.com
17 - 10 - 12
E16764
FSM1630
TYPE
1
11
14
8
12
16
10
6
9
15
17
1
2
3
4
20
21
25
ENGLISH
Do not forget to register your product!
www.blackanddecker.co.uk/productregistration
Register your product online at www.blackanddecker.co.uk/pro-
ductregistration or send your name, surname and product code to
Black & Decker in your country
.
DEUTSCH
Vergessen Sie nicht, Ihr Produkt registrieren zu lassen!
www.blackanddecker.de/productregistration
Lassen Sie Ihr Produkt unter www.blackanddecker.de/productreg-
istration online registrieren oder schicken Sie Ihren Nachnamen,
Vornamen und den Produktcode an Black & Decker in Ihrem Land.
FRANÇAIS
N’oubliez pas d’enregistrer votre produit !
www.blackanddecker.fr/productregistration
Enregistrez votre produit en ligne sur www.blackanddecker.fr/
productregistration ou envoyez vos nom, prénom et code produit à
Black & Decker dans votre pays.
ITALIANO
Non dimenticate di registrare il prodotto!
www.blackanddecker.it/productregistration
Registrate il prodotto online su www.blackanddecker.it/productreg-
istration o inviate nome, cognome e codice del prodotto al centro
Black & Decker del vostro paese.
NEDERLANDS
Vergeet niet uw product te registreren!
www.blackanddecker.nl/productregistration
U kunt uw product online registreren op www.blackanddecker.nl/pro-
ductregistration of u kunt uw voornaam, achternaam en productcode
opsturen naar Black & Decker in uw land.
ESPAÑOL
¡No olvide registrar su producto!
www.blackanddecker.es/productregistration
Registre su producto on-line en www.blackanddecker.es/produc-
tregistration o envíe su nombre, apellidos y código de producto a
Black & Decker en su país.
PORTUGUÊS
Não se esqueça de registar o seu produto!
www.blackanddecker.pt/productregistration
Registe o seu produto online em www.blackanddecker.pt/productre-
gistration ou envie o seu nome, apelido e código do produto para a
Black & Decker no seu país.
SVENSKA
Glöm inte att registrera produkten!
www.blackanddecker.se/productregistration
Registrera produkten online på www.blackanddecker.se/productre-
gistration
eller skicka namn och produktkod till Black & Decker i landet
du bor i.
NORSK
Ikke glem å registrere produktet ditt!
www.blackanddecker.no/productregistration
Registrer produktet ditt online på www.blackanddecker.no/pro-
ductregistration, eller send ditt navn, etternavn og produktkode til
Black & Decker i ditt eget land.
DANSK
Glem ikke at registrere dit produkt!
www.blackanddecker.dk/productregistration
Registrer dit produkt på internettet på: www.blackanddecker.dk/
productregistration eller send dit navn, efternavn og produktkode til
Black & Decker i dit eget land.
SUOMI
Muistathan rekisteröidä tuotteesi!
www.blackanddecker./productregistration
Rekisteröi tuotteesi verkossa osoitteessa www.blackanddecker./
productregistration tai lähetä etunimesi, sukunimesi ja tuotekoodi
oman maasi Black & Decker -edustajalle.
Ε Λ Λ Η Ν Ι Κ Α
Μην ξεχάσετε να καταχωρίσετε το προϊόν σας!
www.blackanddecker.gr/productregistration
Καταχωρίστε το προϊόν σας σε σύνδεση στη σελίδα www.
blackanddecker.gr/productregistration ή στείλτε το όνομα, επίθετο
σας και τον κωδικό πριονωτός στη Black & Decker στη χώρα σας.
  • Page 1 1
  • Page 2 2
  • Page 3 3
  • Page 4 4
  • Page 5 5
  • Page 6 6
  • Page 7 7
  • Page 8 8
  • Page 9 9
  • Page 10 10
  • Page 11 11
  • Page 12 12
  • Page 13 13
  • Page 14 14
  • Page 15 15
  • Page 16 16
  • Page 17 17
  • Page 18 18
  • Page 19 19
  • Page 20 20
  • Page 21 21
  • Page 22 22
  • Page 23 23
  • Page 24 24
  • Page 25 25
  • Page 26 26
  • Page 27 27
  • Page 28 28
  • Page 29 29
  • Page 30 30
  • Page 31 31
  • Page 32 32
  • Page 33 33
  • Page 34 34
  • Page 35 35
  • Page 36 36
  • Page 37 37
  • Page 38 38
  • Page 39 39
  • Page 40 40
  • Page 41 41
  • Page 42 42
  • Page 43 43
  • Page 44 44
  • Page 45 45
  • Page 46 46
  • Page 47 47
  • Page 48 48
  • Page 49 49
  • Page 50 50
  • Page 51 51
  • Page 52 52
  • Page 53 53
  • Page 54 54
  • Page 55 55
  • Page 56 56
  • Page 57 57
  • Page 58 58
  • Page 59 59
  • Page 60 60

BLACK+DECKER FSM1630 User manual

Category
Steam cleaners
Type
User manual
This manual is also suitable for

Ask a question and I''ll find the answer in the document

Finding information in a document is now easier with AI