Page is loading ...

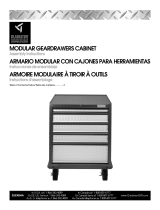
MODULARGEARBOXCABINET
Assemblyinstructions
ARMARIO MODULARPARAHERRAMIENTAS
Instrucciones de ensambloje
ARMOIREMODULAIRE
instructionsd'assemblage
Table of Contents/[ndice/'rable des mati_res ............. 2

TABLEOFCONIENTS
CABINET/LOCKER SAFETY ......................................................... 3
ASSEMBLY INSTRUCTIONS ......................................................... 3
Tools and Parts............................................................................ 3
Cabinet Use Requirements.......................................................... 3
Unpack the Cabinet ..................................................................... 3
Installthe Bumpers ...................................................................... 4
Installthe Casters......................................................................... 4
Installthe Tray/Shelf..................................................................... 5
Glide Adjustment.......................................................................... 5
DoorAdjustment .......................................................................... 5
WARRANTY .................................................................................... 6
INDICE
SEGURIDAD DEL ARMARIO ........................................................ 8
INSTRUCCIONES DE ENSAMBLAJE ........................................... 8
Piezas y Herramientas ................................................................. 8
Requisitosde uso dalarmario ..................................................... 8
Desempaque del armaeq ............................................................. 8
Instalacibndel parachoques ....................................................... 9
Instalacibnde las ruedecillas....................................................... 9
Instalaci6n de la bandeja/estante .............................................. 10
Ajustedel riel.............................................................................. 10
Ajustede lapuerta ..................................................................... 10
GARANT|A ..................................................................................... 11
TABLEDESMATIERES
SI_CURITE DE L'ARMOIRE ......................................................... 12
INSTRUCTIONS DJASSEMBLAGE.............................................. 12
Outillage et pi_ces n6cessaires................................................. 12
Sp6ciflcaticns d'utilisation de I'armoire..................................... 12
D6ballage de I'armoire............................................................... 12
Installationdes pare-chocs ....................................................... 13
Installationdes roulettes............................................................ 13
Installationdu plateau/de I'_tag_re............................................ 14
RL'glagedes glissi_res............................................................... 14
R6glage de la porte.................................................................... 14
6ARANTIE ..................................................................................... 15

CABINET/LOCKERSAFETY
Your safety and the safety of others are very important.
We have providedmany importantsafety messages in this manual and on your appliance. Always read and obey all
safety messages.
This is the safety alert symbol.
This symbol alerts you to potential hazards that can kill or hurt you and others.
All safety messages will follow the safety alert symbol and either the word "DANGER" or
"WARNING." These words mean:
You can be killed or seriously injured if you don't
immediately follow instructions.
You can be killed or seriously injured if you don't
follow instructions,
All safety messages willtell you what the potential hazard is, tellyou how to reduce the chance of injury,and tell you
what can happen if the instructions are not followed.
ASSEMBLYINSTRUCTIONS
Toolsand Pads
Check that you have everything necessary for correct assembly.
Proper assembly is your responsibility.
Tools Needed:
• 7/_8in. Wrench •
Parts Supplied:
• Keys (2)
• Top mat (1)
• Tray liner(1)
• "L"-shaped bumpers (2)
• Hex-key wrench (1)
• Socket-heed cap screws (8)
• Washers (8)
Flat-blade screwdriver
Phillipsscrewdriver
• Rigid casters (2)
• Swivel casters (2)
• V4in. - 20 Self-locking
nuts(16)
• 1/4in. - 20 x 1/2in.
Carriage-head bolts (16)
Cabinet UseRequirements
• Intended for use in a garage.
• Maximumweightlimitis65 Ibs(29kg)forthetray/shelf.
• Maximumweight limitis1,400Ibs(635 kg) forthecabinet.
Unpack the Cabinet
NOTE: Keepthepackingmaterialstocushionthecabinetduring
assemblyandthenproperlydisposeofpackaging,
1. Removethekeysandunlockthecabinet.
2. Verifycontents(see"PartsSupplied"),
3

Installthe Bumpers
1. Close and lock the doors. Remove the key.
2. Remove the top mat from the cabinet.
3. Using two or more people, turn the cabinet upside down.
4. Attach the bumpersto the front corners of the cabinet using 4
washers and 4 socket-head cap screws for each bumper.
NOTE: To keep from stripping the screws, do not overtighten.
5. Using the hex-key wrench provided, tighten all the screws.
1. Insertthe carriage-head bolts into the keyhole slotsand slide
to narrow end, seating the bolt in place as shown.
2. Attach the 2 rigid casters (with left-side brakes) to the front
casterplates and start the 4 self-locking nuts for each caster.
3. Hold the caster in place making surethe bolts are seated in
the narrow ends of the keyhole slots. Tighten the self-locking
nuts with a%8in. wrench.
4. Repeat steps 2 and 3 to attach the 2 swivel casters to the
rearcaster plates as shown.
1. Bumper
2. Washer
3. Socket-head cap screw
2
1.Swivel casters
2. Casterplate
3. Rigid casters
4. Front of cabinet
5. Return the cabinet to its upright position.
6. Replace the top mat with the textured sidefacing up.
7. Unlock the door.
8. Replace the tray liner.
4

Installthe Tray/Shelf
Removing the Tray/Shelf
1. Unload the contents from the tray/shelf.
2, Slide the tray out to fullyopen position,
3, Pressthe lever down on the right-hand track and liftthe lever
up on the left-hand track to release tray, Continue to pull the
tray untilit comes free,
Glide Adjustment
[optional)
For storage flexibility, you can removethe tray/shelf glides and
reinstallthem at the desired height.
Removing the Tray/Shelf Glide
1. Back ofgfide
1. Unload the tray/shelf ecd remove (see "Installthe Tray/
I. Lever Shelf").
2. Insert fist-blade screwdriver behind the first slot between the
Replacing the Tray/shelf glideand cabinet panel
3. Using the screwdriver, prythe glide away fromthe cabinet
1. Align the tray guides with the receivingglides.
2. Holding the receiving glides firmly in place, insert the tray
guide.
NOTE: It is normalfor the tray/shelf to closetightly the first time
after it has been removed.
3. Push tray/shelf in completely.
Changing from Tray to Shelf
Toaccommodate your storage needs, the tray inverts easily to
become a shelf, Followthe steps for removingthe tray/shelf, and
flip the tray/shelf over beforefollowing the steps for replacing the
tray/shelf.
panel while pushing the glide toward the rearof the cabinet
untilthe glide comes free.
Replacing the Tray/Shelf Glide
1. Determine desired height fortray/shelf.
2. Insertglide tabs into the openingsin the cabinet panel.
3. Holding ontothe back ofthe glide, pull ittoward you untilit
locksinto place.
4. Replece the tray/shelf (see "Replacing the Tray/Shelf").
DoorAdjustment
The cabinetisdesignedwithadjustabledoors.
I. Usinga Phillipsscrewdriver,loosenallscrewsattachingthe
hingetothecabinet.
2. Adjustdoortothedesiredheight
3. _ghtecthe screws.

GLADIATOR"GARAGEWORKSMODULARGEARBOX
CABINETWARRANTY
LIFETIME LIMITED WARRANTY
Forthe life of the product, when the Modular GearBox Cabinet is usedand maintained according to the instructionsattached to or
furnishedwith the product, GladiatorTM GarageWorks will pay for replacement or repair ofthe defective product or partsto correct
defects in materials or workmanship.
Gladiator TM GarageWorks will not pay for:
1. Service callsto correct the installationof any GladiatorTM GarageWorks products or to instruct you on how to use or installthem.
2. Damage resultingfrom improperhandling or shipping of products, or products damaged by accident misuse, abuse, fire, flood,
improper installation, acts of God, neglect, corrosion,modification or mishandling.
3. Shippingorfreightfeestodeliverreplacementproductsortoretumdefectivepreducts.
4. Repairs or replacement when your product isused inother than normal, single-family household use, suchas a commercial
environment or handled in any way inconsistentwith the installation instructionsincluded with the product.
5. Cosmstic damage including scratches, dings, dents or cracks that do nct affec_ the structural or funstional capability ofthe
product.
6. Replacement parts or product for GladiatorTM GarageWorks products operated outside the United States or Canada.
7. In Canada, travel ortransportation expenses for customers who reside in remote areas.
8. Any labor costs during the limitedwarranty period.
9. Damage resultingfrom improper loading beyond the specified maximum weight capacity outlined in the assembly instructions
provided with the product, including overloading of hooks, baskets, shelves, cabinets, and other GladiatorTM GarageWorks
accessories used with the product.
10. Surfaces damaged due to chemical interaction resultingin corrosionof paint or metal.
11. Replacement keys or locking mechanism.
12. Loss of product contents due to theft, fire,flood, accident or acts of God.
GLADIATOR TM GARAGEWORKS SHALL NOT BE LIABLE FOR INCIDENTAL OR CONSEQUENTIAL DAMAGES
Some states or provincesdo not allow the exclusionor limitationof incidentalor consequential damages, so this exclusion or limitation
may not apply to you.This warranty gives you specific legal rights, and you may also have other rights whichvary from state to state or
province to province.
Outside the 50 United States and Canada, this warranty does not apply. Contact your authorized Gladiator TM GaregeWorks
dealer to determine if another warranty applies.
Ifyou need service, callthe GladiatorTM GarageWorks Customer Care Center, 1-866-342-4089 (toll-free), from anywhere in the U.S.A. In
Canada, contact your Whirlpool Canada inc.designated servicecompany or call 1-800-807-6777.
3/03
Keep this book and your sales slip together for future
reference. You must provide proof of purchase or installation
date for in-warranty service.
Wdte down the following information about your Modular
GearBox Cabinet to better help you obtain assistance or service
ifyou ever need it. You will need to knowyour complete model
number and serial number.You can find this informationon the
model and serial label located on the back of the product.
Dealer name
Address
Phone number
Model number
Sedal number
Purchase d_te

2253693A
2003 Whirlpool Corporation. 4/03
All dghts reserved. ® Registered TrademarkJTM Trademark of Whidpool, U.S.A., Whldpoo_Canada Inc. Licensee in Canada Printed in U.S.A.
Tedos los derechos reservados.® Marca resistrada/TM Marca de cemercio de Whirlpool EE.UU. usada ba o Jicencia de Whirlpool Canada fnc. en C,anadd Impreso en EE. UU.
TOUSdro ts r6serv_s. ® Marque d6posde/TM Marque de commerce de Whirlpool, U.S.A., Emploi Licencie par Whirlpool Canada tnc. au Canada Imprimd aux _.oU.
/