Page is loading ...

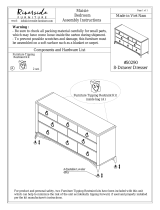
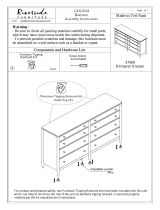
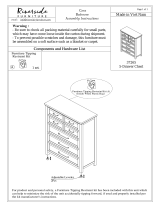
Acadian / Normandy / Brunswick
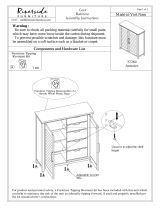
5 Shelf Bookcase
Model # AXCACA55-BRU
TM
TM
1

2
It's time to register your product warranty.
It's quick and easy. And you'll be happy you did.
simpli-home.com/product-registration
Great quality is a right.
Thank you for shopping with Simpli Home,
America's top brand for high-value furniture.
Activate your 1-year warranty
Automatic entry to win a $500 gift certificate
Earn instant rewards and save
ü
ü
ü

3
Review your product and collect rewards!
Thank you for your purchase! We hope you enjoy it. We’d love
your feedback. Please share a review and get instant rewards!
simpli-home.com/product-review
Share photos and get your cash back!
Send us images or share them on social and qualify for instant
rewards. You may even receive store credit on your entire purchase!
simpli-home.com/share-images

4
For Fastest Customer Service:
1. Open your phone’s camera.
2. Point your phone’s camera at the QR code to scan.
3. Click on the pop up.
4. You’ll be taken to our customer service page.
5. Fill the form with your order information and issue.
6. Submit form.
7. A customer service associate will contact you.
Other ways to contact us…
Visit Us
Visit our site directly at
www.simpli-home.com
Email Us
Call Us
1-866-518-0120
Monday to Friday
9am to 5pm EST
*If you’ve purchased from a retailer and you wish to return the product, please
contact the retailer directly.

CAUTION: Injuries and damage can occur from furniture tip over if product is
not properly anchored to the wall. Use the Furniture Anti-Tipping Restraint
provided with the product. Consult our assembly instructions for help.
If the Furniture Anti-Tipping Restraint kit is not in the box, please contact our
customer service department in order to obtain another kit before using the
furniture.
Identify all the parts and hardware. Do not discard of the packaging until you
have checked that you have all of the parts and hardware required.
Hardware package may have spare parts.
WARNING: This item contains small parts which can be swallowed by
children and pets. Keep children and pets away during assembly. To avoid
danger of suffocation, always keep plastic bags away from children and pets.
We recommend that you assemble this unit on a carpeted floor to avoid
scratches. If using power tools, set the tool to low torque to avoid damage.
May require 2 people for ease of assembly.
IMPORTANT : Please read this manual carefully before beginning assembly
of this product. Keep this manual for future reference.
5
Safety Information

This furniture is designed for indoor use.
Perhaps the greatest environmental damage to wood furniture comes from wide swings in
relative humidity (RH) in our homes. Wood absorbs and desorbs water as relative humidity
rises and falls, and in doing so it swells and shrinks. Making matters worse, it expands and
contracts unequally along different grain directions. As humidity changes, the components
of wooden objects are continually pushing and pulling against each other. This pressure
often results in parts of furniture no longer fitting together closely or becoming distorted
or breaking from their own internal stresses.
The response to relative humidity changes begins with determining the annual average RH
for your particular space. Then try to keep the RH in the space where your furniture is as
close to that average as possible, generally within about 10% up or down. De-humidify in
the summer and humidify in the winter.
Be aware that raising the temperature lowers the humidity and vice versa. Thus, modern
heating systems, which can drive down interior RH in the winter, almost invariably cause
problems for furniture. To counteract their effect, you can either modify the RH by keeping
furniture containing spaces cooler in the winter or most importantly, have a good working
humidifier for your home. A humidistat automatically works to balance the humidity in
your home so it is constant. Dry indoor air can suck enough moisture from its surroundings
to do permanent damage to wood, causing it to crack or split.
Remember, that not all woods are created equal. Two factors that help determine how
rapidly a wood will lose moisture are pore size and surface hardness. A piece made from a
dense and hard wood will dry less rapidly than pieces made from softer woods.
Furniture that is sealed and lacquered will lose moisture more slowly than an unfinished
piece while pieces with veneer finishes are not only stronger but lose moisture more slowly
than other finishes.
To help protect your wood furniture, take these steps:
·Use a humidifier, preferably one with an automatic control system that can sense the
humidity level and adjust itself accordingly
·Don't over-humidify; that can damage wood by causing it to expand and contract
·Keep furniture out of direct sunlight, which can cause it to dry out, crack and warp
·If you can avoid it, don't put furniture near heating vents; if you can’t, keep the
item 3 to 4 inches away from the wall, giving the heat and air space to circulate
·Dust with soft dry cloth
·Do not use liquid or aerosol products
·To avoid marking, do not place rubber on surface (foot pads, etc.)
·For soil build-up, wipe with damp cloth & dry
·Do not use abrasive cleaners
6
Care & Maintenance

Part Description
7
Model # AXCACA55-BRUPre-Assembly Information
RIGHT SIDE
QTY 1
Front /
Avant
BACK PANEL
QTY 1
LEFT SIDE
QTY 1
Front /
Avant
TOP
QTY 1
Front /
Avant
BOTTOM SHELF
QTY 1
Front /
Avant
MIDDLE SHELF
QTY 1
CABINET SHELF
QTY 3
Warning Label
V16-AL V16-AR V16-B
V16-C V16-D V16-E
V16-F

Hardware Description
8
Model # AXCACA55-BRUPre-Assembly Information
.1
ALLEN KEY SCREW
M6 X 30mm
QTY 12 ALLEN KEY
QTY 1
FURNITURE TIP OVER RESTRAINT
QTY 1 SET
a. M4 X 25mm - QTY 2
( 1 is extra )
b. M4 X 15mm - QTY 1
c. M4 X 25mm - QTY 1
CAM LOCK PIN
CAM LOCK
QTY 6 SETS
.2
PHILLIPS SCREW
ROUND HEAD
M4 X 15mm
QTY 20
Required -
Flathead screwdriver
Phillips screwdriver
Rubber mallet
Not Included
.3
.4.5.6
SHELF SUPPORT
QTY 18

9
Model # AXCACA55-BRUComponents - Key Diagram
Front /
Avant
Front /
Avant
Front /
Avant
Front /
Avant
V16-AL
V16-B
V16-AR
V16-F
V16-E
V16-E
V16-E
V16-D
V16-C

10
Model # AXCACA55-BRUAssembly
Step 1
P
X
2
Front /
Avant
2
2
Front /
Avant
1. Attach three Cam Lock Pins 2 into pre-drilled holes on each Side V16-AL , V16-AR .
2. Use Phillips screwdriver to secure Cam Lock Pins. Do not over-tighten.
V16-AL
V16-AR

11
Model # AXCACA55-BRUAssembly
Step 2
Front /
Avant
1. Align Cam Lock Pin with guide holes and attach Middle Shelf V16-D to
Left Side V16-AL .
2. Insert three Cam Locks 2 into guide holes on Middle Shelf V16-D .
3. Use Phillips screwdriver to secure Cam Locks. Do not over-tighten.
Front / Avant
2
2
V16-AL
V16-D
V16-AL
V16-D

12
Model # AXCACA55-BRUAssembly
Step 3
Front / Avant
Front / Avant
Front / Avant
Front / Avant
1
Front / Avant
Front /
Avant
1
3
1. Use three Allen Key Screws 1 to attach Bottom Shelf V16-C through guide holes
from Bottom Shelf V16-C to pre-drilled holes of Left Side V16-AL .
2. Use Allen Key 3 to tighten Screws. Do not over-tighten.
V16-AL
V16-D
V16-AL
V16-D
V16-C
V16-C

13
Model # AXCACA55-BRUAssembly
Step 4
Front / Avant
Front / Avant
Front / Avant
Front / Avant
Front / Avant
Front / Avant
Front / Avant
Front / Avant
1
3
1
2
2
1. Repeat Step 2-3 for Right Side V16-AR .
V16-AR
V16-AL
V16-D
V16-C
V16-D
V16-C
V16-AR
V16-AL

14
Model # AXCACA55-BRUAssembly
Step 5
Front / Avant
Front / Avant
Front / Avant
1. Attach Top V16-B to Sides V16-AL , V16-AR using six Allen Key Screws 1 through
guide holes from Sides V16-AL , V16-AR (3 screws on each Side).
2. Use Allen Key 3 to tighten Screws. Do not over-tighten.
Front / Avant
1
3
Front /
Avant
Front /
Avant
V16-AR
V16-AL
V16-B

1. Use Phillips Screws Round Head 5 to attach Back Panel V16-F through guide
holes to the back of Bookcase.
2. Use Phillips Screwdriver to tighten screws. Do not over-tighten.
15
Model # AXCACA55-BRUAssembly
Step 6
Note:
The back of the Bookcase does not have
pre-drilled holes to attach the back panels.
Warning Label
Front /
Avant
Front /
Avant
5
V16-F
V16-F

Step 7
shelf level 3
shelf level 2
shelf level 1
shelf support
anti - tipping
1. Use four Shelf Supports 4 for each Cabinet Shelf V16-E in desired location.
2. Two Shelf Supports 4 may be used on back top of each Cabinet Shelf V16-E as a
tipping restraint.
16
Model # AXCACA55-BRUAssembly
4
4
V16-E
V16-E
V16-E
V16-E
V16-E

Step 8
17
NOTE: The screwdriver is not
included in the hardware pack.
WARNING
Serious or fatal crushing injuries can occur from furniture tip-over.
If the furniture tip over restraint kit is not in the box, please contact our customer
service department in order to obtain another kit before using the furniture.
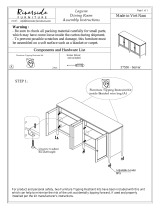
Furniture Tip Over Restraint Assembly
66

18
1. Attach one of the mounting brackets securely to the back edge of
the furniture. Use the shorter screw.
2. Determine where furniture is to be placed and mark location on
the wall for mounting bracket screw hole approximately 2 inches
below the bracket mounted to the furniture.
3. Drill a 3/16 inch hole in the wall. Press the plastic anchor into the
hole and gently tap until the flange on the anchor is against the
wall surface.
4. Position the bracket over the anchor and use the longer screw to
securely attach the bracket to the wall.
5. Place the furniture so the back edge is in line with the bracket on
the wall.
6. Lace an end of the nylon zip-tie strap down through each bracket.
Bring both ends together and slide the smooth side upright
through the square-shaped end and pull through to create the
“locked” position.
7. Check to make sure the strap is securely laced and locked to the
brackets.
·DO NOT put a TV or other heavy objects on top of furniture not
intended for use with a TV
·DO NOT place heavy objects in top drawers or on top shelves
·DO NOT let children climb or hang on drawers, doors or shelves
Px
P
P
x
x
Furniture Anti-Tipping Restraint Instructions
/