9
Appendix
Using the TV’s
Features
Setting up
your TV
Using the
Remote Control
Connecting
your TV
Welcome to
Toshiba
Important
Safeguards
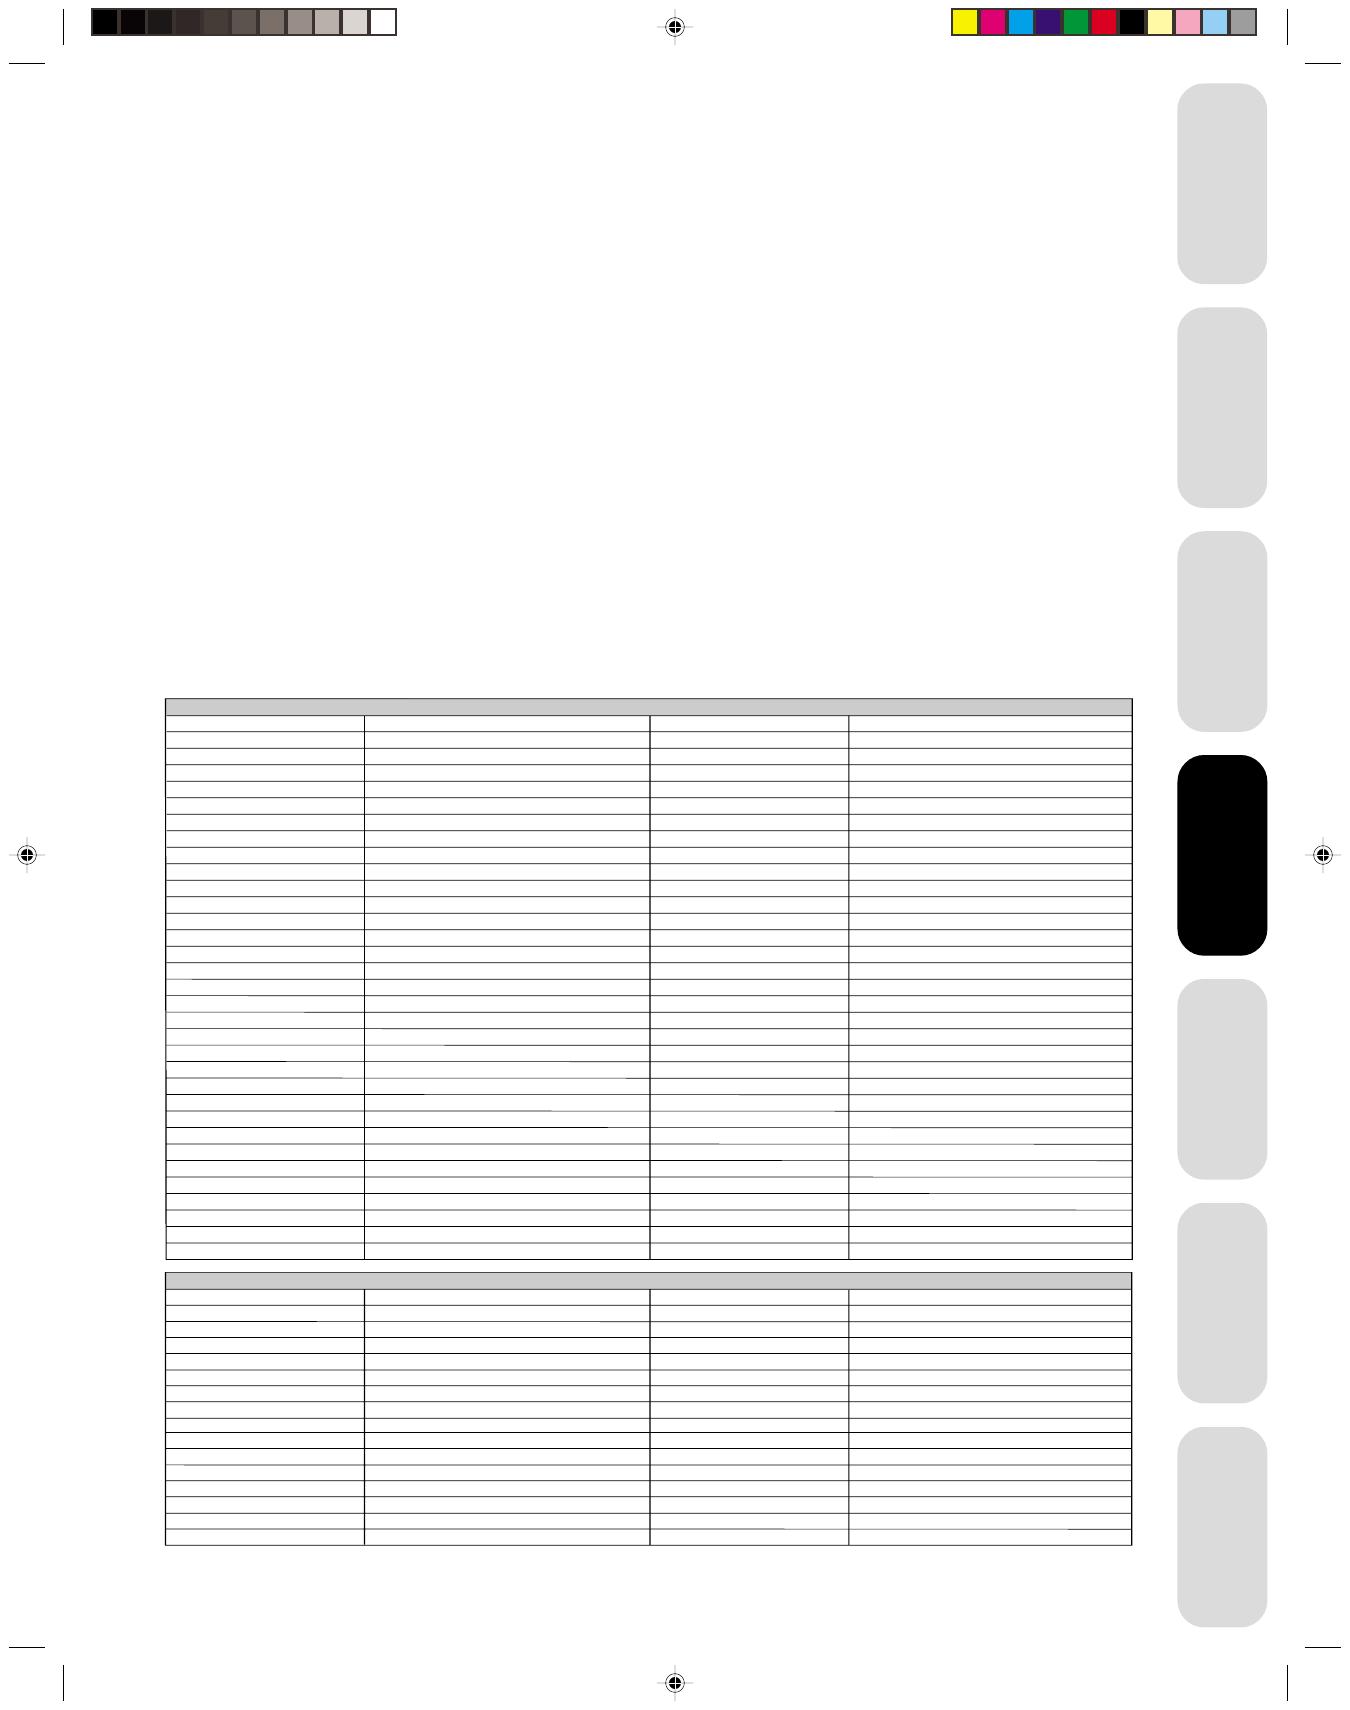
Programming the remote control for use with
a VCR or a cable TV converter
This remote control is pre-programmed to operate Toshiba VCRs. To
use VCRs or cable converters other than Toshiba models, you must
follow the steps below before you operate your remote control.
1. Press the CODE button and the VCR or the CABLE button you
want to register at the same time.
2. Enter the 2-digit code listed below using the Direct Channel
Selection buttons (0-9) within 10 seconds.
3. Point the remote control at the VCR or converter and press
POWER to test the code number.
If the VCR or converter turns on, you have entered the right
number.
If the VCR or converter does not respond to the remote control,
you may have entered the wrong number. Repeat steps 1-2 with
another code number.
For future reference, write down the code numbers you used:
VCR code ________________________
Cable code _______________________
Note:
• When shipped from the factory, the remote
control is set to operate your TV.
• If you do not enter the code within 10
seconds from step 1 or enter the non-listed
code below, this operation is canceled.
• Each time you replace the batteries, you
must reprogram the remote control.
• Some newer VCRs are capable of working
on either of two remote codes. These VCRs
have a switch labeled “VCR1/VCR2”.
If your VCR has this kind of switch, it may
not respond to any of the code numbers for
your VCR brand name. In this case, set the
switch to the other position (VCR1 or VCR2)
and reprogram the remote control.
Using the
Remote Control
Allegro
Allegro A/B Switch
Gemini
General Electric
General Instrument
Hamlin
Jerrold
Kale Vision
Macom
Magnavox
NSC
Oak
Panasonic
Paragon
Philips
Pioneer
58, 62
61
05, 31, 38
67
05, 06
02, 03, 45, 65, 66
04, 07, 08, 09, 10, 18, 60, 63
35
14, 21
34
35, 39, 68, 69, 70
11, 32, 42
13, 20
33
47, 50, 52, 54, 55
15, 43
CABLE
RCA DSS
Regency
Samsung
Sprucer
Scientic Atlanta
Standard Comp
Texscan
Tocom
Unika
United Satellite
Universal
Vid Tech
Video Way
Viewstar
Zenith
Zenith Satellite
73
29
35
16, 23, 36, 64
13
35
39, 56, 71
17, 18, 46
48, 62
44
58, 62
40
49
54, 55, 72
01, 53, 74
12, 28, 30, 51
Akai
23, 38, 41
VCR
Panasonic
Admiral 08, 61 Multi Tech 39
Adventura 31 NEC 02, 18
Aiwa 31 Orion 33, 50
14, 51, 59
Audio Dynamics 02, 18 Pentax 15
Bell & Howell 06, 47 Philco 07, 14
Broksonic 21, 26, 33, 50, 55 Philips 07, 14, 27
Canon 14 Pioneer 10, 15
Citizen 09 Portland 46
Craig 12 Pro Scan 16, 60
Curtis Mathes 14, 59 Quasar 14, 59
Daewoo 44, 46, 48, 54 RCA 15, 16, 20, 27, 40, 42, 60
Daytron 36, 46 Realistic 06, 08, 12, 14, 31
DBX 02, 18 Samsung 20, 30
Emerson 03, 21 23, 26, 33, 35, 43, 50 Sansui 39
Fisher 11, 12, 13, 47 Sanyo 06, 12, 47
Funai 31 Scott 04, 05, 33, 43
General Electric 14, 16, 20 Sears 06, 09, 11, 12, 15
Goldstar 09 Sharp 08, 61
Go Video 56, 62, 63 Shintom 39
Hitachi 15, 57 Signature 2000 08, 14, 16, 19, 31, 49
Instant Replay 14, 27 Sony 17, 32, 37
J.C. Penney 14, 15, 18, 27 Sylvania 07, 14, 27
JVC 02, 25, 58 Symphonic 31
Kenwood 02 Tashiko 09
Logik 39 Tatung 02
LXI 09, 31 Teac 02, 31
Magnavox 07, 14, 31 Teknika 34
Marantz 07, 18 Toshiba 05, 15
Marta 09 XR1000 39
Memorex 06, 12, 14, 31, 33 Vector Research 04, 18
Mitsubishi 04, 22, 52, 64 Yamaha 02, 18
Montgomery Ward
08, 14, 16, 19, 31, 49
Zenith
01, 24, 25, 29, 37
Registration codes by product and brand name
3I70401D P04-11 16/08/2001, 15:579


