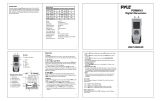
Page is loading ...

PDMM01
PYLE®
Digital
Manometer
WWW.PYLEAUDIO.COM

Introduction
The
device measures Gauge/Differential
Pressure
from -55 H
2
0 to
+55
H
2
0
(+2
psi)
. It features
11
selectableunitsofmeasure:in H
2
0,
psi, bar, mbar, Kpa,
InHg, mmHg, ozin
2
,
FtH
2
0,
cmH
2
0,
kgcm,Additional features include Data
Hold and Auto Power
Off
disabled. Careful
use
of
this meter will provide years
of
reliable service.
5

Specifications
Function
Range
Resolution Function
Range
Resolution
inH
2
0
±55
.
40
psi
±2
.
000
Mbar
±137
.8
kPa
±13.79
inHg
±0.407
mmHg
±103.4
Display
Accuracy
Repeatability
Linearity/Hysteresis
Maximum
Pressure
Response
Time
0.01
0.001
0.001
Low
Battery Indicator
Over
Range
Indicator
Under
Range
Indicator
Operating Conditions
Storage Conditions
Power
Supply
Standard Accessories
ozin
2
32.00
FtH
2
0 4.612
cmH
2
0
140.6
Kgcm
2
0.140
Bar 0.137
Dual
LCD
±0
.3%FSO(25°C)
±0.2%(Max+/-0
.5%FSO)
±0
.29%
FSO
10psi
0.5Seconds typical
Yes
Err.1
Err.2
32°F to 122°F(0 to
50°C)
14°F to
140FO(-1
to
60°C)
0.01
0.001
0.1
0.001
0.001
1 X 9V Battery (included) or External 9VDC
Pouch
&.Tubing

Button
The
meter
has
six
buttons
.
1.
UNITS
2.
DIF
3.
HOLD
3
4.
ON/OFF
A.
REC
B.
BACKLIGHT
2
Display
Description
1 _
--t=1lIOOID
1.
Hold
Function
3
2. Differential Mode
D
3.
Primary
Data
Screen
4.
Record
Mode
5. MAX/MI
N/AVG
6.
Low
Battery Indicator
7.
Pressure
Unit Indicator
8.
Relative
Time
Clock
4
~
5
-
1:1:
8
6
I
IIOOO~
rnlIA\'ii'
w _ •
~
~
IIIIIlIm'
IIIIIlIIIIiMI(g
~
•
!1J!i]{J
.
CID
WHI
.
CID
mn1){J
.
CID
7
2

Operation
1.
Power
Press
the
ON/OFF
button to turn
power
on
or
off
.
The
meter will perform
a short
self-test when turned on.
The
meter defaults to the setting used during
the
last operation.
2.
Zero
Adiust
and
Offset
Before
use
and without fittings attached to the meter, press the HOLD button
for more than 2 seconds to zero the meter.
The
meter will reset and display
"000" from right to left. 0.
000
will be display.
If
it
is
desired to offset the meter and display, press the DIF button while
taking a measurement subsequent reading will be the difference between the
current measurement and the measurement that was on the
display when the
DIF button was pressed.
3.
Data
Hold
Press
the HOLD button momentarily to freeze the displayed reading the
HOLD icon will
appear
on the upper left-hand side
of
the display. press the
HOLD button
again
to return to normal operation.
4 Record
The
MAX/MIN
mode allows the user to view only the highest (MAX), lowest
(MIN)
or
anerage (AVG) readings with relative time stamp.
1 .
Press
the
REe
button once and
REe
appears on the display (All other
Functions are
locked out except for Power & Backlight).
The
relative time
clock
also appears
in
the secondary display and starts counting.
2.
Press
the
REe
button
again
and
MAX
appears on the display.
The
Display
is
now
showing the maximum pressure and relative time it was
recorded.
3

3.
Press
the
REC
button to display the minimum
MIN
reading with the relative
time.
4.
Press
the
REC
button to display the average value AVG reading with the
relative time.
5.
Press
the
REC
button
again
to continue recording
MINIMAXI
AVG
measu rements.
6.
To
exit the MINIMAXI AVG mode, press the
REC
button for 3 seconds to
return to
normal operation.
7.
Backlight
Display
Press
the Backlight button to turn on the backlight. It will remain on for
40
seconds.
8.
Automatic
Power
OFF
The
meter will automatically
shut
off
after
20
minutes to conserve battery life.
To
disable Auto Power
OFF,
hold
down
the hold button and turn on the meter,
an
"n"
will
appear
in
the display indicating that Auto Power OFF mode
is
disabled.
The
meter will return to normal operation when it
is
turned
off
.
9.
Units
Press
the Unit button momentarily and the meter will cycle through the
11
available units
of
measure as indicated
by
the cursor on the button
of
the display.
Error Codes
An error message will
appear
on the display if the meter fails an internal
diagnostic test.
1.
Err
.
1:
Pressure
value
is
over the range.
2. Err. 2:
Pressure
value
is
below
the range.
3. Err. 3:
DIF function, the differential pressure value
is
over range.
4. Err. 4:
DIF function, the differential pressure value
is
below
range.
BaHery Replacement
When
the battery
power
falls low,
"BAT"
will
appear
on the
LCD
. Replace
the
9V
battery.
4
/


