Sony XR-CA440X Installation guide

Type
Installation guide

Sony XR-CA440X is a car stereo system that offers a wide range of features to enhance your in-car audio experience. With its built-in FM/AM radio tuner, you can easily tune in to your favorite stations and enjoy clear and static-free reception. The system also features a cassette player, allowing you to play your favorite music cassettes. Additionally, the XR-CA440X has auxiliary input and output ports, enabling you to connect external audio devices such as MP3 players or CD changers.

Sony XR-CA440X is a car stereo system that offers a wide range of features to enhance your in-car audio experience. With its built-in FM/AM radio tuner, you can easily tune in to your favorite stations and enjoy clear and static-free reception. The system also features a cassette player, allowing you to play your favorite music cassettes. Additionally, the XR-CA440X has auxiliary input and output ports, enabling you to connect external audio devices such as MP3 players or CD changers.

Sony Corporation © 2002 Printed in Thailand
XR-CA440X
3-238-899-11 (1)
Equipment used in illustrations (not supplied)
Аппаратура, фигурирующая в иллюстрациях (не прилагается)
Cautions
This unit is designed for negative earth 12 V
DC operation only.
Do not get the wires under a screw, or caught
in moving parts (e.g. seat railing).
Before making connections, turn the car
ignition off to avoid short circuits.
Connect the yellow and red power input leads
only after all other leads have been connected.
Run all earth wires to a common earth
point.
Be sure to insulate any loose unconnected
wires with electrical tape for safety.
Notes on the power supply cord (yellow)
When connecting this unit in combination with
other stereo components, the connected car
circuit’s rating must be higher than the sum of
each component’s fuse.
When no car circuits are rated high enough,
connect the unit directly to the battery.
Parts Iist (1)
The numbers in the list are keyed to those in the
instructions.
Caution
Handle the bracket 1 carefully to avoid injuring
your fingers.
1
2
B
12
× 4
3
4
6
× 2
Power amplifier
Усилитель
CD/MD changer
Проигрыватель CD/MD
Front speaker
Передний громкоговоритель
Rear speaker
Задний громкоговоритель
BUS AUDIO IN
BUS CONTROL IN
AUDIO OUT REAR
BUS CONTROL IN
BUS AUDIO IN
A
Installation/Connections
Установка/Подсоединение
FM/AM Cassette
Car Stereo
Connection example (2)
Notes (2-A)
• Be sure to connect the earth cord before
connecting the amplifier.
• If you connect an optional power amplifier and do
not use the built-in amplifier, the beep sound will
be deactivated.
Tip (2-B-
)
For connecting two or more CD/MD changers, the
source selector XA-C30 (optional) is necessary.
Connection diagram (3)
1 To a metal surface of the car
First connect the black earth lead, then connect
the yellow and red power input leads.
2 To the power aerial control lead or power
supply lead of aerial booster amplifier
Notes
• It is not necessary to connect this lead if there
is no power aerial or aerial booster, or with a
manually-operated telescopic aerial.
• When your car has a built-in FM/AM aerial in
the rear/side glass, see “Notes on the control
and power supply leads.”
3 To AMP REMOTE IN of an optional power
amplifier
This connection is only for amplifiers. Connecting
any other system may damage the unit.
4 To the +12 V power terminal which is energized
in the accessory position of the ignition key
switch
Notes
• If there is no accessory position, connect to the
+12 V power (battery) terminal which is
energised at all times.
Be sure to connect the black earth lead to it
first.
• When your car has a built-in FM/AM aerial in
the rear/side glass, see “Notes on the control
and power supply leads.”
5 To the +12 V power terminal which is energised
at all times
Be sure to connect the black earth to it first.
1
5 7
* not supplied
не прилагается
Source selector*
Селектор источника
182 mm
53 mm
4 AB
(OFF)
(RELEASE)
1
2
3
Bend these claws
outward for a tight fit, if
necessary.
При необходимости
отогните эти
зажимные зубчики для
обеспечения более
плотной фиксации.
6
4
4
5
5
4
4
1
1
Dashboard
Приборная доска
5
5
2
3
6
A
TOYOTA
to dashboard/center console
к пpибоpной пaнeли/цeнтpaльной
конcоли
to dashboard/center console
к пpибоpной пaнeли/цeнтpaльной
конcоли
Bracket
Кpонштeйн
Bracket
Кpонштeйн
Bracket
Кpонштeйн
Existing parts supplied with your car
Дeтaли, вxодящиe в комплeкт
aвтомобиля
Bracket
Кpонштeйн
max. size
5 × 8 mm
мaкc. paзмep
× 8 мм
Existing parts supplied with your car
Дeтaли, вxодящиe в комплeкт
aвтомобиля
B NISSAN
4
max. size
5 × 8 mm
мaкc. paзмep
× 8 мм
4
max. size
5 × 8 mm
мaкc. paзмep
× 8 мм
max. size
5 × 8 mm
мaкc. paзмep
× 8 мм
4
4
Fire wall
Огнеупорная
перегородка
Precautions
Choose the installation location carefully so
that the unit will not interfere with normal
driving operations.
Avoid installing the unit in areas subject to
dust, dirt, excessive vibration, or high
temperatures, such as in direct sunlight or near
heater ducts.
Use only the supplied mounting hardware for
a safe and secure installation.
Mounting angle adjustment
Adjust the mounting angle to less than 20°.
How to detach and attach the
front panel
(4)
Before installing the unit, detach the front
panel.
4-A To detach
Before detaching the front panel, be sure to
press (OFF). Press (RELEASE), then slide the
front panel a little to the left, and pull it off
towards you.
4-B To attach
Attach part A of the front panel to part B of the
unit as illustrated and push the left side into
position until it clicks.
Mounting example (5)
Installation in the dashboard
Mounting the unit in a Japanese
car (6)
You may not be able to install this unit in some
makes of Japanese cars. In such a case, consult
your Sony dealer.
Note
To prevent malfunction, install only with the
supplied screws 4.
Меры предосторожности
Место для установки магнитолы выбирайте
тщательно, чтобы она не мешала
нормальному управлению автомобилем.
Не устанавливайте магнитолу там, где она
будет подвержена воздействию пыли,
грязи, чрезмерной вибрации или высоких
температур, например в местах,
попадающих под прямые солнечные лучи
или находящихся вблизи вентиляционных
решеток обогревателей.
В целях обеспечения надежной и
безопасной установки используйте лишь
входящие в комплект монтажные детали.
Допустимый угол установки
Установите магнитолу под углом не более 20°.
Порядок снятия и
установки передней панели
(4)
Перед установкой магнитолы снимите с
нее переднюю панель.
4-A Снятие панели
Прежде чем снимать переднюю панель,
обязательно отключите магнитолу, нажав
клавишу (OFF). Затем нажмите (RELEASE),
немного сдвиньте переднюю панель влево и
движением на себя снимите ее.
4-B Установка панели
Сначала присоедините часть A передней
панели к части B магнитолы, как это
показано на иллюстрации, а затем вдвиньте
в паз левую часть панели до легкого щелчка.
Пpимep ycтaновки (5)
Установка магнитолы в приборной доске
Уcтaновкa aппapaтa в
aвтомобилe японcкого
пpоизводcтвa (6)
B нeкотоpыx aвтомобиляx японcкого
пpоизводcтвa этот aппapaт ycтaновить
нeвозможно. B этом cлyчae обpaтитecь к
cвоeмy дилepy Sony.
Примечание
Для пpeдотвpaщeния нeпpaвильной paботы
ycтaновкa должнa выполнятьcя только c
иcпользовaниeм пpилaгaeмыx винтов 4.
Предостережение
относительно аппаратуры,
установленной в
автомобиле, в зaмкe
зажигания котоpого нeт
отдельного положения
(ACC) для отключения
подсоединенной
аппаратуры.
После выключения двигателя не
забывайте нaжaть и yдepживaть
нaжaтой две секунды кнопку (OFF), с
тем чтобы отключить циферблат
часов.
При кратком нажатии (OFF) циферблат не
отключается, что ведет к разрядке
аккумуляторной батареи.
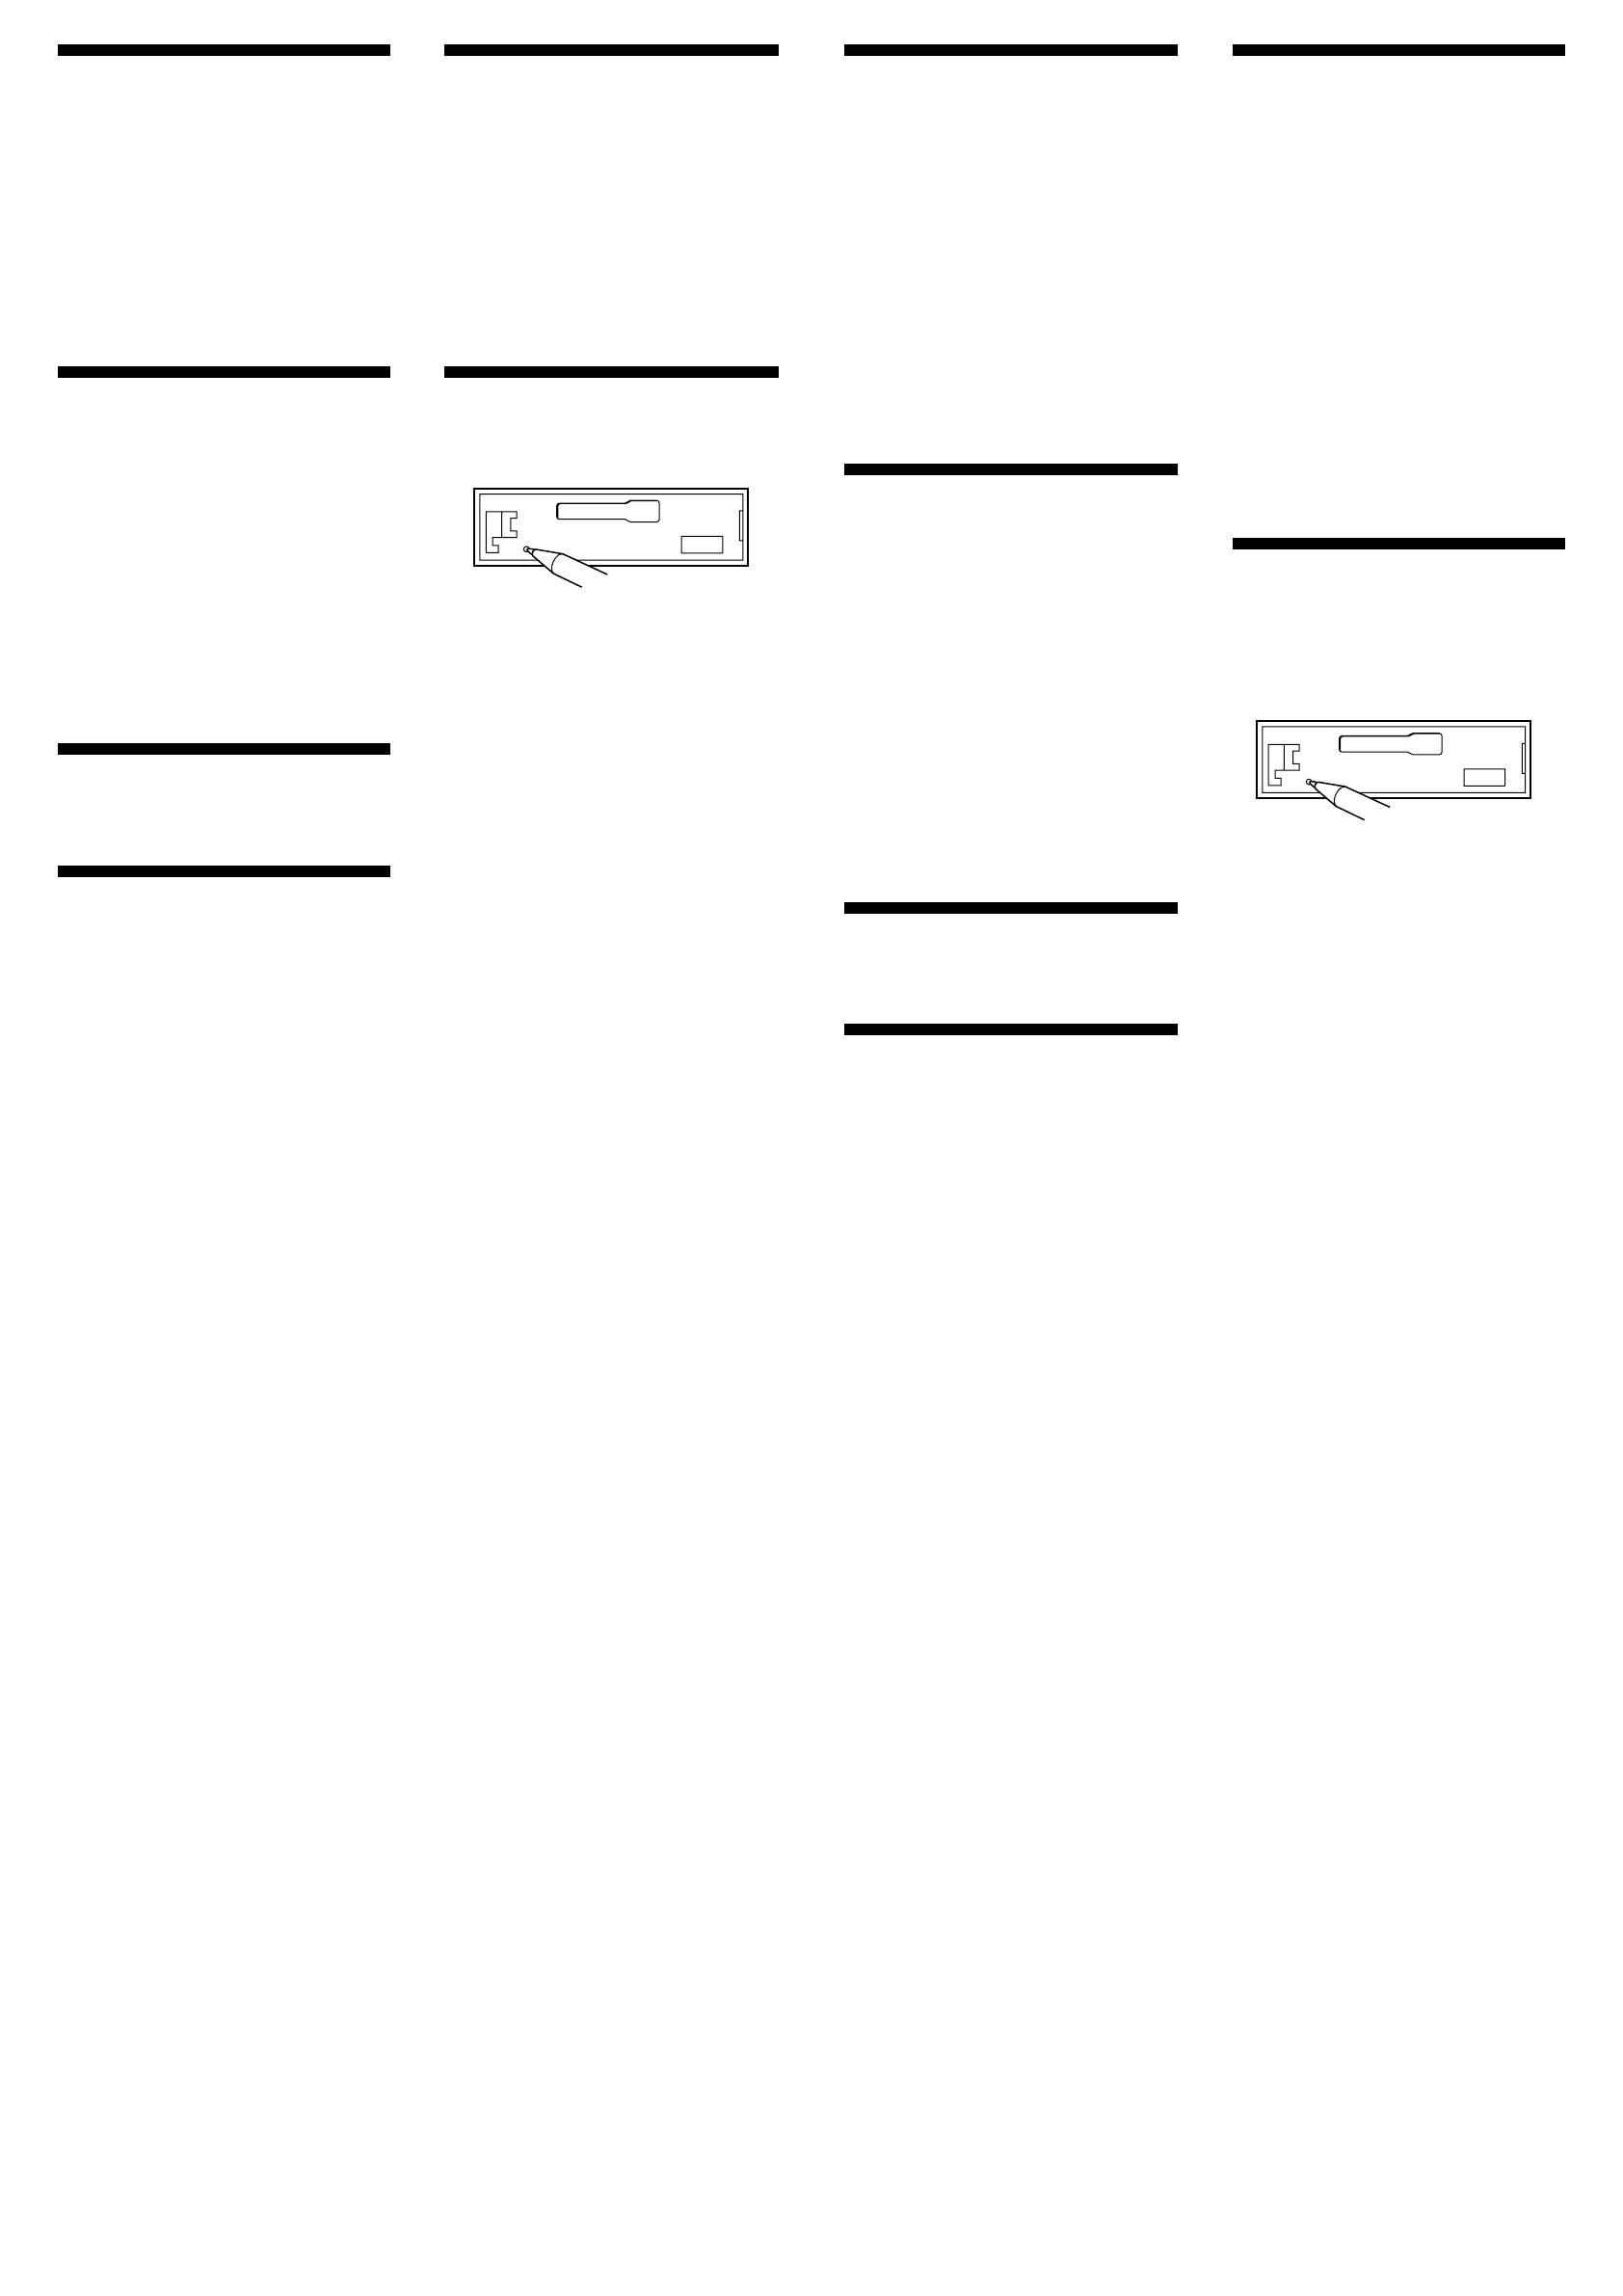
Клавиша переустановки
(RESET)
По окончании установки и всех
подсоединений не забудьте нажать
кончиком шариковой ручки или иным
аналогичным предметом кнопкy
переустановки (RESET).
Warning when installing in a car
without ACC (accessory)
position on the ignition key
switch
Be sure to press (OFF) on the unit for two
seconds to turn off the clock display after
turning off the engine.
When you press (OFF) only momentarily, the
clock display does not turn off and this causes
battery wear.
RESET button
When the installation and connections are
completed, be sure to press the RESET button
with a ballpoint pen, etc.
  • Page 1 1
  • Page 2 2
  • Page 3 3
  • Page 4 4

Sony XR-CA440X Installation guide

Type
Installation guide

Sony XR-CA440X is a car stereo system that offers a wide range of features to enhance your in-car audio experience. With its built-in FM/AM radio tuner, you can easily tune in to your favorite stations and enjoy clear and static-free reception. The system also features a cassette player, allowing you to play your favorite music cassettes. Additionally, the XR-CA440X has auxiliary input and output ports, enabling you to connect external audio devices such as MP3 players or CD changers.

Ask a question and I''ll find the answer in the document

Finding information in a document is now easier with AI