Power requirements for electrical equipment differ from area to area. Please ensure
that your machine meets the power requirements m your area.
If in doubt. consult a qualified electrician.
120V. 60Hz for USA and Canada
220V. 50Hz for Europe except UK
240V. 50Hz for UK and Australia
What you should know to protect yourself
and the Akai S950.
Watch out! You might get an electric shock
Never touch the plug with wet hands.
Always pull out by the plug and never the cord.
Only let a qualified professional repair or reassemble the Akai S950. An
unauthorized person might touch the internal parts and receive a serious
electric shock.
Never allow a child to put anything, especially metal, info the Akai
S950.
Let's protect the Akai S950 too.
Use only a household AC power source. Never use a DC power
source.
If water is spilled on the Akai 5950, disconnect rt and call your dealer.
Make sure that the Akai S950 is well ventilated and away from direct sunlight.
To avoid damage to the internal circuits and the external surface,
keep away from heal (stoves, etc.).
Avoid using spray type insecticide near the Akai S950. It can damage the finish
and might ignite suddenly.
To avoid damaging the finish, never use denaturated alcohol, paint
thinner or other similar chemicals to clean the Akai S950.
Place the Akai 5950 on a flat and solid surface.
To enjoy the Akai S950 for long time, please read this operator's manual
thoroughly.
Should a problem persist, write down the model and serial numbers and
all pertinent data regarding warranty coverage as well as a clear description of the
existing trouble. Then, contact your nearest authorized Akai Service Station, or Akai
Electric Co., Ltd.. Quality Assurance Dept., Service Section m Tokyo. Japan.
The lightning flash with the arrowhead symbol superimposed
across a graphical representation of a person, within an
equilateral triangle, is intended to alert the user to the presence of
uninsulated "dangerous volts"" within the product's enclosure: that
may be of sufficient. magnitude to constitute a risk of electric
shack.
The exclamation point within an equilateral triangle Is Intended to
alert the user to the presence of important operating end mainte-
nance (servicing) Instructions fn the literature accompanying the
appliance.
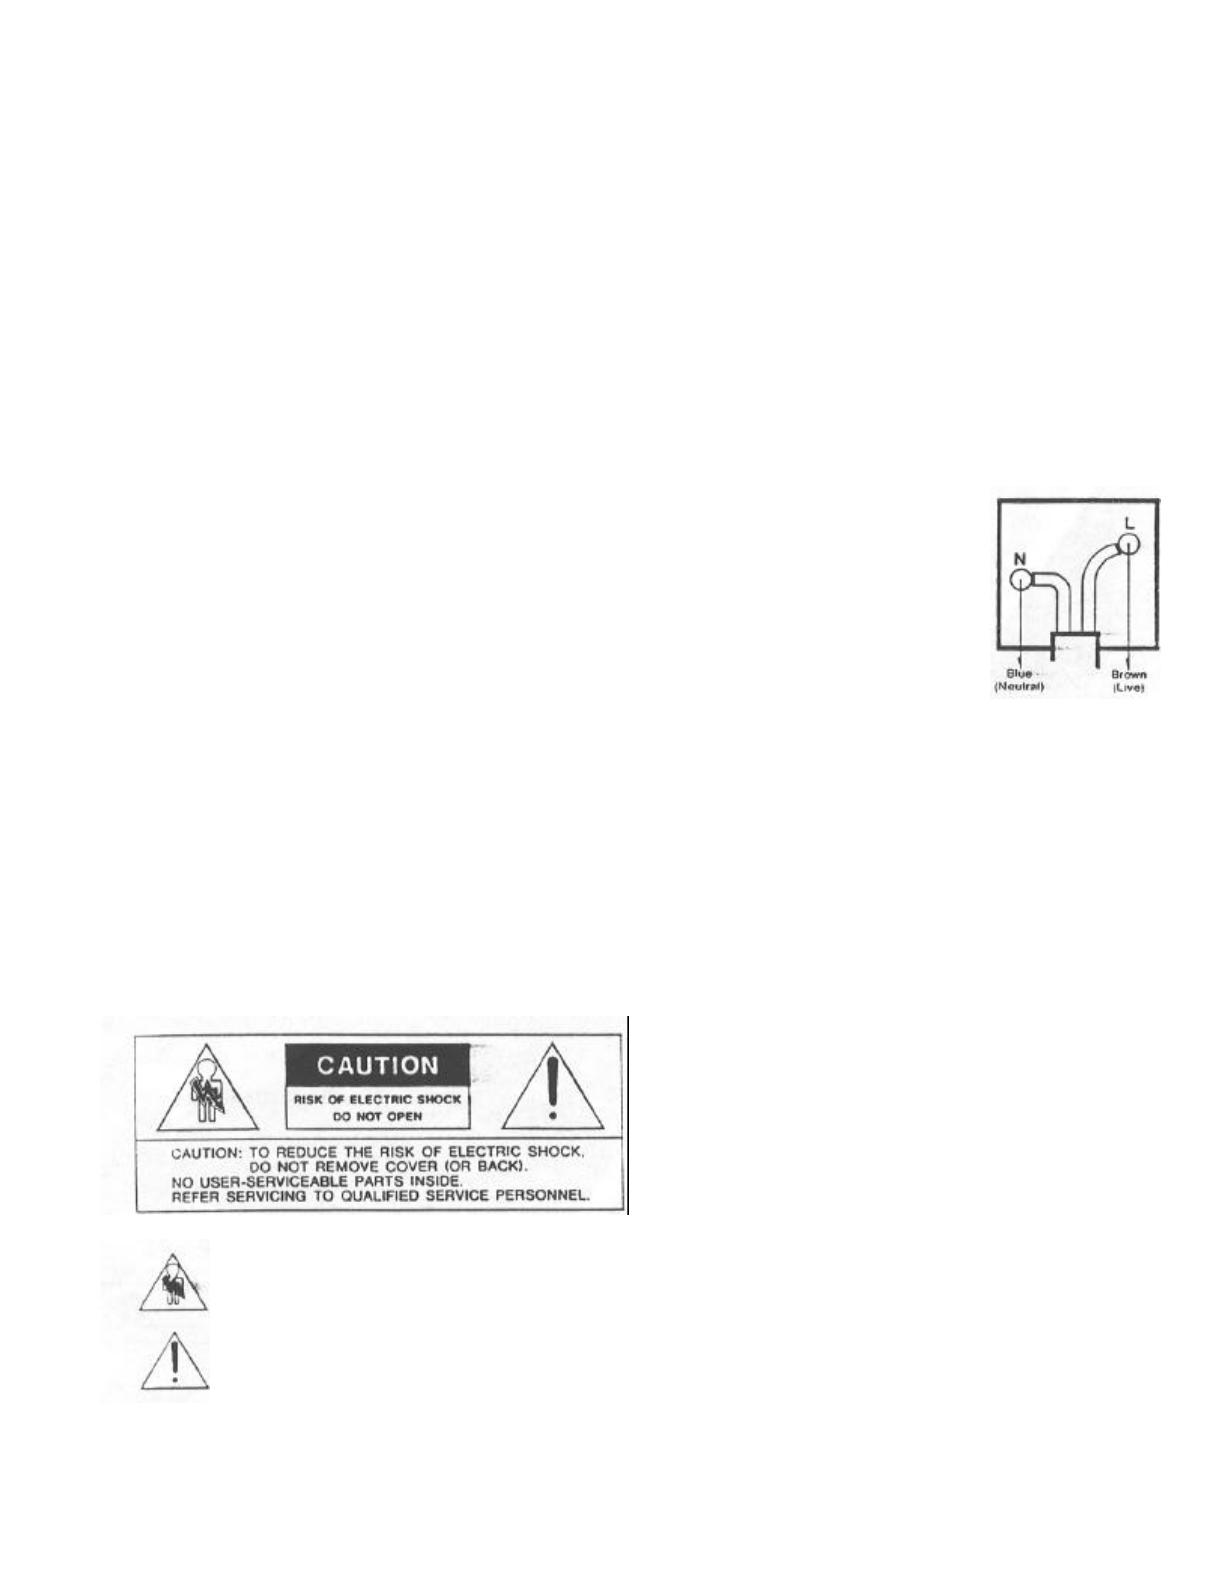
IN THE UK
IMPORTANT FOR YOUR SAFETY
The flex supplied with your machine will have two wires, as shown m the illustration.
IMPORTANT
The wires in this mains lead are coloured in
accordance with the following code: Blue: Neutral
Brown: Live As the colours of the wires in the
mains lead of this apparatus may not correspond
with the coloured markings identifying the
terminals in your plug, proceed as follows: The
wire which is coloured blue must be connected to
the terminal which is marked with the letter N or
coloured black. The wire which is coloured brown
must be connected to the terminal which is marked
with the letter L or coloured red.
Do not connect any wire to the larger pin marked E or down
when wiring a plug.
Ensure that all terminals are securely tightened and that no loose strands of
wire exist.
Warning -- This equipment generates and uses radio frequency energy and if
not installed and used properly, that is, in strict accordance with the manufacture's
instructions, may cause interference to radio and television- reception. It has been
type tested and found to comply with the limits for a Class 8 computing device in
accordance with the specifications in Subpart J of Part 15 FCC Rules. which are
designed to provide reasonable protection against such interference in a
residential installation. However, there is no guarantee that interference will not
occur in a particular installation. If this equipment dose cause interference to radio
or television reception. which can be determined by turning the equipment off and
on, the user is encouraged to try to correct the interference by one or more of the
following measures:
Reorient the receiving antenna
Relocate the computer wish respect to the receiver Move the
computer away from the receiver
Plug the computer into a different outleet so that computer and receiver are on
different branch circuits.
If necessary, the user should consult the dealer or an experienced radio/
television technician for additional suggestions.
The user may find the following booklet prepared by the Federal Communications
Commission helpful:
"How to Identity and Resolve Radio-TV Interference Problems"
This booklet is available from the U.S. Government Printing Office.
Washington, DC 20402. Stock No. 004-000-00345-4.
"This digital apparatus does not exceed the Class B limits (a radio noise emissions
from digital apparatus set out in the Radio Interference Regulations of the Canadian
Department of Communications"


