Page is loading ...

7” Mobile Video System
MMOODDEELL OOHHDD
007700
© 2004 Directed Electronics, Inc. N83070 12-04
OO WW NN EE RR ’’ SS GG UU II DD EE
IINNSSTTAALLLLAATTIIOONN GGUUIIDDEE

NNOONN--TTRRAANNSSFFEERRAABBLLEE LLIIMMIITTEEDD OONNEE YYEEAARR CCOONNSSUUMMEERR WWAARRRRAANNTTYY
Directed Electronics, Inc. (Directed) promises to the original purchaser that the new automotive video moni-
tor and/or source unit(s) (the Product), excluding accessories, that is purchased and installed from a Directed
authorized dealer more than ninety (90) days after the purchase of a new vehicle is warranted for a period of
one (1) year from date of purchase of the Product.
Directed promises to the original purchaser that all video accessories will be free from defects in materi-
als and workmanship under normal use and condition for a period of ninety (90) days after the date of pur-
chase. A sales receipt and/or warranty registration card is required to provide proof of date of purchase of the
Product or accessories.
Should the Product prove to be defective during the applicable warranty period, the Product will be repaired
or replaced with a new or comparable reconditioned part(s), at Directed's election. To obtain warranty service,
the Product must be returned to a Directed authorized dealer along with proof of purchase and proof of instal-
lation by an Authorized Directed Dealer.
Note: This warranty does not cover labor costs for the removal and/or reinstallation of the Product. IN ORDER
FOR THIS WARRANTY TO BE VALID, YOUR PRODUCT MUST BE SHIPPED WITH PROOF OF PUR-
CHASE AND INSTALLATION BY AN AUTHORIZED DIRECTED DEALER. ALL PRODUCTS RECEIVED BY
DIRECTED FOR WARRANTY REPAIR WITHOUT PROOF OF DIRECTED DEALER INSTALLATION WILL
BE DENIED.
This warranty is non-transferable and does not apply to any Product that has been modified or used in a
manner contrary to its intended purpose, and does not cover damage to the Product caused by installation or
removal of the Product. This warranty is VOID if the product has not been purchased from an authorized
Directed dealer or has been damaged by accident or unreasonable use, negligence, acts of God, neglect,
improper service or other causes not arising out of defect in materials or construction. This warranty does not
cover the elimination of externally generated static or noise, or the correction of antenna problems or weak
television reception, damage to tapes, video games, software, camcorders, discs, speakers, accessories or
vehicle electrical systems, cosmetic damage or damage due to negligence, misuse, abuse, failure to follow
operating instructions, accidental spills or customer applied cleaners, damage due to environmental causes
such as floods, airborne fallout, chemicals, salt, hail, windstorms, lightning or extreme temperatures, damage
due to accidents, road hazards, fire, theft, loss or vandalism, damage due to improper connection to equip-
ment of another manufacturer, modification of existing equipment, use of a faulty tape cartridge or cleaning of
the VCR head, or Product which has been opened or tampered with for any reason or which has been dam-
aged due to alteration or service performed by anyone other than Directed Electronics, Inc.
ALL WARRANTIES INCLUDING BUT NOT LIMITED TO EXPRESS WARRANTY, IMPLIED WARRANTY,
WARRANTY OF MERCHANTABILITY, FITNESS FOR PARTICULAR PURPOSE, AND WARRANTY OF
NON-INFRINGEMENT OF INTELLECTUAL PROPERTY ARE EXPRESSLY EXCLUDED TO THE MAXIMUM
EXTENT ALLOWED BY LAW, AND DIRECTED NEITHER ASSUMES NOR AUTHORIZES ANY PERSON TO
ASSUME FOR IT ANY LIABILITY IN CONNECTION WITH THE SALE OF THE PRODUCT. DIRECTED HAS
ABSOLUTELY NO LIABILITY FOR ANY AND ALL ACTS OF THIRD PARTIES INCLUDING ITS LICENSED
DEALERS OR INSTALLERS. IN NO EVENT WILL DIRECTED ELECTRONICS, INC. BE LIABLE FOR ANY
INCIDENTAL, SPECIAL OR CONSEQUENTIAL DAMAGES (INCLUDING LOSS OF PROFITS), BY PUR-
CHASING THIS PRODUCT, THE CONSUMER AGREES AND CONSENTS THAT ALL DISPUTES
BETWEEN THE CONSUMER AND DIRECTED SHALL BE RESOLVED IN ACCORDANCE WITH CALIFOR-
NIA LAWS IN SAN DIEGO COUNTY, CALIFORNIA.
Some states do not allow limitation on how long an implied warranty lasts. In such states, the limitations or
exclusions of this Limited Warranty may not apply. Some states do not allow the exclusion or limitation of inci-
dental or consequential damages. In such states, the exclusion or limitation of this Limited Warranty may not
apply to you. This Limited Warranty gives you specific legal rights, and you may have other rights which vary
from state to state.
920-0001 Directed Video, 1 year Warranty Rev 11-04 Directed Video 1 year RSE warranty 11-17-04.doc

TTaabbllee ooff CCoonntteennttss
Non-Transferable Limited Consumer Warranty . . . . . . . . . . . . . . . . . . . . . . . . .2
Safety Information . . . . . . . . . . . . . . . . . . . . . . . . . . . . . . . . . . . . . . . . . .4
Important Notes . . . . . . . . . . . . . . . . . . . . . . . . . . . . . . . . . . . . . . . . . . . .5
What is Included . . . . . . . . . . . . . . . . . . . . . . . . . . . . . . . . . . . . . . . . . . . .6
Introduction . . . . . . . . . . . . . . . . . . . . . . . . . . . . . . . . . . . . . . . . . . . . . . .6
Your Warranty . . . . . . . . . . . . . . . . . . . . . . . . . . . . . . . . . . . . . . . . . . . . . .7
Supported Disc Formats . . . . . . . . . . . . . . . . . . . . . . . . . . . . . . . . . . . . . . .7
Installation . . . . . . . . . . . . . . . . . . . . . . . . . . . . . . . . . . . . . . . . . . . . . . .8
Preliminary Preparations .........................................................................8
Mounting Video System ..........................................................................8
Electrical Connections...........................................................................10
Video System Controls and Description . . . . . . . . . . . . . . . . . . . . . . . . . . . .11
Remote Control . . . . . . . . . . . . . . . . . . . . . . . . . . . . . . . . . . . . . . . . . . . .13
Functions............................................................................................13
Battery Replacement ............................................................................15
Using the Remote Control......................................................................15
Operation . . . . . . . . . . . . . . . . . . . . . . . . . . . . . . . . . . . . . . . . . . . . . . . .16
Loading/Ejecting a Disc ........................................................................16
Stopping Play......................................................................................16
Rapid Forward/Reverse..........................................................................16
Skipping Track .....................................................................................17
Slow Motion Play .................................................................................17
Pause .................................................................................................17
Mute ..................................................................................................17
Repeat ...............................................................................................18
A-B....................................................................................................18
Disc Search (GOTO)...............................................................................18
Zoom .................................................................................................19
Random ..............................................................................................19
Program..............................................................................................19
Mode Selection ....................................................................................19
Volume Level Adjustment ......................................................................19
Light Switch........................................................................................20
Jack for Earphone ................................................................................20
Earphone Volume Adjustment.................................................................20
Remote Sensor (IR) ..............................................................................20
Turning the Unit ON/OFF .......................................................................20
Monitor Release ..................................................................................20
Infrared Transmitting Window ................................................................20
© 2004 Directed Electronics, Inc.
33

LCD Menu Operations . . . . . . . . . . . . . . . . . . . . . . . . . . . . . . . . . . . . . . . .21
Menu..................................................................................................21
Transmit .............................................................................................21
Screen................................................................................................21
Search................................................................................................21
On Screen Displays . . . . . . . . . . . . . . . . . . . . . . . . . . . . . . . . . . . . . . . . . .22
Display ...............................................................................................22
Multi-Audio Language Function ..............................................................25
Title Menu Function..............................................................................26
Multi-Subtitle Language Function ...........................................................26
Multi--Angle Function...........................................................................26
MP3 Disc Play......................................................................................27
TV Operation .......................................................................................27
Setup . . . . . . . . . . . . . . . . . . . . . . . . . . . . . . . . . . . . . . . . . . . . . . . . . . .28
Initial Setup .......................................................................................28
General Setup......................................................................................29
Speaker Setup .....................................................................................32
Audio Setup ........................................................................................33
Preferences Setup (including parental) ....................................................35
Factory Default Setting .........................................................................41
Appendix A – Cleaning . . . . . . . . . . . . . . . . . . . . . . . . . . . . . . . . . . . . . . .42
Cleaning the LCD Screen .......................................................................42
Cleaning the Enclosure..........................................................................42
Cleaning and Handling Discs..................................................................42
Appendix B – Troubleshooting . . . . . . . . . . . . . . . . . . . . . . . . . . . . . . . . . .44
Appendix C – Specifications . . . . . . . . . . . . . . . . . . . . . . . . . . . . . . . . . . .46
SSaaffeettyy IInnffoorrmmaattiioonn
To reduce the risk of fire or electric shock, do not expose this equipment to rain or
moisture.
The mobile DVD player is a Class I laser product. This mobile DVD player uses a laser
beam which could cause vision damage. Do not open the covers to this unit, there
are no owner serviceable parts inside.
44
© 2004 Directed Electronics, Inc.

IImmppoorrttaanntt NNootteess
NNOOTTEE::
The parental level control is discussed in the Preferences Setup section of this
manual.
1. Before operating your LCD Monitor system, please read these instructions care-
fully.
2. Retain this manual for future reference.
3. Do not remove any WARNING stickers on the unit.
4. When the power to the unit is shut off, the next time the unit is turned on the
speakers will
nnoott
operate. The Transmit feature must be reset to OFF (IR head-
phones off) in the setup features.
5. Do not use any chemical solvent, cleaning agent or corrosive detergent to clean
away dirt on the surface of the screen. Doing so may cause irreversible dam-
age to the surface of the LCD screen. To clean off dirt or fingerprints, it is rec-
ommended that a soft-damp lens cleaning cloth be used.
6. Using spare parts from another manufacturer may cause permanent damage to
the unit.
7. If using the surface mount pedestal, ensure that the pedestal mount is placed
on a flat, hard, and stable surface.
8. Avoid installing the monitor screen in a position that is under direct sunlight
and away from hot air vents.
9. Install the unit in a dry location, avoid condensation.
10. Ensure the plugs are properly plugged in before operating the unit.
11. Should the LCD panel break, avoid contact with the broken glass or fluid leaking
out from the enclosure. If you come into contact, flush and clean the affected
areas with plenty of water. Seek medical attention immediately.
12. When operating the display unit, avoid touching or pressing on the LCD screen.
Excessive force will damage the LCD screen.
13. When installing this unit in a vehicle, ensure that the installation and use of
this unit is in compliance with local vehicle rules and regulations.
14. Do not attempt to disassemble or adjust this product. Contact your factory
authorized dealer for service assistance.
15. Avoid inserting any foreign objects into the slot of this player. Failure to
observe this caution may cause the unit to malfunction.
16. This product is designed to operate with a 12 volt DC, negative ground battery
system.
17. While Driving, keep the volume level low enough to be aware of road and traf-
fic conditions.
18. The unit should be installed in a horizontal position with the front end up at
a convenient angle, but not more than 30 degrees.
© 2004 Directed Electronics, Inc.
55

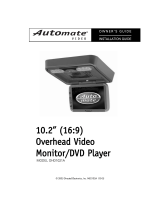
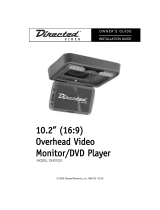
WWhhaatt iiss IInncclluuddeedd
7” Overhead Monitor/DVD Player Mounting hardware
Metal mounting plate Mounting bracket
Remote Control Unit/w battery Rubber plate
IInnttrroodduuccttiioonn
Congratulations on your purchase of the world’s finest video entertainment system.
At Directed we are committed to bringing you the most technologically advanced
products available. We are pleased that you chose a Directed Video product.
Through years of critical testing and hand craftsmanship, we have created a wide
range of video entertainment products for your viewing pleasure.
This system incorporates the use of on screen display menu controls that allow you
to configure the system to suit your own personal preferences.
To view other great products from Directed Electronics, please visit the Directed
Video page at www.directed.com.
66
© 2004 Directed Electronics, Inc.

YYoouurr WWaarrrraannttyy
Your warranty registration must be completely filled out and returned within 10
days of purchase. Your product warranty will not be validated if your warranty reg-
istration is not returned. Make sure you receive the warranty registration from your
dealer. It is also necessary to keep your proof of purchase, which reflects that the
product was installed by an authorized dealer.
SSuuppppoorrtteedd DDiisscc FFoorrmmaattss
The following disc formats are supported by this player.
DDVVDD
12 cm disc
(Single-sided disc only)
VViiddeeoo CCDD
12 cm disc
CCDD
12 cm disc
MMPP33
12 cm disc
The following disc formats are
NNOOTT
supported by this player.
DVD-ROM CDV
DVD-R/DVD-RAM CD-G
6/
© 2004 Directed Electronics, Inc.
77

IInnssttaallllaattiioonn
PPRREELLIIMMIINNAARRYY PPRREEPPAARRAATTIIOONNSS
NNOOTTEE::
The unit should be installed by a qualified service technician. This unit is
designed to operate with a 12 VDC, negative ground battery system.
NNOOTTEE::
Use only proper sized fasteners and cables during installation. Use of improp-
er fasteners or cables can lead to mechanical failure of the unit or create a fire haz-
ard.
1. Disconnect the ground wire from the battery terminal prior to connecting the
unit to the electrical system.
NNOOTTEE::
Some vehicle radios have an anti-theft code system that will disable the radio
if the battery is disconnected. If this vehicle has such a radio, ensure you have the
access code to restore the radio to normal operation.
2. Pick a location to install the monitor where it will not obstruct the rear view
mirror or the air conditioning vents.
3. Do not install this unit at an angle exceeding 30 degrees.
MMOOUUNNTTIINNGG VVIIDDEEOO SSYYSSTTEEMM
88
© 2004 Directed Electronics, Inc.

1. Determine the mounting location and drill four mounting holes (see the figure
above).
2. Attach the mounting bracket to the holes with the self-tapping screws (ø4x10).
3. Let the two levers aim at the slots on the DVD bracket to fix the display unit.
4. Open the monitor to display the five screw holes.
5. Attach the unit to the bracket with the mounting bolts (M 3.5x10).
6. Insert five rubber caps into the screw holes.
7. When the installation has completed, you can turn the display upward or down-
ward, left or right to adjust the viewing angle. (See the arrowhead symbol in
the figure above).
Slots
Rubber Caps
Mounting Bolts (M3.5x10)
DVD Bracket
Levers
Mounting Bracket
Self-tapping Screws (
ø4x10)
© 2004 Directed Electronics, Inc.
99

EELLEECCTTRRIICCAALL CCOONNNNEECCTTIIOONNSS
PPOOWWEERR AANNDD VVIIDDEEOO WWIIRRIINNGG
Connect the power and dome light wires as follows:
OOPPTTIIOONNAALL DDIIGGIITTAALL WWIIRRIINNGG
DIGITAL AUDIO
(OPTIONAL)
CCoolloorr CCoonnnneeccttiioonn
Red Accessory
Yellow Battery +12V
White Interior Light System (Dome -)
Orange Interior Light System (Dome +)
Black Ground
Power and Dome Lamp
Wiring
YELLOW
WHITE
AUDIO R IN
V
IDEO IN
AUDIO L IN
RED
AUDIO R OUT
AUDIO L OUT
VIDEO OUT
YELLOW
WHITE
RED
Video Wiring
1100
© 2004 Directed Electronics, Inc.

VViiddeeoo SSyysstteemm CCoonnttrroollss aanndd DDeessccrriippttiioonn
6
5
17
279
11
17
10
41835
15
14
14
15
13
12
© 2004 Directed Electronics, Inc.
1111

1. POWER Button 11. Indicator Light for AV
2. EJECT Button 12. Disc Slot
3. MENU Button 13. 6.4 inch TFT Color Monitor
4. MOD Button 14. Earphone Volume Controls
5. Car Dome Lamps 15. Jacks for Earphone
6. Light Switch 16. IR Transmitting Window
7. VOLUME+ 17. OPEN Button: Press the button to
8. VOLUME- deploy the screen display from the
9. IR Receiver unit’s base.
10. Indicator Light for DVD 18. Speakers (qty-2)
19. Speaker On/Off button
NNOOTTEE::
The TRANSMIT feature must be Off on the Setup Menu for the speakers to operate.
The auxiliary audio output and conventional headphone jacks are active at all times.
19
18
1122
© 2004 Directed Electronics, Inc.

RReemmoottee CCoonnttrrooll
FFUUNNCCTTIIOONNSS
1. POWER Press to turn the unit ON or OFF.
2. EJECT Press to eject the disc.
3. MUTE Press to mute the sound.
4. SUBTITLE Changing of the SUBTITLE language on multi-subtitle lan-
gauge DVD disc.
4
5
2
11
12
3
6
15
16
19
23
22
18
20
25
28
29
32
21
24
26
30
31
8
9
7
10
1
14
13
27
17
POWER
EJECT
MUTE
SUBTITLE
ANGLE
DISPLAY
MODE
SETUP
PAL/NTSC
AUDIO
TITLE
MENU
ENTER
SLOW
SEARCH
CH - CH +
VOLUME
10+0
897
564
231
CLEAR
PROGRAMRANDOM REPEAT A-B
RESUMEZOOM GOTO PBC
- / - -
© 2004 Directed Electronics, Inc.
1133

5. ANGLE Changing of the view angle on multi-angle DVD disc.
6. DISPLAY Display statistical disc information during playback.
7. MODE Changing between DVD mode, TV mode and AV mode.
8. SETUP Display the SETUP menu.
9. PAL/NTSC Switch between PAL mode and NTSC mode.
10. AUDIO Changing of the AUDIO soundtrack on multi-audio sound-
track DVD disc, or changing of the sound mode of the
VCD/CD discs.
11. TITLE Display the TITLE menu that is stored in DVD disc.
12. MENU Display the adjustment items, such as Bright, Contrast,
Color, Tint, Transmit, Screen, Search and etc.
13. W/X/S/T In case of SETUP Menu mode, the left/right/up/down
W/X/S/T buttons served as cursor buttons to select item
left/right, ahead/back.
14. ENTER Confirm the Track/Chapter selected with the numeric but-
tons or selected with the cursor buttons on TV screen.
15.
||
X/W
||
Change the slow forward/reverse playback motion.
16. Press to play the disc.
17. / Press to search forward rapidly and to search
reverse rapidly.
18. (CH+)/ Press to skip to the next track & press to skip
(CH-) back one track.
19. Press to stop playback.
20.
||||
Press
||||
to pause playback.
21. 0-9 Numeric buttons
22. 10+(-/--) Digital selection button, used with numeric buttons.
23. CLEAR Press this button to clear an erroneous numeric entry.
24. VOLUME +/- Press VOLUME +/- button to increase or decrease volume
level.
Adjust the following items when MENU has been selected.
25. ZOOM Allows the picture to be increased in size.
1144
© 2004 Directed Electronics, Inc.

26. RESUME When in stop mode, press the button, the play can be
resumed from the stop point.
27. GOTO Disc search button, used with numeric buttons.
28. PBC Changing between PBC ON and PBC OFF on the VCD disc.
29. RANDOM Allows the track played in random order.
30. PROGRAM Allows the track played in the order you programmed.
31. REPEAT Switch the Repeat mode of discs.
32. A-B A-B repeat allows a passage to be repeated continuously.
BBAATTTTEERRYY RREEPPLLAACCEEMMEENNTT
Use the following procedure to inserting/replacing the batteries
1. Open the battery compartment cover.
2. Remove the old batteries and insert the new batteries (two AAA size). Make
sure that the positive and negative terminals of the batteries are oriented as
indicated.
3. Close the cover.
UUSSIINNGG TTHHEE RREEMMOOTTEE CCOONNTTRROOLL
Point the remote control towards the player front face IR mark (remote control sig-
nal receiver).
Operation angle: The remote will function in about up to a ±30 degree angle from
the front of the IR receiver.
© 2004 Directed Electronics, Inc.
1155

OOppeerraattiioonn
LLOOAADDIINNGG//EEJJEECCTTIINNGG AA DDIISSCC
When you have installed the unit and all connections have completed, you can load
a disc as follows:
1. Turn the ignition on to the accessory position.
2. Press the POWER button (item 1on the figure below).
3. Insert the disc with printed side facing up into the disc slot (item 2 on the fig-
ure below).
4. The player will start playback automatically.
To eject a disc, press the EJECT
button (item 3 on the figure above).
SSTTOOPPPPIINNGG PPLLAAYY
Briefly press the STOP button to stop the unit playback, when the PLAY
button is pressed, normal playback will continue.
Press STOP button twice to stop the playback and go back to the initial
Track/Chapter on the disc.
RRAAPPIIDD FFOORRWWAARRDD//RREEVVEERRSSEE
Press or during play.
Each time the button is pressed, the speed of rapid forward /reverse changes
according to the disc as follow:
DVD:
Normal playback 2X 4X 6X 8X
VCD/CD:
213213
1166
© 2004 Directed Electronics, Inc.

Normal playback 1X 2X 3X 4X
MP3:
Normal playback 2X 4X 6X 8X
On the next press of the button after reaching the maximum speed, the disc
resumes normal playback speed.
SSKKIIPPPPIINNGG TTRRAACCKK
Press the or buttons on the remote control during playback. Press
to skip to next track, and to skip back one track.
NNOOTTEE::
For some VCD2.0 discs (PBC-playback control), the / buttons
may be unavailable.
SSLLOOWW MMOOTTIIOONN PPLLAAYY
Press
||
X or W
||
during playback of a DVD. Each time the button is pressed, the
speed of slow forward /reverse changes according to the disc as follows:
DVD:
Normal Playback 2X 4X 8X
On the next press of the button after reaching the minimum speed, the disc resumes
normal playback speed.
PPAAUUSSEE
Pressing
||||
on the remote control during playback will stop play temporary. Press
PLAY on the remote control to resume normal playback.
MMUUTTEE
Will mute the audio, but the disc continues playing. When you unmute the audio
(press MUTE again), audio will resume.
© 2004 Directed Electronics, Inc.
1177

RREEPPEEAATT
FOR DVD:
Press the REPEAT button to cycle through the select repeat mode as follows:
CHAPTER REPEAT ON—TITLE REPEAT ON—REPEAT OFF
FOR VCD/CD:
Press the REPEAT button to cycle through the select repeat mode as follows.
REP-ONE—REP-ALL—REPEAT OFF
1. REP ONE—Continuously repeat at the current chapter/track.
2. REP-ALL—Continuously repeat all chapter/track on the current disc.
3. When the player finishes playback of the current disc last chapter/track, it will
stop and display the elapsed time. When REPEAT OFF mode is selected, REP-
ONE &REP-ALL disappears from screen display.
4. REPEAT feature does not support VCD2.0 (with PBC ON).
AA--BB
A-B repeat allows a passage to be repeated continuously. Press A-B button at the
start of the required passage, then press A-B button again at the end of the pas-
sage. To revert to normal playing, press A-B button again. Each time the button is
pressed, the screen will display as follows:
A TO B SET A A TO B SET B A TO B CANCELLED
DDIISSCC SSEEAARRCCHH ((GGOOTTOO))
FOR DVD:
Press GOTO button twice, the screen will display the following message:
You can select the item you want to watch through the TIME setting by using
numeric buttons and then the ENTER key.
TITLE 01/01 TIME -- : --: --
00:00:25
1188
© 2004 Directed Electronics, Inc.

FOR CD/VCD (WITH PBC OFF):
Press GOTO button once, the screen will display the following message:
Use numeric buttons to input the time directly.
ZZOOOOMM
Allows the picture to be increased in size. Press ZOOM to toggle among 1.5 scale,
2.0 scale and 3.0 scale.
RRAANNDDOOMM
Press RANDOM button, track selection will be made in random order. The display
screen will show "SHUFFLE ON" on the screen. Press RANDOM button again, "SHUF-
FLE OFF" appears and the mode is released.
PPRROOGGRRAAMM
In stop mode, press PROGRAM button, the screen will display "PROGRAM P00:00".
For example: press numeric button 4 and PLAY button, "PROGRAM P01:04"
appears. It means track 4 will be played first.
MMOODDEE SSEELLEECCTTIIOONN
Press MOD button on the front panel of the unit or MODE button on the remote con-
trol to select among DVD, or AV mode. When the mode is selected, the correspon-
ding mode indicator on the front panel will be illuminated.
VVOOLLUUMMEE LLEEVVEELL AADDJJUUSSTTMMEENNTT
Press VOL +/VOL- on the front panel or VOLUME +/- on the remote control to
increase or decrease the volume level.
GO TO -- : --
00:00:25
© 2004 Directed Electronics, Inc.
1199

LLIIGGHHTT SSWWIITTCCHH
The two car dome lamps on the unit will be illuminated depending on the lamp
operation setting. There are three settings for the car dome lamp operation: OFF,
AUTO, and ON.
A. OFF: To turn off the lamp.
B. AUTO: To make the lamp turn on only when car doors are opened.
C. ON: To turn on the lamp.
JJAACCKK FFOORR EEAARRPPHHOONNEE
There are two jacks for earphones, one on each side of the DVD unit. You can con-
nect an earphone to anyone of the jacks to receive audio.
EEAARRPPHHOONNEE VVOOLLUUMMEE AADDJJUUSSTTMMEENNTT
Slide the control on the side of the DVD unit to increase or decrease the volume
level of the earphone.
RREEMMOOTTEE SSEENNSSOORR ((IIRR))
This IR sensor receives it’s signal from the remote control.
TTUURRNNIINNGG TTHHEE UUNNIITT OONN//OOFFFF
Press the POWER button on the front panel or on the remote control to turn the
unit on or off.
MMOONNIITTOORR RREELLEEAASSEE
Press the button on the unit to deploy the screen display from the base of the uni..
Then the display can easily be adjusted for the best viewing.
IINNFFRRAARREEDD TTRRAANNSSMMIITTTTIINNGG WWIINNDDOOWW
There are six infrared transmitting lights inside the window on the unit, the user
can put on the infrared wireless headphones supplied with the unit and hear the
audio signal without the use of wires or cables from the unit to the headphones.
2200
© 2004 Directed Electronics, Inc.
/